Leaderboard


Popular Content
Showing content with the highest reputation on 07/16/12 in all areas
-
DE's HEARTRINGS SYSTEM This may sound crazy, but I also believe it's a good idea, why not? In order to get some advertising (since it's really needed), I'm implementing a points system that people can exchange for gifts or some love. These services aren't mean to boost your server graphics development or something, these are just lovely gifts from me. Ok, so let's go, I'll list what stuff gives points: Posting a lovely (it must be lovely, if not it doesn't count lol) message there: +1 Heartring Using DE's userbar linking to this thread (each RO-related forum counts): +5 Heartrings Link from your RO website/forum (each site/forum counts, not userbar): +10 Heartrings Purchasing something from me (over 25$): +10 Heartrings Use more than 5 of my custom sprites in your server: +10 Heartrings Use more than 15 of my custom sprites in your server: +15 Heartrings Translating one of my guides from Spanish to English: +15 Heartrings Sending me a customer (over 50$): +20 Heartrings Working with me in a collaboration project/server: +20 Heartrings Advertise my services in your main page: +20 Heartrings Being a lovely person: +50 Heartrings Acting not according to my ToS: +1000 Baphorings and u lose all your stacked love. Gifts/prizes: 10 Heartrings for 5% discount. 20 Heartrings for 10% discount. 20 Heartrings for an inventory sprite gift. 30 Heartrings for a 20 dyes pack. 40 Heartrings to advertise your server in my signature for 1 month. 50 Heartrings to make a beautiful headgear for you. 60 Heartrings to make an NPC based on you and with your name on it. 80 Heartrings to make a small map to commemorate our love <3. 100 Heartrings and you will get a lovely prize . *-*-*-*-*-*-*-*-*-*-*-*-*-*-*-*-*-*-*-*-*-*-*-*-*-*-*-*-*-*-*-*-*-*-*-*-*-*-*-*-*-*-*-*-*-*-*-*-*-*-*-*-*-*-*-*-*-*-*-*-*-*-*-*-*-*-*-*-*-*-*-*-* If you liked my work, dont forget to use the DE's Userbar =D I think it's good to show my work in order to encourage other people to start spriting/pixel art. Well, basically, my RO-related works are organized in generations/collections. My portfolio is made up of: 1st Sprite Generation (a.k.a. The Red Moon Collection): My first sprites and palettes, Jan 07 ~ Jun 07. Approximately made up of 30 works. 2nd Sprite Generation (a.k.a. The Silver Moon Collection): Medium knowledge as a spriter. Not private spriter anymore (Not working for p.servers). Jun 07 ~ Jul 08. Around 25 designs or more. 3rd Sprite Generation (a.k.a. The Golden Moon Collection): High Knowledge in RO Graphics. 4th Sprite Generation (a.k.a. The Light Moon Collection): 2010-2011 (last works as a RO artist before retirement) .A. Hearts (.Atska.'s Collection): Dedicated to Atska. Fashion and girlish customs. 1st Mapping Generation: When I got Borf's. 2nd Mapping Generation When I improved at Borf's My current works aren't included in any generation/collection anymore. Download packs: First Sprite Generation: Headgears - Mobs Second Sprite Generation: All material (Except private or/and unfinished works) Third Sprite Generation: Mobs UPDATE: My sprites are no longer available for free. Please contact me to purchase them through email or twitter. Thanks to Luigiman for hosting the material - Give credits in your website or forum. - You are not allowed to redistribute or share them unless I gave permission to do so. Redistribution of my public work is allowed in brAthena, frAthena, DivineRO and rAthena. - Do not steal credits from the original author/s. - It is prohibited to use these works to make money unless I gave you permission to do so. - You are not allowed to edit my material without permission. Many of these works are based on official Gravity's designs, so I'm not the only author of these designs (there are, however, a lot of 100% original designs). Keep that in mind if you are planning to give credits to me only. Same happens with Trickster Edits. I wrote in descriptions which sprites are Trickster conversions or edits. If you want to use them as donations, please ask me through PM and then I may give you the permission. DevilEvil's Portfolio Fourth Sprite Generation To conmemorate Gay Pride Festival /me likes EVE Based on people: Jman, Usako, Rico, Eury, Epoque, me, and a friend, Phoebe xD. Third Sprite Generation Based on an Arcturus NPC A project never finished for Kisuka . Made it for the Gay Pride Festival (Reference from Arcturus) Original designs by DevilEvil are published under the Creative Commons non-commercial license. Second Sprite Generation (Forum doesnt let me upload more images) Original designs by DevilEvil are published under the Creative Commons non-commercial license.3 points
-
My guess is that the VPS provider added up all the CPU power together making the number a bit more appealing, for 21ghz case it would be 6 core with 3.5ghz speed each.3 points
-
join me at congratulating our beloved admin who made rathena a reality. HAPPY B-DAY JMAN <32 points
-
kRO MVP Tomb System.... Changelog: 1.0 First version 2.0 Added Feature showTimeRespawn and showTimerRespawn. 2.1 Fixed map crashing when MVP arena is use or summoning MVP using 'monster' script. 3.0 Fixed duplicate issue and max gap. TODO: incorporate with the convex mirror. (need info in official behavior) @battle.h // rAthena int max_third_parameter; int atcommand_max_stat_bypass; +// Tomb System [malufett] +int show_mvp_tomb; @battle.c **/ { "max_third_parameter", &battle_config.max_third_parameter, 20, 0, INT_MAX, }, { "atcommand_max_stat_bypass", &battle_config.atcommand_max_stat_bypass, 0, 0, 100, }, +{ "skill_amotion_leniency", &battle_config.skill_amotion_leniency, 90, 0, 100, }, +// Tomb System [malufett] +{ "show_mvp_tomb", &battle_config.show_mvp_tomb, 1, 0, 1 }, // Should MVP slaves retain their target when summoned back to their master? mob_slave_keep_target: yes +// Show Tomb when MVP got killed? +show_mvp_tomb: yes @mob.c md->spawn_timer = add_timer(gettick()+spawntime, mob_delayspawn, md->bl.id, 0); +if( md->status.mode&MD_BOSS && + battle_config.show_mvp_tomb){//Tomb System [malufett] + struct map_session_data *sd = map_id2sd(md->target_id); + md->target_id = npc_mvp_tomb(md, sd ); +} int mob_spawn (struct mob_data *md) { int i=0; unsigned int tick = gettick(); int c =0; +if(md->status.mode&MD_BOSS && + battle_config.show_mvp_tomb){//Tomb System [malufett] + npc_mvp_tomb(md, NULL); +} clif_clearunit_delayed(&md->bl, CLR_DEAD, tick+250); if(!md->spawn) //Tell status_damage to remove it from memory. return 5; // Note: Actually, it's 4. Oh well... +if( mvp_sd && md->status.mode&MD_BOSS && battle_config.show_mvp_tomb)//Tomb System [malufett] + md->target_id = mvp_sd->bl.id; @npc.c npc_debug_warps_sub(map[m].npc[i]); } +/** MVP Tomb System. [malufett] +**/ +int npc_mvp_tomb(struct mob_data *md, struct map_session_data *sd){ + char w1[256], w2[256], w3[256]; + struct npc_data *nd = NULL; + + nullpo_ret(md); + + if(sd){ + struct mob_data *boss_md = map_getmob_boss(sd->bl.m); // Search for Boss on this Map and ignore summoned Boss + + if( boss_md != NULL && + boss_md->bl.prev != NULL && + md->bl.id == boss_md->bl.id ) + { + int x = boss_md->bl.x, y = boss_md->bl.y; + const struct TimerData * timer_data = get_timer(md->spawn_timer); + + if(md->spawn_timer == INVALID_TIMER) + return 1; + + sprintf(w2, "Tomb#%d|%d", boss_md->class_, (DIFF_TICK(timer_data->tick, gettick()) + 60)); + sprintf(w1, "%s, %d, %d, 1", map[boss_md->bl.m].name, x , y); + sprintf(w3, "%s@%s", sd->status.name, map[boss_md->bl.m].name); + sprintf(w2, "%s::%s", w2, w3); + sprintf(w3, "%s::OnMyMobDead", w3); + + safestrncpy(md->npc_event, w3, sizeof(md->npc_event)); + npc_parse_duplicate(w1,"duplicate(tomb_stone)",w2,"565", "-", "-", "MVP_TOMB"+boss_md->class_); + + npc_event(sd,md->npc_event,0); + safestrncpy(md->npc_event, "", sizeof(md->npc_event)); + return sd->bl.id; + } + }else{ + struct map_session_data *msd = map_id2sd(md->target_id); + + if(msd != NULL){ + sprintf(w1, "%s@%s", msd->status.name, map[md->bl.m].name); + nd = npc_name2id(w1); + if (nd != NULL){ + npc_unload(nd); + md->target_id = 0; + } + } + } + return 0; +} @npc.h int npc_duplicate4instance(struct npc_data *snd, int m); int npc_cashshop_buy(struct map_session_data *sd, int nameid, int amount, int points); +int npc_mvp_tomb(struct mob_data *md, struct map_session_data *sd); How to configure? 1. Add this script on your npc/custom folder. tomb_stone.txt - v1.0 tomb_stone.txt - v2.0 tomb_stone.txt - v3.0 2. Add this line scripts_custom.conf npc: npc/custom/tomb_stone.txt 3. And lastly the adding of tomb to MVP monster *for this nothing to configure in your mob folder, just make/add to your liking ex. anthell02,0,0,0,0 boss_monster Maya 1147,1,7200000,0,1 4. Open tomb_stone.txt and edit the settings for your likings. //+-- -- -- -- -- -- -- + //| Settings | //+-- -- -- -- -- -- -- + set .showTimeRespawn, 1; // Display the time when the MVP will respawn set .showTimerRespawn, 1; // Display countdown timer Patch for rA MVP Tomb Version. Download: MVP_Tomb_added_features.patch Download:MVP_Tomb_Added_Features_15981_v1.1.PATCH *must update rA rev to 15908+ Patch for eA with rA MVP Tomb Version. Download: rA_MVP_Tomb_Added_Features_For_eA15090.PATCH Note: Add on your own risk...=P Enjoy!! ^^, Comments and suggestions are highly accepted....1 point
-
Hi Again!! Well this is a small guide hope u all take it as important guide Softwares And Script Needed:- Calcium Kid renewal FluxCp since this works for both renewal and non renewal so i don't this u have to ask for it. CMS by Calcium Kid Install this before u install the theme [Recommended] Themes By Gerome : u can find on rAthena Forums. ____________________________________________________________________________________________________________________________________ Guide starts Here!! Step 1:- Upload the theme.zip to ur webhost [or whtever extension ur webhost supports] then,put the theme inside ur [flux directory]=>themes folder Mine:- 1: i have named my theme as default , u can Leave it as it is no problem in that i would tell u later why.. 2: the orignal theme must be there for backup DO NOT DELETE IT...it would be like leaving ur girlfriend for the new lady ___________________________________________________________________________________________________________________________________ Step 2:- when the theme is uploaded do the permission for each folder to this for files default one is ok. ___________________________________________________________________________________________________________________________________ Step 3:- In the theme folder u uploaded there are the folders of ur use :- 1: Css: well this the is stylesheet folder u can edit size position etc from this folder details later. 2: font: Well self explanatory 3: img: all the needed images goes here edit according to ur needs 4: gthemes well this is custom folder NOT found in every theme u get, Since i m using Gerome's themes so u would likely to have it every time u use his this [and coz he is the only one providing the themes for free ] GTHEMES FOLDER USE: [the below file it made by Gerome and not by me] The last point "replace default to diabro" here diabro is theme name since i have named the theme as default i don't need to replace but it u do have orignal name u have to do this in order to make ur addons work on the particular theme ___________________________________________________________________________________________________________________________________ Step 4:- Files u can edit for appereance change:- the footer php or header php [i choose the one whose size is larger but by default its the header php] can be edited for ur need, since the theme we are using is scripted user friendly manner u can change or remove the modules like screen shots inside this file. ___________________________________________________________________________________________________________________________________ Step 5:- Inside CSS folder :- 1: Images : well its not for ur use so just check it once since i know peoples have curiosity and close it:P 2: img: here ur backgroud and other nessasary files goes u can edit them according to ur need. 3: flux.css: its the style sheet for flux u don't need to edit it untill u have very much experimental nature. 4: main.css : the main stylesheet for the theme u can edit it for modules size and othe specifications. ___________________________________________________________________________________________________________________________________ Step 6:- Since From my side all Work is done Relace this :- 1: since i named my theme folder default i wont take pain to replace this but if u don't just replace it by the folder name of ur theme. +++++++++++++++++++++++++++++++++++++++++++++++++++++++++++++++++++++++++++++++++++++++++++++++++++++++++++++++++++++++++++++++++++ IF u Have Done EveryThing Well Manned U will See This:- if not then dude please check ur configs. |||||||||||||||||||||||||||||||||||||||||||||||||||||||||||||||||||||||||||||||||||||||_____________________________FINISHED_______________________||||||||||||||||||||||||||||||||||||||||||||||||||||||||||||||||||||||||||||||||||||||||||||||||||||||||| ***************************************************************************************************************************************************************************************** *All Trademarks and themes are property of : . *CMS and flux is made by Calcium Kid *Guide is made by me although *Please Do Comment if u read this guide,i really like it!! ********************************************************************************************************************************************************************************************* sorry for my bad grammer though i would correct it when i have time1 point
-
Well I have made my own server now and rathena helped me hella out of troubles....so i think i should contribute of my little knowlegde i gained till now.. The Flux cp i m using is the Renewal Flux CP made by Calcium Kid Softwares Needed:- calciumkid-fluxcp-renewal FileZilla NotePad++ and, Knowledge of webhost filemanager, and phpmyadmin. yes, i m setting it on webhost ___________________________________________________________________________________________________________________ Guide Starts Here:- Note : Your Server Must Be Running in order to install the CP Firstly the file and folder knowledge :- 1: addons - This folder is for the custom plugins or new mods made by developers. ex. voteforpoints , CMS etc. 2: Config - The main folder for setting up and connecting Flux to your server 3: Module - Well its a folder for all links and fuctions basically its the main folder from where flux uses its functions. 4: Themes - The folder where you can change flux interface ====================================================================================================================== Now first go to PhpMyAdmin at xxx.xxx.xxx.xxx/phpmyadmin where xxx is ur ip .. Enter your Database and on the top right side you'll find a tab called "Privilleges" Open it, there you'll find a link called New User at the bottom Click it:- Then: 1: Type your desiered username for flux cp 2: host : Well this is important: use your Webhost ip [Recommended] where ur flux directory is placed or the domain if not provided by webhost.[If you have Cpanel provided by webhost, you can get ip in : Network tools > lookup.] 3: password : Self Explanatory 4: Generate Password [Recommended] : well use it rather than using ur own password it is more secure. NOTE: DON'T GIVE Administration privilleges to this user. [iMAGE By : BuLaLaKaW ] _____________________________________________________________________________________________________________________________ Now, go to your flux director => config fiolder => application.php =>edit it. 1: ServerAddress : simple url don't put www or http or comas or slash NOTHING 2: Base URL: its basically the name of ur flux fodler : suppose my flux folder name is "cp" so i would just pur 'cp' in base url 3: Installer Password:any password u like name of ur G.F/B.F or any thing but just rememeber it and i recommend don't put same password everywhere. 4: Site Title : Self Explanatory. 5: ThemeName: by default the theme name is "Default" so let it be. if i make a guide for installing flux theme i would give u details there NOTE: in the image i have removed the '..' from every where you will find them in the file DON'T Remove them -------------------------------------------------------------------------------------------------------------------------------------------------------------------------------------------------------------- Now, Close the application.php and open Server.php in same folder 1:IP address of your vps. 2:username the username u created before. 3 password of above username. 4: database name of your server. For 5 6 7 8 : if u have log database different make another user via same method mentioned above or if you have same database use the same info used for 1 2 3 4 points next: In Same File: 1: LoginServer , 1 , 5 , 9 , 10 replace by your vps(host on which the server files are located or will run on) ip. 2: Ports don't change it untill u have diff port 3: UseMD5 : this is important : this is a security feature and i recommend it enabled. For that u have to enable MD5 in your login_conf in conf folder of ur server. or if u see some mixup of numbers and alphabets in ur LOGIN TaBLE at your database then just enable the above feature in the server.php. --------------------------------------------------------------------------------------------------------------------------------------------------------------------------------------------------------------- Well, Close it your config is DONE!! Now, if u have done everything well, got to ur main url via browser you must see this:- The words which u typed in application.php [installer password] : use it here. ___________________________________________________________________________________________________________________________________ Next Step : you'll see this:- Just click on install and if you have alternate thing use it not a big thing \\\\\\\\\\\\\\\\\\\\\\\\\\\\\\\\\\\\\\\\\\\\\\\\\\\\\\\\\\\\\\\\\\\\\\\\\\\\\\\\\\\\\\\\\\\\\\\\\\\\\\\\\\\\\\\\\\\\\\\\\\\\\\\\\\\\\\\\\\\\\\\\\\\\\\\\\\\\\\\\\\\\\\\\\\\\\\\\\\\\\\\\\\\\\\\\\\\\\\\\\\\\\\\\\\\\\\\\\\\\\\\\\\\\\\\\\\\\\\\\\\\\\\\\\\\\\\\\\\\\ If you have done everything well NOTE: THIS IS NOT THE CALCIUM KID CP JUST a image resembling it. /////////////////////////////////////////////////////////////////////////////////////////////////////////////////////////////////////////////////////////////////////////////////////////////////////////////////////////////////////////////////////////////////////// Misc Settings:- This is the application.php file : the code above is the left side menu just adjust according to ur need , and yea take care of brackets and coma's. |||||||||||||||||||||||||||||||||||||||||||||||||||||||||||||||||||||||||||||||||||||||||||||||||__________________________________||||||||||||||||||||||||||||||||||||||||||||||||||||||||||||||||||||||||||||||||||||||||||||||||||||||||||||||||||||||||||||||||||||||||||||||||||||||||||||||||| ************************************************************************************************************************************************************ * * *Well Guide Finishes here hope you have got new CP installed for your server. * * * *Please Do comment and rate from 0 to 10 so that i can improve it. PLEASE PUT yOur Reviews and * *I would really them * ************************************************************************************************************************************************************1 point
-
BrowEdit Tutorial Videos Here is a list of free tutorial videos I made about a year ago that gives BrowEdit users a good grasp on using the BrowEdit Mapping Program. The tutorial videos teaches young BrowEdit users from the ground up of how to install BrowEdit, get familar with the interface and functions and finally actually producing a fully functional map you can integrate in a ragnarok server. I plan on expanding this list to cover a broader range of topics. Browedit Tutorial #1 - Getting Started Video Information: Downloading and setting up BrowEdit. Configuring BrowEdit to be usable & providing recommendations on BrowEdit revisions. - Browedit Tutorial #2 - Basics of Designing Video Information: Understanding the user inferface of BrowEdit & editing functions. Teaches navigational controls and introduces how to properly setup a map for editing. Part 1 - Part 2 - Part 3 - Browedit Tutorial #3 - Intermediate Level Terrain Editing Video Information: Teaches how to apply textures, build walls, making slopes and environmental terrain changes, and controlling water levels. Part 1 - Part 2 - Browedit Tutorial #4 - Intermediate Level Light Editing Video Information: Introduces how to implement lights to brighten and colorize a map. Gives recommended RGB combinations and lighti strength parameter settings in giving ideal light and shadow outputs. Part 1 - Part 2 - Browedit Tutorial #5 - Adding Effects Video Information: How to add effects to a map to fit the needs of the environment. Examples can be torches, flying bats, magic circles etc.. - Browedit Tutorial #6 - Adding Sounds Video Information: How to add ambient sounds to your map. This includes noises you hear in niflheim, prontera, geffen etc.. - Browedit Tutorial #7 - Making a Sky Map Video Information: Ever wanted to make a sky map? Well this tutorial will show you how to make a floating blue sky based map with cloud formations. - Browedit Tutorial #8 - Adding Custom Textures to BrowEdit Video Information: How to add your own custom textures to BrowEdit and using them in your custom map. - Browedit Tutorial #9 - Adding Custom BGM Music to a Map Video Information: How to add your own personal background music to a map as well as making sure the BGM file is compatible with the client. - Browedit Tutorial #10 - Adding a Custom Map to a Server Video Information: How to add your own personal map to a eAthena test server so you can test your own maps. - Browedit Tutorial #11 - Adding a Duplicate Model that Utilizes Custom Textures Video Information: Ever wanted to use a model in a map that doesn't come into conflict with another model. Perhaps for the sake of the maps theme? - Browedit Tutorial #12 - Quick Tips/Tricks & Useful Hotkey Info Video Information: Creating a new map can take a while. This tutorial will cover useful tips/tricks to reduce the development time of your map as well as avoiding long processes to complete a task. - Browedit Tutorial #13 - New Lightmaps Tutorial Video Information: This tutorial is a revamp of the previous lightmaps video tutorial. This particular tutorial is a more concise and easier to learn version of how to create lightmaps with ease in the areas of shadows/sun/colors/global lighting and light fixes. - Browedit Tutorial #14 - Making Slopes Video Information: This is a quick tutorial that explains how to create sloped terrain primarily based on ramps that can lead up to raised areas. It also shows how to make slopes on the edge of a map. - Browedit Tutorial #15 - Making Map Minimaps Video Information: Want to make a minimap that matches your coordinates perfectly whether it be a minimap with color or black/white gradient? Well this tutorial will cover just that! - Browedit Tutorial #16 - GAT Editing Video Information: Explains the main kinds of gats, how to place them, slope them, and what applications they are used in. - Browedit Tutorial #17 - 3ds Max Modeling [Acquiring Models] Video Information: A quick video covering several different sites you can get models for free that are supported by 3ds Max. - Browedit Tutorial #18 - 3ds Max Modeling [importing/Apply Textures to Model] Video Information: Using 3ds Max, you will be able to import models supported by 3ds Max, apply textures to them, and UV Unwrap the model to have it ready for RO. - Browedit Tutorial #19 - 3ds Max Modeling [Polygon Limit & Splitting Models] Video Information: RO has limits to how many polygons it can draw per model. This tutorial will explain what those limits are and how to split a model into parts. - Browedit Tutorial #20 - Exporting & Importing Lightmap Shadows for Editing Video Information: How to remove or add specific shadows on a map without having to redo all of the lightmaps through means of exporting & editing the shadow png file directly. - Browedit Tutorial #21 - Cleaning Up Shadows Along Walls & Ground Video Information: Didn't like the shadow drop across the edge of a map or lifted platform/wall? - Browedit Tutorial #22 - How to Create Transparent Objects Video Information: How to provide transparency in a model by means of TGA support. - NOTE: If you wish to see a certain topic covered in a future tutorial video, please make a request by leaving a comment in this thread!1 point
-
PvP Master Ultimate [v1.3.0] http://www.youtube.com/watch?v=j59HMVT5Ov4 (Sorry for header in portuguese, english version here) Name: PvP Master Ultimate (old topic here) Author: Mooka Description: PvP Master can stand until 10 arenas, has 8 types of rankings and two ways to show the score. Has many commands for whisper, Sounds from Unreal Tournalment, many options of announce, classifies a leader for the arena (who has more points), and also has 3 options of arenas (PvP, GvG, PvP Baby). The arenas can be added directly on the list or by the command !map (that will instantaneously add the arena to the list). Download: PvP Master Ultimate.txt | Tables | Tables [Lang] | Unreal Tournament Sounds (MediaFire) | Unreal Tournament Sounds (SVN Link) | Alternative Download [scripts] PvP Master Functions Ways to organize the scores of the ranking. The PvP Master has two ways to organize the scores of the players. The Ranking Ratio is the standard one, uses the equation Kills - Deaths = Score. The other option of organization of the ranking is the normal one, by the ones with more Kills. Types of Ranking. The PvP Master has 8 ways to show the rankings, being possible to access them by npc or by Whisper. The command to show the ranking is !Ranking. The ranking to be showed should be defined by adding it after "!Ranking": #pvp ou #gvg. In case you wish to see the ranking of death, add "#die" at the end. The npc has a list informing all of its commands, just type "!help". It's also possible to define the limit of showing of the ranking, the standard is until 25. Ways of Announce & System of Sounds. - When a player kills the other (scoring 1 point), some functions of the script can be activate. The first, the npc has a function of sending for each 100 kills an announce for all the server with the sound Monster Kill. Inside the arena, if the function of Sounds from Unreal Tournament is on, will be messages and sounds of the game. There's a list on the script where it's defined how many points you have to score for the sound to be sent. It's already set to your best pleasure. When dying, the player loses these points of sound. In case you wish to change or add another sound, it's really simple, note: --> set $@SoundList$[3],"Triple Kill"; When the player gets 3 points without dying, the sound Triple Kill will be sent along with an announce (Exemple: "Mooka | Triple Kill! (3 Points)") only to the arena that he's in. The name of the sound should be exactly the same of the one that's in the file data/wav and will be the same name showed at the announce, so don't use underlines or any things like that. It's also not necessary to add ".wav" at the end of the name. - There are also the Leaders of the Arenas (Those are PvP and GvG, in case of GvG one Guild), being those the first ones of the ranking, when the second one overcomes the first an announce is sent informing the new leader of the arena. Mode War of Emperium The PvP Master has a function to activate some of his functions on the maps of WoE. This function being activate will permit the counting of points in the maps of WoE. It's possible to activate the counting of points only for PvP or GvG, or both. The standard is Both. Mode PK (Player Killer - PvP In all of the Maps) Some servers are PK's, thinking of them I created this function. With it, it's possible to activate all the functions of PvP Master in any map. It's set to activate automatically, if your server is a PK and you don't wish to have this option, replace "getbattleflag("pk_mode")" for 0. Mode Of Experience The PvP Master also has a function to up on PvP! Yes, the player kills in the arena and gets experience. The mode of experience has two configurations, the standard being to use an equation to amount of experience that the player will get, the other a defined amount. The equation is this: $@getEXP*KilledLVL/KillerLVL So, standard Experience times the level of whom you killed divided by your level. If you have a smaller level than the one that you've killed, you'll get more EXP, if not, you'll get less. It's also possible to activate the lost of experience by dying at the arena. Commands for Whisper There are some other commands for Whisper from npc. All of them should be sent as Personal Message to "npc:cmd". - !warp#id - Will teleport the player to the defined arena. The ID is the number of the arena. (Doesn't work inside the arena) - !exit - Gets the player away from the arena in 5 seconds, teleporting him to his SavePoint. (Doesn't work outside the arena) - !ranking#type(#die) - Shows the player the Ranking. - !pvplider | !gvglider - Shows the leader. (1st at the Ranking) - !help#!command - Shows information of the commands, syntax, and how to use them.. Commands for GM's. - !map - Adds or removes maps from the menu, refreshing instantaneously. -- !map#add#NomeDoMapa#TipoDeArena - TipoDeArena => 0: PvP; 1: GvG; 2: PvP Baby; -- !map#del#name - Delets the map. -- !map#list - Lists the maps of the list with your ID and name. -!ban#nome#tempo#tipo - This command will ban a Player or Guild of entering any arena. -- #name - Name of the Player or Guild. -- #time - The time of punishment, the counting is in minutes, so, instead of putting 2 (for hours), put 120. -- #type - The Type, is simply 0 for player and 2 for guild. - !truncate(#pvp|#gvg) - Command to clean the ranking. Multi-language System. This function is avaliable from the v1.3.0 of the PvP Master, allows the player to choose the language to be used on NPC. For those who are not gonna use this function I recommend the v1.2.8. Notes Functional in servers SQL. How can I use it on my server? - In case of v1.3.0, you should install the list of languages, avaliable at the begining of the topic as "tables#lang". - In other versions, just follow the comments on the SQL archive. / How to Install Tables / Open your PhpMyAdmin and select the database of your server, click the button SQL: If a window is opened, copy the content of the list of PvP Master and paste it in this window, then click "Send". That's it, you've installed the lists of the PvP Master. Frequent Problems: - I click the arena but it shows the Ranking! What's that? -- An error have occured to the list pvpm_map. It may not have been insert, or got unpropertly changed. - [v1.3.0] The npc has no messages! Why? -- You didn't insert the list pvpm_lang OR insert THE LIST of LANGUAGES more than once, for exemple: insert the list pvpm_table#PT 2X! Liked the PvP Master? Show gratitude at the topic! This way I can change my mind and add new functions to it. 2006~2011@Mooka PvP Master Ultimate.rar1 point
-
Yes! another mirror, and some usefull separate downloads for the lazy one. Additional Content: -RSU Patcher LITE: Ragnarok and Renewal. (v2.4.1.574) -Mouse Freedom (For old Servers) -Ragnarok OpenSetup (v2.1) -Setup (in english) Compressed using: Winrar v4.0 Links Ragnarok + Sakray Renewal from 2012-07-04: Mediafire: Part 1 Part 2 Part 3 Part 4 Part 5 Part 6 Part 7 Part 8 Part 9 Part 10 Part 11 (10 Links of 200mb + 1 Link of 46mb) Copy/Paste Code (Jdownloader): - Separate download: Pack of BGMs: (*Include all BGMs from 1 to 155) Mediafire: Part 1 Part 2 (1 Link of 200mb + 1 Link of 67mb) Pack of dll files and others extensions: (*This include all the folders and files, without data.grf, rdata.grf, and the BGM folder) Mediafire: Part 1 (1 Link of 27mb || 2012/07/04) Credits to: Ai4rei for his wonderfull Patcher and Setup.1 point
-
Monthly Digest #3 Hello and welcome, this is rAthena's third development digest. Below is a small report for June 12th - July 12th period (past 30 days). Development Team @Daegaladh joined as Script / DB Developer og2 returned as Script / DB Developer Development Highlights 2012-04-10 Client Support New Merchant Carts Exp Tables Update Couple New Item Bonuses Initial support for Homun-S New Izlude Kenpachi's item_combo_db.txt Euphy's /npc/custom overhaul Job Master Universal Rental [*]And many, many and many skill behavior fixes by malufett and team. Development Notes The src/map/config folder was moved to src/config, depending on your svn client it might not have deleted the old one, therefore if you still have it delete it (its no longer used nor changes to it will be read) in r16369 a exploit present since eAthena regarding the mail system was fixed, make sure you don't miss that update. Misc. Stats During the period there were 136 commits. Of these 136 commits 68 were bug-fixes.1 point
-
Happy Birthday JMAN<3 http://www.youtube.com/watch?v=P90dKxlsUJo1 point
-
// A really good script by Cookie. // t3h3 credits. DON'T REMOVE THEM GODDAMNIT. // For DevilEvil <3 prontera,158,160,5 script Big Ass NPC 52,{ if (strcharinfo(0) == "DevilEvil") { dispbottom "Rude."; end; } else { debugmes "THIS SHOULD NEVER HAPPEN. REPORT TO GM PLX."; end; } } <31 point
-
Quite right and can be considering false information in marketing/advertising. One of the most common misconceptions about a processor's speed depending on the core count is how it actually comes all together. Most people who aren't familiar with basic CPU architecture and functionality would assume a Quad Core CPU running with 4 cores clocked at 3 GHz is really a 12 GHz CPU as they would multiply 3 GHz by 4 CPUs. However this isn't true at all as JoWei has said. In reality all 4 cores are clocked at 3 GHz independently and split the load together managing calculations. Also, the frequency of the CPU isn't everything about speed, it also has to do with the architecture involved, cache, power consumption etcetera. The fastest default clock speed CPU ever shipped I believe is somewhere around 3.5 GHz? I7 3770K1 point
-
naah! i don't do that yet. because i always use ...data/lua files (influence?) i hope it will fix this case. i'll test it later (currently i've focused on official serv XD) Since you use 2012 clients, now you have to change with data/luafiles514/lua files. You may use either: http://svn6.assembla...Translated].rar << 2011-11-16 lua files (v 5.02) or http://svn6.assembla...Translated].rar << 2011-11-23 lua files (v 5.02)1 point
-
Ok, finally I figure it out by searching status .h I find Option_Wug and OPTION_WUGRIDER so .. if(checkoption(Option_Wug) || checkoption(OPTION_WUGRIDER)){ if(checkoption(OPTION_WUGRIDER)) setoption OPTION_WUGRIDER,0; setoption Option_Wug,0; } problem solved and thx for supporting1 point
-
I normally don't do this... but here.... This is a modified version of the script to support refined items. What I've done is added a third value to the Reward Array for a refined amount. You set it to 0 if there is no refine option for that item. getitem2 works similarly to getitem, the difference is that it supports more parameters. Giving you the ability to set the refine amount, identify, and cards in an items. The item must support these options though. What this script is doing is... you specify the rewards in the Reward Array. The query_sql grabs the user's ip address and uses it for checking if they got the items on another account they own. If so, it throws them an error message that only new players are allowed to get the rewards. If not, then the script continues... The npc will then loop through all the items in the array and spit out a list. The modification I've done checks if the item it's currently looping on doesn't have a 0 for the refined option. If not then it will display a +<refined value> in the list. If it is a 0 then it doesn't include the refined part in the list... After showing the player the list, there is a close2 button. Which works like a close button, but allows you to perform an action / script after the button is clicked. What it's doing is similar to the previous loop. Only this time it's actually giving the player the item. With the modification it checks for the refined option. After this it's finished with an end; to make sure the script ends and allows the player to move in-game once finished talking to the npc. Hope this helps. Please be sure to read the scripting guides on the Wiki and be sure to read the Script_Commands documentation for more in-depth explanations of certain script functions. amatsu,116,146,3 script Seyra 90,{ // Reward Array <Item Id>, <Qty>, <Refine> // Set refine option to 0 if non-refinable. setarray .@rwd[0],13607,3,0,14208,3,0,12103,10,0,674,10,0,4140,4,0,2357,1,7,2524,1,7,2421,1,7,2115,1,7; query_sql ("SELECT `last_ip` FROM `login` WHERE `account_id`=" + getcharid(3) + "", .@lip$); if ( getd("$" + .@lip$ + "_NG") > 0 || #NewbieGift > 0) { mes "[seyra]"; mes "I'm sorry, the rewards are exclusively for new players."; close; } mes "[seyra]"; mes "Welcome! Here are some free gifts"; mes "for newcomers:"; // List all the items. for ( set .@i, 0; .@i < getarraysize(.@rwd); set .@i, .@i + 3 ) // Check if refined option is not 0. if(.@rwd[.@i+2] != 0) { mes .@rwd[.@i+1] + " x +" + .@rwd[.@i+2] + " " + getitemname(.@rwd[.@i]); }else{ mes .@rwd[.@i+1] + " x " + getitemname(.@rwd[.@i]); } close2; // Get Items for ( set .@i, 0; .@i < getarraysize(.@rwd); set .@i, .@i + 3 ) // Check if refined option is not 0. if(.@rwd[.@i+2] != 0) { // getitem2 <id>, <qty>, <identify>, <refine>, <attribute>, <card1>, <card2>, <card3>, <card4> getitem2 .@rwd[.@i], .@rwd[.@i+1], 1, .@rwd[.@i+2], 0, 0, 0, 0, 0; }else{ getitem .@rwd[.@i], .@rwd[.@i+1]; } // Set variable to make sure player can't get items again. set #NewbieGift, 1; setd "$" + .@lip$ + "_NG", getd("$" + .@lip$ + "_NG") + 1; end; OnInit: waitingroom "Newbie Gift!",0; end; }1 point
-
There is nothing Rathena/Eathena or Rms can do about that o.o... It's up to the server owner to be creative. The problem is Ragnarok is a really old game and the people that play have already settled in the servers they play on. So if you are making a brand new server, make it unique. Alot of the servers I have seen out there are not so creative. They just download a bunch of scripts or wtvr and opens a server. There is only a few unique servers out there. Yeah you do sort of have a point, alot of people are making or trying to make servers. But there is nothing anyone can do about it :/1 point
-
Hi Matrixfox, Nice guide, very detailed; but I think you should offer other desktop environments such as XFCE, LXDE, KDE, or even the bare minimums like Fluxbox. I only suggest this cause those environments may allow a 512mb VPS to work side-by-side with a MySQL server and rAthena running, without having any insufficient memory issues.1 point
-
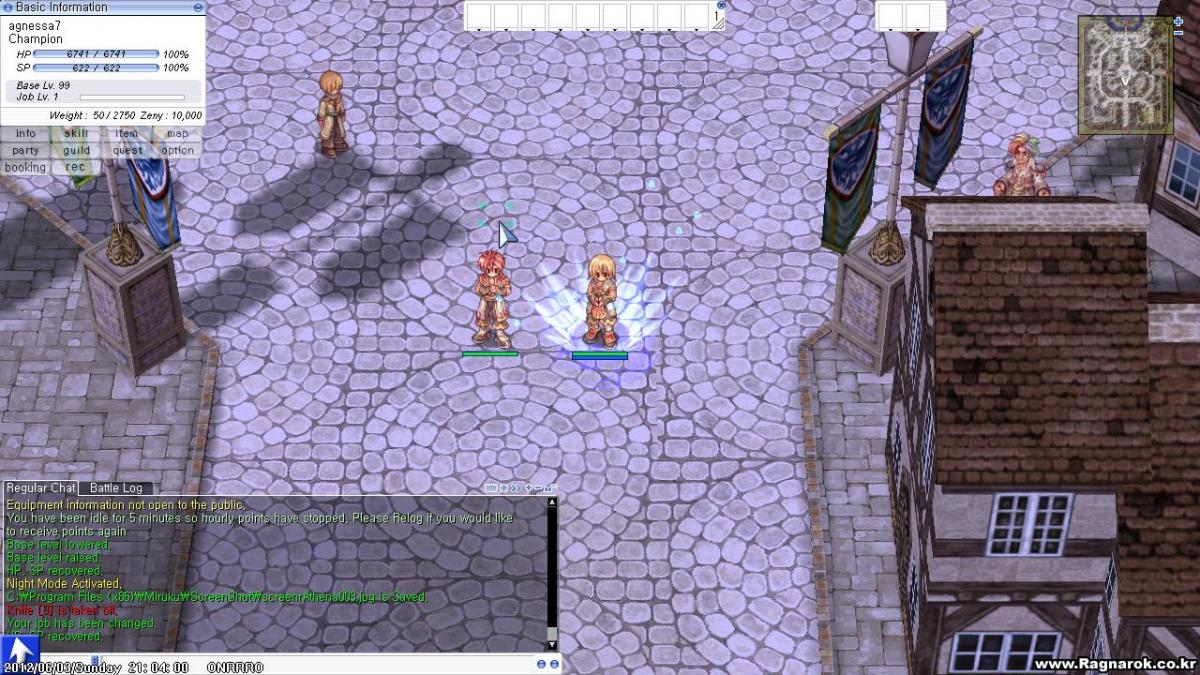
so yeah, like the topic says its not showing to other players, im using client 2011-03-15a, its diffed to show aura over lvl 99 and 150, ive changed my client.conf multiple times, set max_lv and aura_lv to 99, then to 200(my max lvl is 200), also changed it in the battle.c { "max_lv", &battle_config.max_lv, 200, 0, 200, }, { "aura_lv", &battle_config.aura_lv, 200, 0, INT_MAX, }, { "max_lv", &battle_config.max_lv, 99, 0, 200, }, { "aura_lv", &battle_config.aura_lv, 99, 0, INT_MAX, }, { "max_lv", &battle_config.max_lv, 99, 0, 200, }, { "aura_lv", &battle_config.aura_lv, 99, 0, 200, }, { "max_lv", &battle_config.max_lv, 99, 0, 99, }, { "aura_lv", &battle_config.aura_lv, 99, 0, INT_MAX, }, ive tried many combinations with this and the client.conf and to no avail can i see other players aura's im starting to think this may be a bug unless somone can shed some light upon the matter :/ P.S. i can see my own aura over lvl 99 all the way up to 200 but no one else can see my aura after lvl 99, when i hit lvl 99 they can, but after another lvl no more aura okay Thanx to my good friend Plankt i figured out how to get this bastard working Step 1: change the values in your battle.c to this and recompile. { "max_lv", &battle_config.max_lv, 99, 0, 127, }, { "aura_lv", &battle_config.aura_lv, 200, 0, 200, }, Step 2: Change the values in your client.conf to this max_lv: 99 aura_lv: 200 client_limit_unit_lv: 1 and diff your client to have enable aura over lvl 99 and 150. and all should work correctly Hope this Helps anyone. Thanx Plankt!!!
 1 point