Leaderboard


Popular Content
Showing content with the highest reputation on 03/22/24 in all areas
-
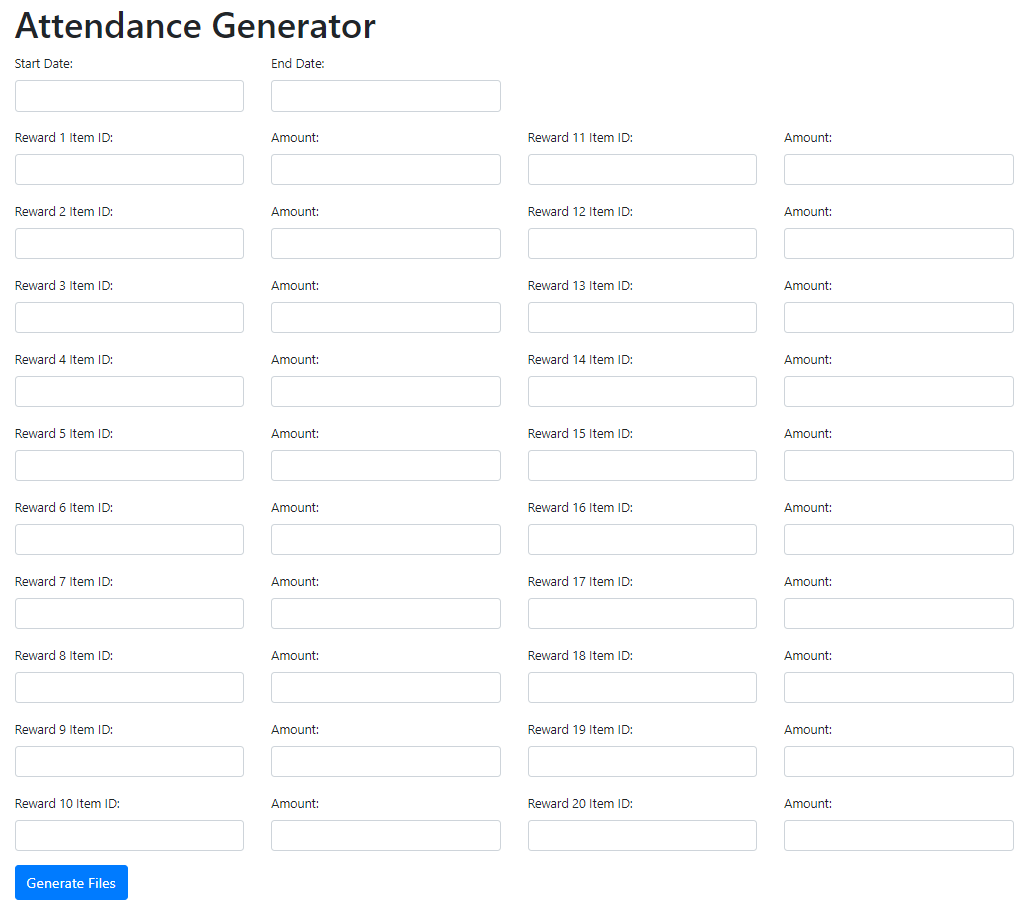
Hello, I'm sharing this project, since this might help someone who need to generate this easily. The file that generated = CheckAttendance_EN.lub & attendance.yml Download, extract, add it in your System folder and server file or create a patch or anything. You can access to this simple project here : https://x-files.amirazman.my/attendance. Let me know if you having issues and Ill update it if possible & have some leisure time to play with.
 2 points
 -
Do you have very old clients or emulators lying around? Maybe that old hard drive with RO stuff? How about those old CD-Rs on the shelf? Or are you simply a RO data hoarder? WE WANT YOU! Hi, I’m vit. I’m developing along with o oldinroplayer a *Ragnarok Online Cross-Episode Database*, called RagnaDB. It’s a db in which you’re able to choose a specific episode and we’ll show you all the info precisely as it was back in the day. The idea is for it to be the “one RO database to rule them all”. For this to exist, there’s a great deal of historical research and digital data scavenging involved. Since we’re committed to historical accuracy, we’re on a journey to finding old files (client and server) to feed the db with, as well as (old) reliable sources for data validation. If you were waiting for the right moment to shine and looking for a group of people who will truly appreciate and see value in those dozens of RO gigabytes collecting dust like no one ever had, this is the moment! We’ll love to have you! If any of the words above piqued your interest, you’re more than welcome here. Join our Discord to hear about the latest updates or just hang around! Our Discord: https://discord.gg/cueAdED64N RagnaDB: https://ragnadb.com/1 point
-
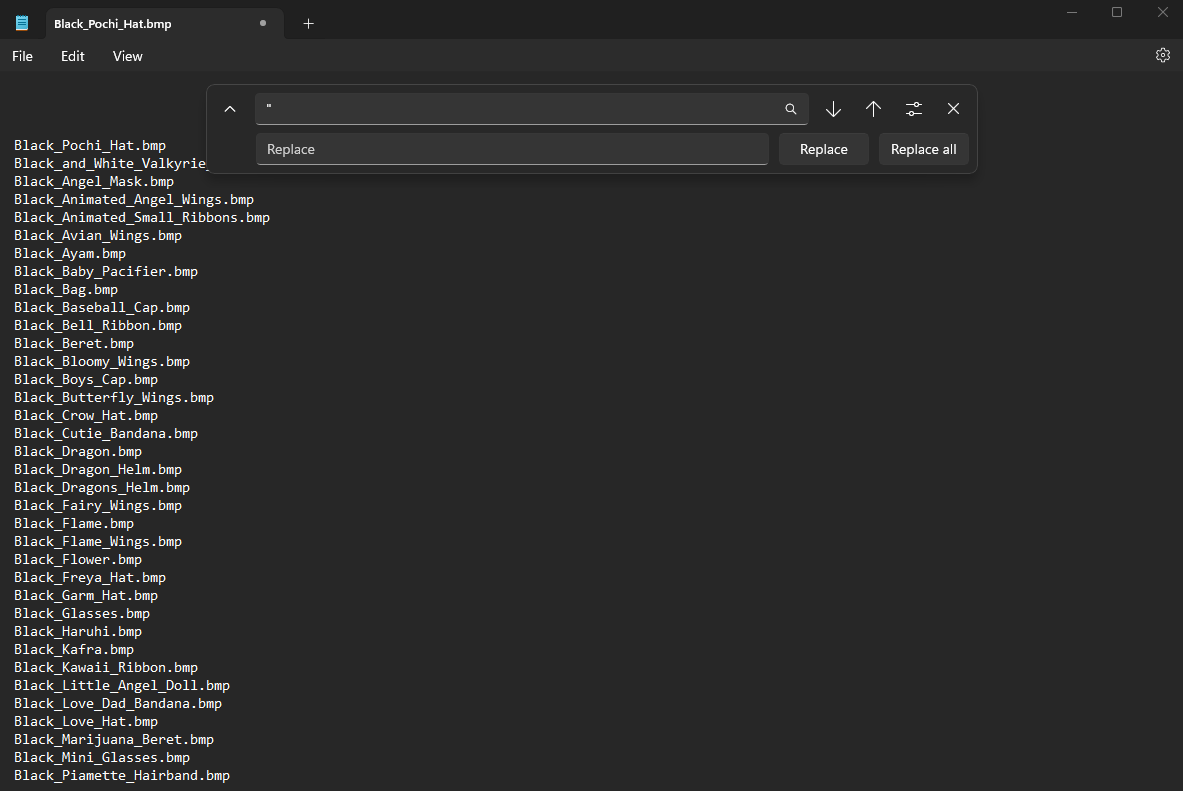
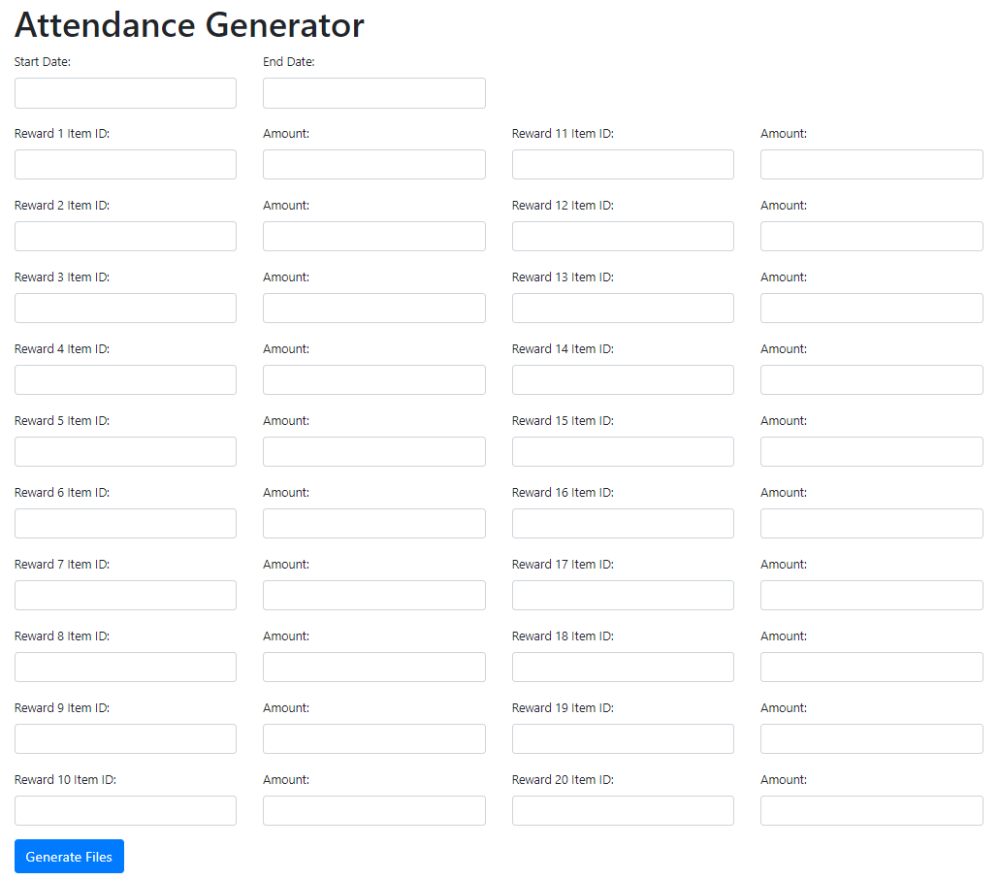
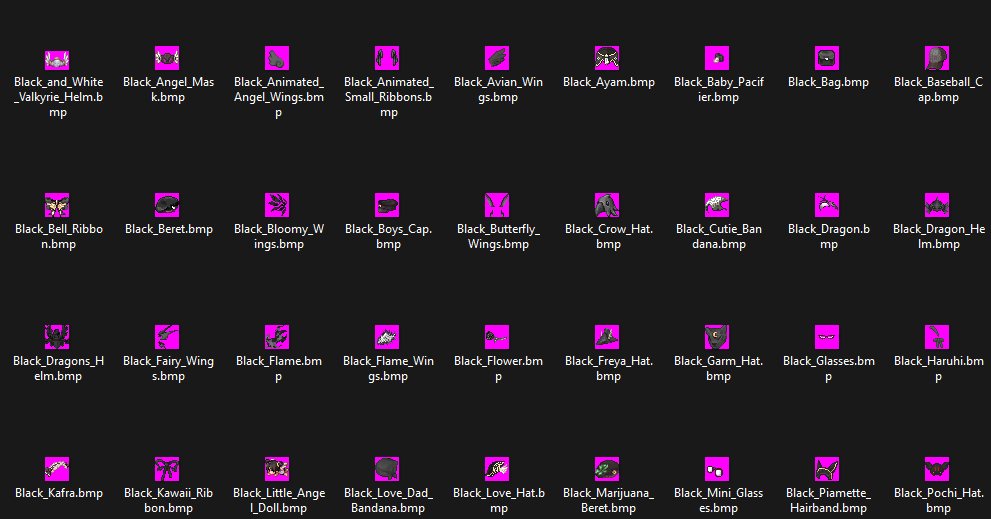
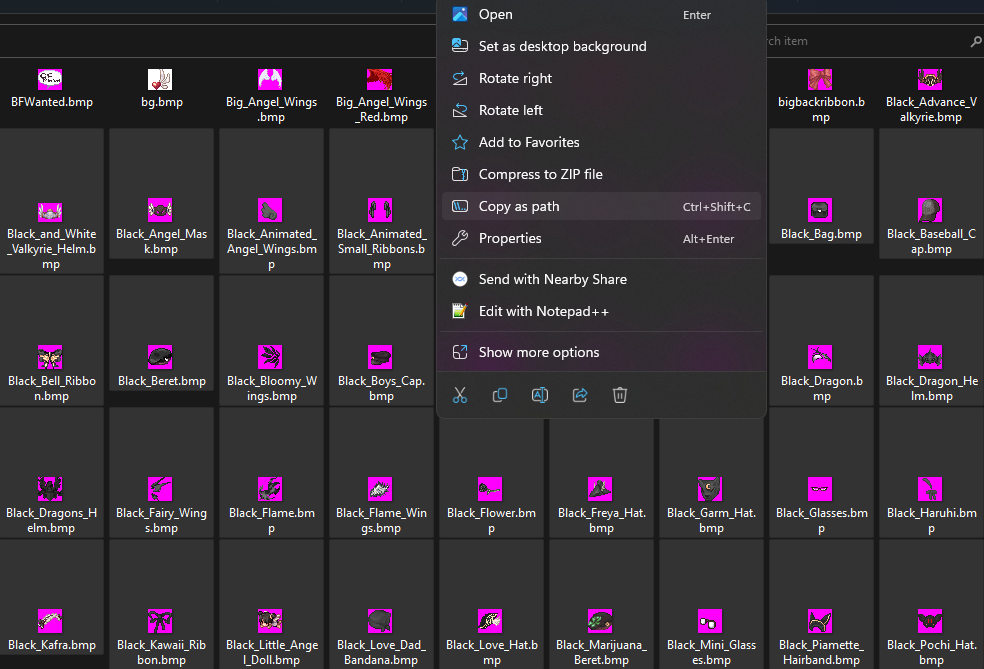
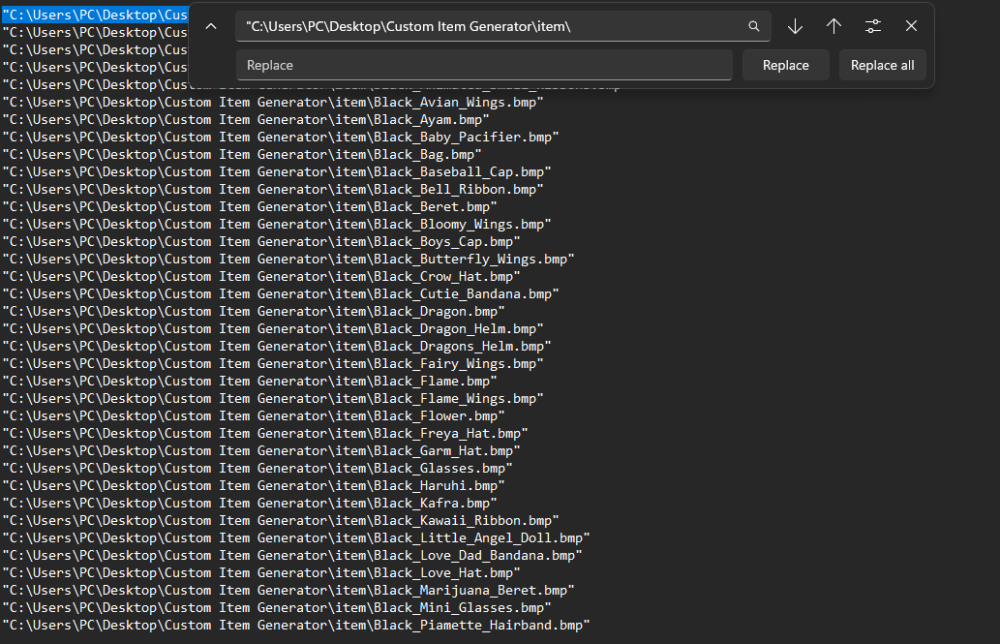
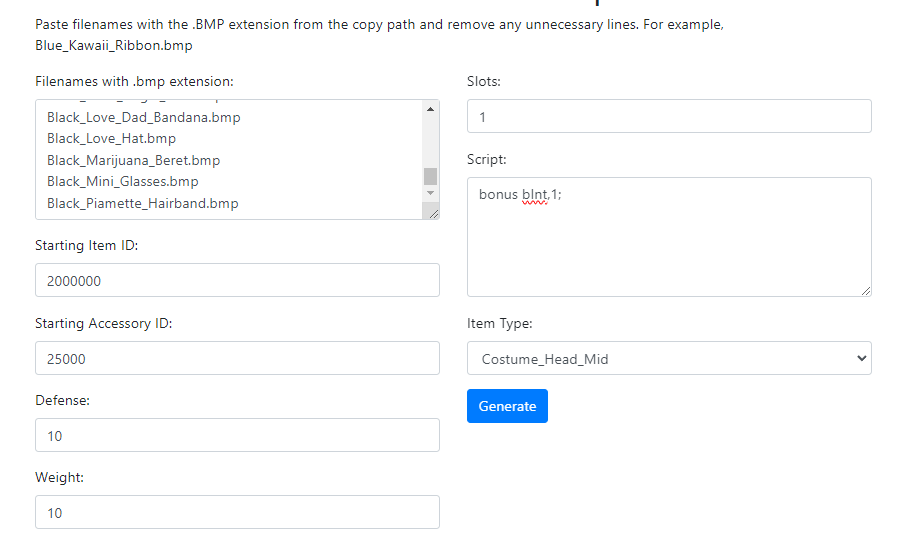
Hello, I'm sharing this project, since this might help someone who need to generate this easily. Right now, this project support custom file generator for : 1. Custom headgear. 2. Custom robe/garment. 3. Custom weapon. 4. Custom NPC. The required file generated depends on which generator that you used. The scenario on how to generate for custom headgear file : 1. Maybe extract data\texture\유저인터페이스\item\ folder and u will have the listed one .BMP that u want to add. 2. Select all the item u want to add, right click mouse and right click, copy as path. Then open notepad, paste it. 3. Get the only .BMP in list, so replace your directory path and replace all with blank/nothing . And lastly the " with blank/nothing. So the result is as below. Copy all of it, insert in https://x-files.amirazman.my/customfilegenerator and change your : - Starting ItemID you want it to start with. Make sure the itemID is supported by your client. - Starting AccessoryID that you didnt use yet. Also make sure the final accessoryID didnt reach the maximum of your client can support/set. - Defense, so you can set all the defense in bulk. - Weight. - Slots. - Script. Insert any scripts or anything that you can replace all easily later on in itemdb and also custom_iteminfo.lua (yes, its generated inside the description). - Item Type for now only support headgears and costume headgears, I will add another item types soon if possible (yes, its generated inside the description). And click Generate. Download, extract, add it in your System folder and server file or create a patch or anything. You can access to this simple project here : https://x-files.amirazman.my/customfilegenerator. Let me know if you having issues and I'll update it if possible & have some leisure time to play with.

 1 point
 -
View File Upscaled npc sprites Please note that you can download the full version of the sprite set from this link. The file is large and cannot be uploaded to the forum. You can download my sprites rework [FOR FREE] and not for resale! [DOWNLOAD] https://mega.nz/file/taQwkKwL#ikVnLwKyX52rymVMlaAqxFMd8YHsC2itTyk3GxmAjtc Submitter Balfear Submitted 09/20/23 Category NPC Sprites Video https://youtu.be/gt8JM0Y5pwM Content Author Gravity / Balfear1 point
-
The error tells u that the function *rand have to be greater than -1. The attached file isn't available. Unfortunately I can't take a look therefore. Rynbef~1 point
-
Version 1.0.1
149 downloads
***Include Abyss Lake4**** -IllusionTeddy Bear/Labyrinth base on https://www.divine-pride.net/ (Include Drops Table) -No Portal -Issgard Dun/Frozen scale Field are custom to fit my server. (Custom Drops Table) Install : Put Mob and mob skill to rathena\db\import PutNpcfiles (Custom.txt) to rathena\npc\custom add new line npc: npc/custom/Custom.txt at rathena\npc\scripts_custom.confFree1 point -
I see. I went with the first solution I came up with from the top of my head. But it isn't that hard to do it the way you are showing either. You simply can use an invisible npc with an OnTouchNPC label that teleports the mob back into the desired area. - script EXAMPLE_SPAWN -1,{ OnInit: areamonster("prontera", 151, 149, 155, 143, "", "poring", 2); } - script MOB_BOUNDARY_CELL -1,{ OnTouchNPC: unitwarp(getattachedrid(), "this", 153, 147); } prontera,150,150,0 duplicate(MOB_BOUNDARY_CELL) MOB_BOUNDARY_CELL#01 -1,0,0 prontera,151,150,0 duplicate(MOB_BOUNDARY_CELL) MOB_BOUNDARY_CELL#02 -1,0,0 prontera,152,150,0 duplicate(MOB_BOUNDARY_CELL) MOB_BOUNDARY_CELL#03 -1,0,0 prontera,153,150,0 duplicate(MOB_BOUNDARY_CELL) MOB_BOUNDARY_CELL#04 -1,0,0 prontera,154,150,0 duplicate(MOB_BOUNDARY_CELL) MOB_BOUNDARY_CELL#05 -1,0,0 prontera,155,150,0 duplicate(MOB_BOUNDARY_CELL) MOB_BOUNDARY_CELL#06 -1,0,0 prontera,156,150,0 duplicate(MOB_BOUNDARY_CELL) MOB_BOUNDARY_CELL#07 -1,0,0 prontera,150,149,0 duplicate(MOB_BOUNDARY_CELL) MOB_BOUNDARY_CELL#08 -1,0,0 prontera,150,148,0 duplicate(MOB_BOUNDARY_CELL) MOB_BOUNDARY_CELL#09 -1,0,0 prontera,150,147,0 duplicate(MOB_BOUNDARY_CELL) MOB_BOUNDARY_CELL#10 -1,0,0 prontera,150,146,0 duplicate(MOB_BOUNDARY_CELL) MOB_BOUNDARY_CELL#11 -1,0,0 prontera,150,145,0 duplicate(MOB_BOUNDARY_CELL) MOB_BOUNDARY_CELL#12 -1,0,0 prontera,150,144,0 duplicate(MOB_BOUNDARY_CELL) MOB_BOUNDARY_CELL#13 -1,0,0 prontera,150,144,0 duplicate(MOB_BOUNDARY_CELL) MOB_BOUNDARY_CELL#14 -1,0,0 prontera,151,144,0 duplicate(MOB_BOUNDARY_CELL) MOB_BOUNDARY_CELL#15 -1,0,0 prontera,152,144,0 duplicate(MOB_BOUNDARY_CELL) MOB_BOUNDARY_CELL#16 -1,0,0 prontera,153,144,0 duplicate(MOB_BOUNDARY_CELL) MOB_BOUNDARY_CELL#17 -1,0,0 prontera,154,144,0 duplicate(MOB_BOUNDARY_CELL) MOB_BOUNDARY_CELL#18 -1,0,0 prontera,155,144,0 duplicate(MOB_BOUNDARY_CELL) MOB_BOUNDARY_CELL#19 -1,0,0 prontera,156,144,0 duplicate(MOB_BOUNDARY_CELL) MOB_BOUNDARY_CELL#20 -1,0,0 prontera,156,149,0 duplicate(MOB_BOUNDARY_CELL) MOB_BOUNDARY_CELL#21 -1,0,0 prontera,156,148,0 duplicate(MOB_BOUNDARY_CELL) MOB_BOUNDARY_CELL#22 -1,0,0 prontera,156,147,0 duplicate(MOB_BOUNDARY_CELL) MOB_BOUNDARY_CELL#23 -1,0,0 prontera,156,146,0 duplicate(MOB_BOUNDARY_CELL) MOB_BOUNDARY_CELL#24 -1,0,0 prontera,156,145,0 duplicate(MOB_BOUNDARY_CELL) MOB_BOUNDARY_CELL#25 -1,0,0 prontera,156,144,0 duplicate(MOB_BOUNDARY_CELL) MOB_BOUNDARY_CELL#26 -1,0,01 point
-
Version 1.0.0
151 downloads
Please note that you can download the full version of the sprite set from this link. The file is large and cannot be uploaded to the forum. You can download my sprites rework [FOR FREE] and not for resale! [DOWNLOAD] https://mega.nz/file/taQwkKwL#ikVnLwKyX52rymVMlaAqxFMd8YHsC2itTyk3GxmAjtcFree1 point -
Version 4.1
2226 downloads
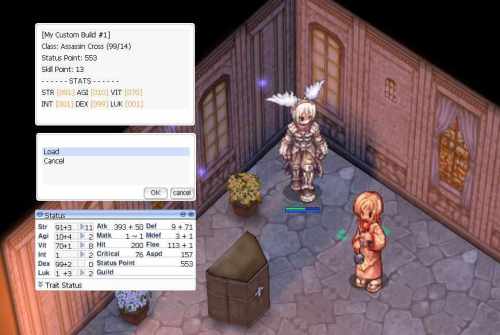
A NPC that allow your Characters to Switch Build from time to time. Players are able to save his current status build , so that he/she can switch back to the saved build whenever he/she want. Players no need to keep memorize their status build upon changed. Configuration : // maximum build player can store (0 = disable) .max_build = 3; // check player weight limit before switching stat (0 = disable) .check_weight_limit = 1;Free1 point -
Repository: https://github.com/eleriaqueen/rag-highres-scrolling-dmg-sprites Description: For this project I make high-res sprites of popular/interesting/cool fonts I come across. I apply a faithful RO-like gradient to the digits and letters so that they don't look out of place in game. Future of the Project: More stuff is coming, stay tuned, I'm hunting for the next interesting/cool/fun fonts when I have some free time. Info: Latest Release: 2023/02/01 - Release 9 - Roboto About Me: I was born in the late eighties, I like tinkering with programming and vector graphics drawing software, my skills are limited but I tend to pour hours upon hours of work into projects to compensate.1 point
-
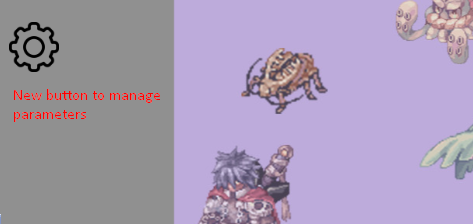
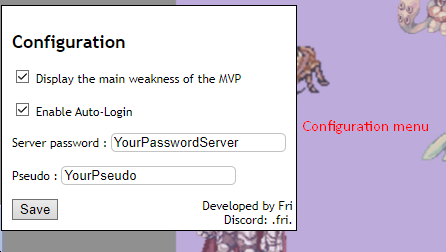
Hello, I made a script that I update regularly to improve the Guiderz.com / MVPTracker.net site for those who use it. The script is open source and you can modify it as much as you want Features: - No need to calculate the number of minutes since the death of the MVP. Simply write the time of his death as it is written on his grave. - Auto login to your tracker. - Display the main weakness of the MVP next to his name. - Enable/Disable MVP weakness display To install this script you will need : - Install the TamperMonkey extension. - Install the script from GreasyFork Demo video : https://www.youtube.com/watch?v=ZIPSBiJ2Z0M Screenshots : Changelog : v2.8 (04/07/2023) : - The script is now compatible with the Guiderz.com site. - Fixed the element of some mvp.
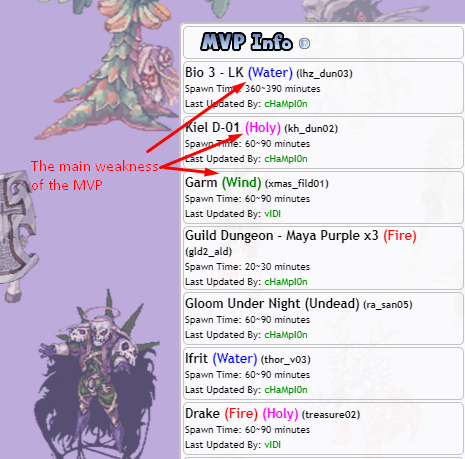
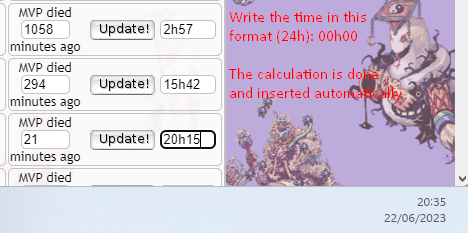 1 point
 -
View File Ragnarök Login Background Generator resize , convert and slice the image to fit Ragnarok Login Background Drag and drop the image you want onto the exe application. Do not double click the application, just drag and drop the image onto the application. A 'data' folder will be created next to the image (not the application unless they are in the same folder). You can add that folder as it is in your '.grf' file. This application requires .Net Framework 4.7.2 I know there is other tools, however it didn't work for me, and I am bored of debugging every time I want to create a login background ? Source Code: https://github.com/sader1992/Sader-Ragnarok-Login-Background https://sader1992.com/ Submitter sader1992 Submitted 10/07/2021 Category Client Tools Video Content Author sader19921 point
-
View File 4th Jobs Corrected Sprites Since Rytech released their 4th job code it is also pertinent to have the sprites corrected. It works with Kamishi's palletes and almost any generic. I recommend use Shared Body Palettes type 1 patch in NEMO Submitter ohyono Submitted 12/19/2021 Category kRO Sprites Video Content Author Van1 point
-
View File Hairstyle Package Introduction: This package are currently contains around 90~100 hairstyles for both male/female character. I obtained these from various sources like old eAthena, rAthena, Hercules, TheSpriteRepository and other member who shared these sprites with me etc. I don't remember who exactly made each of the sprites, or who even shared these... tell me if you know who are them. If any of these hairstyles are custom work that are meant for private use, kindly contact me, so that I could remove it from the listing. I do have more than this amount, but since my current test client (2018-06-20) can only support up to 100 sprites, so I randomly picked 100 and only upload it here. It included the default 31 hairstyle from kRO, but I think I replaced the 1~20+ hairstyles from JRO which dyed the hair in dark color, the rest are custom hair styles. How to use: You can either merge the provided GRF into your own GRF Load it as another individual GRF using the DATA.ini file Extract it and put it in your Data folder * Depend on your client hexed with whatever settings. Search forum for all these guides. Disclaimer: You're free to share with everyone but do not monetize the contents in any way! These materials are meant for study or research purpose. Use these at your own risk, and always give credit to original author. If there exists issue with sprite file, for example: sprite misalignment, error, etc, kindly ask help from any member who have knowledge with sprite edit. If there exists issue with palette color file, for example: messed up color, error, etc, kindly ask help from any member who have knowledge with palette color edit. Fun Fact: Do you know you can actually combine all male and female hairstyle (including doram) to create a list of universal hairstyles that could be used by any gender of player and doram? Submitter Emistry Submitted 03/15/2020 Category Hairstyles Content Author Various1 point
-

Version 1.0.0
981 downloads
Hello Friends, I'm a mapper and I also do map services (contact-me if you're interested in my job) I recently had this Prontera ripped and now I need to make it free for everyone. I hope y'all like it! If anyone wanna support me, please DM me.Free1 point -
Heya, This post is meant to explain the file format of RSM2 for those who are interested and want to play with them. I haven't seen many projects exploring the topic and I've finished digging through the file for GRF Editor. I shared some of the structure pubicly in BrowEdit's Discord almost a year ago, but the fields were still unknown at that point. Also before anyone asks, no I am not making a public converter for RSM2 > RSM1. That's not fully possible anyway. General The structure of a RSM file is quite simple. It's a list of mesh data with transformations applied to them. Each mesh has a transformation matrix, a position, a parent, etc. Then you have the transformation components on the mesh: Offset/Translation RotationAngle RotationAxis Scale And at last, you have the animation components on the mesh: RotationKeyFrame ScaleKeyFrame All the code presented below comes from GRF Editor. Also the structure varies quite a bit even among the 2.2 version and the 2.3 version. I was unable to find any model using versions 2.0 or 2.1. I'd guess they were only used internally...? Who knows. Animation duration changes In previous versions, below 2.2, the AnimationLength field and the frame animation field represented time in milliseconds. So a model such as ps_h_01.rsm has 48000 as a value for AnimationLength, which means the animation lasts for a whole 48 seconds before it resets. The key frames for the transformations work in the same manner. In version 2.2 and above, the AnimationLength field reprensents the total amount of frames in the model. So a model such as reserch_j_01.rsm2 has a value of 300. The keyframes would therefore range between 0 and 300. The duration is given by the new FramesPerSecond field, which is 30 for almost all 2.0 models currently existing. The delay between frames would then be 1000 / FramesPerSecond = 33.33 ms. The duration would be 1000 / FramesPerSecond * AnimationLength = 1000 / 30 * 300 = 10000 ms in our example. Shading Nothing new there, but I thought I'd go over the topic quickly. The ShadeType property is used to calculate the normals. There are three types that have been found in models to this day: 0: none; the normals are all set to (-1, -1, -1). 1: flat; normals are calculated per triangle, with a typical cross product of the 3 vertices. 2: smooth; each face of a mesh belongs to a smooth group, the normal is then calculated by adding the face normal of each connected vertices. In the real world, most models end up using the smooth shading type. The smooth group is a bit confusing at first if you've never heard of it, but some reading on the topic will help you. These are common techniques. Textures In previous versions, below 2.3, the textures were defined at the start of the file. Each mesh then defines a list of indices. So for example, a mesh could define these indices: "2, 5, 0" which means the mesh has 3 textures. Each face of the mesh then has a TextureId property from 0 to 2 in our example. If the face TextureId is 1, it would refer to the second indice previously defined, which is 5. This means that the texture used for this face would be the 5th texture defined at the start of the model. In version 2.3 and above, the textures are defined per mesh instead. There are no longer using texture indices. The TextureId defined for each face refers directly to the texture defined of that particular mesh. So say the TextureId for a face is 1, then the first texture defined on the mesh is the corresponding one. Transformation order In version 2.2 and above, the Scale/Offset/RotationAngle/RotationAxis properties were removed. Instead, it relies on animation frames or the TransformationMatrix. The order looks as such: /// <summary> /// Calculates the MeshMatrix and MeshMatrixSelf for the specified animation frame. /// </summary> /// <param name="animationFrame">The animation frame.</param> public void Calc(int animationFrame) { MeshMatrixSelf = Matrix4.Identity; MeshMatrix = Matrix4.Identity; // Calculate Matrix applied on the mesh itself if (ScaleKeyFrames.Count > 0) { MeshMatrix = Matrix4.Scale(MeshMatrix, GetScale(animationFrame)); } if (RotationKeyFrames.Count > 0) { MeshMatrix = Matrix4.Rotate(MeshMatrix, GetRotationQuaternion(animationFrame)); } else { MeshMatrix = Matrix4.Multiply2(MeshMatrix, new Matrix4(TransformationMatrix)); if (Parent != null) { MeshMatrix = Matrix4.Multiply2(MeshMatrix, new Matrix4(Parent.TransformationMatrix).Invert()); } } MeshMatrixSelf = new Matrix4(MeshMatrix); Vertex position; // Calculate the position of the mesh from its parent if (PosKeyFrames.Count > 0) { position = GetPosition(animationFrame); } else { if (Parent != null) { position = Position - Parent.Position; position = Matrix4.Multiply2(new Matrix4(Parent.TransformationMatrix).Invert(), position); } else { position = Position; } } MeshMatrixSelf.Offset = position; // Apply parent transformations Mesh mesh = this; while (mesh.Parent != null) { mesh = mesh.Parent; MeshMatrixSelf = Matrix4.Multiply2(MeshMatrixSelf, mesh.MeshMatrix); } // Set the final position relative to the parent's position if (Parent != null) { MeshMatrixSelf.Offset += Parent.MeshMatrixSelf.Offset; } // Calculate children foreach (var child in Children) { child.Calc(animationFrame); } } The original vertices are then multiplied by MeshMatrixSelf for their final positions. MeshMatrix is the resulting transformation matrix of a particular mesh only, without taking into account its parents matrixes or the mesh position. The MeshMatrixSelf is the final transformation matrix that will be applied to the vertices. Contrary to previous versions, the TransformationMatrix is applied all the way to the children. The matrix invert function may not be available in all common librairies, so here is the implementation used: public Matrix4 Invert() { if (this.IsDistinguishedIdentity) return this; if (this.IsAffine) return this.NormalizedAffineInvert(); float num1 = this[2] * this[7] - this[6] * this[3]; float num2 = this[2] * this[11] - this[10] * this[3]; float num3 = this[2] * this[15] - this[14] * this[3]; float num4 = this[6] * this[11] - this[10] * this[7]; float num5 = this[6] * this[15] - this[14] * this[7]; float num6 = this[10] * this[15] - this[14] * this[11]; float num7 = this[5] * num2 - this[9] * num1 - this[1] * num4; float num8 = this[1] * num5 - this[5] * num3 + this[13] * num1; float num9 = this[9] * num3 - this[13] * num2 - this[1] * num6; float num10 = this[5] * num6 - this[9] * num5 + this[13] * num4; float num11 = this[12] * num7 + this[8] * num8 + this[4] * num9 + this[0] * num10; if (IsZero(num11)) return false; float num12 = this[0] * num4 - this[4] * num2 + this[8] * num1; float num13 = this[4] * num3 - this[12] * num1 - this[0] * num5; float num14 = this[0] * num6 - this[8] * num3 + this[12] * num2; float num15 = this[8] * num5 - this[12] * num4 - this[4] * num6; float num16 = this[0] * this[5] - this[4] * this[1]; float num17 = this[0] * this[9] - this[8] * this[1]; float num18 = this[0] * this[13] - this[12] * this[1]; float num19 = this[4] * this[9] - this[8] * this[5]; float num20 = this[4] * this[13] - this[12] * this[5]; float num21 = this[8] * this[13] - this[12] * this[9]; float num22 = this[2] * num19 - this[6] * num17 + this[10] * num16; float num23 = this[6] * num18 - this[14] * num16 - this[2] * num20; float num24 = this[2] * num21 - this[10] * num18 + this[14] * num17; float num25 = this[10] * num20 - this[14] * num19 - this[6] * num21; float num26 = this[7] * num17 - this[11] * num16 - this[3] * num19; float num27 = this[3] * num20 - this[7] * num18 + this[15] * num16; float num28 = this[11] * num18 - this[15] * num17 - this[3] * num21; float num29 = this[7] * num21 - this[11] * num20 + this[15] * num19; float num30 = 1.0f / num11; this[0] = num10 * num30; this[1] = num9 * num30; this[2] = num8 * num30; this[3] = num7 * num30; this[4] = num15 * num30; this[5] = num14 * num30; this[6] = num13 * num30; this[7] = num12 * num30; this[8] = num29 * num30; this[9] = num28 * num30; this[10] = num27 * num30; this[11] = num26 * num30; this[12] = num25 * num30; this[13] = num24 * num30; this[14] = num23 * num30; this[15] = num22 * num30; return this; } New transformation animations TranslationKeyFrames In version 2.2 and above, PosKeyFrames are added. If you've seen the previous formats, you may be confused by this. I've seen PosKeyFrames in many implementations, but version 1.6 adds ScaleKeyFrames, not TranslationKeyFrames. The name is self-explanatory: it translates the mesh. TextureKeyFrames In version 2.3 and above, TextureKeyFrames are added. Similar to other transformations, they are defined as: struct TextureKeyFrame { public int Frame; public float Offset; } The TextureKeyFrames target a specific texture ID from the mesh and have different animation types. The Offset affects the UV offsets of the textures. The animation types are: 0: Texture translation on the X axis. The texture is tiled. 1: Texture translation on the Y axis. The texture is tiled. 2: Texture multiplication on the X axis. The texture is tiled. 3: Texture multiplication on the Y axis. The texture is tiled. 4: Texture rotation around (0, 0). The texture is not tiled. Main mesh In previous versions, below 2.2, there could only be one root mesh. This is no longer the case with newer versions. Code And those were all the changes! Here is a full description of the structure (which is again based on GRF Editor). # # RSM structure # private Rsm(IBinaryReader reader) { int count; // The magic of RMS files is always GRSM Magic = reader.StringANSI(4); MajorVersion = reader.Byte(); MinorVersion = reader.Byte(); // Simply converting the version to a more readable format Version = FormatConverters.DoubleConverter(MajorVersion + "." + MinorVersion); // See "Animation duration changes" above for more information. AnimationLength = reader.Int32(); ShadeType = reader.Int32(); Alpha = 0xFF; // Apparently this is the alpha value of the mesh... but it has no impact in-game, so... if (Version >= 1.4) { Alpha = reader.Byte(); } if (Version >= 2.3) { FrameRatePerSecond = reader.Float(); count = reader.Int32(); // In the new format, strings are now written with their length as an integer, then the string. In previous versions, strings used to be 40 in length with a null-terminator. // The syntax below may be a bit confusing at first. // reader.Int32() reads the length of the string. // reader.String(int) reads a string with the specific length. for (int i = 0; i < count; i++) { MainMeshNames.Add(reader.String(reader.Int32())); } count = reader.Int32(); } else if (Version >= 2.2) { FrameRatePerSecond = reader.Float(); int numberOfTextures = reader.Int32(); for (int i = 0; i < numberOfTextures; i++) { _textures.Add(reader.String(reader.Int32())); } count = reader.Int32(); for (int i = 0; i < count; i++) { MainMeshNames.Add(reader.String(reader.Int32())); } count = reader.Int32(); } else { // Still unknown, always appears to be 0 though. Reserved = reader.Bytes(16); count = reader.Int32(); for (int i = 0; i < count; i++) { _textures.Add(reader.String(40, '\0')); } MainMeshNames.Add(reader.String(40, '\0')); count = reader.Int32(); } // The Mesh structure is defined below for (int i = 0; i < count; i++) { _meshes.Add(new Mesh(reader, Version)); } // The rest of the structure is a bit sketchy. While this is apparently what it should be (some models do indeed have those), they have absolutely no impact in-game and can be safely ignored when rendering the model. if (Version < 1.6) { count = reader.Int32(); for (int i = 0; i < count; i++) { _scaleKeyFrames.Add(new ScaleKeyFrame { Frame = reader.Int32(), Sx = reader.Float(), Sy = reader.Float(), Sz = reader.Float(), Data = reader.Float() }); } } count = reader.Int32(); for (int i = 0; i < count; i++) { VolumeBoxes.Add(new VolumeBox() { Size = new Vertex(reader.Float(), reader.Float(), reader.Float()), Position = new Vertex(reader.Float(), reader.Float(), reader.Float()), Rotation = new Vertex(reader.Float(), reader.Float(), reader.Float()), Flag = version >= 1.3 ? reader.Int32() : 0, }); } } # # Mesh structure # public Mesh(IBinaryReader reader, double version) { int count; if (version >= 2.2) { Name = reader.String(reader.Int32()); ParentName = reader.String(reader.Int32()); } else { Name = reader.String(40, '\0'); ParentName = reader.String(40, '\0'); } if (version >= 2.3) { count = reader.Int32(); for (int i = 0; i < count; i++) { Textures.Add(reader.String(reader.Int32())); } // This is more so for backward compatibility than anything. The texture indices now refer to the texture list of the mesh directly. for (int i = 0; i < count; i++) { _textureIndexes.Add(i); } } else { count = reader.Int32(); for (int i = 0; i < count; i++) { _textureIndexes.Add(reader.Int32()); } } // The TransformationMatrix is 3x3 instead of 4x4 like everything else in the universe. TransformationMatrix = new Matrix3( reader.Float(), reader.Float(), reader.Float(), reader.Float(), reader.Float(), reader.Float(), reader.Float(), reader.Float(), reader.Float()); if (version >= 2.2) { // In 2.2, the transformations are already applied to the mesh, or calculated from the animation key frames. None of these properties are used anymore. Offset = new Vertex(0, 0, 0); Position = new Vertex(reader); RotationAngle = 0; RotationAxis = new Vertex(0, 0, 0); Scale = new Vertex(1, 1, 1); } else { // The Offset is the translation vector for the mesh. translated > scaled > rotated >TransformationMatrix. Offset = new Vertex(reader.Float(), reader.Float(), reader.Float()); // Position is the distance between the mesh and its parent. Position = new Vertex(reader.Float(), reader.Float(), reader.Float()); RotationAngle = reader.Float(); RotationAxis = new Vertex(reader.Float(), reader.Float(), reader.Float()); Scale = new Vertex(reader.Float(), reader.Float(), reader.Float()); } count = reader.Int32(); for (int i = 0; i < count; i++) { _vertices.Add(new Vertex(reader.Float(), reader.Float(), reader.Float())); } count = reader.Int32(); for (int i = 0; i < count; i++) { _tvertices.Add(new TextureVertex { Color = version >= 1.2 ? reader.UInt32() : 0xFFFFFFFF, U = reader.Float(), V = reader.Float() }); } count = reader.Int32(); // A face has changed a little in the new version. The SmoothGroup isn't only bound to the face itself, but can be bound to the vertex itself instead. for (int i = 0; i < count; i++) { Face face = new Face(); int len = -1; if (version >= 2.2) { len = reader.Int32(); } face.VertexIds = reader.ArrayUInt16(3); face.TextureVertexIds = reader.ArrayUInt16(3); face.TextureId = reader.UInt16(); face.Padding = reader.UInt16(); face.TwoSide = reader.Int32(); if (version >= 1.2) { face.SmoothGroup[0] = face.SmoothGroup[1] = face.SmoothGroup[2] = reader.Int32(); if (len > 24) { // It is unsure if this smooth group is applied to [2] or not if the length is 28. Hard to confirm. face.SmoothGroup[1] = reader.Int32(); } if (len > 28) { face.SmoothGroup[2] = reader.Int32(); } } _faces.Add(face); } // This was weirdly predicted to be in model version 1.6... which never existed? Either way, it is safe to set it as >= 1.6 if (version >= 1.6) { count = reader.Int32(); for (int i = 0; i < count; i++) { _scaleKeyFrames.Add(new ScaleKeyFrame { Frame = reader.Int32(), Sx = reader.Float(), Sy = reader.Float(), Sz = reader.Float(), Data = reader.Float() // Useless, has in impact in-game }); } } count = reader.Int32(); for (int i = 0; i < count; i++) { _rotFrames.Add(new RotKeyFrame { Frame = reader.Int32(), // Qx, Qy, Qz, Qw Quaternion = new TkQuaternion(reader.Float(), reader.Float(), reader.Float(), reader.Float()) }); } if (version >= 2.2) { count = reader.Int32(); for (int i = 0; i < count; i++) { _posKeyFrames.Add(new PosKeyFrame { Frame = reader.Int32(), X = reader.Float(), Y = reader.Float(), Z = reader.Float(), Data = reader.Int32() // Useless, has in impact in-game }); } } // Texture animations, look at "Textures" above for more information if (version >= 2.3) { count = reader.Int32(); for (int i = 0; i < count; i++) { int textureId = reader.Int32(); int amountTextureAnimations = reader.Int32(); for (int j = 0; j < amountTextureAnimations; j++) { int type = reader.Int32(); int amountFrames = reader.Int32(); for (int k = 0; k < amountFrames; k++) { _textureKeyFrameGroup.AddTextureKeyFrame(textureId, type, new TextureKeyFrame { Frame = reader.Int32(), Offset = reader.Float() }); } } } } } I'm also sharing the program I used to test the RSM2 files. It's a bit messy, but it does the job and might help someone. This testing program no longer has any purpose to me as it's been merged into GRF Editor already. https://github.com/Tokeiburu/RSM2/tree/master/Rsm2 The provided model is the following (it contains all the new features of RSM2): The chain on the right as well as the lights use these new texture animations. The red ball uses the translation key frames. This test project can read any RSM or RSM2 file as well as save them (you can edit RSM/RSM2 models via source). Changing the header version to change the output file will cause issues depending on which version you go from and to. With that said, have fun...! One day I'll make GRF Editor sources public again, one day.
 1 point
 -
Version 1.0.0
1276 downloads
STAFF SIGN CUSTOM HEADGEAR BUNDLE Greetings again, rAthena! I'm Haziel, you might know me from the work I've done for the past years, I'm now posting new releases every week. Staff Signs is a bundle of Custom Headgears, it has all necessary files to be appropriately implemented, such as Equip Sprites, Icon and Collection files! This package contains four different Headgears to represent each Staff position, such as Community Manager, Event Manager, Game Master and Administrator! Let me know in the comments below if I'm missing any other! I hope you enjoy the final product! If you're interested in my work, Contact me on hyering or through one of the channels below! By downloading this file, you agree to my Terms of Service: • YOU WILL NOT remove my signature from any of the included files. • YOU WILL NOT alter, edit, recolour any of my files unless for your personal use. • YOU WILL NOT repost, repass or mirror my work nor edited versions of it anywhere. • YOU WILL NOT sell, resell or in any manner, ask money or rewards using my work as an exchange. • YOU WILL NOT claim my work as yours.Free1 point -
Version 1.0
3248 downloads
This is the original version of Caspen Town that I created. The town comes complete with full exterior and interior maps. It also has 3 field maps & a 3 level dungeon (including a transition map). Warps are not included so its up to you to create warps for the interior maps and dungeon the way you want it.Free1 point