Leaderboard


Popular Content
Showing content with the highest reputation on 07/25/23 in all areas
-
RO DPS Meter Always thought the game needed some way to quantify combat efficiency, so I built a dps meter. (tested on the latest revision) Do you think this could be useful on the server you are currently playing? Give me your thoughts!!4 points
-
Hello rAthena Community I'm Earnestinence, and i'll be guiding you to setup rAthena and run Ragnarok Programs you need to install before we start Downloads: Github : https://desktop.github.com/ MySQL (When installing: make sure to check 'Use Legacy Authentication Method; Retain MySQL 5.x compatibility' ) : http://www.mysql.com/downloads/mysql/ MySQL Workbench : http://www.mysql.com/downloads/workbench/ Note: remember the username and password you set when installing ! Latest Clean kRO Full Client : by: @Akkarin Microsoft Visual Studio ( MVS ) : https://www.visualstudio.com/downloads/ Visual Studio is a code editor supporting and C andC++ compiler. more info Click here by @Aleos Notepad ++ : https://notepad-plus-plus.org/download/ Note: Notepad++ source code editor and Notepad replacement ( or just use notepad ) 2015-11-04a unpacked client: https://mega.nz/#!w84jRRjZ!iWjU1Qfsez_3nbTtqQuFWHsbda2IglPi7TBnzZWmJtI by: @Napster rAthena support all the clients listed in the packet files : read more Required Files: After you download and install GitHub download these files using GitHub File > Clone Repository rAthena ( server ) : https://github.com/rathena/rathena.git English Translated System & Data Folders RE/PRE: by @zackdreaver For Renewal: https://github.com/zackdreaver/ROenglishRE For Pre-Renewal : https://github.com/zackdreaver/ROenglishPRE NEMO Client Patcher : https://github.com/MStr3am/NEMO.git For more info see this topic by @NeoMind Client Setup : http://nn.ai4rei.net/dev/opensetup/ Client setup for Ragnarok Online by @Ai4rei ========================================== Setting up rAthena Server-Side: See video time-line: 00:02 Step 1: Download/Clone rAthena Source Open GitHub. Click Clone repository. Click URL tap. Copy and paste this URL: https://github.com/rathena/rathena.git Choose the downloading path. Click Clone and wait for it do finish downloading. Step 2: Configuring rAthena See video time-line: 00:35 open rathena/conf/import/char_conf.txt Add these lines : userid: username passwd: password login_ip: 127.0.0.1 char_ip: 127.0.0.1 [Optional] To change server name add this line : server_name: YourDesiredServerName Note: If you want to change anything in char_athena.conf, use the import-tmpl directory to avoid future issues when updating. ( just add the respective value you want ). rathena/conf/import/map_conf.txt Add these lines: userid: username passwd: password char_ip: 127.0.0.1 map_ip: 127.0.0.1 Note: If you want to change anything in map_athena.conf, use the import-tmpl directory to avoid future issues when updating. ( just add the respective value you want ). rathena/conf/import/inter_conf.txt Add these lines login_server_db: rathena ipban_db_db: rathena char_server_db: rathena map_server_db: rathena log_db_db: rathena_logs Note: If you want to change anything in map_athena.conf, use the import-tmpl directory to avoid future issues when updating. ( just add the respective value you want ). Note: I use rathena as my main database which contain all main tables (like: chars, login, guilds, etc... ). However, I like to separate my logs to rAthena_logs . Step 3: Compiling rAthena See video time-line: 02:16 Locate rathena/rAthena.sln Locate and right click rAthena.sln open with > Microsoft Visual Studio 2017 ( or 2013 / 2015 ) Wait for the MVS to load the project, when it's ready select Solution 'rAthena' (8 projects) and then right click and Click 'Clean Solution' First when clean finish successfully click on 'build Solution' Wait for it to finish, make sure the log below finish successfully Step 4: Setting SQL Database ( make sure MySQL installed and running ) See video time-line: 03:13 open MySQL Workbench log in : Using the username 'root 'and the password you set when you first install MySQL ( If you don't remember the password, you can reconfigure MySQL using MySQL installer ) once you logged in create new user account and grant Administrator Privileges: - See video time-line: 04:17 In The Left Side click on Users and Privileges At The Bottom click on Add account Set Login Name : ragnarok Set Password : ragnarok Set Confirm Password : ragnarok At The Top Menu Click Administrative Roles: and then check DBA Click Apply logout by clicking on X at the top of the current tap and then login using the new user account ragnarok with password ragnarok See video time-line: 05:00 Creating databases/schema : See video time-line: 05:26 Click on create new database/schema Set the Name: rathena ( this will be our main database/schema ) Set Charset: utf8 ( Now this's is important you need to check this ) Click apply, apply and then finish Now Click on create new database/schema Set the Name: rathena_logs ( this will be our logs database/schema ) Set Charset: utf8 ( Now this's is important you need to check this ) Click apply, apply and then finish import rathena SQL files to rathena & rathena_logs databases: See video time-line: 06:16 Double click on rathena database/schema we've just created Click on locate rathena folder and go to rathena/sql-files and click on main.sql Click on the light icon * wait for the tablet to be executed * Double click on rathena_logs database/schema we've just created Click on locate rathena folder and go to rathena/sql-files and click on logs.sql Click on the light icon * wait for the tablet to be executed * change the username and password of the server: See video time-line: 07:03 Now next/around rathena database right click on a blank area and click refresh all ( in order to view the tables we've just created or just relog ) Click on rathena database/schema > tables > locate login table.. now click on tables and locate login table then right click and click on select Rows - Limit 1000 Double click on s1 and change it to username then hit enter ( we put the userid: username in rathena/conf/import-tmpl/char_conf.txt and map_conf.txt make sure you use the same one you put in these files ) Double click on p1 and change it to password then hit enter ( we put the passwd: password in rathena/conf/import-tmpl/char_conf.txt and map_conf.txt make sure you use the same one you put in these files ) Click apply, apply and then finish Step 5 ( running the server ) Running rAthena server See video time-line: 07:35 locate rathena folder rathena/ click on runserver ( less than 8 mins without any errors ) ================================================== Client Side Running & patch ragnarok online client open Official kRO Client/ Updating kRO Files: Locate and run rsu-kro-rag-lite.exe and wait for it to finish and then rsu-kro-renewal-lite.exe and wait for it to finish updating .. Adding translated system/data files Locate ROenglishRE or ROenglishPRE and copy Data & System folders , GuildTip & Tipoftheday and paste these files into the official kro client folder ( Replace the files when asked ) Setting up clientinfo.xml : locate official kRO client folder open folder data/ and edit file clientinfo.xml change the version to 55 <version>55</version> (This might not be needed anymore.) set the langtype to 1 < To be able to write in English. ( refer to this page to find your preferred language beside English: https://github.com/rathena/rathena/wiki/Clientinfo.xml ). set admin sprite for any account you want, just put the account id <aid> <admin>2000000</admin> </aid> Copy and paste the setup file into the the official kRO client folder Patching the Client 2015-11-04 load the client and select recommended and click enter for data.ini and then CHANGE/EDIT system/iteminfo.lub to system/iteminfo.lua and check read data folder first, ignore missing palettes, ignore resource errors and then customize the client as you want Here's my additional patches: >>> Custom Window Title ( name you server ) Disable Swear Filter Disconnect to Login Window Enable Title Bar Menu Read Data Folder First Show Cancel To Service Select Ignore Missing Palette Error Ignore Resource Errors Use Ragnarok Icon ( ragnarok icon for the client ) <<< copy the new 2015-11-04aRagexe_patched and paste it your official kRO client folder now the client is ready, just run the game using 2015-11-04aRagexe_patched and Enjoy to create a male account just type ex: admin_f for female - admin_m for male and don't forget to set the account group id 99 to get full GM permissions Issue #1: Closed connection from '127.0.0.1'. Solve: go to your rathena/src/custom/defines_pre.hpp and open it with notepad++ ( or any notepad ) add this line #define PACKETVER 20151104 ======================================================== As of 28-7-2018: the topic is fully updated and support MySQL 8.x ======================================================== For further questions or concerns regarding the tutorial, Do NOT hesitate to contact me in this topic. - Earnestinence1 point
-
Download Samples, click rAthena Logos, Icons, Banners collection The vector file (CorelDraw X5 file) can be found in vector folder, link above. Info This is NOT official release for rAthena, only owner/admin that own it. This is "cover" rAthena logo created by me -cydh- originally, item placements and colors maybe are NOT same like original ones. Feel free to download, edit, or redistribute this creation, but PLEASE don't forget my name -cydh- at least in your memories. And I hope, for you guys that using rAthena emulator, why don't put "rAthena" on your loading screen, "supported by" sign, it's just a simple way of tons ways to support rAthena. Not for money! Enjoy!
 1 point
 -
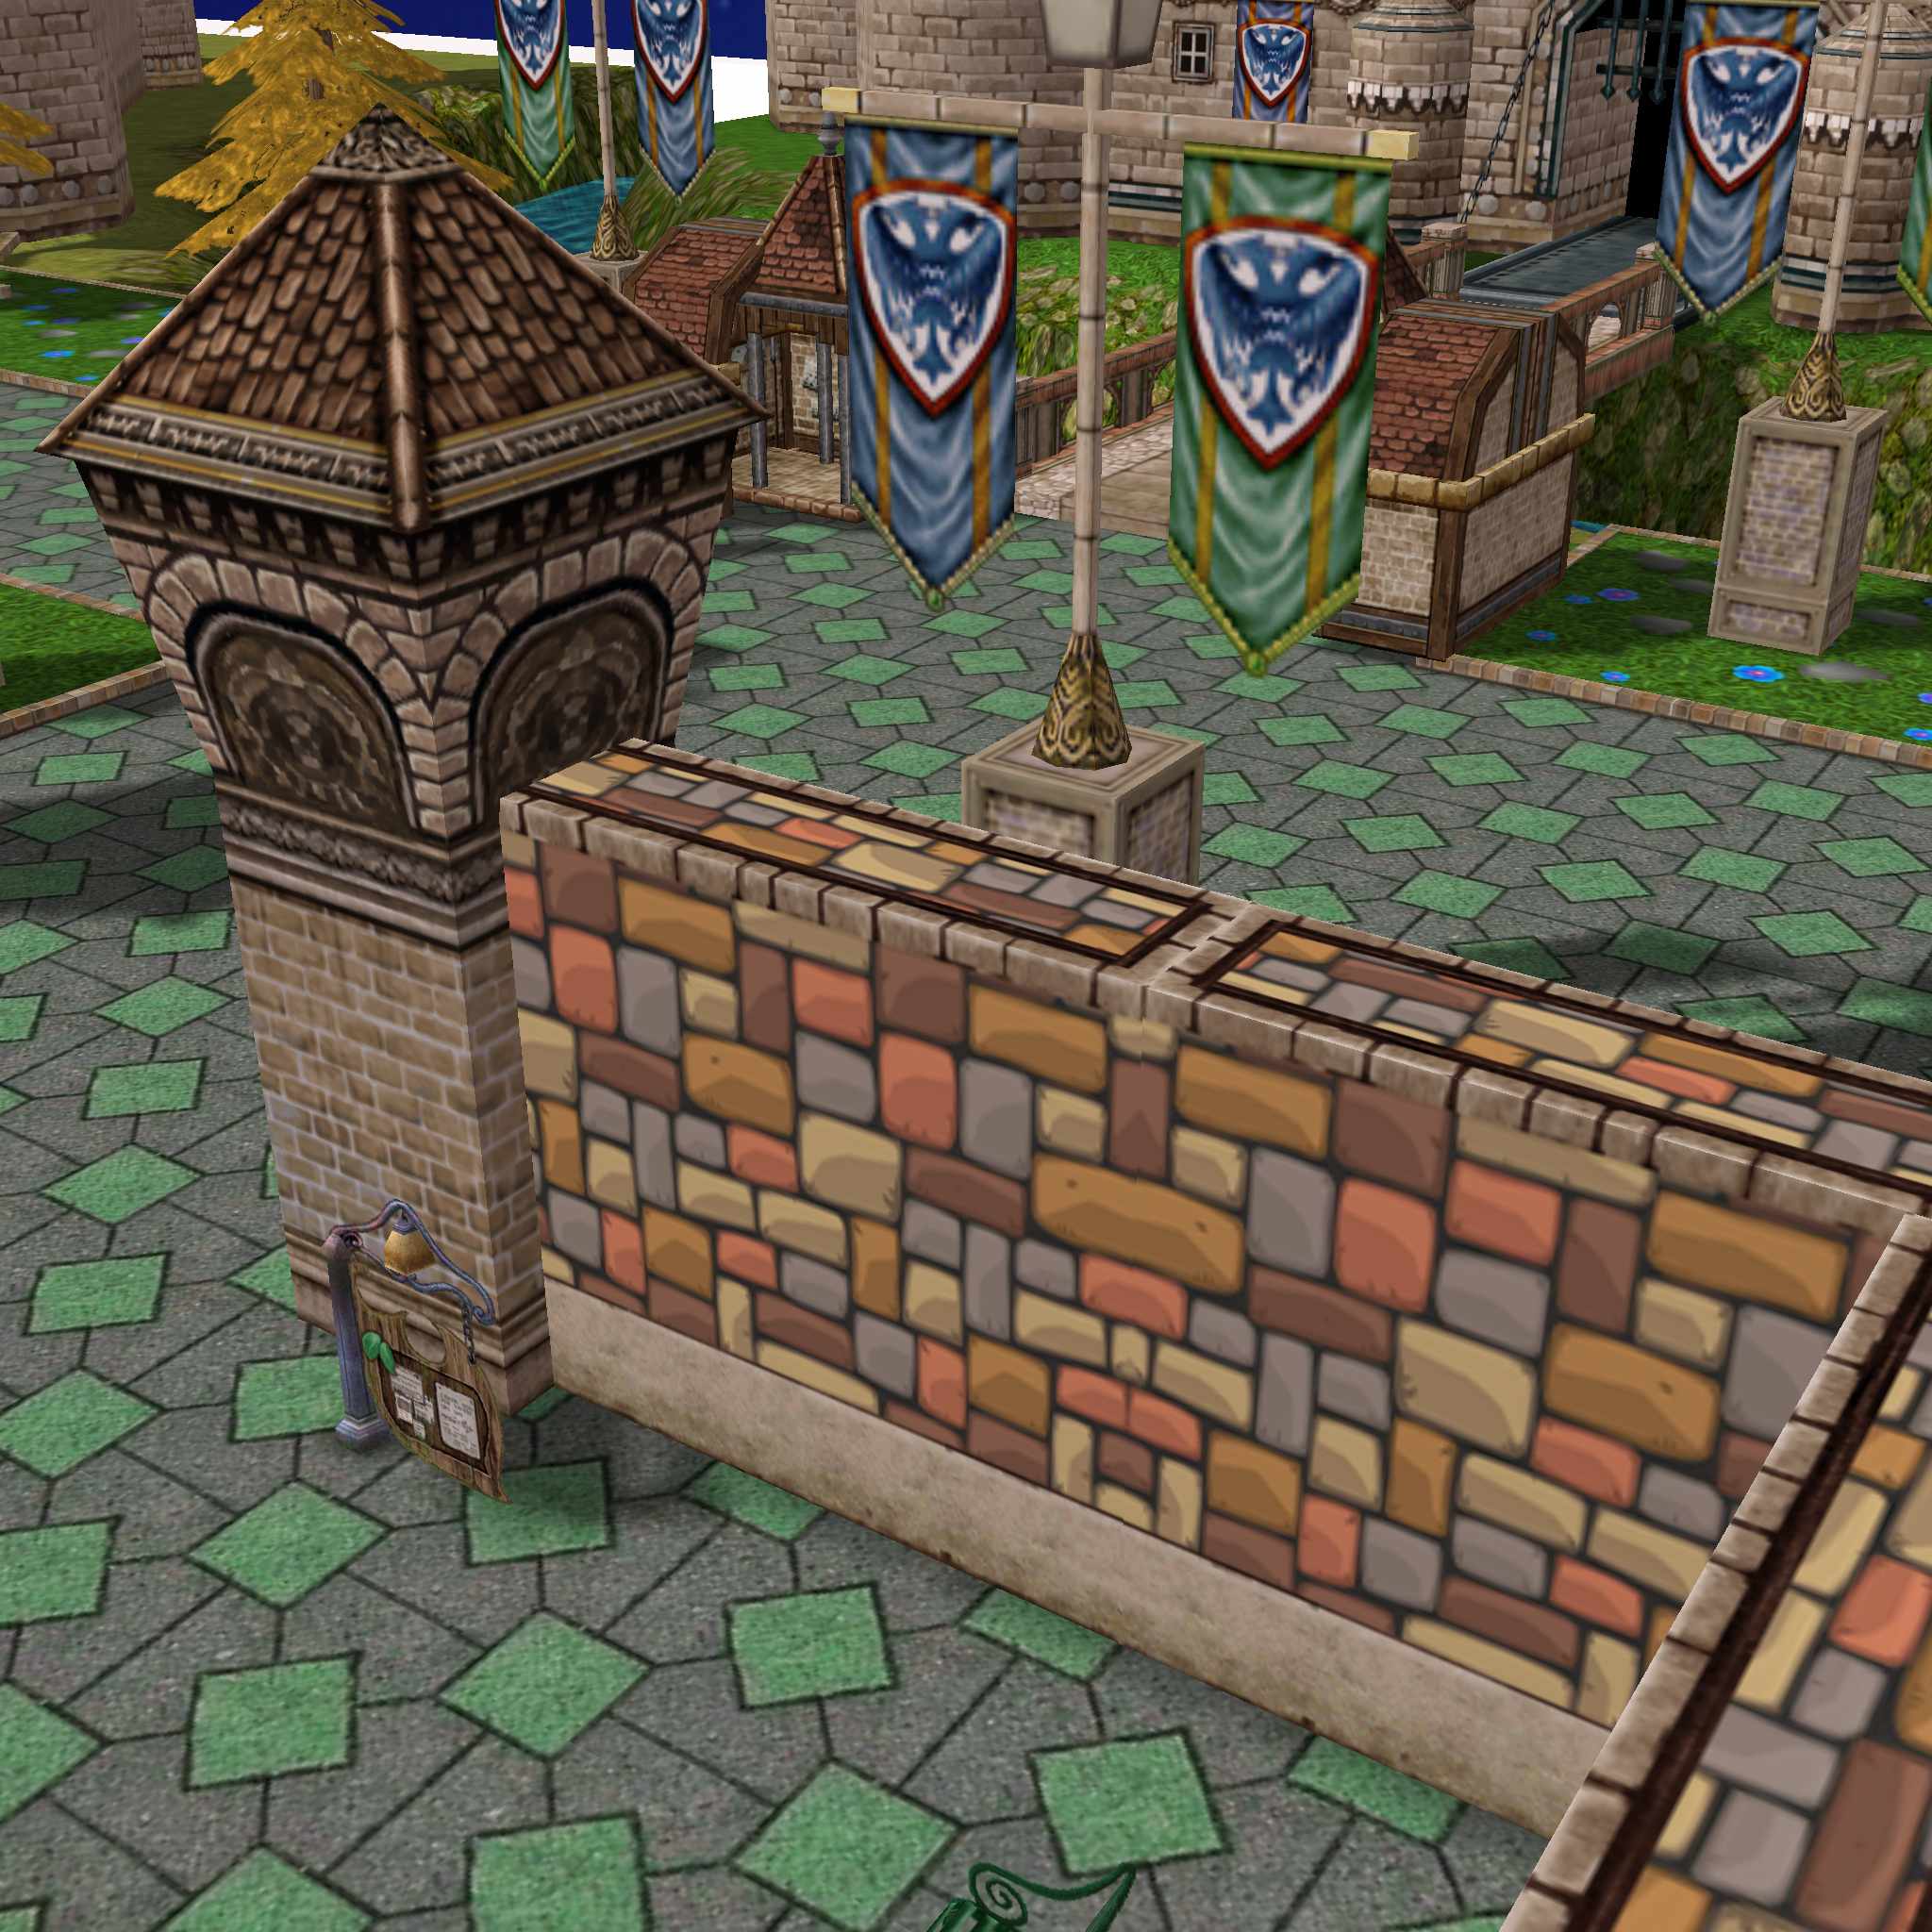
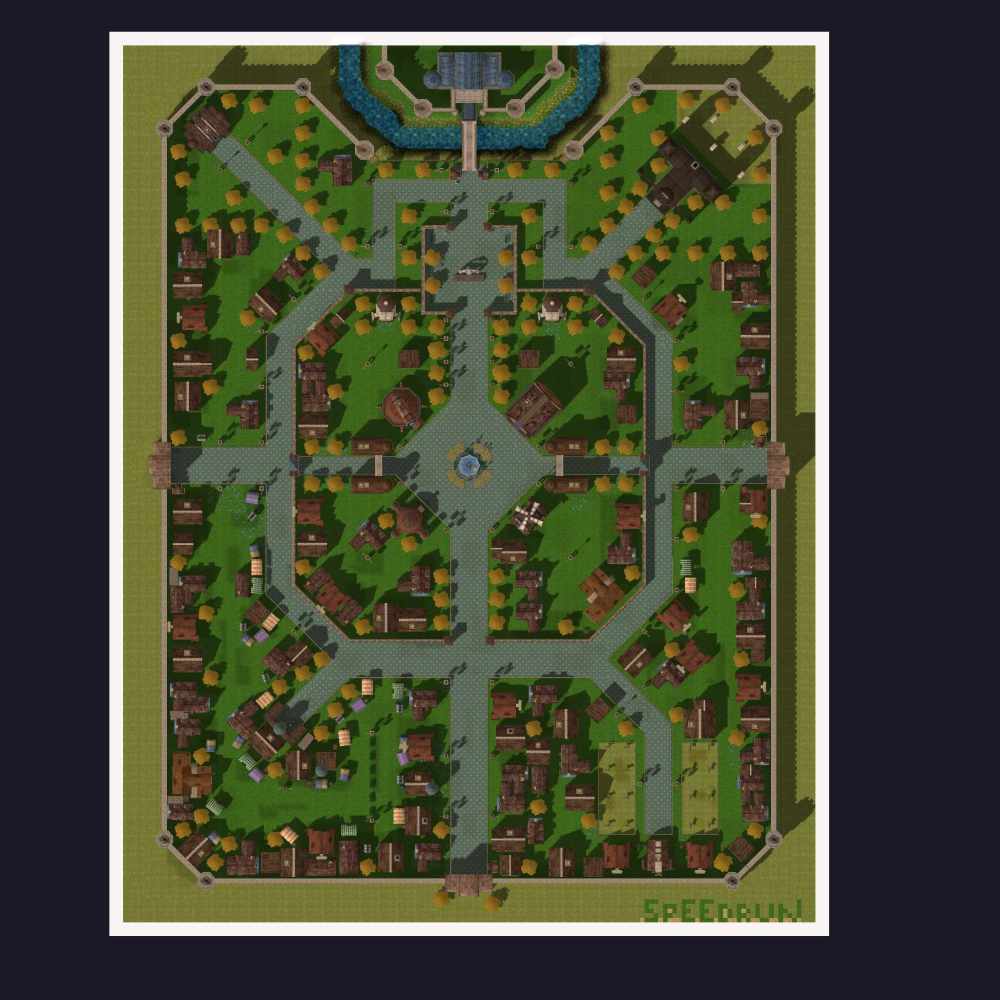
Note: This map was made during my Browedit tutorial. * If you are interested to learn how to develop your own custom RO Map, please check the link below. prontera v0.1 Very simple prontera map with custom texture. Image 1 Image 2 Image 3 Thanks for Downloading. speedrun_prt.grf


 1 point
 -
looking for free 2023 Latest RO offline full download I'm have no knowledge in coding nor programing hoping someone could upload and share a link -I just wanna play1 point
-
You could adjust it on your NEMO or WARP Client when you patcht your client look for ChangeNewCharNameHeight and adjust it from 0 to 10 or 15 (preference)1 point
-
Patch on nemo/warp Change new char name field height ChangeNewCharNameHeight Allow change height in input field in new char creation dialog Set value to 201 point
-
There is a sample in the docs under doc/samples/instancing.txt. Please note the comment that says you need to add the instance to the database, for the script to work. It is in the old format, but you shouldn't have issues to convert it to the yaml version. //===== rAthena Script ======================================= //= Sample: Instancing //===== By: ================================================== //= Euphy //===== Last Updated: ======================================== //= 20140129 //===== Description: ========================================= //= Contains elements of a basic instance script. //============================================================ // Before running this script, add the entry below to // 'db/(pre-)re/instance_db.txt': // 100,Abyss Lake Instance,3600,300,abyss_03,160,155 // Instance Creation //============================================================ prontera,151,190,6 script Sample Instance 101,{ .@instance$ = "Abyss Lake Instance"; if (instance_live_info(ILI_NAME, instance_id(IM_PARTY)) == .@instance$) { // the instance "Abyss Lake Instance" is running mes "[Sample Instance]"; mes "You are already part of an instance."; next; switch(select("Enter Instance.:Cancel.")) { case 1: break; case 2: mes "[Sample Instance]"; mes "You don't want to try again?"; emotion ET_CRY; close; } } else if (instance_id(IM_PARTY)) { // another instance is running mes "[Sample Instance]"; mes "You are part of the instance " + instance_live_info(ILI_NAME, instance_id(IM_PARTY)) + "."; close; } else { mes "[Sample Instance]"; mes "Would you like to try the sample instance in Abyss Lake 3?"; next; switch(select("Create Instance.:Cancel.")) { case 1: .@create = instance_create(.@instance$); if (.@create < 0) { mes "[Sample Instance]"; switch (.@create) { case -1: mes "ERROR: Invalid type."; break; case -2: mes "ERROR: Party not found."; break; case -3: mes "ERROR: Instance already exists."; break; case -4: mes "ERROR: No free instances."; break; } mes " "; mes "Instance creation ^FF0000failed^000000."; emotion ET_HUK; close; } mes "[Sample Instance]"; mes "Instance created."; mes " "; mes "Now entering the instance..."; next; break; case 2: mes "[Sample Instance]"; mes "Okay. Maybe next time!"; close; } } .@enter = instance_enter(.@instance$); if (.@enter != 0) { mes "[Sample Instance]"; switch (.@enter) { case 1: mes "ERROR: Party not found."; break; case 2: mes "ERROR: Party does not have an instance."; break; case 3: mes "ERROR: Unknown error."; break; } mes " "; mes "Instance entry ^FF0000failed^000000."; emotion ET_HUK; close; } close; } // Instance Scripts //============================================================ abyss_03,154,159,6 script Instance NPC#start 101,{ mes "[Instance NPC]"; mes "Are you ready to begin?"; next; switch(select("Yes.:No.")) { case 1: mes "[Instance NPC]"; mes "Good luck."; close2; donpcevent instance_npcname("#ins_abyss03_mobs")+"::OnEnable"; delwaitingroom; disablenpc instance_npcname(strnpcinfo(0)); end; case 2: mes "[Instance NPC]"; mes "Take your time."; close; } end; OnInit: // hide the NPC on the normal map disablenpc strnpcinfo(0); end; OnInstanceInit: // initialize the NPC when the instance is created disablenpc instance_npcname("abysslakedunwarp004"); // disable original warp portal (currently buggy) waitingroom "Click here to start!",0; end; } abyss_03,0,0,0 script #ins_abyss03_mobs -1,{ end; OnEnable: initnpctimer; end; OnTimer1000: //strnpcinfo(4) will retrieve the instanced map name mapannounce strnpcinfo(4),"Instance NPC: The Abyss Lake instance has begun.",bc_all; end; OnTimer4000: mapannounce strnpcinfo(4),"Instance NPC: Smash the Treasure Chest in the center of the map for a prize.",bc_all; end; OnTimer5000: stopnpctimer; // spawn mobs .@map$ = instance_mapname("abyss_03"); .@label$ = instance_npcname(strnpcinfo(0))+"::OnMyMobDead"; .@label_boss$ = instance_npcname(strnpcinfo(0))+"::OnMyBossDead"; monster .@map$,0,0,"Huge Poring",1002,20,.@label$,2; monster .@map$,0,0,"Huge Drops",1113,15,.@label$,2; monster .@map$,0,0,"Huge Poporing",1031,10,.@label$,2; monster .@map$,0,0,"Huge Marin",1242,10,.@label$,2; monster .@map$,0,0,"Tiny Zombie",1015,30,.@label$,1; monster .@map$,0,0,"Huge Mime Monkey",1585,2,.@label$,2; monster .@map$,97,102,"Treasure Chest",1732,1,.@label_boss$,2; end; OnMyMobDead: // normal mobs dispbottom "What am I doing? I should be attacking the Treasure Chest!"; viewpoint 0,97,102,0,0xFF0000; switch (rand(6)) { // for fun (: case 0: sc_start SC_STONE,5000,0; break; case 1: sc_start SC_FREEZE,5000,0; break; case 2: sc_start SC_STUN,5000,0; break; case 3: sc_start SC_SLEEP,5000,0; break; case 4: sc_start SC_CONFUSION,5000,0; break; case 5: sc_start SC_BLIND,5000,0; break; } end; OnMyBossDead: // treasure chest specialeffect2 EF_MVP; getitem 512,1; //Apple // trigger other events .@map$ = instance_mapname("abyss_03"); .@label$ = instance_npcname(strnpcinfo(0))+"::OnMyMobDead"; killmonster .@map$,.@label$; mapannounce .@map$,"Instance NPC: Good work! Please speak to me as soon as possible.",bc_all; donpcevent instance_npcname("Instance NPC#finish")+"::OnEnable"; end; } abyss_03,97,102,4 script Instance NPC#finish 101,{ mes "[Instance NPC]"; mes "Congratulations! You've finished the instance."; mes "I'll send you back to town now."; emotion ET_BEST; close2; warp "prontera",156,191; instance_destroy(); end; OnInit: disablenpc strnpcinfo(0); end; OnInstanceInit: disablenpc instance_npcname(strnpcinfo(0)); end; OnEnable: enablenpc instance_npcname(strnpcinfo(0)); specialeffect EF_HIDING; end; } abyss_03,115,26,0 script #ins_abyss03_warp 45,5,5,{ end; OnTouch: mes "Are you sure you want to leave?"; next; switch(select("Leave.:Stay.")) { case 1: warp "prontera",156,191; break; case 2: warp strnpcinfo(4),160,155; break; } close; OnInit: disablenpc strnpcinfo(0); end; }1 point
-
if reach 50 hearts make for version 2 with MVP and PVP Statues too hehe1 point
-
try import file at your flux folder\data\schemas\charmapdb\cp_commands.20160608065501.sql if you don't have it you can trry download from this link https://github.com/rathena/FluxCP1 point
-
I saw a lot of posts about this over the years, but none seemed updated for the most recent version. I recently spent a lot of time on pets, so here's a quick guide. I did everything for pre-renewal, but I would imagine most of this would work for renewal too, you might just need to add some stuff about evolution. What you'll need: GRF Editor SDE (Server Database Editor) Both of these can be found elsewhere on this forum and are used for most things involving editing your server. Understanding GRF files: When the client needs a file, it searches through the GRF files in a certain order to find it. The order it uses is specified in data.ini in the client's root folder. Mine looks like this. [Data] 0=rathena_resources.grf 1=pre20190427.grf 2=renewal20190427.grf 3=palettes.grf 4=data.grf 5=rdata.grf It looks in files that are higher in the list first. This means rathena_resources.grf is checked first, and rdata.grf is checked last. This means that if I need to override a file which is normally in data,grf, I can simply add it to any grf file that is higher in the list, and it will be used instead of the one in data.grf, without having to modify that file. Since rathena_resources.grf is first in the list, it's easiest to add your files to that. Getting started with your custom pet: The first two things your pet needs are an egg and a taming item. For eggs, I simply chose to replace an existing pet egg that was unused. In Pre-Re, there aren't any unused eggs, but we can fix that. In a text editor, open up the item_db.txt file for renewal, which is under your db/re folder. Search for 9001, which will get you to the beginning of the pet eggs. Renewal has tons of them! Copy and paste all the eggs that renewal's item_db has into pre-re's item db, and now they'll be available for pre-re to use. Now open up SDE. To add an egg for your new pet, all we have to do is rename it. Use the item search and find an egg you don't care about. Change its Aegis Name and Name to be the one of the pet you want. For example, I made Garm Baby, so the Aegis name is Garm_Baby_Egg and the Name is Garm Baby Egg. This part is done. Now we need a taming item. It's easiest to make a taming item by using a miscellaneous item. For Garm Baby, I used Nursing Bottle. To turn this item into a taming item, first we have to change it from a Misc Item to a Usable item, which is done using the dropdown in the upper right. We then need to set the Applicable Job to FFFFFFFF, upper to 7, and Gender to Both. Now we need to set the script. The script must look like this: pet 1515; Except that the number must match the id number of the enemy you want to be able to capture. Look this up in the mob database. You might want to modify the drop rates on your item through the mob database too, particularly if it's an item that no one in the game drops. Most pet items also have a sell price of 2500 and a weight of 50, if you want to be consistent. Use "save database (quick)" to save your changes. We're done with SDE for now. Adding your pet to the game: The next thing to do is to add your pet to pet_db.yml so it can spawn into the game. The installation I have actually breaks pet_db.yml into two parts. There's one file inside pre-re that contains the pet's basic information, and one inside import that contains its skill information. You could merge these files if you wanted, but if not you'll need to update both. There are already a bunch of entries in this file, so you can probably just copy one. Note that when it comes to yaml files, the spacing of the file is important, so make sure you copy it exactly including the spacing. Here's the one I used for Garm Baby. - Mob: GARM_BABY TameItem: Milk_Bottle EggItem: Garm_Baby_Egg FoodItem: Ice_Piece Fullness: 4 IntimacyFed: 10 CaptureRate: 500 Script: > .@i = getpetinfo(PETINFO_INTIMATE); if( .@i >= PET_INTIMATE_LOYAL ){ bonus2 bResEff,Eff_Freeze,5000; } The entries for MOB, TameItem, EggItem, and FoodItem are all Aegis_Names, you can look these up through SDE. For example, the Nursing Bottle's Aegis Name is actually Milk_Bottle. The script is something you'll have to come up with on your own. There's a bunch of examples in the file already you can draw on. My script makes the pet give you 50% resistance to the freeze status. If you want the pet to use skills, you'll need to update the other yml file inside import. Garm Baby has this inside that file: - Mob: GARM_BABY AttackRate: 8000 RetaliateRate: 8000 ChangeTargetRate: 800 SupportScript: > petskillattack "MG_FROSTDIVER",5,10,30; The main thing we care about is the SupportScript. This is what attack your pet will use. Here, this pet uses Frost Driver level 5, between 10-30% of the time depending on how happy it is. For a support skill, you use petskillsupport instead, with values like this one: petskillsupport "HP_ASSUMPTIO",1,80,100,100; This pet would cast Assumptio level 1 with an 80 second delay, when your hp and sp are 100% or less. There's also stat bonuses available: petskillbonus bLuk,5,20,40; This pet gives a bonus of 5 luck for 20 seconds, with a 40 second delay between uses. For more detail, look in script_commands.txt within Rathena's doc folder. With this, you can now restart your server and your pet will exist in the game! There will still be a bit of jank, for example its egg won't show the right name on the client, it won't have a picture, and it won't talk, we'll discuss how to fix that next. Fixing your pet's egg entry: This one is fairly easy. Navigate to your client folder and open up System/iteminfo.lua This is where the game stores all the item translations. Find the egg that you used by searching for its item id inside square brackets, like this [9001]. The description will be listed here. If you added a completely new egg, it won't be in this file and you'll need to add an entry for it. Update the name so it shows the right name. You can also add a description if you want. Mine looks like this, but it doesn't need to be this fancy. [9108] = { unidentifiedDisplayName = "Garm Baby Egg", unidentifiedResourceName = "¾ðµ¥µå¾Ë", unidentifiedDescriptionName = { "..." }, identifiedDisplayName = "Garm Baby Egg", identifiedResourceName = "¾ðµ¥µå¾Ë", identifiedDescriptionName = { "An egg in which a Garm Baby Cute Pet rests.", "Can be hatched by using a ^33CC33Pet Incubator^000000.", "^33CC33Special Power ^000000:", "Casts level 5 Frost Driver against the enemy", "^33CC33Loyal Bonus^000000", "Increases resistance to the Freeze status by 50%", "Class:^6666CC Monster Egg^000000" }, slotCount = 0, ClassNum = 0 }, Adding a picture for your pet: Every pet has a little picture that is displayed in their pet window. If you don't do this step, it'll just display NO IMAGE. This is not cool, so let's add an image. This requires GRF editor. To start with, you should probably open up data.grf, just to know how it's structured. Images for pets are stored in data/texture/userinterface/illust . If you search this folder for "pet", you'll see the existing images. They are all 90x134 pixels, your image will need to be this size too. Name it something like pet_garm_baby.bmp. You could just upload your file into data.grf, but data.grf is huge and thus it's slow to send update to this file to your players. Instead, it's easier to put it into rathena_resources.grf. It does not have this folder, but you can create it using GRF editor. Remember, any files you put inside something higher in the list of GRF files will override the earlier files. After adding your file, you'll notice that it won't actually display in game. This is because there is also a table of pets in the application that maintains the paths to the images that you need to update. This file is called petinfo.lub, and it is stored inside data.grf in the folder data/luafiles514/lua files/datainfo. We'll need to make a copy of this file, so extract it using right click extract with GRF editor. This file needs specific encoding to read the Korean characters, so make sure to save the file with ANSI encoding when you're done. There are many tables in this file that you'll need to add your pet to. Generally, you can follow the format they use. You'll notice that most of the entries use an identifier that looks like this: [jobtbl.JT_GARM_BABY] = "GARM_BABY", This is an entry into the file jobidentity.lub, which is in the same folder. You should not need to modify that file, pretty much every enemy in the game is already in there, just enter your pet's Aegis name here, in all caps. When you come to this table: PetEggItemID_PetJobID You'll need to give your pet a new JobID, you can just assign a new one at the end. When you're finished updating this file, add it into your rathena_resources.grf, making the same folder path for it as above, so it will overwrite the one in the base game. Make sure to save your GRF afterwards. If you find that the pet accessories on your server no longer work after doing this, you saved the file with the wrong encoding. I fixed this by switching all the pet accessory files to the english names and adding them all to my GRF files, but the smart way is probably just to use a text editor that handles encoding properly, like notepad++. Making your pet talk: To make your pet talk, it needs entries in pettalktable.xml. For me, this file was in my renewal.grf file, in the data folder. This is fairly straightforward, you can just copy and then modify Poring's entry. You just need to know what to put for the enclosing tags. The name must match the entry you made in the PetNameTable inside petinfo.lub. I put the name "GARM_BABY" for my pet, so the tag must say <GARM_BABY>. For some reason, my pets only talked when I put their entries near the beginning of the file. I suspect one of the entries inside the default file has an error in it, but I haven't found it. Either way, adding them to the top of the file is safe. With all of this stuff done, just save your GRF edits and restart the game (it's not necessary to restart the server for GRF changes) and hopefully your pet should talk and have a picture! Once you confirm everything works, you'll need to distribute the changed grf files and iteminfo.lua to your players. It's probably worth adding all your custom pets to the server first before you open in to the public! I'm sorry that this was long, no one said custom pets were going to be easy. Hopefully it all works for you.1 point
-
problem solve thanks to @Royr just need to add this commands to ssh via root, chmod -R 777 /var/www/html/cp/data/logs chown -R apache:apache /var/www/html/cp/data/logs and change the end of each commands to itemshop and tmp1 point
-
Just purchase a VPS / Server Host on DigitalOcean, Vultr, OVH which cost around 10$ - 20$ to put your server online. Ideal Server Specification is located on our Github rA to Test the waters if you'll have a lots of player then purchase a Dedicated Server. Domain is 15$ - 20$ per year. Web Host is 10$ Monthly for a Server Developer there is a Third Party Services here on our Forum which you could contact and transact with them with ease because they're certified for Game Guard which is Gepard Shield you can contact @Functor for information regarding his prices. As for Advertisement. Facebook is one the most useful for advertising a server which you can do it on your own or you could hire some here on Server Jobs Available also.1 point
-
Version 1.0
3322 downloads
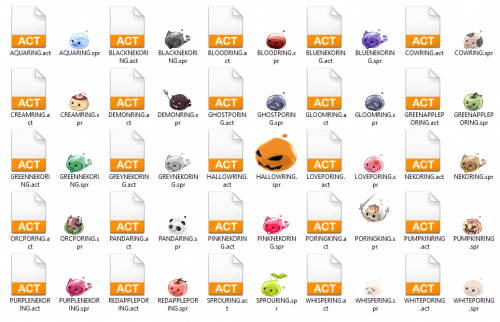
this is the poring collection that i previously grabbed from The Sprite Repository. inside got about 25 custom poring sprites ... previously i have edited the name of each sprites which allow me to install all the mob sprite into the test server of mine easily. I dont own any of these sprite .. and I dont know who are the original users who start to distribute it since the source no longer available. Do remain any credits of respective author if you know.Free1 point -

Version 1.2.5
13639 downloads
Heya, This tool is an action file editor, it edits Act and Spr files. You will find similarities with ActOR in its design, but it should be much more enjoyable to edit animations ;]. Special thanks to Nebraskka for testing this software in its early days. All the suggestions and feedbacks made this software much better. How to install Download the zip archive provided from the download link at the bottom of this description or directly from there : http://www.mediafire.com/file/uoymx2vni249mlu Install the application with Act Editor Installer.exe; if you are missing a .NET Framework you will be prompted to download it. Once you are done, you can start the program from the link on your desktop. Key features The software has many, many features available. It would take too long to describe each one of them, so I've only focussed on the more impotant ones. You can undo and redo everything, scripts included. You can edit and add sounds easily. Powerful and easy to use palette editor. Sprite types have been abstracted - you don't have to worry or care about that. Animation speed can be changed easily. Most components have a drag and drop feature. Advanced scripting engine (C# language). The scripts can also be used to customize the software menus. Error checking when saving the act/spr to avoid invalid files. The sprite version will be automatically downgraded if RLE compression is not available. Frame interpolation (inbetweening/tweening) is possible via the Animation menu. Prompts you with an image converter dialog if the added image is invalid. Allows advanced edition for actions and frames via their respective menus. You can load files from GRFs directly (and save in the GRFs directly as well). Technical stuff Requires .Net Framework 3.5 (SP1) Client Profile to run (3.5 or more will work as well). When prompted with an error, use the "Copy exception" button to copy the debugging info. I will need this to fix the issue you're encountering. The editor's primary window The interface is really straightforward and similar to ActOR. I'll only focus on new elements! Rendering mode : This option changes the behavior of how layers are rendered. If you use 'Editor', you'll clearly see all the pixels when zooming in. If you use 'Ingame', it will use a linear scaling instead, which is closer to what the client does. References : These allow you to know where your item will be positionned (the yellow marker is the anchor, see below). Color mask : To edit the color of a layer, simply click on the color rectangle. You can also drag and drop the colors between different layers to quickly modify many of them. Common shortcuts : You can manipulate layers by using common shortcuts. More can be found from the Edit menu. These below are only the primary ones. Ctrl-A : Select all layers. Ctrl-C : Copy the selected layers. Ctrl-V : Paste the copied layers. Ctrl-X : Cut the selected layers. Alt-C : Copy current action. Alt-V : Paste current action. Advanced action and frame editions These expose all the available methods of the editor. You can remove a range of frames or copy a frame 10 times very quickly and easily. This dialog is found in Action/Frame > Advanced edit... Anchors You can edit anchors from the editor directly. Anchors are points that connect frames together, from different act files. Here's an example without and with anchors : This is mostly useful when you're using reference sprites (on the right panel). Clicking on the anchor button will let you choose where to attach the sprite (this is set semi-automatically for you though). You can edit those from the Anchors menu, but it is recommended to start from a pre-existing act to avoid doing this tedious process. Palette editor The palette editor allows you to quickly recolor sprites with an intuitive interface. Only indexed images can be edited (it's a palette editor after all) and three modes are available. The gradient mode changes an existing gradient to another color while keeping the original saturation and brightness of the colors - this makes the gradients blend in better. If there are no gradient (usually because it's a custom sprite), there's always the Adjust color mode. This one changes all color from a specified range to another one (Photoshop has a similar feature, which does work better). You can click on the image (on the left) to automatically select the palette indexes. These will be highlighted for a few seconds to show you what you're about to edit. Interpolation (tweening) This script can be accessed via Animation > Interpolate frames. This process fills the images between two frames by detecting the changes applied to the layers. Here's a simple example of how it can be used : Script engine The script engine can be accessed via Scripts > Script Runner. This is a big feature of Act Editor, it allows you to automate all your work with the act and much more. Click on the Help button for guides and available methods (don't hesitate to try out a script; if an error occurs the act will be reversed to its previous state). The documentation doesn't cover all of the available options and methods for obvious reasons (the .net framework is huge). Doc example : The language used by the script engine is C#. If you're not familiar with it, simply check out the script samples (Scripts > Open scripts folder)! I won't go into details here, questions can be asked in the support thread regarding addiotional features and methods. If you believe your script should be added in the program, send it to me and I'll probably add it. Customizable The settings dialog allows you to modify all colors in the editor easily. You'll also find the sound resources (GRFs and folders) that can be set up in the Sound tab. The Shell integration tab can associate the .act files with the software to edit them more easily. Don't hesitate to give me a feedbacks or suggestions!Free1 point -
if(addrid(0)) dispbottom "This will show to everyone in dark red",0xFF7777;1 point
-
I hope you make rathena guild emblem (With options) as well. I want to represent rathena on my server.1 point
-
Yeah, thank you. Feel free to use it.1 point
-
You're welcome lol It's a gift Yeah I did some mistake here a little revision. mob_db2.txt 2302,GOBLIN_LEADER,Goblin Leader,Goblin Leader,64,5000,0,6036,2184,1,663,752,99,99,5,55,37,30,69,58,10,12,1,7,24,0x3695,120,1120,620,240,0,0,0,0,0,0,0,0,0,0,0,0,0,0,0,0,0,0,0,0,0,0,0,0,0,0,0 prontera,155,180,5 script Goblin Invasion 456,{ if( !.count && .shop ) { mes "Exchange Goblins points ?"; if( select( "Yes", "No" ) -1 ) if( getgmlevel() < 1 ) close; else goto L_event; // Use Euphy's quest_shop // ---------------------- callfunc "qshop", 1; } else if( getgmlevel() < 1 ) close; // GM can Start / Stop Event // ------------------------- L_event: mes ( .count ? "Stop" : "Start" ) +" Goblin Invasion ?"; if( select( "Yes", "No" ) -1 ) close; if( .count ) goto L_stop; OnHour00: OnHour02: initnpctimer; set .Leader, ( rand( 1,100 ) <= .mob_option5[ 1 ] ? 1 : 0 ); set .num, getusers(1) * 3; set .count, .num + 3 + .Leader; set .map$, .map_event$[ rand( getarraysize( .map_event$ ) ) ]; announce .count +" Goblins invade "+ setchar( .map$, strtoupper( charat( .map$, 0 ) ), 0 ) +" citie !", 0; for( set .@i, 1; .@i <= 3; set .@i, .@i + 1 ) { set .@a, ( .@i == 3 ? .num - .@b : ( getd( ".mob_option"+ .@i +"[ 1 ]" ) * .num ) / 100 ); monster .map$,0,0,"--ja--", getd( ".mob_option"+ .@i +"[ 0 ]" ), .@a, strnpcinfo(0) +"::OnKillGob"+ .@i; set .@b, .@b + .@a; } monster .map$,0,0,"--ja--", .mob_option4, 3, strnpcinfo(0) +"::OnKillGob4"; if( .Leader ) monster .map$,0,0,"--ja--", .mob_option5, 1, strnpcinfo(0) +"::OnKillGob5"; close; OnKillGob1: callsub S_getitem, 1;// 1 : just a post-it OnKillGob2: callsub S_getitem, 2; OnKillGob3: callsub S_getitem, 3; OnKillGob4: callsub S_getitem, 4; OnKillGob5: callsub S_getitem, 5; S_getitem: set .count, .count - 1; // Rewards : 1/ Points // ------------------- set .@p, getd( ".mob_option"+ getarg(0) +"[ 2 ]" ); set #Goblin_points, #Goblin_points + .@p; dispbottom "You get "+ .@p +" point"+ ( .@p > 1 ? "s" : "" ) +"."; // 2/ Items // -------- for( set .@i, 3; .@i < getarraysize( getd( ".mob_option"+ getarg(0) ) ); set .@i, .@i + 2 ) getitem getd( ".mob_option"+ getarg(0) +"[ "+ .@i +" ]" ), getd( ".mob_option"+ getarg(0) +"[ "+ ( .@i+1 ) +" ]" ); // Broadcast // --------- switch( .count ) { case 10: announce .count +" Goblins left.", 0; break; case 0: announce strcharinfo(0) +" kill the last Goblin !", 0; getitem 27007, 1; break; // Count down how many goblins are left : if = 100 then broadcast, broadcast by ones if Goblins <= 50 default: if( .count < 100 && .count > 50 || .count > 100 ) end; mapannounce .map$, .count +" Goblins left.", 0; } end; OnTimer1800000:// Automatically stop invasion 30 min later L_stop: stopnpctimer; set .count, 0; killmonsterall .map$; announce ( playerattached() ? strcharinfo(0) +" : " : "" ) +"Event Goblins invasions is finished !", 0; close; OnInit: // Leave this alone for( set .@i, 1; .@i <= 5; set .@i, .@i + 1 ) deletearray getd( ".mob_option"+ .@i ); deletearray .map_event$; // Index : MobID, Spawn rate (70/100), Points reward, ID reward 1, Number reward 1, ID reward 2, Number reward 2, etc... setarray .mob_option1, 2300, 70, 1, 27004, 1; setarray .mob_option2, 2300, 10, 7; // = Mob ID 1122(2) setarray .mob_option3, 2301, 20, 3, 27005, 1; // = Mob ID 1125 // Fix 3 spawn every time / change '3' in < monster .map$,0,0,"--ja--", .mob_option4, 3, strnpcinfo(0) +"::OnKillGob4"; > to change this number setarray .mob_option4, 2303, 100, 1, 27003, 1, 27007, 1; // Goblin Leader / Index : MobID, chance spawn (5/100) PER EVENT, Points reward, ID reward 1, Number reward 1, ID reward 2, Number reward 2, etc... setarray .mob_option5, 2302, 5, 1, 675, 20, 671, 5, 27003, 1, 27007, 1; // Map Invasion // ------------ setarray .map_event$, "amatsu", "prontera", "alberta", "payon"; // Enable Shop ? 1 / 0 : ( yes / no ) // ---------------------------------- set .shop, 0; end; }1 point