Leaderboard


Popular Content
Showing content with the highest reputation on 03/15/20 in all areas
-
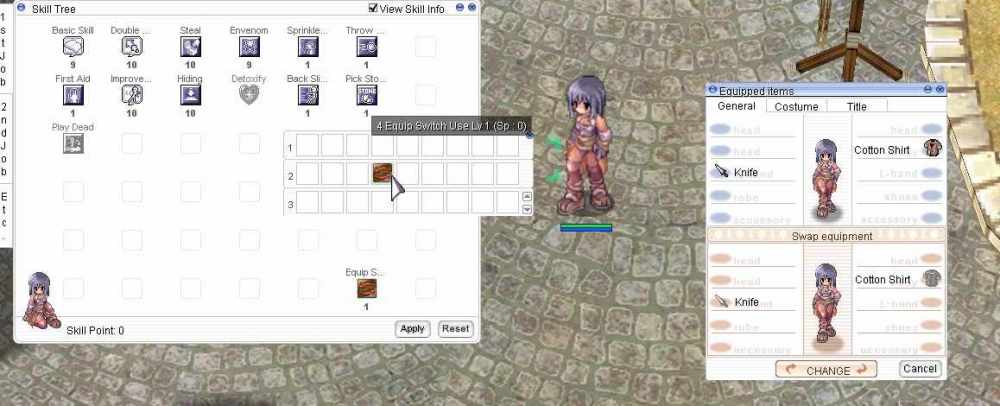
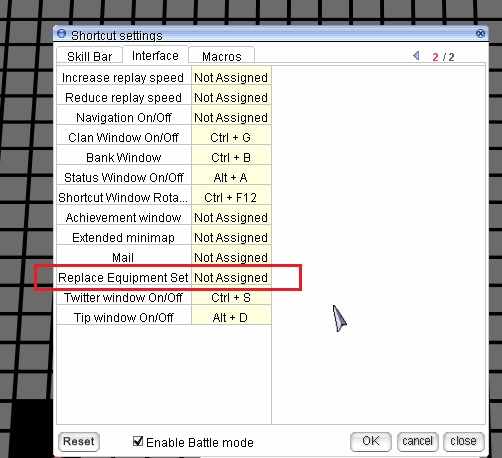
Hello dear members, it has been a long time since my last login here, and I came back with my recent customization, it's damm good, that once finished in my test server confirmed that was 100% functional, with and with no issues , I decided to share.... This Skill provides the same function than the equipment swap tab, but instead of opening the inventory and aim with the cursor to the "change" button!, you can do the same even faster, with a custom skill icon and just one tip of your finger. ***------- Trunk Side -------*** 1- Go to your skill_db.txt and make sure to find the skill #5067. If you are using pre-renewal config, you may export the bellow skill line to the pre-re/skill_db.txt file instead. 5067,0,6,4,0,0x1,0,1,1,no,0,0x1,0,none,0,0x0, ALL_EQSWITCH,Equip Switch 2- Now that the skill is implemented, you need to add the timers in the db file skill_cast_db.txt, this can´t be ignored, you may add the skill line. I gave the skill 10 seconds cooldown, but you can do it at your like. //-- ALL_EQSWITCH 5067,0,0,0,0,0,10000 3- Most important part, can´t be ignored, add the skill line for every job in the skill_tree.txt file. just like this: //Novice 0,5067,1,0,0,0,0,0,0,0,0,0,0 //-- ALL_EQSWITCH#Equip Switch# //Swordman 1,5067,1,0,0,0,0,0,0,0,0,0,0 //-- ALL_EQSWITCH#Equip Switch# //Magician 2,5067,1,0,0,0,0,0,0,0,0,0,0 //-- ALL_EQSWITCH#Equip Switch# //Archer 3,5067,1,0,0,0,0,0,0,0,0,0,0 //-- ALL_EQSWITCH#Equip Switch# And keep going until you add the skill to every job available in your server. (watch out the job# id, for the copy paste, don´t forget to add the correct number). ***------- Client Side --------*** - You need the icon sprites for the skill and the item bmp, you can make a prettier one, in my case I recycled Taekwon skill icon Counter Kick Stance and recolored. You will find it attached, well, This .spr and .act files must be added inside the drop sprite folder the route is: data/sprite/¾ÆÀÌÅÛ ALL_EQSWITCH.act ALL_EQSWITCH.spr - Now for dragging the skill icon from the skill tab, you need the item bmp, also attached, and It has to be added inside the item folder. The route is: \data\texture\À¯ÀúÀÎÅÍÆäÀ̽º\item ALL_EQSWITCH.bmp ---EDITING THE LUAS--- - The very first thing we are going to edit is the skilltreeview.lub this file is found inside the skillinfoz folder at this route: \data\luafiles514\lua files\skilltreeview.lub Please only add the skill for the novice tree, watch out the key and please note that there is not comma at the last line added skill, if you wonder about the #41 is the bottom right corner penultimate slot in the alt+s skill tab. SKILL_TREEVIEW_FOR_JOB = { [JOBID.JT_NOVICE] = { [0] = SKID.NV_BASIC, [7] = SKID.NV_FIRSTAID, [14] = SKID.NV_TRICKDEAD, [41] = SKID.ALL_EQSWITCH }, - Second Step editing the luas belongs to the file skillid.lub this file is found inside the skillinfoz folder at this route: \data\luafiles514\lua files\skillinfoz And you have to add the skill ALL_EQSWITCH = 5067 Example: WE_CALLALLFAMILY = 5063, WE_ONEFOREVER = 5064, WE_CHEERUP = 5065, ALL_EQSWITCH = 5067, - Third step for the luas, the skilldescript.lub This file is located in \data\luafiles514\lua files\skilldescript.lub In this file you have to create a description for the new skill implemented in this case the ALL_EQSWITCH This is an example of mine, watch out the keys and the commas, you can make a good description with your own taste.: [SKID.ALL_PRONTERA_RECALL] = { "Return to Prontera", "Max Level: 2", "Skill Form: ^339900Supportive^000000", "Description: ^777777Teleport to Prontera, 15 minutes after use delay.^000000" }, [SKID.ALL_EQSWITCH] = { "Switch Equipment", "Max Level: 1", "^CC3399Requirement: Finish Quest^000000", "Skill Form: ^339900Active^000000", "Target: ^777777Self^000000", "Description: ^777777Swap you actual equipment with the one placed in the alternative equip tab.^000000" }, [SKID.ALL_THANATOS_RECALL] = { "Return to Thanatos", "Max Level: 1", "Skill Form: ^339900Supportive^000000", "Description : ^777777Teleport to Thanatos, 5 minutes after use delay.^000000" }, - Finally the Last Step and most most most important, the skillinfolist.lub This file is located in \data\luafiles514\lua files\skillinfolist.lub We have to add the new skill to this file, EXAMPLE: [SKID.ALL_GLASTHEIM_RECALL] = { "ALL_GLASTHEIM_RECALL", SkillName = "Return to Glastheim", MaxLv = 1, SpAmount = { 0 }, bSeperateLv = false, AttackRange = { 1 } }, [SKID.ALL_EQSWITCH] = { "ALL_EQSWITCH", SkillName = "Equip Switch", MaxLv = 1, Type = "Quest", SpAmount = { 0 }, bSeperateLv = false, AttackRange = { 1 } } } - In this case I added the skill at the last in the bottom, so you watch out the keys and the commas placed properly to avoid client side error, VERY VERY VERY IMPORTANT, you see the Type = "Quest" bold in green? Please, do not ignore that line, ... That line is very very important, and the client use that line, to avoid investing job skill points in that quest skill. Now, for getting the skill active, you can edit the npc global funcion and add it to the platinium skills: in your trunk/npc/other/Global_Functions.txt Example: ////////////////////////////////////////////////////////////////////////////////// // Gives attached player their Platinum Skill based on their class. ////////////////////////////////////////////////////////////////////////////////// function script F_GetPlatinumSkills { skill "NV_FIRSTAID",1,SKILL_PERM; skill "ALL_EQSWITCH",1,SKILL_PERM; or make your own script to get the skill permantent. Now The Testing In Game: Party Ragnarok 2020-03-14 19-25-47.mp4 OPTION 2: For Experienced Users, if you want to save hours on this.... just go to the shortcut settings and add a shortcut to replace equip.
 2 points
 -
Version 1.0.0
3263 downloads
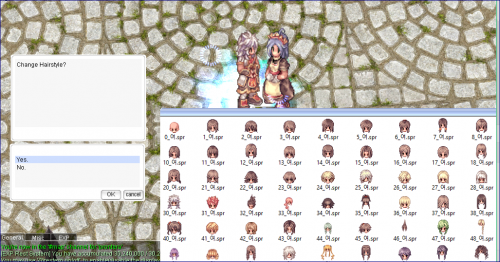
Introduction: This package are currently contains around 90~100 hairstyles for both male/female character. I obtained these from various sources like old eAthena, rAthena, Hercules, TheSpriteRepository and other member who shared these sprites with me etc. I don't remember who exactly made each of the sprites, or who even shared these... tell me if you know who are them. If any of these hairstyles are custom work that are meant for private use, kindly contact me, so that I could remove it from the listing. I do have more than this amount, but since my current test client (2018-06-20) can only support up to 100 sprites, so I randomly picked 100 and only upload it here. It included the default 31 hairstyle from kRO, but I think I replaced the 1~20+ hairstyles from JRO which dyed the hair in dark color, the rest are custom hair styles. How to use: You can either merge the provided GRF into your own GRF Load it as another individual GRF using the DATA.ini file Extract it and put it in your Data folder * Depend on your client hexed with whatever settings. Search forum for all these guides. Disclaimer: You're free to share with everyone but do not monetize the contents in any way! These materials are meant for study or research purpose. Use these at your own risk, and always give credit to original author. If there exists issue with sprite file, for example: sprite misalignment, error, etc, kindly ask help from any member who have knowledge with sprite edit. If there exists issue with palette color file, for example: messed up color, error, etc, kindly ask help from any member who have knowledge with palette color edit. Fun Fact: Do you know you can actually combine all male and female hairstyle (including doram) to create a list of universal hairstyles that could be used by any gender of player and doram?Free1 point -
you can try this. prontera,155,181,5 script Sample 4_F_KAFRA1,{ if (quest_random_cd > gettimetick(2)) { mes "You will be assigned with a new quest by tomorrow 6AM."; mes "Cooldown: "+(quest_random_cd - gettimetick(2))+" seconds"; close; } if (!quest_random) { quest_random = rand(1, 2); mes "You have been assigned with a new quest."; next; } switch(quest_random) { case 1: setarray .@reward, 4001, 1; setarray .@item, 512; setarray .@amount, 100; break; case 2: setarray .@reward, 4002, 1; setarray .@item, 501, 502, 503; setarray .@amount, 3, 1, 2; break; default: mes "invalid quest."; close; } mes "Quest Requirement(s):"; .@size = getarraysize(.@item); for (.@i = 0; .@i < .@size; .@i++) { mes " > "+.@amount[.@i]+"x "+getitemname(.@item[.@i]); if (countitem(.@item[.@i]) < .@amount[.@i]) .@fail++; } if (!.@fail) { next; if (select("Submit Quest", "Cancel") == 1) { for (.@i = 0; .@i < .@size; .@i++) delitem .@item[.@i], .@amount[.@i]; getitem .@reward[0], .@reward[1]; quest_random = 0; quest_random_cd = gettimetick(2) + (86400 - gettimetick(1)) + (6 * 3600); // till 6AM next day. } } close; } or this prontera,155,181,5 script Sample 4_F_KAFRA1,{ if (quest_random_cd == gettime(8)) { mes "You will be assigned with a new quest by tomorrow 6AM."; close; } if (!quest_random) { if (gettime(3) < 6) { mes "You will be assigned with a new quest by 6AM today."; close; } quest_random_cd = 0; quest_random = rand(1, 2); mes "You have been assigned with a new quest."; next; } switch(quest_random) { case 1: setarray .@reward, 4001, 1; setarray .@item, 512; setarray .@amount, 100; break; case 2: setarray .@reward, 4002, 1; setarray .@item, 501, 502, 503; setarray .@amount, 3, 1, 2; break; default: mes "invalid quest."; close; } mes "Quest Requirement(s):"; .@size = getarraysize(.@item); for (.@i = 0; .@i < .@size; .@i++) { mes " > "+.@amount[.@i]+"x "+getitemname(.@item[.@i]); if (countitem(.@item[.@i]) < .@amount[.@i]) .@fail++; } if (!.@fail) { next; if (select("Submit Quest", "Cancel") == 1) { for (.@i = 0; .@i < .@size; .@i++) delitem .@item[.@i], .@amount[.@i]; getitem .@reward[0], .@reward[1]; quest_random = 0; quest_random_cd = gettime(8); } } close; }1 point
-
1 point
-
if you're using Thor Patcher, try to use this (I prepare it earlier, didnt manage to find the real file because I already thor and delete it) https://mega.nz/#!VdYVQCZD!dF5tUq90hJqiBfxyWbBE-npIELqUiVxdoSPKjwonbM4 Update : 13 December 2020. Link : https://mega.nz/file/lJhAhYBB#dF5tUq90hJqiBfxyWbBE-npIELqUiVxdoSPKjwonbM4 Note : This is .thor file. So you can directly patch it using thor.1 point
-
prontera,158,181,5 script Race-To-99 100,{ if (BaseLevel < 99) { npctalk "Sorry, Only Lvl 99 can claim the reward!"; end; } if (JobLevel < 70) { npctalk "Sorry, Only Job Lvl 70 can claim the reward!"; end; } if ($ItemGive == 100) { npctalk "Sorry, all rewards has been taken!"; end; } if (getreward) { npctalk "Sorry, Nothing for you!"; end; } announce "Congratulations! "+strcharinfo(0)+" has claimed his reward for Race to 99 Event", bc_all; ++$ItemGive; if ($ItemGive == 1) { getitem 501, 100; getitem 501, 100; getitem 501, 100; getitem 501, 100; } else if ($ItemGive == 2) { getitem 501, 100; getitem 501, 100; getitem 501, 100; } else if ($ItemGive == 3) { getitem 501, 100; getitem 501, 100; } else { getitem 501, 100; } getreward = 1; sleep 2000; announce "There are "+(100 - $ItemGive)+" rewards left to give!", bc_all; end; OnInit: waitingroom "Level 99 Rewarder", 0; end; }1 point
-

Version 1.2.1
1095 downloads
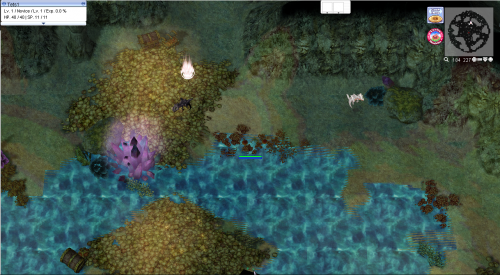
Original Topic: http://herc.ws/board/topic/16037-campfire-to-regenerate-hpsp/ Herc Script Link : https://pastebin.com/fksPdpFQ The Idea: Camp Fire to restore / regenerate HP & SP. When you sit by the Camp fire, you start feeling the warmth and the comfort, so your HP & SP begin to regenerate. How to use : 1. add the source mode provided in the script. (or here) 2. make a usable item_db with these bonus script. callfunc("func_CreateCampFire", <range>, <duration>, <heal_rate>); // create campfire callfunc("func_UpdateCampFire", <range>, <duration>, <heal_rate>); // update the campfire duration/heal rate. Preview: Credits : @Dastgir & @Radian for the src mod and @Habilis for the ideaFree1 point -
Version 1.2.1
839 downloads
odin past and abyss 4 maps.rar texture map uploadedFree1 point -
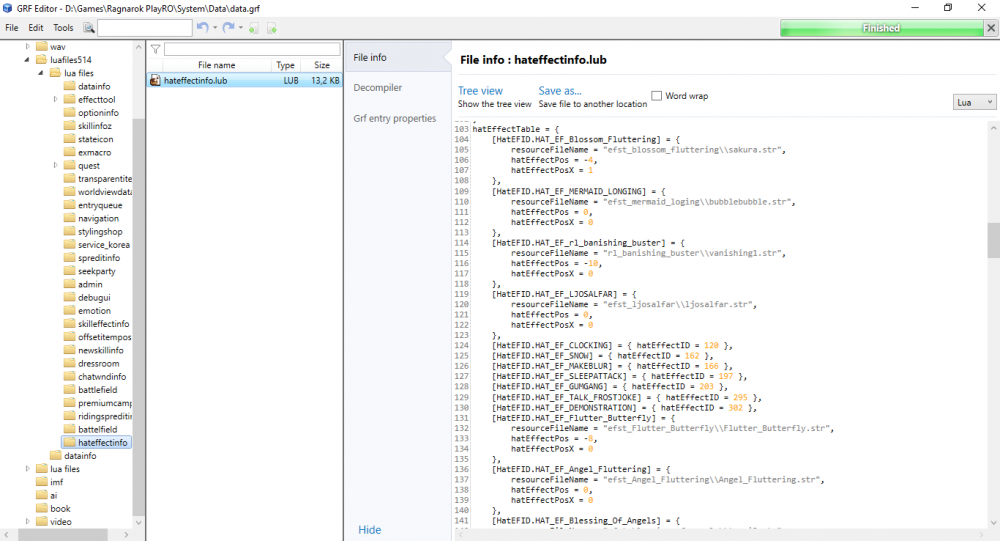
For test (Remove all hat_effects and add selected effect to char) ID 0 = no effect prontera,170,180,1 script Test hat effect#test_effects 122,{ for(.@i = 0; .@i < 100; ++.@i){ hateffect .@i,false; } input .@ID; hateffect .@ID,true; end; } Script info: https://github.com/rathena/rathena/blob/master/doc/script_commands.txt *hateffect(<Hat Effect ID>,<State>); This will set a Hat Effect onto the player. The state field allows you to enable (true) or disable (false) the effect on the player. The Hat Effect constants can be found in 'src/map/script_constants.h' starting with HAT_EF_*. Requires client 2015-05-13aRagEXE or newer. You can change effects in your data.grf (hateffectinfo.lub) hatEffectID = effect ID
 1 point