Leaderboard


Popular Content
Showing content with the highest reputation since 07/02/24 in Posts
-
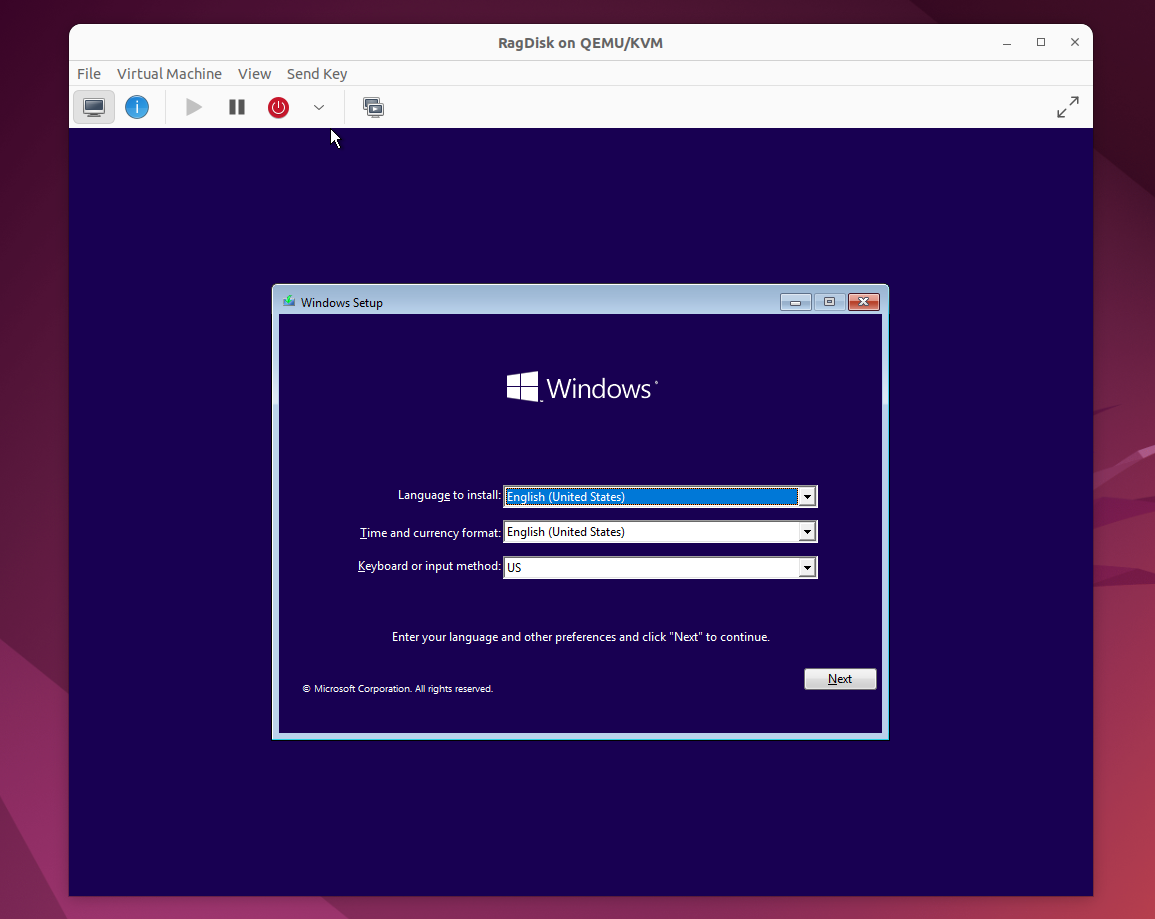
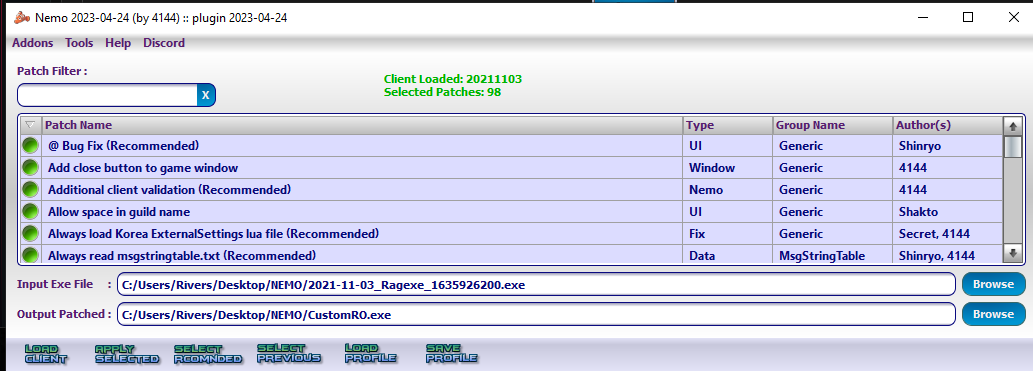
KRO : https://github.com/hiphop9/ROClient_en 2025-06-04_Ragexe.exe -PATH- @ Bug Fix(Recommended) Add Close Button Custom Window Title Disable 1rag1 Params(Recommended) Disalbe Filename Check(Recommended) Disable Help Message Enable DNS Suport Enable Multiple GRF(Recommended) Fix NPC Dialog Scroll Increase Zoom Out 75% Read Data Folder First(Recommended) Remove Hard Coded Address & Port(Recommended) Restore Clientinfo.xml(Recommended) Restore Old Login Packet(Recommended) externalsettings Korea patch Skip License Screen Translations client EnableWho EnableShowName AlwaysAscii CallKoreaClientInfo PlainTextDesc HideBuildInfo TranslateClient NoGGuard CustomItemInfoLub CustomAchieveLub CustomTownInfoLub CustomTipboxLub Customspopuplub CustomMapInfoLub CustomOngQuestInfoLub CustomRcmdQuestInfoLub Customachievementslub CustomQuestClassificationInfolub NoNagle OpenToServiceSelect GuildBrackets NoGravityAds NoGravityLogo FixLatestNCWin Restore model culling Headgears viewID 64000 ExtendCashShopPreview EnableProxySupport IncreaseMapQuality rAthena 2025-06-14 (66a4a2ab68ce85d781514c3c000433f981d6842f) https://github.com/hiphop9/rathena20250614 - emotion ui update for 20230925 clients - 20231220+ CLIENT bodystylefix - macro user report packet This is distributed for testing purposes only. Please do not request additional patches!! I am not a seller!! Therefore, if you plan to operate or commercialize a server, do not contact me!!
 24 points
 -
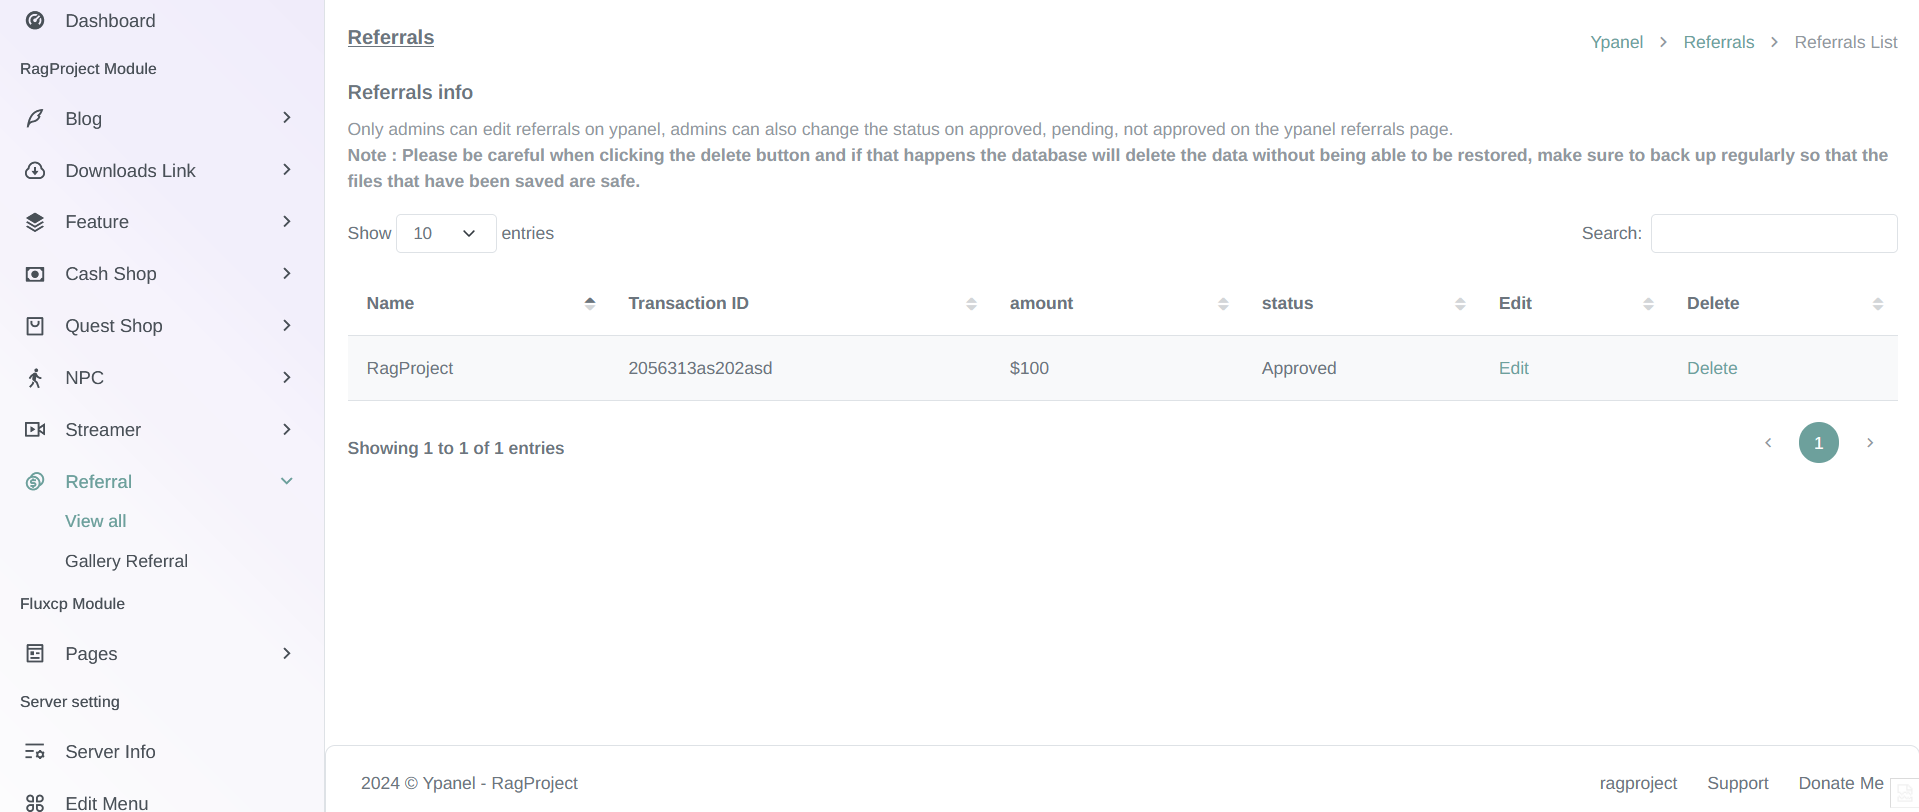
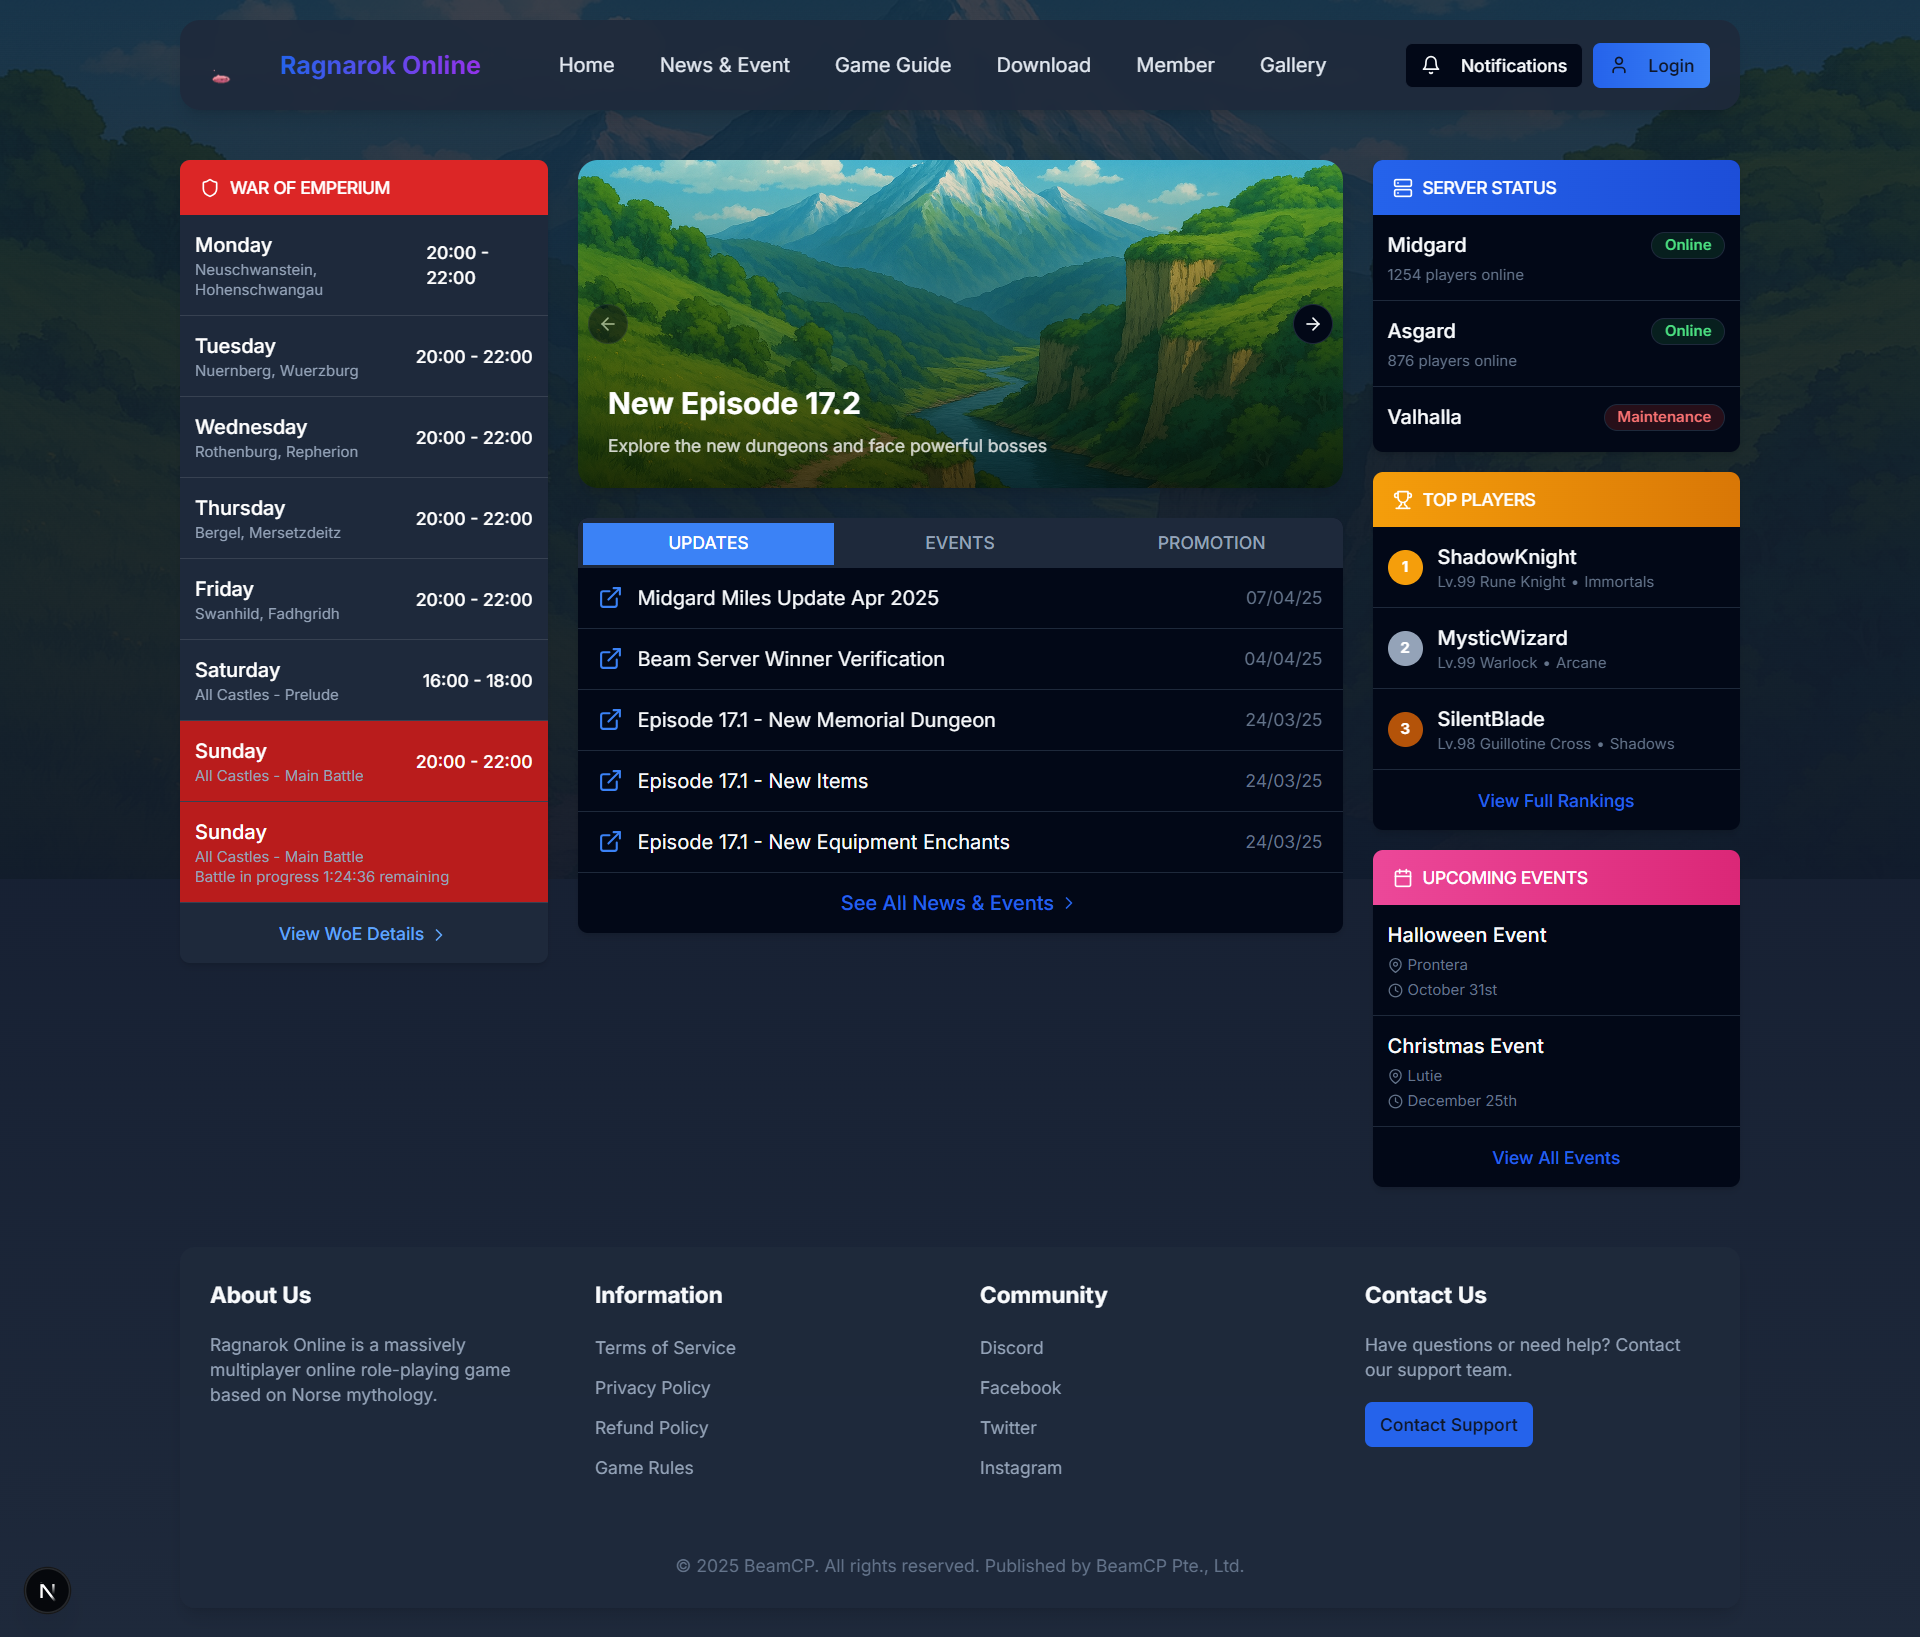
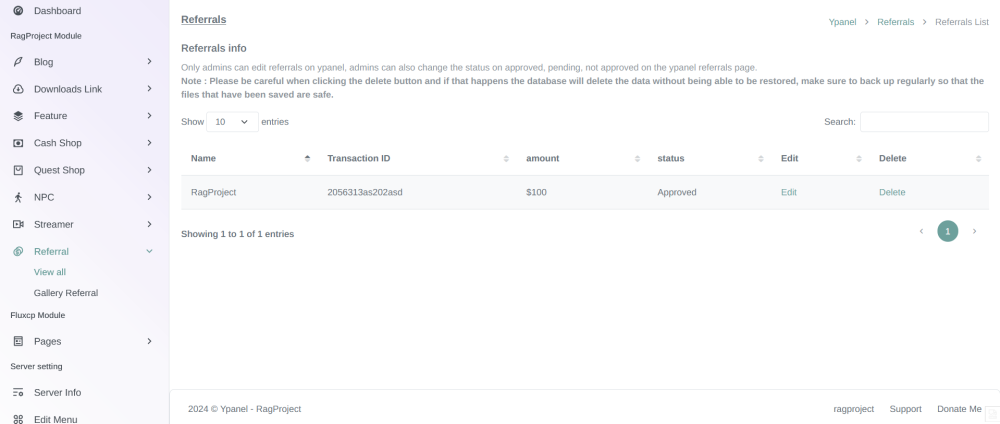
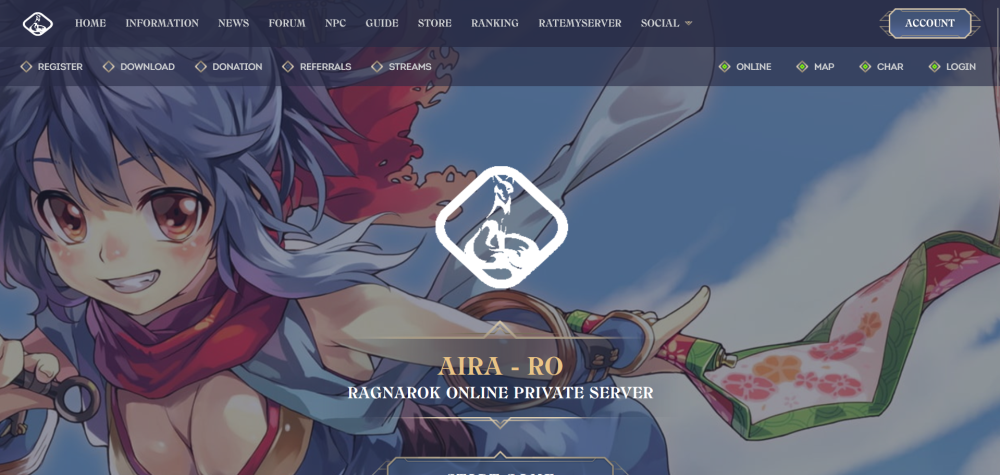
we have completed our theme project. Maybe it's not perfect and some modules don't work properly on the theme, but we will fix the module problems that you really need, and give us some time to finish it. Features of this theme Ypanel (allows admin to post articles and so on using ypanel easily) Blog (added manually) Server information editor (manually edited) Download page (manually edited) NPC (added manually) Cashshop (added manually) Questshop (manually added) Menu Editor (manually edited) Referrals system by all users (admin can perform actions there ypanel) Streamers (manually added) we didn't post the theme because the file is too big than the maximum upload file size set by the forum. we tried this theme using cpanel and rathena fluxcp Question : will this theme be published for free or for a fee? Answer : All the themes we provide are free of charge and self-installing. If you want to request a feature, we may consider it and add it if it's something you want. Support : Discord Please install the theme correctly
 10 points
 -
Froggo Rö Folder This is a simple RO folder that contains everything you need to run a 2022-04-06 client, the latest publicly available. I have cleaned and compressed the data.grf file to reduce its size from 3.87GB to 2.14GB. official_data.grf took the same treatment and the file size went down to 426MB. Additionally, I have added a mini-map to all those maps that were lacking one, approximately 275 mini-maps were added, I only ignored some indoor (_in) and guild castles maps. Before BGM, the Rö folder has a total size of 2.62GB, after BGM it reaches 2.96GB Screenshots Requirements Server Up & Running with PACKETVER=20220406 Visual C++ Redistributables DirectX Runtime Features Includes latest RoEnglishRE - 16/mar/2024 Custom Lua Support jRO Enchantment Display Includes rsu-kro-rag-lite (kRO updater) - v4.2.2.1316 Includes opensetup - v3.1.0.627 Includes iRO's Setup.exe, thanks to relzz! Includes AzzyAI 1.55 Includes Packet Viewer Download click here to download a .zip file of this ro-folder ~fast mirror (●'◡'●)~ Extra Warp Profile for 2022-04-06 used for FroggoClient.exe (mirror) 2022-04-06 Vanilla Ragexe Client Login Screen Creator Official Ragnarok Complete Zipped Folder(10/June/2024) Official Ragnarok Complete EXE Installer (08/Jan/2024)(mirror) Froggö Ro Folder Gitlab's Repo FAQ Why am I getting CHARACTER_INFO size error when trying to log in? Possible reasons: You are using outdated rAthena which doesn't work with 2022-04-06 client. You haven't set correct PACKETVER or done it with mistakes (skill issue ). You haven't recompiled rAthena. You haven't restarted server after recompilation. Why am I getting errors about MSVCP140.dll, VCRUNTIME140.dll when executing FroggoClient.exe? You haven't installed Visual C++ Redist, check requirements section, if problem persists, try installing this too Visual C++ Redist for VS 2012u4 What is official_data.grf ? official_data.grf is from the ROResourceCollection project, which brings many items, mobs and npc files from other RO Regions and merges it into one convenient grf. Why does the Setup.exe opens instead of the FroggoClient.exe? In your Windows registry there is no data about your selected graphic card, to fix it, just set up your settings in Setup.exe and click on OK, be aware to don't select DirectX9, stay on DirectX7 What was removed from the data.grf? Several unnecessary files were removed from the data.grf . These included residual files such as thumbs.db and stray BMP Screenshots. However, the majority of the cleanup was performed in the mob and npc sprite folders. In these folders, some .spr files contained sprites (images) that were not utilized in their corresponding .act files. For example, the monster katrinn's .spr file contained approximately 140 images, but only 6 of them were actually used. In total, out of nearly 90,000 collective images, around 9,400 were removed alv.9 points
-
Hi, I'm working on a ranking system inspired by League of Legends, and I decided to create these files to apply it to the players I'm new to editing this kind of stuff. I wish a professional could review it and give it a proper cleanup, but anyway, it doesn't seem too bad for now. How do use it: 1) Download League of Legends Rank File. 2) Put into your GRF. 3) Go to your hateffectinfo.lub (data/luafiles514/hateeffectinfo) 4) Search or something Similar. HAT_EF_NightSkyOfRutie = 225, 5) Put this: -- Ranks Lol Tag by Scanty -- HAT_IRON_RANK = 231, HAT_BRONCE_RANK = 232, HAT_PLATA_RANK = 233, HAT_ORO_RANK = 234, HAT_PLATINO_RANK = 235, HAT_ESMERALDA_RANK = 236, HAT_DIAMANTE_RANK = 237, HAT_MAESTRO_RANK = 238, HAT_GM_RANK = 239, HAT_RETADOR_RANK = 240, 6) Now, Search for [HatEFID.HAT_EF_NightSkyOfRutie] = { resourceFileName = "efst_NightSkyOfRutie\\christmasx3.str", hatEffectPos = -11, hatEffectPosX = -0.3, isRenderBeforeCharacter = true, isAdjustPositionWhenShrinkState = true, isAdjustSizeWhenShrinkState = true }, 7) After that --- Inician Rangos de Lol - By Scanty --- [HatEFID.HAT_IRON_RANK] = { resourceFileName = "custom\\rangos_lol\\iron_RANK.str",hatEffectPos = 6, isIgnoreRiding = false, isRenderBeforeCharacter = false, isAttachedHead = true, isAdjustPositionWhenShrinkState = true, isAdjustSizeWhenShrinkState = true}, [HatEFID.HAT_BRONCE_RANK] = { resourceFileName = "custom\\rangos_lol\\bronce_RANK.str",hatEffectPos = 6, isIgnoreRiding = false, isRenderBeforeCharacter = false, isAttachedHead = true, isAdjustPositionWhenShrinkState = true, isAdjustSizeWhenShrinkState = true}, [HatEFID.HAT_PLATA_RANK] = { resourceFileName = "custom\\rangos_lol\\plata_RANK.str",hatEffectPos = 6, isIgnoreRiding = false, isRenderBeforeCharacter = false, isAttachedHead = true, isAdjustPositionWhenShrinkState = true, isAdjustSizeWhenShrinkState = true}, [HatEFID.HAT_ORO_RANK] = { resourceFileName = "custom\\rangos_lol\\oro_RANK.str",hatEffectPos = 6, isIgnoreRiding = false, isRenderBeforeCharacter = false, isAttachedHead = true, isAdjustPositionWhenShrinkState = true, isAdjustSizeWhenShrinkState = true}, [HatEFID.HAT_PLATINO_RANK] = { resourceFileName = "custom\\rangos_lol\\platino_RANK.str",hatEffectPos = 6, isIgnoreRiding = false, isRenderBeforeCharacter = false, isAttachedHead = true, isAdjustPositionWhenShrinkState = true, isAdjustSizeWhenShrinkState = true}, [HatEFID.HAT_ESMERALDA_RANK] = { resourceFileName = "custom\\rangos_lol\\esmeralda_RANK.str",hatEffectPos = 6, isIgnoreRiding = false, isRenderBeforeCharacter = false, isAttachedHead = true, isAdjustPositionWhenShrinkState = true, isAdjustSizeWhenShrinkState = true}, [HatEFID.HAT_DIAMANTE_RANK] = { resourceFileName = "custom\\rangos_lol\\diamante_RANK.str",hatEffectPos = 6, isIgnoreRiding = false, isRenderBeforeCharacter = false, isAttachedHead = true, isAdjustPositionWhenShrinkState = true, isAdjustSizeWhenShrinkState = true}, [HatEFID.HAT_MAESTRO_RANK] = { resourceFileName = "custom\\rangos_lol\\maestro_RANK.str",hatEffectPos = 6, isIgnoreRiding = false, isRenderBeforeCharacter = false, isAttachedHead = true, isAdjustPositionWhenShrinkState = true, isAdjustSizeWhenShrinkState = true}, [HatEFID.HAT_GM_RANK] = { resourceFileName = "custom\\rangos_lol\\GM_RANK.str",hatEffectPos = 6, isIgnoreRiding = false, isRenderBeforeCharacter = false, isAttachedHead = true, isAdjustPositionWhenShrinkState = true, isAdjustSizeWhenShrinkState = true}, [HatEFID.HAT_RETADOR_RANK] = { resourceFileName = "custom\\rangos_lol\\Retador_RANK.str",hatEffectPos = 6, isIgnoreRiding = false, isRenderBeforeCharacter = false, isAttachedHead = true, isAdjustPositionWhenShrinkState = true, isAdjustSizeWhenShrinkState = true} 8 ) Create a script to test. you need to use this: hateffect 240, true; *hateffect(<Hat Effect ID>,<State>); This will set a Hat Effect onto the player. The state field allows you to enable (true) or disable (false) the effect on the player. The Hat Effect constants can be found in 'src/map/script_constants.hpp' starting with HAT_EF_*. Requires client 2015-05-13aRagEXE or newer. League of Legends Rank.rar
 8 points
 -
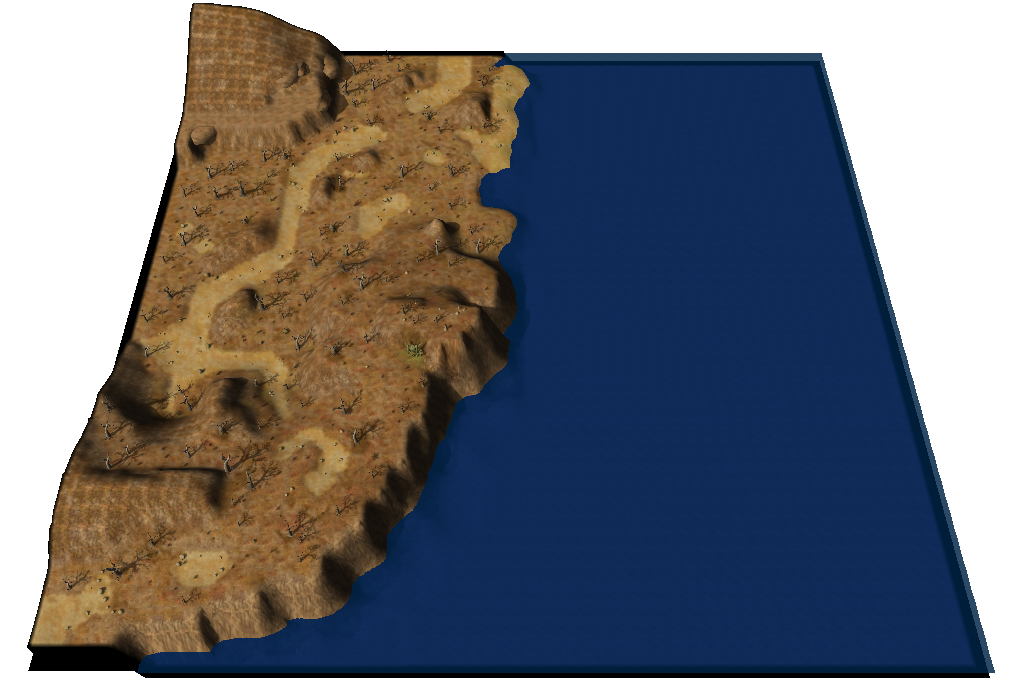
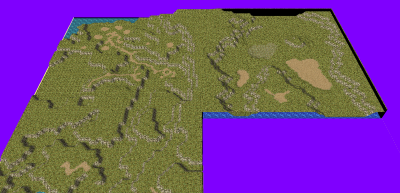
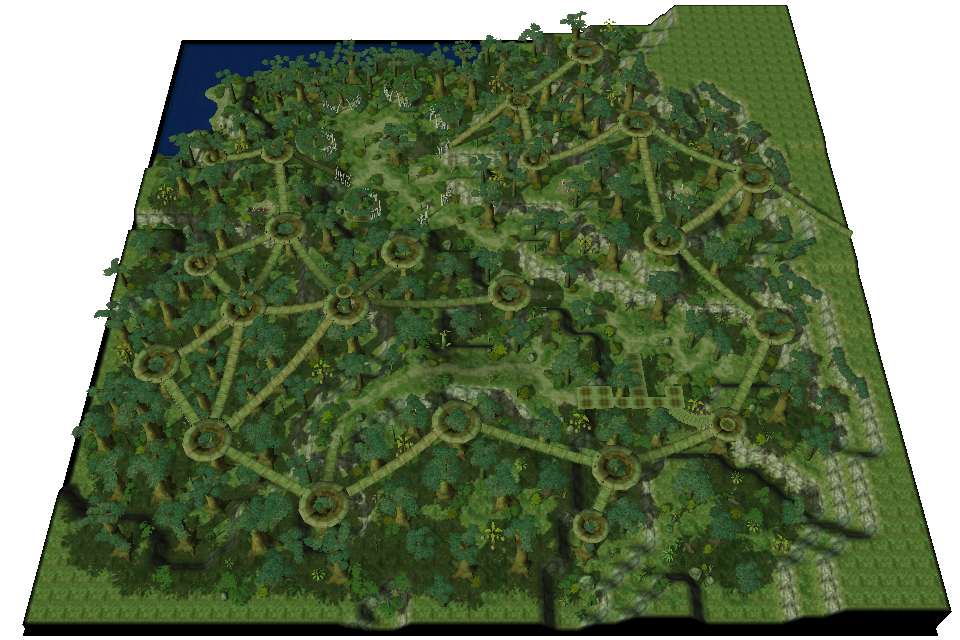
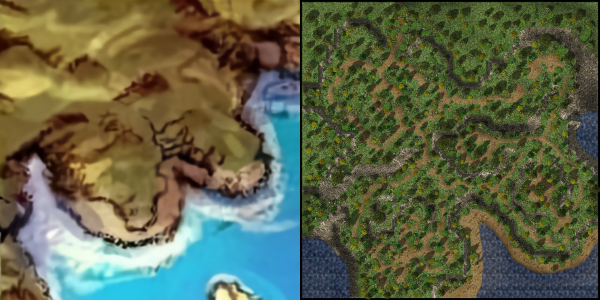
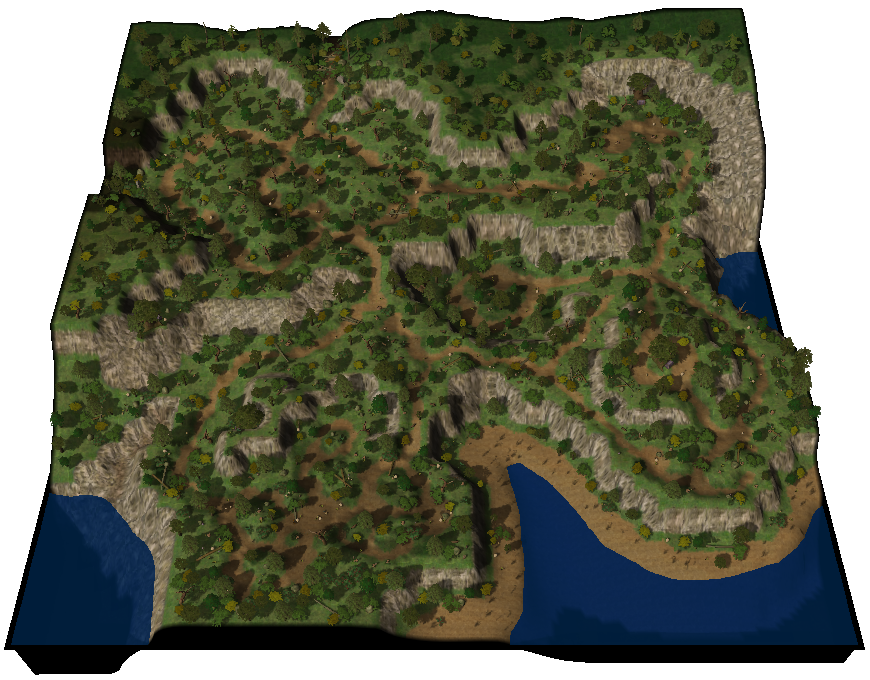
This map belongs to the game universe expansion series. Made with attention to detail and inspired by the original! .•°'°•.•°'°•.•°'°•.•°'°•.•°'°•.•°'°•.•°'°•.•°'°•.•°'°•.•°'°•.•°'°•.•°'°•.•°'°•.•°'°•.•°'°•.•°'°•.•°'°•.•°'°•.•°'°•.•°'°•.•°'°•.•°'°•.•°'°•.•°'°•.•°'°•.•°'°•.•°'°•. um_fild05 Now you can visit the new part of the Hoomga Jungle! The map is a continuation of the Umbala Field 04 location and repeats its main features. The landscape also follows the outlines of the original art design of the location on the world map. The map seamlessly connects with neighboring levels. This map is also supposed to be the home of the MVP Wootan Defender, who was never featured in the original game. However, an ancient version of this MVP was added as a boss in Illusion of Luanda, but for some reason lived in the Comodo North Cave mixed with other monsters and even with another MVP Ancient Tao Gunka instead of in the forest area. Now you can fight its regular version in its native jungle zone and get a unique custom item. I asked the artist to draw a card and a custom shield for this MVP. MVP Wootan Defender MVP Wootan Defender Card Special Loot Wootan's Token - ID 25633 Wootan Defender's Shield Piece - ID 25634 Wootan Defender's Shield [1] - Custom All images and sprites can be downloaded in this topic: https://rathena.org/board/files/file/3844-w0w_custom_collection/ P.S. You may not have noticed in the video but all the gorillas are doubled in size. In their normal size they look very weak the same height as the player. But they have good pixel art that does not lose its beauty when enlarged. It also allows you to double their HP stats and experience to make their farming at least a little more interesting. P.S.S. Also fixed the neighboring location um_fild04: 1) Removed official inaccessible gat points 168,137 and 185,138 2) Added seamless passage to the new location um_fild05 Please rate it if the map is good enough ~~ This map can be downloaded here https://rathena.org/board/files/file/4487-w0w_map_collection/


 8 points
 -
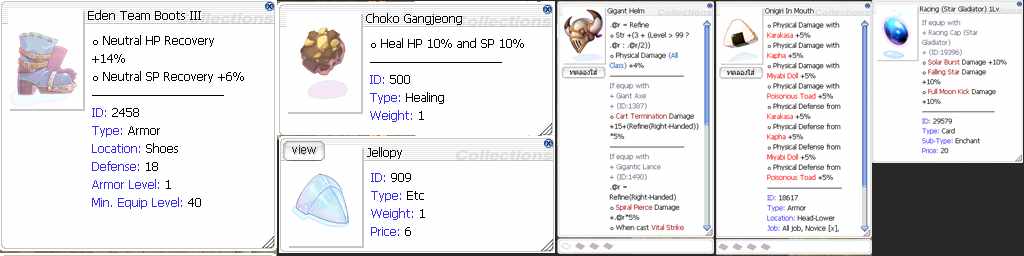
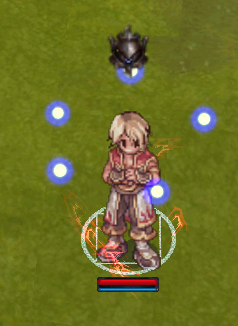
View File Mob Element View A small mod that allows you to display a custom icon and a title referring to the element and element level of the mob. It can be disabled by changing it in monster.conf // Show Element Info [Hyroshima] // 0= Off, 1= On mob_ele_view: 1 I have an observation to inform, if any of the information related to show_mob_info is enabled the mod will behave as disabled. // Display some mob info next to their name? (add as needed) // (does not works on guardian or Emperium) // 1: Display mob HP (Hp/MaxHp format) // 2: Display mob HP (Percent of full life format) // 4: Display mob's level show_mob_info: 0 Obs: i am making 2 diff files available: _A = Closest to current revision. _B = A little older compared to the current review The video quality is not very good (sorry), watch the preview video in fullscreen Submitter Hyroshima Submitted 10/04/24 Category Source Modifications Video Content Author Hyroshima8 points
-
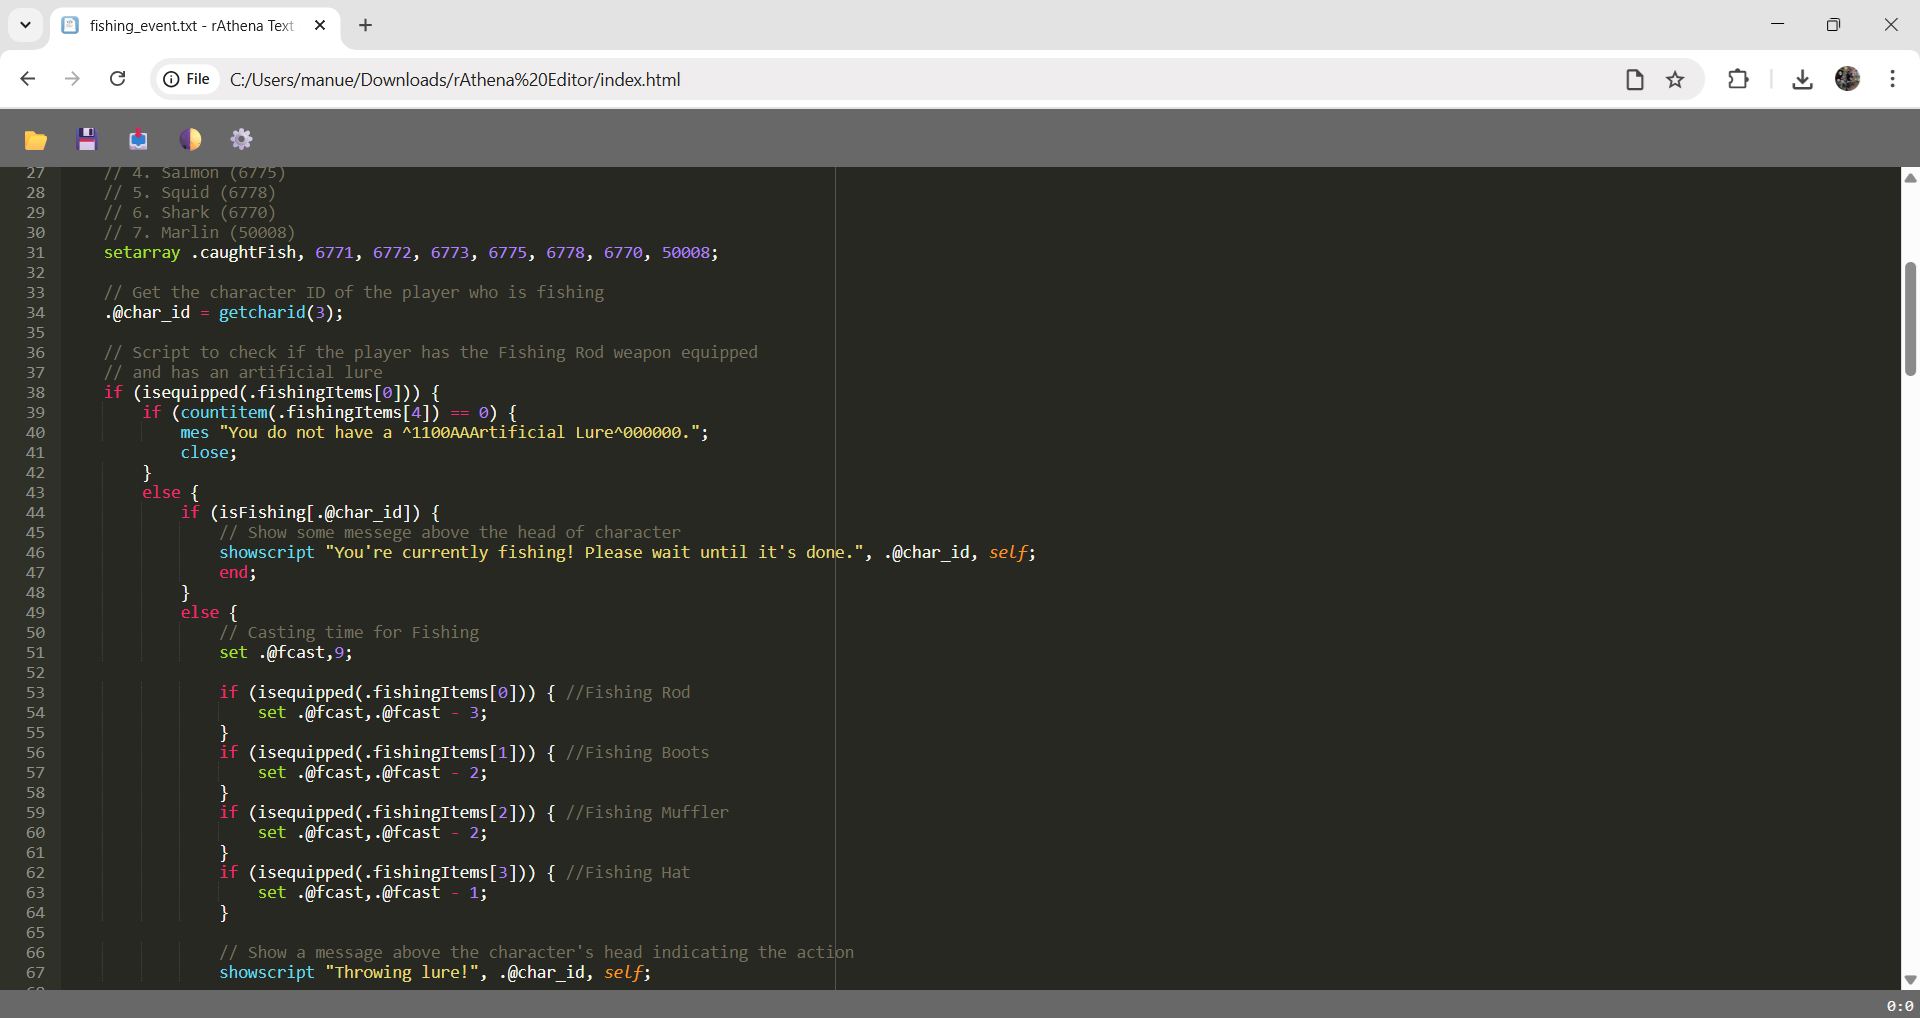
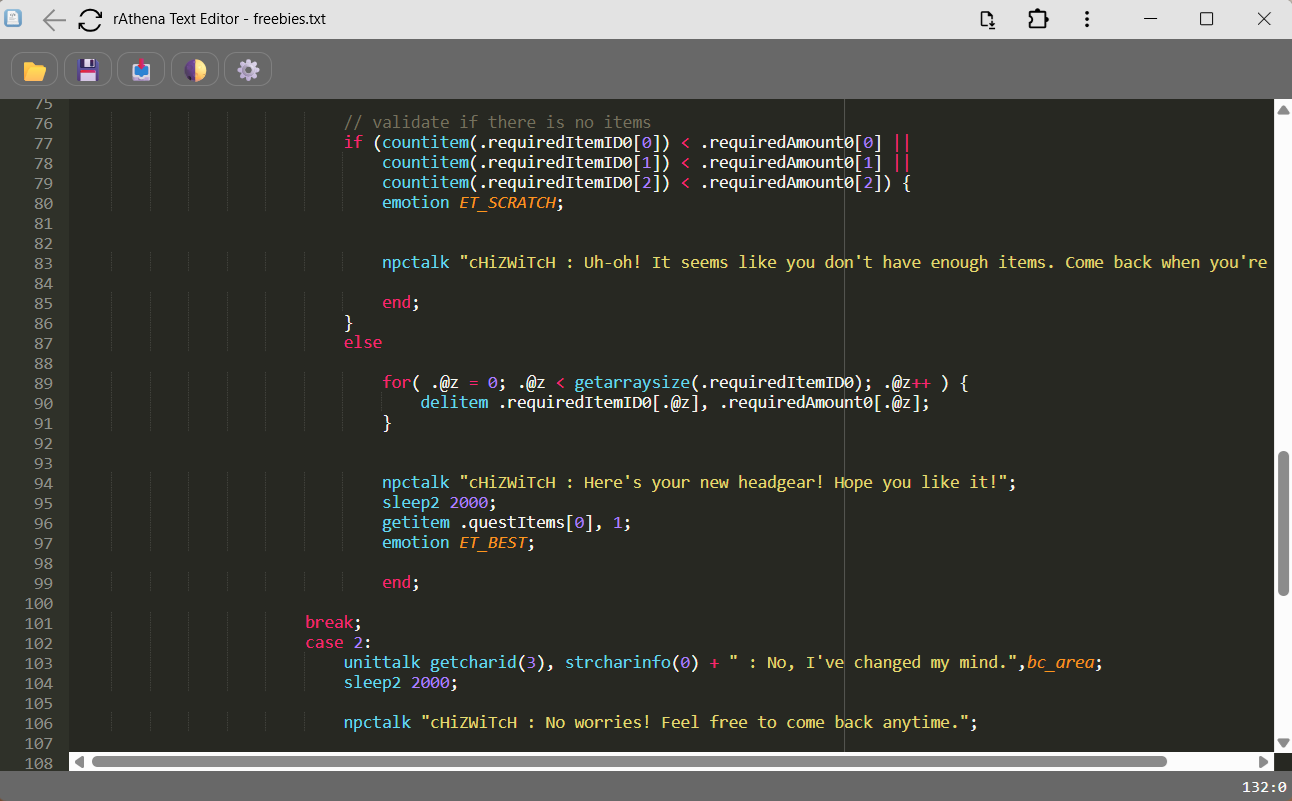
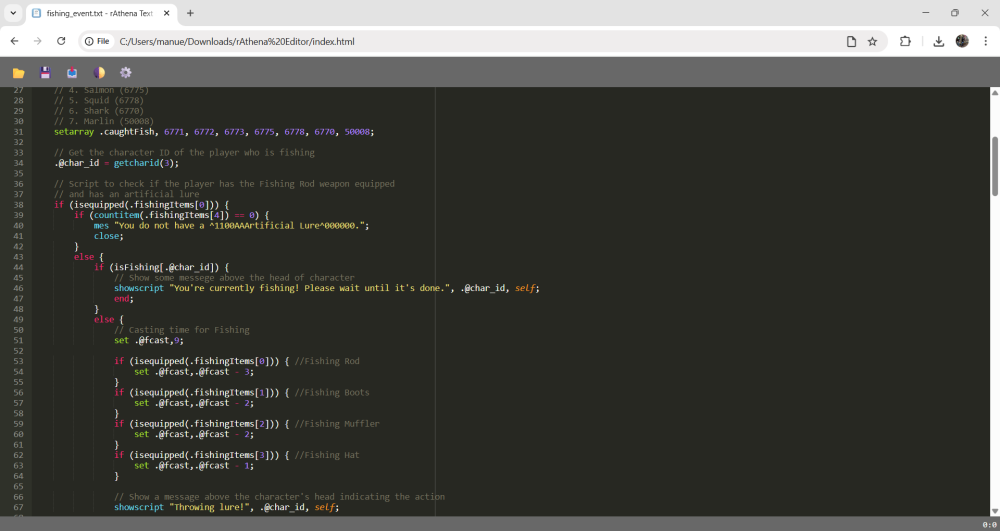
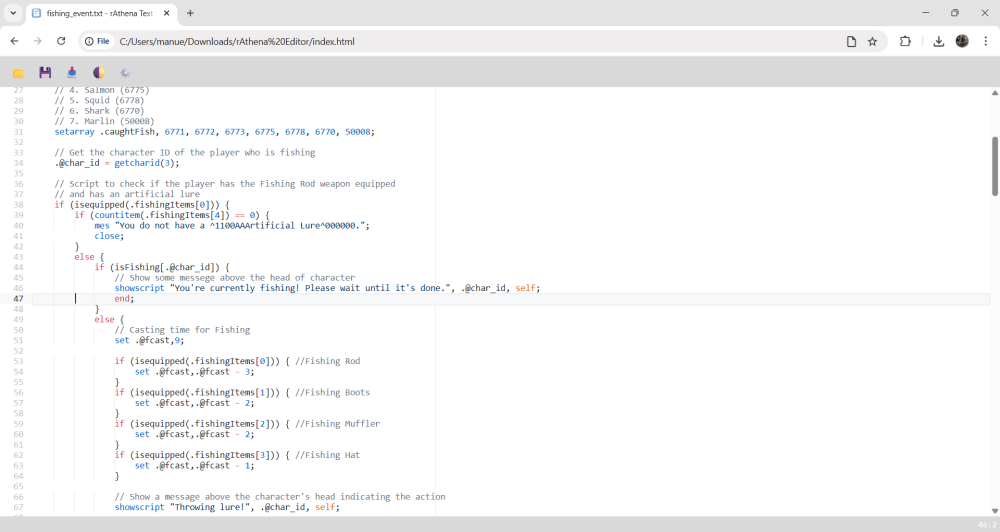
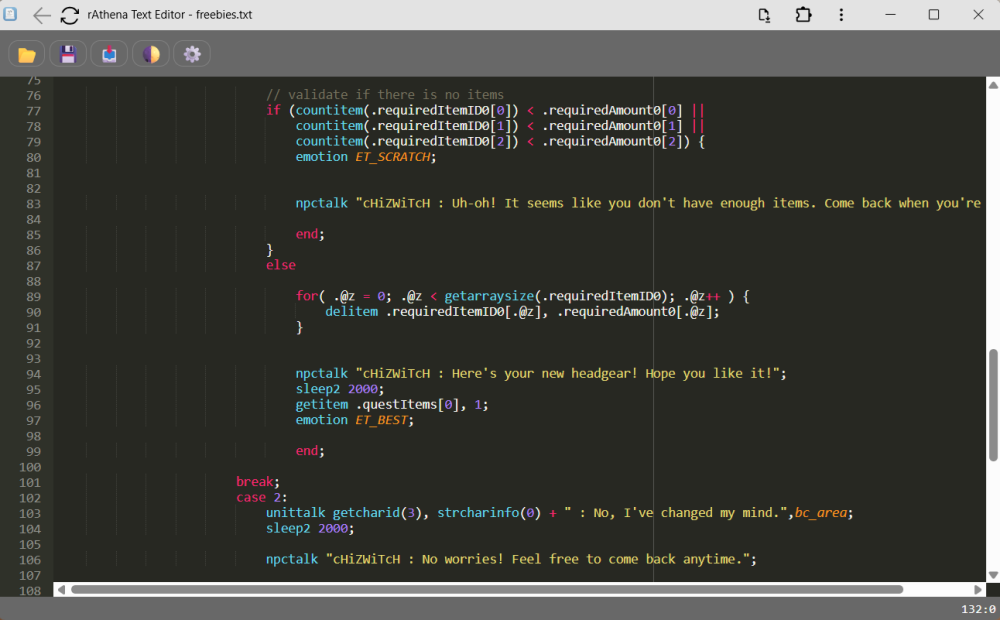
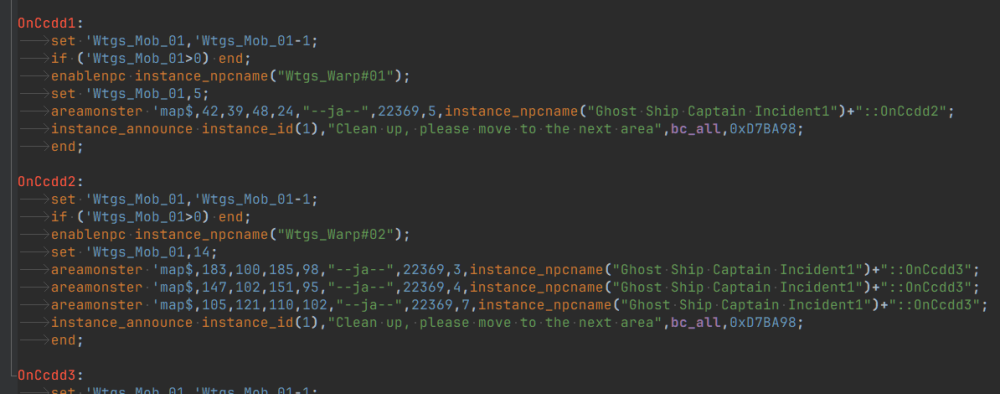
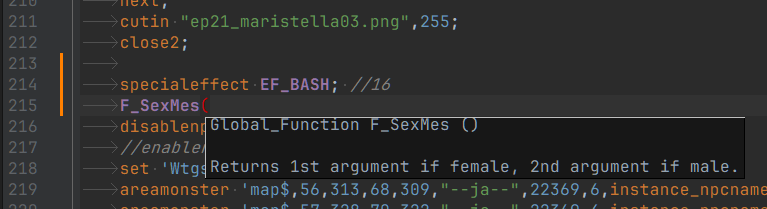
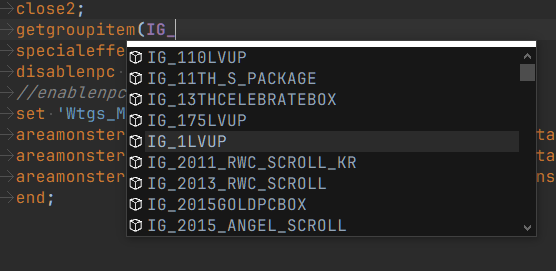
Hello guys, this is my rAthena Text Editor (Offline), a lightweight, browser-based tool I created for editing rAthena scripts (syntax highlight) without needing any installation or internet connection. Features: NOW, integrated with the Gemini Chatbot API for the Editor! Just ask it, and it will provide code for you directly in rAthena Text Editor. Simply provide your Gemini API key. We're using the latest and fastest Gemini model: "gemini-2.5-flash-preview-05-20". Edit your scripts directly in your browser Download your code as a .txt file after you're done Open existing .txt files to continue editing Toggle between Dark Mode and Light Mode for better readability Autocomplete suggestions Added a CTRL+S feature and SAVE button. The tab title now updates based on the file you open or created/saved as. Drag and drop .txt files to get the data of txt file Works on mobile but on Chrome and Edge only. Added some rathena scripting keywords to highlight. <-- this is most tiring xD Works 100% offline – no installation, no internet, no hassle This is a simple tool made for convenience, especially for fellow scripters who want to work quickly without setting up a full IDE. Feel free to check it out, use it, or suggest improvements. Thanks and happy scripting! Screenshots:
 7 points
 -
Hi, so, I've seen a lot of servers using auto attack system, I noticed a consistent issue: poor user experience and Walk AI is horrible. Both of which triggered me to develop a new one for herc which hopefully have more intuitive experience for players (and server owners ). I initially planned to release to herc only but due to high demand, I've ported for rA peeps. Please note that rA version is in beta and bugs are yet to be discovered. I can fix asap when reported. The features are inspired by Ragnarok Mobile: Eternal Love. Here are few features: Monster Selection: Automatically detect monsters based on the current map. Configurable Potion and Buff Item Selection: Server owners can customize which potions and buffs items players are allowed to use. Human-Like Movement AI: Intelligent and natural movement, unlike the aimless wandering typical of other systems. Can utilize warp portals of the same map (ignores those that warp to different map). Extensive Customization for Server Owners: Allows server administrators to configure settings to fit the unique needs of their server. Player-Friendly UI/UX: Hassle-free setup and adjustments. Player can choose to Warp to Savepoint / Logout / Do Nothing when Auto Combat ended. Offline Battle: Players can enable offline mode, allowing their character to continue Auto Combat even after the client is closed. Duration and end condition still applies Server Easy Configuration: Loot Config: Do not loot at all - good for server that has @autoloot or @alootid Default config - character walk up to the loot, and loot normally Auto loot to inventory - servers that DONT have @autoloot nor @alootid but want autoloot for Auto Combat Duration Config: 24/7 - Auto combat can be used all the time Per character - duration is based on character variable Account wide - duration is based on account variable Per Gepard Unique ID - not implemented, extra modules required. pls pm me if you want this Rental Item - duration is based on item expiration date. Exp and Drop Modifier: By Ratio - modifies overall exp and rates for player while on Auto Combat By Value - increase/decrease exp or drop rates (how Battle Manual, Bubble Gum, etc work) Not Supported by default (will count as extra module if required): 3rd Job Classes Very old revision of rAthena Gepard related variables and usage To do / To improve: Offensive Debuffs - do you guys need this? FAQS: Is this the same as Shakto's Autoattack or built from it? No, the system is based from goddameit's system. And codebase is ported from modern game engines that uses similar AI. If you guys are interested, please add me in discord: jasonch35. Teaser Videos:7 points
-
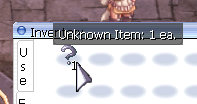
This will replace the apple sprite on missing items with a question mark based on the question mark emotion sprite. Also includes a bigger version of the question mark texture made by me. To setup this: 1: Replace the apple's '»ç°ú' ACT, SPR and BMP sprites in the data with the ones inside 'data.zip' from this post 2: Add and reference the new 'apple_' textures from 'data.zip' in your itemInfo (so that the apples use the pseudo-custom apple texture instead of also using the '?') Result: Apples still look like Apples. Unknown Items look like a question mark. Less confusion, easier to spot and report! Includes: - »ç°ú.act / spr / bmp - apple_.act / spr / bmp - Partial 'itemInfo' template data.zipunknown.lua
 7 points
 -
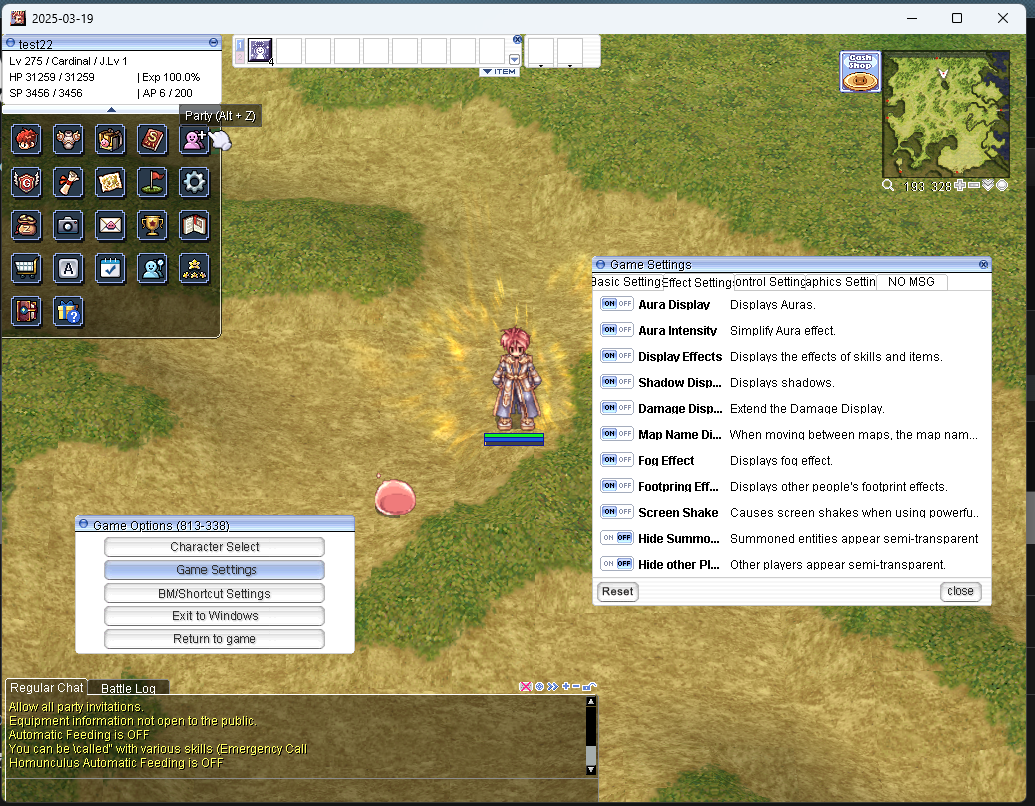
Block Party Mode from Fall Guys in Ragnarok Online I'm excited to show you this event, get ready to watch the video! Special thanks to Emistry for the tip .•°'°•.•°'°•.•°'°•.•°'°•.•°'°•.•°'°•.•°'°•.•°'°•.•°'°•.•°'°•.•°'°•.•°'°•.•°'°•.•°'°•.•°'°•.•°'°•.•°'°•.•°'°•.•°'°•.•°'°•.•°'°•.•°'°•.•°'°•.•°'°•.•°'°•.•°'°•.•°'°•. flgs01 In the video you will see 5 random launches and you will be able to estimate the complexity of the event. The video lags a little but without recording the video on the computer the client does not lag at all. The event involves dodging 42 waves of random moving walls for 1 minute 45 seconds. There are some consistent patterns, but mostly there is a random selection of 37 wall options. Three times the walls speed up from 200 to 125 speed points, and at the end there is a final narrow stage. When a wall touches a player, it starts pushing them out of the arena. Also you can't go through the walls, they block the way. Fallen players are thrown out of the event and the winners who remain on the platform share the reward. All 3D objects, textures, pictures and script are made by me. The map does not use rsm2 models, was made in Browedit 1 and tested on the 2018 client. I'd be happy to make a custom map for you, you can check out my portfolio at this link on rAthena: https://rathena.org/board/search/?q=.•°'°•.&type=forums_topic&nodes=38&author=w0wZukuBg&updated_after=any&sortby=newest&search_and_or=and
 7 points
 -
Updated to 1.8.7.7: Updated the encryption library for added security. This new version may not work in older clients (hard to test on my end, do let me know). This version requires Microsoft Visual C++ 2022 (x86): https://aka.ms/vs/17/release/vc_redist.x86.exe This is also required for your players. It is usually already installed for most, but some may not have it. The previous version of the encryption required VC++ 2010 (x86). A custom approach as mentioned in the above post (https://rathena.org/board/topic/77080-grf-grf-editor/?do=findComment&comment=432591) will always be more secure. If you do decide to rename cps.dll to something else, then you'll have to ensure your previous encryption cps.dll no longer exists. Otherwise, this will be pointless. You can leave the regular cps.dll from Gravity, that will not conflict.7 points
-
This map belongs to the game universe expansion series. Made with attention to detail and inspired by the original! .•°'°•.•°'°•.•°'°•.•°'°•.•°'°•.•°'°•.•°'°•.•°'°•.•°'°•.•°'°•.•°'°•.•°'°•.•°'°•.•°'°•.•°'°•.•°'°•.•°'°•.•°'°•.•°'°•.•°'°•.•°'°•.•°'°•.•°'°•.•°'°•.•°'°•.•°'°•.•°'°•. mosk_dun04 The map completely repeats all the patterns and elements of levels 1 and 2 of the Moscovia dungeon. I tried to use design elements from the official painted representation as much as possible. The map seamlessly connects with neighboring levels. Excellent for placing low-level monsters without a place to live: Woodie > and < Domovoi Woodie already has its own card with an image and effect, but Domovoi still hasn’t, so I’m glad to show you and suggest using this art for Domovoi card! (Without the use of AI. It is initially a pencil drawing on paper) Please download Domovoi_Card.BMP: Domovoi_Card.bmp P.S. In the Slavic religious tradition, Domovoy is the household spirit of a given kin. Please rate it if the map is good enough ~~ This map can be downloaded here https://rathena.org/board/files/file/4487-w0w_map_collection/


 6 points
 -
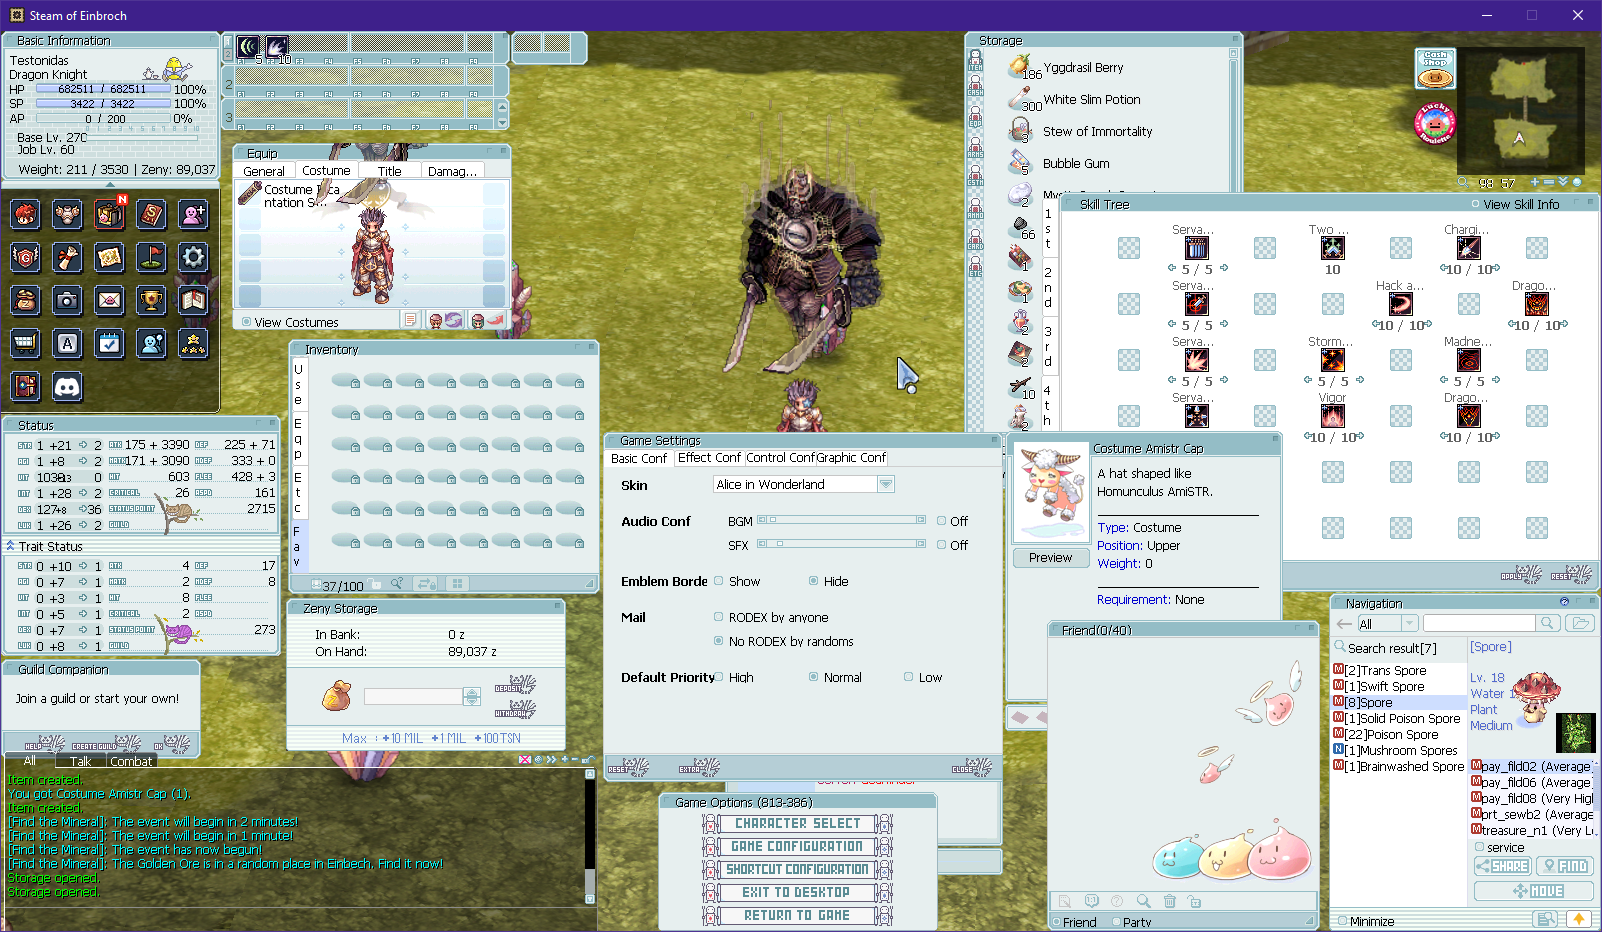
Alice in Wonderland skin (unknown author) fanmade update to fix existing textures and add missing ones including 4th job related UI and renewal menus. iRO's version of the skin (outdated, for reference): Notable new features: - 4th job Basic Information (3 remade bars) - Trait Status background - Locked favorite inventory texture - Fixed all* transparency errors and missing textures Can't fix: - Quest UI (default texture can be improved with this), Rodex, Attendance, Adventure Guide Costume Preview window (these can only be changed via data/GRF, currently broken via skin) - Tab textures (Use, Equip, Etc, Fav, Basic Settings, others): Hardcoded on modern clients (if you know of a patch to change this, let me know) 08/05/2025: Hotfixed Trait window text and updated item comparison Alice in Wonderland.zip
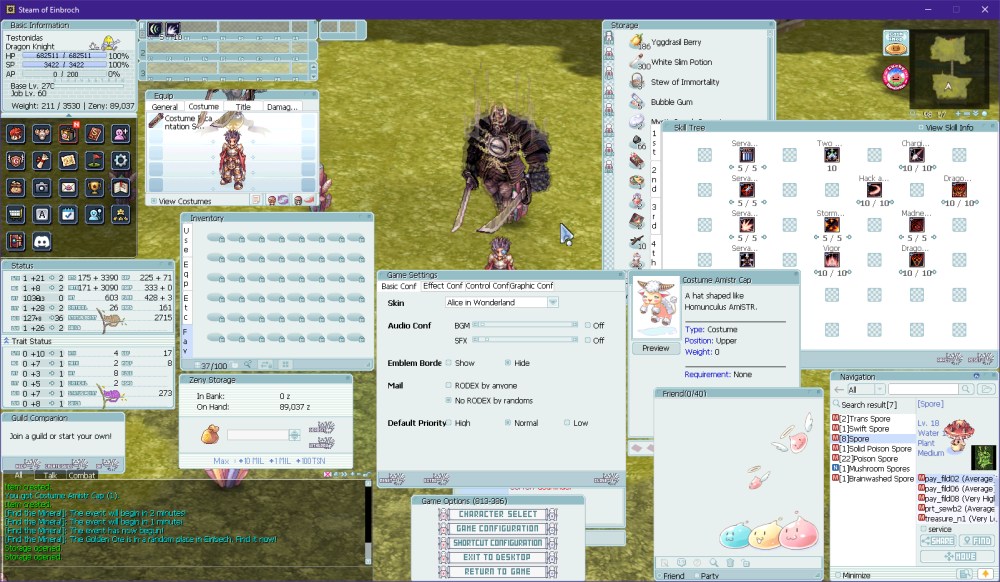
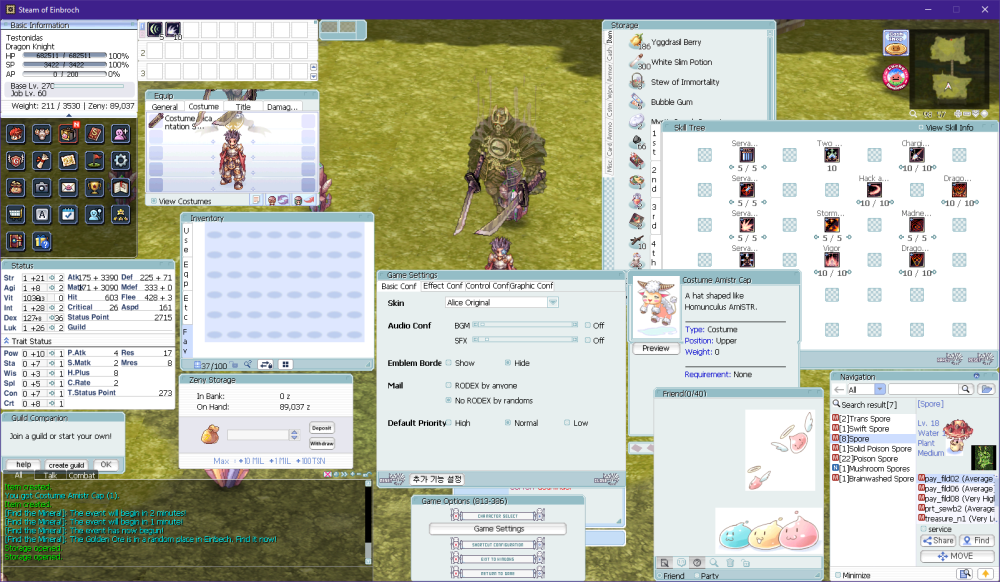 6 points
 -
View File Custom Cursor by Speedrun Don't worry. Be Happy s2s2s2 Submitter Speedrun Submitted 02/18/25 Category Sprites & Palettes Video https://youtu.be/Wa9zezkvnO8?si=wC-8vt6tNlH2tbKD Content Author Speedrun6 points
-
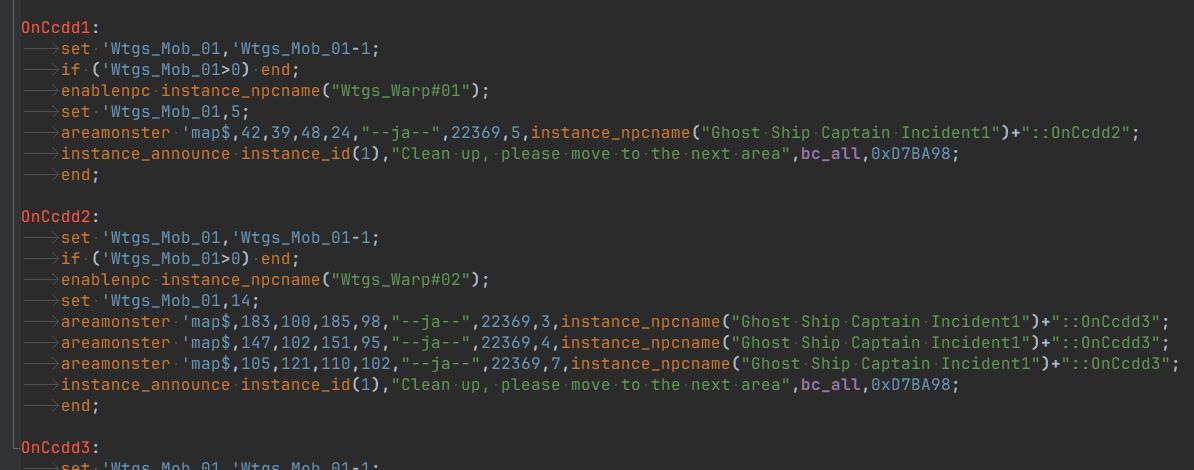
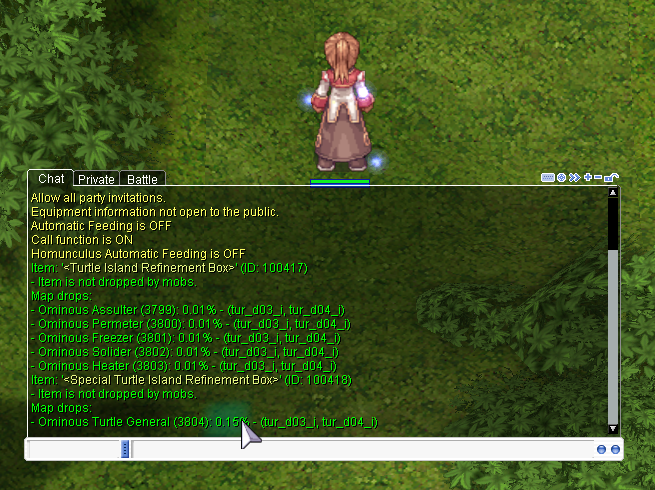
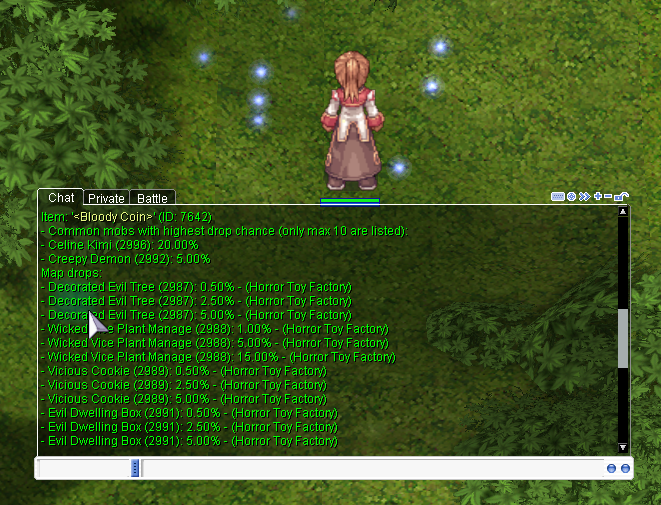
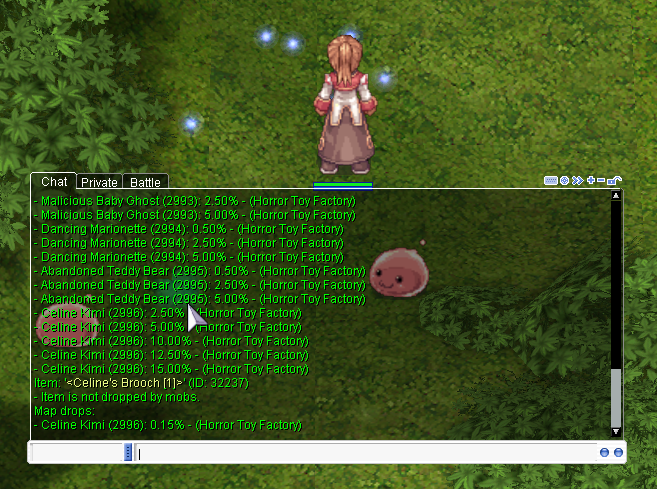
This is a request from Extend whodrops command to include map drops #8017 I'm only enhancing @whodrops command. I've included map_drops.yml in the command extern MapDropDatabase map_drop_db; extern InstanceDatabase instance_db; sprintf(atcmd_output, "Map drops:"); clif_displaymessage(fd, atcmd_output); std::map<std::pair<uint16, double>, std::vector<std::string>> map_drop_groups; bool found_map_drops = false; for (const auto& map_entry : map_drop_db) { std::shared_ptr<s_map_drops> mapdrops = map_entry.second; std::string map_name = map_mapid2mapname(map_entry.first); std::string display_name = map_name; if (map_name.find("@") != std::string::npos) { for (const auto& instance_entry : instance_db) { std::shared_ptr<s_instance_db> instance = instance_entry.second; if (strcmp(map_mapid2mapname(instance->enter.map), map_name.c_str()) == 0) { display_name = instance->name; break; } for (const auto& additional_map : instance->maplist) { if (strcmp(map_mapid2mapname(additional_map), map_name.c_str()) == 0) { display_name = instance->name; break; } } if (display_name != map_name) break; } } for (const auto& global_drop : mapdrops->globals) { if (global_drop.second->nameid == id->nameid) { double rate_percent = (global_drop.second->rate * 100.0) / 100000.0; std::pair<uint16, double> key = std::make_pair(0, rate_percent); map_drop_groups[key].push_back(display_name); found_map_drops = true; } } for (const auto& specific_entry : mapdrops->specific) { uint16 mob_id = specific_entry.first; for (const auto& drop : specific_entry.second) { if (drop.second->nameid == id->nameid) { double rate_percent = (drop.second->rate * 100.0) / 100000.0; std::pair<uint16, double> key = std::make_pair(mob_id, rate_percent); map_drop_groups[key].push_back(display_name); found_map_drops = true; } } } } if (!found_map_drops) { sprintf(atcmd_output, " - Item is not dropped by map-specific drops."); clif_displaymessage(fd, atcmd_output); } else { for (const auto& group : map_drop_groups) { uint16 mob_id = group.first.first; double rate = group.first.second; const std::vector<std::string>& maps = group.second; std::string map_list = ""; for (size_t i = 0; i < maps.size(); ++i) { if (i > 0) map_list += ", "; map_list += maps[i]; } if (mob_id == 0) { sprintf(atcmd_output, "- All monsters: %.2f%% - (%s)", rate, map_list.c_str()); } else { std::shared_ptr<s_mob_db> mob = mob_db.find(mob_id); if (mob) { sprintf(atcmd_output, "- %s (%d): %.2f%% - (%s)", mob->jname.c_str(), mob_id, rate, map_list.c_str()); } } clif_displaymessage(fd, atcmd_output); } } Screenshot: Extend whodrops command to include map drops (#8017).diff
 5 points
 -
Link: https://github.com/TBlazeWarriorT/TBlazeWarriorT-Utility-Scripts/tree/main/NP%2B%2B rAthena Autocomplete Screenshots:
 5 points
 -
Hi everyone, it's been a long time since I visited the this forum, I had thought about making a simpler control panel, I hope there are those here who want to contribute to the control panel that I made, if anyone is interested, please send a message directly. Here is the display, suggestions and input from all of you are very important for the development of this control panel.5 points
-
In this section we are going to go through the steps to getting you set up with your very own server computer to run Ragnarok Online (and other games). Requirements : A Computer with at least 128 GB of space & 4 GB of RAM (8GB Recommended). Latest rAthena (Download here) Your own pre-made private client. (Not covered in this topic) Stable Internet connection. Ubuntu Bootable drive. (This guide was made using UBUNTU 22.04 LTS) Download Rufus if you don't have a bootable drive made. (Not Portable) Some time to process all of this information. Replace 127.0.0.1 with your Public IPv4 address. Wired Internet connection Optional Requirements : A Domain name SSL Certificates 32 GB Free Space (we will format it) Windows 10 ISO (x64) PRE-GAME SETUP Very Minimum system requirements : Operating System : Windows 95 to 11 CPU : Pentium II, 400MHz (or better) Memory (RAM) : 128 MB (or higher) Hard Disk Space : 7.2 GB (after system installation) Monitor Resolution : 640 x 480 (or higher) Video Card : Any with 3D Acceleration & at least 16MB on-board RAM Sound Card : DirectSound (or compatible with 3D Sound Effect Support) Internet Connection : 56 kbps (or faster) DirectX : 8.1 (or newer) Recommended System specifications : Operating System : Windows 10 CPU : Intel® Core™ i3-1305U Processor - 10M Cache, up to 4.50 GHz (or better) Memory (RAM) : 2 GB (or higher) Hard Disk Space : 128 GB (after system installation) Monitor Resolution : 1080x 720 (or higher) Video Card : Any with 3D Acceleration & at least 16MB on-board RAM Sound Card : DirectSound (or compatible with 3D Sound Effect Support) Internet Connection : 10 MB/ps (or faster) DirectX : 8.1 (or newer) ...... Now that we got a few things to get us moving let's get started... Section 1 - Installation STEP ONE: Making the Bootable (Rufus booter) i1.1.0 Once you've downloaded Rufus (here if still need) you will run it. You will a simple window with a basic user interface. Simple click "Boot selection" and make sure "Disk or ISO image" is selected. We will continue by clicking "SELECT" and choosing the Ubuntu disk image we downloaded earlier. The "Device" will be the USB drive we're making bootable: The default "cluster size" we'll leave as default. The "Volume Label" is what we will name the USB (optional). With that we're ready to click "START"! Here is what mine looks like at the end of it. STEP TWO: Setting up the OS (Ubuntu 22.04) i1.2.0 Upon booting up, you'll want to select "Try or Install Ubuntu". After this it will load up the start up interface. Follow the linear steps to install your new operating system. (NOTE: Ubuntu Pro is optional) We will do a normal installation for our example. After selecting the driver and location, you will need to create your user account. This is very important as it will contain information used further into the guide. Make sure you can remember your credentials. Getting used to the system will be beneficial for you. For this guide, we will navigate to your app menu located by default in the bottom left corner. STEP THREE: Preparing the Server (Adding Utilities & Libraries) i1.3.0 Here we are going to download a few necessary packages and then we will be able to simply update them whenever we need to using our update and upgrade commands. First thing's first. Let's update & upgrade our system. Type inside your terminal the following command: sudo apt update && sudo apt upgrade -y This will update and upgrade the system. Next we will need to install some packaged to run the server. Still inside the terminal, we will enter the following commands: sudo apt update && sudo apt upgrade -y sudo apt install build-essential zlib1g-dev libpcre3-dev -y sudo apt install libmariadb-dev libmariadb-dev-compat -y sudo apt install software-properties-common apt-transport-https -y sudo add-apt-repository ppa:ondrej/php -y sudo apt-get install php phpmyadmin mysql-server mysql-client git make gcc libmysqlclient-dev zlib1g-dev libpcre3-dev -y sudo apt-get install g++ From here we are ready to download rAthena. (If you have it downloaded manually and have a custom directory already ready for it, go ahead and upload it now. If not, follow these next couple steps to download and set the directory.) In this example, we are going to make the rAthena folder inside our Documents folder so we can find it easily. In your terminal enter in the following command to change to your documents directory: (replace the name with your user.) cd /home/raguser/Server The terminal should now read something along the lines of: raguser@RagServer:~/Server$ This is where we will create the rAthena directory. We will pull the rAthena trunk to a custom location we will name using the terminal. To do this we must enter in: git clone https://github.com/rathena/rathena.git ~/Server/rAthena This will now clone the rAthena repository to the directory we specified as rAthena inside the Documents folder. Now we need to update the repo to make sure we have the latest files. Change directory using the cd command and entering in the new folder we just created: cd ~/Server/rAthena And pull the latest updates from the repository to ensure we have the correct version: git pull We now have a fully functional rAthena that is ready to be set up with our packet information, SQL database, our website, and more. In the next section we will cover how to set up the SQL server using PMA (phpmyadmin) right from the desktop browser! STEP FOUR: PMA & SQL (Setting up the database) i1.4.0 Now that we have a fresh rAthena installed, it's time to check MySQL to see if it installed correctly at the start. This may not be installed by default so follow the commands if you don't have it. To check the status of MySQL enter in your terminal the following command: service mysql status This will tell you what the status of your MySQL is. If this fails, install MySQL using: sudo apt-get install php phpmyadmin mysql-server mysql-client git make gcc You will want to select apache2 to install. Now we will have full access to MySQL! We need to start our first launch of SQL to get things started. To access SQL enter in: sudo mysql -u root -p This will access MySQL as the root user after you enter the password. (The password is the one you set up earlier when initially installing MySQL) Once authenticated and inside we can create a database and populate it with our server account. Creating the database is done using a few simple inputs. Enter in & modify the following details: CREATE DATABASE ragserver; CREATE USER 'raguser'@'localhost' IDENTIFIED BY 'StrongPassword'; CREATE USER 'raguser'@'%' IDENTIFIED BY 'StrongPassword'; GRANT ALL PRIVILEGES ON ragserver. * TO 'raguser'@'localhost' WITH GRANT OPTION; GRANT ALL PRIVILEGES ON * . * TO 'raguser'@'%' WITH GRANT OPTION; GRANT ALL PRIVILEGES ON * . * TO 'raguser'@'localhost' WITH GRANT OPTION; FLUSH PRIVILEGES; This created the database 'ragserver' and added 'raguser' to the database with full access. Next we need to make the logs and grant privileges to raguser on it. To do this enter in: CREATE DATABASE log; GRANT ALL ON log.* TO raguser@localhost; Now we can leave by entering in: quit This next part of this step is a little more complicated, but very simple to do. rAthena has a database in their files that we are going to pull the columns and rows from so we don't have to manually construct it ourselves piece by piece. Thankfully we can execute it all in two simple commands: mysql -u raguser -p ragserver < /home/raguser/Server/rAthena/sql-files/main.sql mysql -u raguser -p log < /home/raguser/Server/rAthena/sql-files/logs.sql And finally we are going to insert the first player account of our database. To do so we much enter & modify the following details. (This can always be changed later.) sudo mysql -u raguser -p Inside MySQL enter the following lines: INSERT INTO `ragserver`.`login` (`account_id`, `userid`, `user_pass`, `sex`, `email`, `group_id`, `state`, `unban_time`, `expiration_time`, `logincount`, `lastlogin`, `last_ip`, `birthdate`, `character_slots`, `pincode`, `pincode_change`, `vip_time`, `old_group`) VALUES ('20000000', 'admin', 'adminPassword', 'M', '[email protected]', '99', '0', '0', '0', '0', '2022-02-20 00:00:00', '', '2022-02-20', '9', '', '0', '0', '0'); (You can always change this later in the PMA window in the next steps.) It's time to check our SQL to make sure it looks as good as we think. To do this we are going to need to go to your favourite web browser and enter in the following website ( your website! ) http://127.0.0.1/phpmyadmin/ And we're in! Here inside PMA you will find all the accounts and database information. You can load item and mob databases directly to here and read from here instead of the traditional rAthena directory. There are many things to control inside here, especially if you're troubleshooting. (You also have an App icon in your menu.) STEP FOUR-2: PMA (Restricted Access) i1.4.1 Now that we've got PMA up and running we're going to want to restrict access to any users other than the host. To do this we will use our host address and only allow access to PMA using that address. Else, it will throw a forbidden page to the user. Start by editing the following file: sudo nano /etc/apache2/conf-available/phpmyadmin.conf And at the very bottom we will enter a new line for it to read: <Directory /usr/share/phpmyadmin> Order deny,allow Deny from all Allow from 111.222.33.444 </Directory> Be sure to change the address to your machine's IP address. Restart apache2 and you're ready to go! sudo systemctl restart apache2 STEP FIVE: Getting Green (Online) i1.5.0 Great! You're this far. Not much more to do from here. We're going to now navigate to your rAthena directory and edit the "char_athena.conf" script located in: /home/raguser/Server/rAthena/conf/char_athena.conf Open the file with any text editor, the default one will work. Inside this file, near the top, will be the lines that show your Name & Password. These are for your Login database we set up earlier for phpMyAdmin (PMA). Search for and change the values to a random name and password: // Server Communication username and password. userid: s1 passwd: p1 For this step it is recommended to use random password generator of some sort. This never needs to be entered in manually anywhere. You can copy-paste it everywhere in this guide. In this example we are changing it to: userid: 4Xy3NAKxnl3sk6Aj passwd: 79y59S3m8lWmMDMS Now the Server's username and password are set, we can change the "inter_athena.conf" file so that the server can read our database we set up. Navigate to: /home/raguser/Server/rAthena/conf/inter_athena.conf This is where we are going to change some access information so the server can read through our MySQL login we made earlier. Find and change: // MySQL Login server login_server_ip: 127.0.0.1 login_server_port: 3306 login_server_id: raguser login_server_pw: StrongPassword login_server_db: ragserver login_codepage: login_case_sensitive: yes ipban_db_ip: 127.0.0.1 ipban_db_port: 3306 ipban_db_id: raguser ipban_db_pw: StrongPassword ipban_db_db: ragserver ipban_codepage: // MySQL Character server char_server_ip: 127.0.0.1 char_server_port: 3306 char_server_id: raguser char_server_pw: StrongPassword char_server_db: ragserver // MySQL Map Server map_server_ip: 127.0.0.1 map_server_port: 3306 map_server_id: raguser map_server_pw: StrongPassword map_server_db: ragserver // MySQL Web Server web_server_ip: 127.0.0.1 web_server_port: 3306 web_server_id: raguser web_server_pw: StrongPassword web_server_db: ragserver // MySQL Log Database log_db_ip: 127.0.0.1 log_db_port: 3306 log_db_id: raguser log_db_pw: StrongPassword log_db_db: log log_codepage: log_login_db: loginlog The last location we need to navigate to are our map server configurations. For this we will navigate to: /home/raguser/Server/rAthena/conf/map_athena.conf Change the username and password for the server. It's the same as earlier: userid: 4Xy3NAKxnl3sk6Aj passwd: 79y59S3m8lWmMDMS Now add (or uncomment) the following lines: char_ip: 127.0.0.1 char_port: 6121 map_ip: 127.0.0.1 map_port: 5121 In this part of the step we will configure the client to match your packet version. First we need to ensure "make" is installed. Enter in: sudo apt install make We'll need to give execution access to the configure file. Enter inside the rAthena directory (cd /home/raguser/Server/rAthena) : sudo chmod a+x ./configure Then we are going to configure the server packet to match the client we downloaded. ./configure --enable-packetver=YYYYMMDD The YYYMMDD is your client version for your server.exe. Our example is going to be 20211103: ./configure --enable-packetver=20211103 Once you've done that we're all ready to get the green light. Let's test it out! Let's make a clean slate! Enter in the command while still inside your rAthena directory: make clean Now let's start constructing the server: make server After that's done loading, let's give execution access to the start files & servers: sudo chmod a+x login-server && sudo chmod a+x char-server && sudo chmod a+x map-server Time to start it up! (Make sure you're inside the rAthena directory) To start the server: sudo ./athena-start start To stop the server: sudo ./athena-start stop To restart the server: sudo ./athena-start restart To check the status: sudo ./athena-start status We're online! EXTRA STEPS (OPTIONAL) STEP SIX: DNS. (Mask your IP) i1.6.0 So many of you, like myself, would like to mask your IP address and the best way to do this is to use a domain name service to mask our IP. But does this mean you can't find my IP? No. This does not mean your IP is hidden completely. It just means people have an easier way of accessing your website on a more reliable and trusted connection. In this part of the guide we will go through the process of obtaining and setting up the DNS on your personal dedicated server. Let's start by understanding what DNS means. I'll be quick. What this is telling is, is that we can now take one thing (our IP) and mask it with another thing (domain name). That's short enough. Now some might be wondering... "Don't I need a website and a host for all of that?" The answer is Yes. We set that all up in the previous steps of this guide. You're all ready good to go. The first step is to navigate to your favourite (and trusted) domain name service provider. There are many out there that a simple google search can discover. In this example we are going to use Domain.com. It's affordable, takes Paypal, and has everything we need neatly displayed. Right in the middle of the landing page, you'll notice a search bar. It's large and ahrd to miss. This is where you will type your domain name you want to look for. Don't worry about attaching the endings onto it (.com, .net, etc) as it will give you a list of all the available ones. Purchasing a domain will create an account for you using the details entered in during the billing process. The basic domain I purchased costs slightly more because it's a ".net", which holds a premium standard these days. You don't need to worry about protection and SSL either. We will be managing that all from the server computer as well. For free. Once you find a domain name that fits what you want to achieve and your account was successfully created, it's time to navigate to your email and verify the website. This process is necessary to get the site online. We are now authenticated and ready to move onto the next part of this step. Now that we have a domain, what do we do now? How do we ge this domain name we now own onto mask your personal address? Keep following along. We're almost there! To confirm we have everything, in case there was an issue before, we're going run, in the terminal, the command: sudo apt update && sudo apt upgrade -y && sudo apt install apache2 -y Next we'll need a couple library files for the server to read the data. The following command will give us those libraries: sudo apt install php libapache2-mod-php php-mysql -y Now that we made some changes, it's always good to verify things are still where we left them. Let's verify PHP again to make sure it's the same version as before (8.2.2) php -v Earlier we made a web server. Now it is time to configure it! Enter in and customise the name: sudo mkdir /var/www/customName sudo chown -R raguser /var/www/customName This creates a folder and gives us full ownership of it inside the webserver directory. The custom name is for security measures. This is where we will upload our website and all the web files later. First we need to make a configuration file to run it properly. To do that we must enter in and adjust the name of: sudo nano /etc/apache2/sites-available/customName.conf An empty screen will appear. This is what we want. Now we can populate it with all the information necessary to maintain the web server. I recommend pasting this into a notepad and changing the values as needed. You will need your web site name, user name,custom folder name we made moments ago and your public IP address (v4). Change the values and paste it in to the blank page: <VirtualHost *:80> ServerName localhost ServerAlias kingsman-gaming.net ServerAdmin [email protected] DocumentRoot /var/www/customName ErrorLog ${APACHE_LOG_DIR}/error.log CustomLog ${APACHE_LOG_DIR}/access.log combined </VirtualHost> Now the website is almost ready. We've given it instructions where to go. All we have to do now is verify it and enable scripts for the site to operate. Let's start by reloading our web server. sudo systemctl reload apache2 You may have to reload the apache2 service. If this appears simply run the command again: sudo systemctl reload apache2 This will appear a couple times through this part. Next we need to enable the default script. To do this we will run a command called "a2dissite". What this does is uses system links to run the website and disaables them when needed. Once enabled, we can set and forget even after reboots. sudo a2dissite 000-default Now we're going to do the same thing, except for the config file we just created above. The name must be exact: sudo a2ensite customName Let's test the config to see if it throws any errors: sudo apache2ctl configtest It looks like we got an error! It reads: If you encounter this, it's a simple fix! Enter the command to edit the following file: sudo nano /etc/apache2/apache2.conf Now we need to go to the bottom of the page and insert (at the very bottom) : ServerName localhost And now we want to reload the apache2 service one more time: sudo systemctl reload apache2 Finally, we must route our public IP to the domain name. This is done in that DNS menu on our domain host website. Let's navigate back to Domain.com and set this up. Here we want to edit (or add if it's not here) the "A record" that points to the host configured IP address. We will simply click edit to change the existing record and have it reflect (and edit to match your public IP) the values below: A @ 127.0.1.1 And to prepare things for the next steps, we are going to navigate to back to our basic domain settings and make sure the settings reflect the following: (Auto-renew optional) This is telling us all the options are disabled. We won't be needing any of them supplied by the host. That's it for this part! Our web server is ready for a website to be added and for the DNS to be redirected in our network settings. In the next step we will go through securing the website with a security certificate. It's free and easy to set up. STEP SEVEN: Getting SSL Certified (HTTPS) i1.7.0 In this step we're going to get that SSL set up. Currently when we access our website it says HTTP. We are going to make it say HTTPS. Start by registering to SSL For Web. It's free and easy to set up. After registering, we're going to go right to the top right and click the create button. You will be given two options. DNS & HTTP. We are going to select DNS to continue. You'll also need to enter your domain name to continue. This is where it gets a little more complicated, so follow closly. You will be given two codes to enter into your DNS register. To find this, you will navigate to where you purchased the domain name and modify the existing DNS service to include these values. Simple, right? In our example we used Domain.com. So we will continue using them. Log in and navigate to your domain. On the left side panel you will have some options. Select the one that says DNS & Nameservers. You will get a window like this: We are going to click DNS Records. This is where we will enter those values SSL generated for us. Go back to the SSL page and copy the first value on the left. This is a challenge domain for your domain name. Go back to your DNS records and enter in a new record. The record type we want is TXT. Paste inside the "Name" box the value we just copied. Go back to SSL and copy the value on the left. This is going to be pasted in the "Content" box. Set the value to 1/2 hour and hit confirm. Finally go back and verify that it worked. (It can take up to 30 minutes to fully work, but is usually quicker dependingon the service.) There is a status checker so you don't need to submit every time. Use the scroll bar to go to the right and check the status. Now that we have the green light and a security certificate is added to the domain, we can download the certificates and add them to the server. There are two main types of certificate for use and a bundled version. All we need in this example is the Certificate and Private Key. Now that we have them, how do we add them? Leave this page open for now, as we will need it shortly, and navigate back to your terminal. We're going to enter a few commands to get things set up on our dedicate server. Enter in to edit your certificate file: (rename to your website) sudo nano /etc/ssl/certs/kingsman-gaming.net.crt Then paste your certificate value that was given to you. We're looking for the Certificate. It now looks good to save! (CTRL-X, then enter Y to confirm) Now we must give it the key to the certificate. Enter in and edit the file: sudo nano /etc/ssl/private/kingsman-gaming.net.key We want to populate it with the key that SSLForWeb gave us. Go ahead and paste that in, then save the file. The last certificate we're going to add is the CA bundle. This will be used in the later steps, but let's add it now since we're here. Create a new file and give it adifferent name. In this example we just added ca. to it: sudo nano /etc/ssl/certs/kingsman-gaming.net.ca.crt Certificates are added and ready to go. Here we will go back to our server config file we made earlier and set it up for SSL encryption. Open: sudo nano /etc/apache2/sites-available/customName.conf We want to change the values to reflect: <VirtualHost *:443> SSLEngine on SSLCertificateKeyFile /etc/ssl/private/kingsman-gaming.net.key SSLCertificateFile /etc/ssl/certs/kingsman-gaming.net.crt ServerName localhost ServerAlias kingsman-gaming.net ServerAdmin [email protected] DocumentRoot /var/www/customName ErrorLog ${APACHE_LOG_DIR}/kingsman-gaming.net_error.log CustomLog ${APACHE_LOG_DIR}/kingsman-gaming.net_access.log combined <Directory /var/www/customName> Options FollowSymlinks AllowOverride All Require all granted </Directory> </VirtualHost> Then enable SSL to run scripts: sudo a2enmod ssl Let's break that down.... <VirtualHost *:80> is set to a standard, non-secured, port. We updated this to a secure port to allow the security certificates through. We added three lines to the top. These lines will be read first and indicate we are turning the SSL Engine ON, setting the Certificate Key file to our private ssl folder, and setting the Standard Certificate file to our certificate folder. And at the bottom we added some additional options for some System Links, Overrides, and Permission granting. Now the server can read all the security changes we made! Once we save that file we are going to enable the SSL scripts in the server. This was done simply with one command. With all this done, we have only one more step left to complete before we can fully set up SSL on the server. We need to allow our SSL access through the firewall. We can do this very easily with the following commands: sudo ufw allow 443 Your firewall should now appear with these ports for all of default Ragnarok services: (Check out open allowed services with sudo ufw status) 443 ALLOW Anywhere 5121 ALLOW Anywhere 6121 ALLOW Anywhere 6900 ALLOW Anywhere 80 ALLOW Anywhere 22 ALLOW Anywhere If you don't ahve an active firewall you can enable it with: sudo ufw enable With all this added, we are now going to check the syntax for the apache2 configuration to make sure it's still "OK" and restart the apache2 service: sudo apache2ctl -t sudo systemctl restart apache2 Common issue after this step: This is caused because the SSL scripts have to be passed through the system still. To do this we can enter in two commands to set this up: sudo a2enmod ssl sudo systemctl restart apache2 That's it for this step! We now have an SSL connection for our webserver. In the next section we will go through various methods of setting up the File Transfer Protocol (FTP) for our webserver. This is great for setting up files from your server for others to download. Users can download files directly from the web server. STEP EIGHT: File Trasnfer Protocol (FTP) i1.8.0 We're going to enable this on our server to allow users to download various files we set up in the download folder. Let's start by making that folder. Change directory to your web directory. We modified it earlier above: cd /var/www/kingsman/ Now create a directory: mkdir download We now have a folder where we will be adding out downloadable files. Let's get the libraries ready for the web server. Enter in: sudo apt-get update && sudo apt-get install openssh-server It will be a linear installation. Once it completes we can check the status of it: sudo systemctl status ssh If it failed to start load it again with: sudo systemctl start ssh Once we set the configs we're all ready to go. Edit the file: sudo nano /etc/ssh/sshd_config These settings will be added at the very bottom of this document. Scroll to the bottom, add & edit the following values: Match User raguser ForceCommand internal-sftp PasswordAuthentication yes ChrootDirectory /var/www/kingsman/download PermitTunnel no AllowAgentForwarding no AllowTcpForwarding no X11Forwarding no Save the document and exit. (CTRL + X then Y & Enter) Restart SSH with: sudo systemctl restart ssh We now have a fully functional FTP server attached to the web server. Now to get links for your files, you'll need to understand how the folders work in the web server. This part is completely ignored in the link you will generate: /var/www/kingsman/ Your link will be the default web address, so let's start with that: https://kingsman-gaming.net/ That's the start. Now we need to add our download folder. We know the default location is /var/www/kingsman/ directory, so this means kingsman-gaming.net is that location. To add the downloads folder we simply just separate it with a " / " and add the download directoy, exactly how it's spelt,in the file hierarchy: So /var/www/kingsman/download becomes: https://kingsman-gaming.net/download/ You can add as many directories as you can fit into the web address search bar and break off from the download folder to download other parts of the site. You'll add the file name to the link for which ever file you want to download. For example, I want to download VLRO.zip: https://kingsman-gaming.net/download/vlro.zip Now we have a place players can download our server from. Simply upload your files inside this download folder and send the link to your players to download. In the next step we will go through how to create a launchable version of Windows 10 wil your Ragnarok Online server set up on it. We will also go through various tools that will be useful to development. STEP NINE: Emulating Windows 10, Ragnarok & RO Tools (QEMU/KVM) i1.9.0 In this step we will be going through how to build and run a virtual machine based on Windows 10 operating system with our Ragnarok Online server installed onto it. Make sure to download Windows 10 ISO while we work. This will save some time later. You may also want to consider moving it to a new directory inside your Documents folder. We'll be doing this for our example moving forward, as well. Start by check that your system is Virtualization Ready. Enter in the terminal: egrep -c '(vmx|svm)' /proc/cpuinfo If your system is Virtualization Ready it will appear with a number greater than 0. My number came out as 16, so we're good to check if the system is supported. To do this enter in: kvm-ok If the system does not have the checker, you can enter this command to enable it: sudo apt install cpu-checker -y Now that we found out we can support virtualization it's time to install it, along with the librarfies neeeded to run it. Enter the following command to run all of this in one go: sudo apt install qemu-kvm virt-manager virtinst libvirt-clients bridge-utils libvirt-daemon-system -y We're going to run two more commands to make sure we have the virtualization daemon. Enter in: sudo systemctl enable --now libvirtd sudo systemctl start libvirtd Now check the status of to make sure it's online and everything is green:\ sudo systemctl status libvirtd Everything looks good so far! Before we can run the program we need to give our user specific permissions to access the daemon. To do this we will enter in: sudo usermod -aG kvm $USER sudo usermod -aG libvirt $USER We are now ready to launch! You can start the application in the application menu using the icon it supplies. (It can take a minute to populate) If you can't find it, or it hasn't appeared yet, you can manually run it with the command: sudo virt-manager You should now have a window that looks like this: If you experience an error trying to connect after finishing up to this part of the step and it reads something along the lines of: Unable to connect to libvirt qemu:///system.Verify that the 'libvirtd' daemon is running. Error: Failed to connect socket to '/var/run/libvirt/libvirt-sock': Permission denied It is recommended to restart your computer and try connecting. Sometimes after the installation it won't have all permissions set properly. A full restart of the system can resolve this. Now that we are set up, it's time to create a virtual machine! Go ahead and click the New Machine button at the top left. We're going to select Local install media from the list and select the ISO file we downloaded at the start of this step. (If you didn't donwload it before, now is a good time to. While you're waiting you can reflect over the steps you've went through to get this far. It is good to understand the system and how you got here.) We'll want to click "Browse..." and a new window will appear. Here we have our default filesystem directory. This is a default directory that is given with the application. We don't have files in this folder so we won't focus on this. At the bottom left, there's green " + ". Click it. Now we are presented with options for renaming the pool, changing the type of file it is, and setting the target path for where to read and write data. We are only going to focus on two of these options in this step. Name & Target Path. We'll give it the name "DiskImages", though you can name it anything you want, and we want to select the path to be the folder we created inside our Documents which holds the Windows 10 ISO. We now have a link to this folder inside the KVM. If we select it, we can now see the Windows 10 64 bit ISO is there. We will click it and Choose Volume. The applicatiion will likely guess that it is Windows 11, so we need to uncheck that box and change it from an 11 to a 10. Change to Press Forward and agree to the promt. You can click the Don't Ask button for future changes. Now we must set the amount of RAM and Cores to use. We can change this any time after shutting the virtual machine down. For now, we will use the default 8G and 4 Cores. (Recommend: 3G RAM or more, 2 cores or more for this setup) The next part of this step is to create the virtuale machine's hard drive. To do this we need to let the VMM do a rather long process to the 32 GB of space that will add a system file to a size we pre-determine, and it will allow us to boot Windows 10 off that space and dedicate it a hard drive to store files. It sounds complicated, but it's really simple to do. It just takes some time if you have larger spaces to work with. Moving forward, we much select "Enable Storage for this virtual machine" and we will then go to the bottom and select "Create a dusk image for the virtual machine" and click "Forward". If we get asked to grant search permissions for the path. Click YES. Now we are ready to create the Windows 10 disk space. Double check the information is correct, mainly the Windows 10 operating system doesn't say Windows 11. It will launch automatically for the first time on Finish. You will now be able to set up your emulated Windows 10. (If you encounter...) ERROR: If you experience an error, roughly like the one I created above, it's possible that the QEMU user does not have access to this directory still. You can manuall add this access very easily. Enter in the command to check the permissions, first: The output should look close to this: This is showing us that our QEMU is not here on the list. Let's add it: sudo setfacl -m u:libvirt-qemu:rx /home/raguser/RagDisk Now if we run the command to check it again: sudo getfacl -e /home/raguser/RagDisk We can see that the user is added successfully. Finally, Restart the Virtualization library and you're ready to continue on to the next parts of this step: sudo systemctl restart libvirtd You should be ready to launch now! We've got Windows 10 running and Updated as much as it can get. We're going to install a few necessary applications to run our programs and the game itself. Download the following files from the following (trusted) sources: -Microsoft Direct X Runtime -Visual C++ Redistributable for Visual Studio 2015 -.NET 6.0 or 7.0 -(Optional) RO Tools List With everything installed, and the system fully rebooted for good measure, we're ready to get started with the game installation. STEP TEN: Setting up rAthena Source (Game Files) i1.10.0 Now it's time to get rAthena set up so we can get players connecting to the server. First thing's first! Organise and familiarise yourself with the files. This is where you will be spending lots of your time. This will be an ongoing process once you complete these steps. In this guide, it will give you some organization pointers. Take your time with this and get used to how you lay things out. You will navigate back and forth a lot during a maintenance. If you have not already downloaded rAthena we will go ahead and do that now. The following commands will change your directory to the root for your profile, next it will make a "Server" folder for you to operate in, and finally it will download the rAthena trunk to that directory. Finally we will enter that directory to process the remaining steps. cd sudo mkdir Server git clone https://github.com/rathena/rathena.git ~/Server/rAthena cd ~/Server/rAthena To update rAthena to the latest verison we need to process a git-pull while inside the rAthena diretory. git pull Now we've got rAthena's latest trunk and all the updates! It is important to get a good, or at least an okay, understanding of how rAthena has all their files organized. Things are in a specific place and named specific things for a reason. If you move or rename a file or folder it will cause you many problems. Source files are where you will make changes that will affect the entire game and the way it functions. Be very careful when editing these files and stay within the lines of the cave if you don't know what you're doing. Config files are where you will make the majority of changes to your server. This is where things like Drop rates, EXP rates, and all your Server settings will be located. In the continued steps below, we will go through how to set up the remainder of the server. It's time to create a database for all the player accounts to be saved to. To get started be sure you've followed the previous steps for setting up PMA (phpMyAdmin). Now that we have access to MySQL we can start by entering in some commands to give us access to the databases involved. Open the terminal and enter in the following: (Note: You set the username and password earlier) CREATE DATABASE ragserver; CREATE USER 'raguser'@'localhost' IDENTIFIED BY 'StrongPassword'; CREATE USER 'raguser'@'%' IDENTIFIED BY 'StrongPassword'; GRANT ALL PRIVILEGES ON ragserver. * TO 'raguser'@'localhost' WITH GRANT OPTION; GRANT ALL PRIVILEGES ON * . * TO 'raguser'@'%' WITH GRANT OPTION; GRANT ALL PRIVILEGES ON * . * TO 'raguser'@'localhost' WITH GRANT OPTION; This created the database 'ragserver' and added 'raguser' to the database with full access. Next we need to make the logs and grant privileges to raguser on it. Enter in: CREATE DATABASE log; GRANT ALL ON log.* TO raguser@localhost; Now we can leave by entering in: quit Majoirty of the database is set up now! This next step is a little more complicated, but very simple to do. rAthena has a database in the server files that we are going to pull the columns and rows from so we don't have to manually construct it ourselves piece by piece. Thankfully we can execute it all in two simple commands: mysql -u raguser -p ragserver < /home/raguser/Server/rAthena/sql-files/main.sql mysql -u raguser -p log < /home/raguserServer//rAthena/sql-files/logs.sql Now we have an almost-fully functional database for the server. It's time to create the first account! Back to the terminal, we are going to enter and log in to MySQL again: sudo mysql In MySQL enter in: (Before submitting this to the database, we are going to change the Login Name, User Name, Password, & Email) INSERT INTO `ragserver `.`login` (`account_id`, `userid`, `user_pass`, `sex`, `email`, `group_id`, `state`, `unban_time`, `expiration_time`, `logincount`, `lastlogin`, `last_ip`, `birthdate`, `character_slots`, `pincode`, `pincode_change`, `vip_time`, `old_group`) VALUES ('20000000', 'admin', 'adminPassword', 'M', '[email protected]', '99', '0', '0', '0', '0', '2022-02-20 00:00:00', '', '2022-02-20', '9', '', '0', '0', '0'); Great! You're this far. Not much more to do from here. Navigate in WinSCP/FileZilla (or other FTP access app) and go to your directory: /home/raguser/Server/rAthena/conf/char_athena.conf Inside this, near the top, will be the lines that show your Name and Password. These are for your Login database we set up earlier for PMA. If you haven't changed these yet, do so now. I recommend a random generator for the values. A simple Google search for this will help. Search for and change the values to a random name and password: // Server Communication username and password. userid: s1 passwd: p1 These values must reflect what is inside the login database or the server won't be able to connect. Do not share these values. With anyone. Now the Server's username and password are set, we can navigate to: /home/raguser/Server/rAthena/conf/inter_athena.conf This is where we are going to change some access information so the server can read through our MySQL login we made earlier.Find and change: // MySQL Login server login_server_ip: 127.0.0.1 login_server_port: 3306 login_server_id: raguser login_server_pw: StrongPassword login_server_db: ragserver login_codepage: login_case_sensitive: yes ipban_db_ip: 127.0.0.1 ipban_db_port: 3306 ipban_db_id: raguser ipban_db_pw: StrongPassword ipban_db_db: ragserver ipban_codepage: // MySQL Character server char_server_ip: 127.0.0.1 char_server_port: 3306 char_server_id: raguser char_server_pw: StrongPassword char_server_db: ragserver // MySQL Map Server map_server_ip: 127.0.0.1 map_server_port: 3306 map_server_id: raguser map_server_pw: StrongPassword map_server_db: ragserver // MySQL Web Server web_server_ip: 127.0.0.1 web_server_port: 3306 web_server_id: raguser web_server_pw: StrongPassword web_server_db: ragserver // MySQL Log Database log_db_ip: 127.0.0.1 log_db_port: 3306 log_db_id: raguser log_db_pw: StrongPassword log_db_db: log log_codepage: log_login_db: loginlog The last locations we need to navigate to are our map server & subnet configurations. Navigate to: /home/raguser/Server/rAthena/conf/map_athena.conf Change the username and password for the server. It's the same as earlier: userid: 4Xy3NAKxnl3sk6Aj passwd: 79y59S3m8lWmMDMS Now add (or uncomment) the following lines: char_ip: 127.0.0.1 char_port: 6121 map_ip: 127.0.0.1 map_port: 5121 And finally adjust the subnet to match your server's IP address. This step can be a little tricky if you don't understand how a subnet works. So simply follow below and replace x.x.x.x with your server's IP address: subnet: 255.0.0.0:127.0.0.1:127.0.0.1 subnet: 255.0.0.0:x.x.x.x:127.0.0.1 Details about Subnet and why we want to set these values exactly as above: Subnet Mask (255.0.0.0): The subnet mask defines the range of IP addresses that are considered part of the same network. In this case, 255.0.0.0 allows for any IP addresses within the range 127.0.0.1 to 127.255.255.255. This is a standard loopback range used for local network testing and communication between processes on the same machine. IP Address (IPv4 Address): This is the actual IP address of your server or the machine running the rAthena server. It is the address where the rAthena server listens for incoming connections from clients. Setting this value ensures that the server only accepts connections from the specified IP address. Loopback Address (127.0.0.1): The loopback address is a special IP address that refers to the local machine. In the context of rAthena, it allows the server and any local processes to communicate with each other without going through the external network. Purpose of this Configuration: Security: By specifying a subnet, you're telling rAthena which IP ranges it should consider valid for connections. This can help to prevent unauthorized access to your server from IP addresses outside of this range. Local Development and Testing: The loopback address (127.0.0.1) allows the server to recognize and accept connections from the same machine. This is useful when you're running the client and server on the same machine for testing or development purposes. Network Segmentation: The subnet mask of 255.0.0.0 limits the accepted connections to a specific network range. If you set it to 255.255.255.0, for example, only IP addresses in a narrower range would be accepted. The chosen mask ensures that your setup is flexible enough to accept a broad range of connections, depending on your server's configuration. Why Use 255.0.0.0 Specifically? Simplicity: Using 255.0.0.0 ensures that any IP address within the local loopback range (127.x.x.x) is accepted. This is a common and straightforward setting for local development. Compatibility: Many default rAthena setups and guides use this specific subnet configuration because it covers all the IP addresses typically used by local and internal server processes, making it suitable for a wide range of setups without needing to adjust the configuration for specific IP ranges. Excellent! You're near the end. It's time to configure the client to your packet version. Let's give execution access to the configure file: sudo chmod a+x ./configure Then we are going to configure the server: ./configure --enable-packetver=YYYYMMDD The YYYMMDD is your client version for your server.exe. An example of how this looks is: ./configure --enable-packetver=20211103 Congratulations on making it to the end of setting up your server. It's time to start it up now! Let's make a clean slate! Enter in: make clean Then let's start constructing that server. Enter in: make server After that's done loading, let's give execution access to the start files & servers: sudo chmod a+x login-server && sudo chmod a+x char-server && sudo chmod a+x map-server Time to start it up! (Make sure you're inside the rAthena directory) To start the server: ./athena-start start To stop the server: ./athena-start stop To restart the server: ./athena-start restart To check the status: ./athena-start status That's it for this step. If you followed up to here you'll have a all server files downloaded and ready on the server side with a database ready to accept logs and registrations. In this next step we will go through the systemd.service files to get your server running automatically when the system restart or if it crashes. STEP ELEVEN: Setting up UFW (Firewall) i1.11.0 When setting up the firewall, we want to make sure we know exactly what ports we are adding in before we add them. This will save us from having to deny thema ccess later. Let's gather the ports we know of for all the services we've set up thus far. We know of our Web ports, which should be automatically added when installed, but sometimes this isn't the case. We've also got the FTP ports for the download servers, if we want to use them. There's also the PMA & SSH ports. Are you writing this down? sudo ufw allow 443 sudo ufw allow 80 sudo ufw allow 20/tcp sudo ufw allow 21 sudo ufw allow 22 sudo ufw allow 3306 sudo ufw allow 6900 sudo ufw allow 5121 sudo ufw allow 6121 sudo ufw allow 8888 Sometimes you might still get some issues with the firewall blocking you. You may be required to let the firewall know what type of conneciton to allow, either TCP or UDP; but what is TCP/UDP you might ask? Very simply put... TCP means Transmission Control Protocol which runs a more reliable connection, however, it can lack in transfer speed. UDP means User Datagram Protocol and it has a much faster transfer rate of data, but can be unreliable in sending said data. What does this mean for you? You can choose to do UDP all accross the board since Ragnarok uses small packets of data compared to a much larger scale game. Just my recommendation. However, if you want absolute data transfer at the highest success rate to avoid lost packets and data, then do TCP. Still confused? Do both in the firewall. An example of what the command will look like for adding TCP/UDP: sudo ufw allow 5121/udp sudo ufw allow 5121/tcp Now that we've got an understanding of the firewall and the ports we have added we can now relax knowing the firewall will protect us from majority of threats. STEP TWELVE: Setting & Forgetting (Auto-Start scripts) i1.12.0 I hate when the server crashes. But you know what's worse? When it doesn't come back up until an admin turns it on. In this step we will go through the simple setup process to get your server ready to start when you load your system and reboot if it crashes. Start by opening up the terminal and entering in the following command to create a new system.service file: sudo nano /etc/systemd/system/ro-login.service This will create a system service file which we will enable later to start automatically. Inside these service files will be a series of commands that will allow the server to boot up automatically when it experiences an outage for a speificied amount of time & when starts the system after a reboot. Populate the file and edit the values to match your rAthena directory and User Login name: [Unit] Description=Ragnarok Login-Server After=syslog.target network.target mysqld.service [Service] WorkingDirectory=/home/raguser/Server/rAthena User=raguser ExecStart=/home/raguser/Server/rAthena/login-server ExecReload=/bin/kill -HUP $MAINPID KillMode=process Restart=on-failure RestartSec=15s [Install] WantedBy=multi-user.target We are going to do this two more times. Once for Character Server & another for the Map Server. sudo nano /etc/systemd/system/ro-char.service Populate with: [Unit] Description=Ragnarok Character-Server After=syslog.target network.target mysqld.service [Service] WorkingDirectory=/home/raguser/Server/rAthena User=raguser ExecStart=/home/raguser/Server/rAthena/char-server ExecReload=/bin/kill -HUP $MAINPID KillMode=process Restart=on-failure RestartSec=15s [Install] WantedBy=multi-user.target And now: sudo nano /etc/systemd/system/ro-map.service Populate with: [Unit] Description=Ragnarok Map-Server After=syslog.target network.target mysqld.service [Service] WorkingDirectory=/home/raguser/Server/rAthena User=raguser ExecStart=/home/raguser/Server/rAthena/map-server ExecReload=/bin/kill -HUP $MAINPID KillMode=process Restart=on-failure RestartSec=15s [Install] WantedBy=multi-user.target We will now start them all and check their status: sudo systemctl start ro-char sudo systemctl start ro-map sudo systemctl start ro-login sudo systemctl status ro-char sudo systemctl status ro-map sudo systemctl status ro-login Once we have the Green light on the status we can go ahead and enable the scripts to automatically start on boot. Enter in: sudo systemctl enable ro-char sudo systemctl enable ro-map sudo systemctl enable ro-login That's it! You're set to boot up automatically after a crash and upon system restart. Well done! Section 2 - After-Installation Now that we've got everything set up this far, we can continue maintaining & updating what we've started. Continue below to learn more on how to maintain the server after you've set it up. Requirements : Latest NEMO release An executable update from NEMO's website Latest FluxCP from rAthena STEP ONE: FluxCP (Registration & Logins) i2.1.0 Everyone needs to register somehow, right? We're mostly all aware of the high risks with enabling registration via "_M/_F", if you're not... In short: Don't use it if you're opening the server to the public. It can enable botters, spammers, & hackers the ability to just create infinite accounts and continue their schemes easier. With FluxCP we can help avoid this by limiting the amount of registrations allowed per person. Let's dive into it now. Gather your resources! You'll need to download the latest FluxCP by clicking that link. If you missed it, here's the link again: https://github.com/rathena/FluxCP This is where we will manage all the registrations to the game as well as many other fun functions we will get into later. For now download & extract this entire directory into your webserver. I put mine in the primary (root) directory of my webserver. That's the folder we created earlier with the custom name we provided. In this example we used "kingsman" as the custom name. The folder path is: /var/www/customName Our final output will look like not include the folder. This means we must drag all the contents into the root directory of the webserver. Now we should look like this at after extraction: Enter the config folder first. This is where we will be doing all the work for setting up this control panel. Inside the config folder you will have 31 files to select from. We're only going to work in two of these for this step. Open servers.php and you will see a set up similar to earlier where we added some settings for rAthena configs. They are the exact same configs. Go ahead and add that in there exactly as you did in the configs earlier. Now that we have our config looking good, let's scroll down towards the bottom and edit our rates to reflect that of our server's. This will display the rates set up in your databse as well so players can use that to search drop rates on your server. Change accordingly! That's it for the servers.php! Save that & move to the next file. Let's now open up application.php and edit the first few lines we see. We want to change the base URI to be blank. This will set it to the root directory where we hold the control panel. Server Address is going to remain localhost since we are running it on the localhost. And finally we need a storng password to gain access to the administration panel to set it up. 'ServerAddress' => 'localhost', // This value is the hostname:port under which Flux runs. (e.g., example.com or example.com:80) 'BaseURI' => '', // The base URI is the base web root on which your application lies. 'InstallerPassword' => 'superduperstrongpassword,man', // Installer/updater password. Save that and open your website now! You'll likely get several permission errors. Copy waht they say for you to do, it will be a sudo chmod command giving access to the logs. This is necessary to proceed to the next part. Add sudo before each command or it won't work. You'll need to enter your password into the control panel shown after granting permissions to FluxCP. After the password is successfully added it will update your PMA database with all the new information for FluxCP's registration and logins. Your panel should look like this by default now: You now have a palce where you can register and manage accounts! Navigate through the application.php file to change some various settings like your control panel name and what is displayed. You can also adjust the ports if they are different during the previous set up. STEP TWO: My First EXE (Making an Executable) i2.2.0 Now that we've got everything set up on the server-side of things it's time to work on the client-side of things now. Let us start first by making an executable. this will be the CustomRO.exe that players will use to run the game. Launch NEMO and give it a moment to load up. In a compact form, this is waht you'll see. What this is showing us is that we can Load a client, which we downloaded from the "Requirements" section above, we can apply patches, select the recommended patches, select previously loaded patches, load a pre-saved profile, and save an existing setup as a profile to load later. for this example we are going to use the current recommended version in rAthena's trunk. This is version "2021-11-03". We are presented with a file that will launch a terminal to download the latest executable. It will look similar to this: Now we have the executable ready to be patched. Back inside NEMO, we want to browse to that file we just downloaded and select it. You can change the saved outpute file name here or rename it anytime later. Here we will change it now. Click "Load Client" and a list of patches will populate. Now we want to "Select Recommended" patches given for for the executable. To apply these patches simply click the "Apply Selected" button and it will pack it for you. Brose the patches and select any patches that will help you or you might use in the future. For this example we are changing the Client Title name, the ItemInfo.lub or ItemInfo.lua and a majority of other changes that will allow the client to read LUA files over LUB files. Take your time going through the list. It will take a while the first time around. With all the patches applied we now have en executable in our output folder. But it came with other files, what do I do with those? You only need the custom executable we made (CustomRO.exe). This is going to be sent to the players and the rest will be removed from the client folder You're now ready to send this to other players! STEP THREE: My First Patcher (Making a Patcher) i2.3.0 We've got a client executable and it's fully patched the way we like. This is a great start! Now it's tie to send players an update. Through the patcher. But we don't have one yet! In this example we will go through the steps to creating a patcher using Thor Patcher from rAthena download section. Your extracted package should reflect similar to this: We want to enter the Configuration folder and edit the config.ini file located inside. Inside this config file are the lines necessary to connect the client to the server and send files from the server to the client. In the first few mines we'll edit the values to reflect our server values: The IP can be our website, this example is just a localhost address. Remote config file we will leave as default. Status file we can name server.dat. This can be anything, however. The custom GRF we have for our server, listed as number 0= in the data.ini. Finally our custom client executable we made earlier. Further down the page we have the title of the patcher. This can be anything. And lastly our notice page which will have a brief text description for the updates on the patcher front page. Save that and we're ready to launch the config generator. Drag the config into your .../Thor_Patcher/Patcher folder and it you're ready to copy them to your CustomRO client files. When compelte you'll have a patcher similar to this: You're made your Patcher now, well done! STEP FOUR: My First Patch (Making a Patch) i2.4.0 Keeping organised is key to staying sane. Let's start off by making a couple folders. A Patches folder & a data folder. It should look like this now: Patches/data This should look familiar. It's the same set up as the GRF. We will now be able to drag all the files we want to patch into this directory. One more folder we want to make is going to be the Output folder. This is where all the patches will be saved. There will be two more options to deal with. We want to set compression to HIGH and in the Options tab we want to set the file type to ACSII. It should reflect the below image. Once that's set we can click "Generate" to make the first patch. It will be create in the Output folder we selected. That's all there is too it! You've created your first patch. STEP FIVE: Sending The Patch (Sending Patches) i2.5.0 We now have it all. The Patcher & The Patch. Things are great. But how do we send it to players withing them having to redownload the entire GRF? Great question! In this next step we will cover how to add the patch to the webserver and get it ready for players to recieve when they load their patchers. In step i2.3.0 we covered how to set the patcher up in the web server. This is the file structure we will continue to follow moving forward. Let's open open up our file browser for accessing the server trunk, if needed, or it you're running your own system you can also navigate to the web server folder. The directories are the same either way. /var/www/custom/patch/ This is the directory we wil be working in regarding the patcher. It should now represent the image below: Let's break this down first... We have: The data folder. This is where we will add the patches into after we name them. The Background image. This will be a back ground image for the patcher to load. You can even leave this transparent if you want. Our main.ini is where we will configure the settings for the patcher. We will go through this soon. The notice page will be need to be updated with each news change. This is a very simple text edit. Keep it short and simple. Our patch list text file is where we will add the patches. The format will be discussed soon. Our Style sheet. This is the style arrangements for the pages. We usually don't need to modify this unless we know what we're doing. First thing to do after we have a patch made is to give it a name. What do you ask? A very specific name. In this example we will follow a date format with a part value in the event of more than one patch in a day. Our name in this example will be the date followed by a version number, or update number. 24012024-1 This well tell me that the patch was set for today and it's the first path released of that day. Now we can edit the plist.txt and add this patch into the list. Inside the patch list we will enter in the exact namme of the patch. Including the ending. Our names will start with an index number first. This is the order at which the patcher will read the patches. The index starts at 0 and is followed by a SPACE and then the item name. 1 24012024-1.thor Save and it's ready to load through the patcher! Finally we need to tell the website to send patches to players. Open up the main.ini file with a text editor. We're going to modify the line that asks for a website address. Search for "file_url=" ad edit that to be your website. Save and it's ready to go! That's pretty much it for uploading patches to the server. You're all set to start updating players with new content! STEP SIX: Adding/Removing Maps (map_cache.dat) i2.6.0 Got a enw map you want to try out or is your current map not up to date with your pathing? In this step we're going to add maps to the map_cache.dat, remove maps if needed and update the list with our new maps. First start by downloading the Map Cache Editor from the trusted rAthena source: HERE You'll be presented with a window that looks like this: What we want to do next is download our map_cache.dat from the server trunk: rAthena/db/map_cache.dat Once downloaded it will be able to drag and drop that file into this window. We now are presented with a list of maps. From here what we want to do is drag and drop all our map's .gat files from our GRFs into this window. this will update the walkable paths for the map. This is especially important when you cannot walk on certain maps due to old GAT configurations, It still thinks there are structures in the way. To delete a map you can select it and click delete. Simple as that. Save the Map Cache and reupload it to your server. That's it! Nice and quick. Section 3 - Optional Options Things are running now, yeah? That's great to hear. Sometimes they may require additional software, maybe another step or two, or maybe you need something else for it all to work. Below are some steps that are completely optional but might just help you out in some situations. STEP ONE: Forwarding a Router (Port Forwarding) o3.1.0 Understanding what port forwarding is will be an important start to not having your network breached. In this step we will go through the basics of forwarding your port through your router. The user interface (menus) will look different for each router brand, however, the concept will remain the same universally. Check your router software for updates before making any changes. Let's begin! Accessing the Router To access the router we want to first ensure we are connected to the internet using it. Next we will open the trouter software through our web-browser. To access that page we will have to enter the local domain IP to gain access to the initial menu. In your address bar enter in: 192.168.1.1 If this DOES NOT work try entering in: 192.168.0.1 My basic Netgear modem has a menu that looks like this. I'm going to want to click into Advanced Settings & open up the Port Forwarding option. We are now presented with a window similar to this. It will give us all options for forwarding our ports. Let's get an understanding of what's here before we continue... We will select between Forwarding and Triggering. Since we don't need to trigger a port we will focus only on Forwarding it. There are many types of services that might be precompiled in your router. For our Ragnarok Online server will be making a custom service. It's not as hard as it sounds, don't worry! The device IP we want to connect is a little different. It has to be exactly what device you have the server under. Let's navigate to the device list on the router. This will be under the "basic" settings, usually. It shows here I have 3 devices listed. An Amazon Fire stick, My cell phone and a PC I built specifcally for this guide. That's exactly what we are looking for, too! It looks like the device I am forwarding resides under the IP ending with 7. Okay, so we now understand where the ports are going to and waht device has them. So it's time to make that custom service we spoke of earlier. This interface has a button, making it very convenient to start. We're going to go ahead and click the "Add Custom Service" button. With the custom port window we can now add our ports for Ragnarok to run. We will need to process this 1 number of times as we have more than one port for Ragnarok Online services. The ports we need to add are: 3306, 6900, 5121, 6121, 8888 Make sure to select the proper device for it to work as we want it to. After they are all applied, it will represent something similar to this: That's it! Your ports are now open & ready for users to connect through to. Make sure firewalls are enabled at all times. STEP TWO: Automatic Server Backups (World Runner) o3.2.0 This script will automatically save your server to your server_backup folder every 24 hours. This time is completely adjustable in time and destination. I originally made this for Minecraft hence the name World Runner. Open the terminal and enter in the command: sudo nano /etc/systemd/system/worldrunner.service This will create a service script we will set to run on start up. Inside this document we are going to add int the following script and change the destination values to match our back up folder destination: [Unit] Description=This will copy the Server folder to a back-up location [Service] Restart=always RuntimeMaxSec=1d User=raguser ExecStart=cp -r /home/raguser/Server/rAthena /var/www/raguser/Documents/server_backups/ RemainAfterExit=yes [Install] WantedBy=multi-user.target Now we want to enable it on start-up: sudo systemctl enable worldrunner If you're having issues with it executing properly we can simply grant permissions to the file to do so: sudo chmod 600 /etc/systemd/system/worldrunner.service We now have the trunk backing up now, but what about the SQL server? For that we need to edit a default file structure in Ubuntu called Cron. Cron can hold automated tasks on a timer, or schedule, just like what we want to do for backing up MySQL. Enter in the terminal: sudo nano /etc/crontab You'll be presented with a window simial to this: As you can see here they are displaying each value for the job. First digits represents Minutes and the second digits represents Hours. These are the two we'll primarily need for daily backups to occur. At the very bottom we are going to add the following line: (NOTE: Include your password after the -p. My password is "69SuperStrongPass69" so the password section will look like -p69SuperStrongPass69 ) 0 0 * * * root mysqldump -u raguser -p69SuperStrongPass69 --all-databases | gzip > /home/raguser/Documents/Rag_SQL/ragserver_`date +%d%m%Y-%H:%M:%S`.sql.gz This will set the back up time to be at Midnight each night using the PMA login we set up earlier, backing up our ragserver database into a zip file at the directory ~/Documents/Rag_SQL. NOTE: Avoid use of these symbols in the password field: ) ( ' ` Finally we need to restart the service for it to take effect: sudo /etc/init.d/cron restart That's all there is to it! Keep up to date with the latest changes & updates to this guide. Want to see something included? Suggest it below!

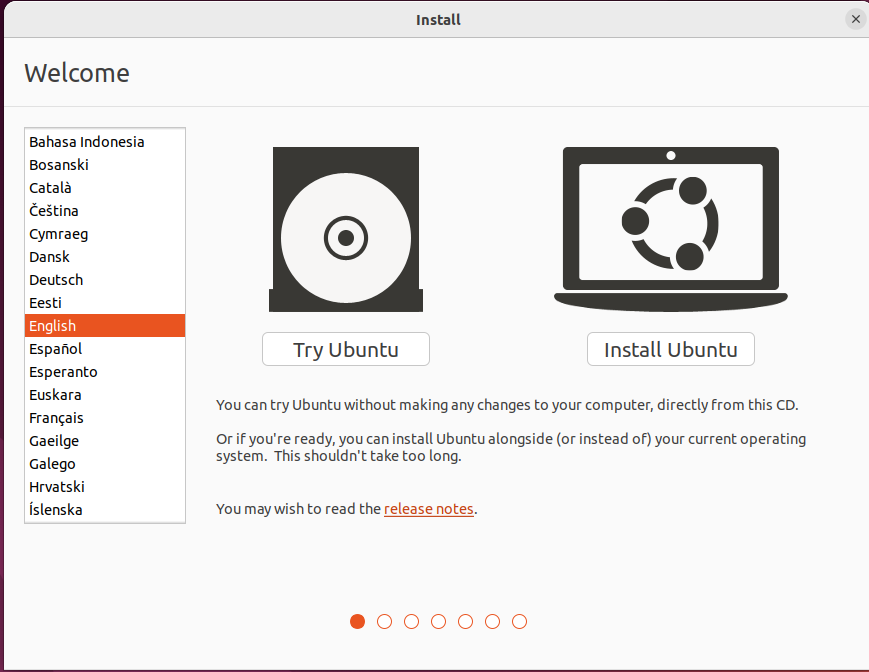
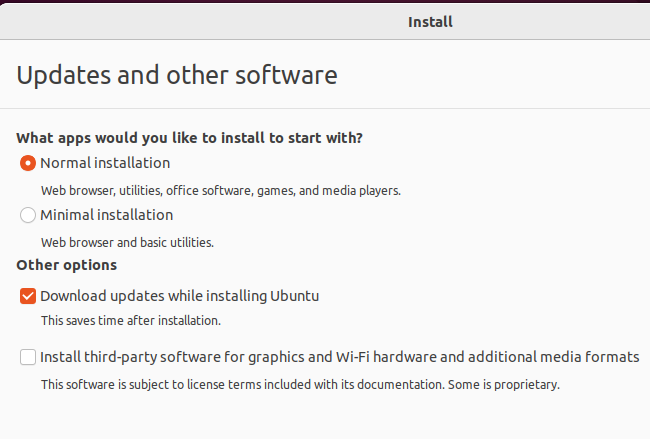
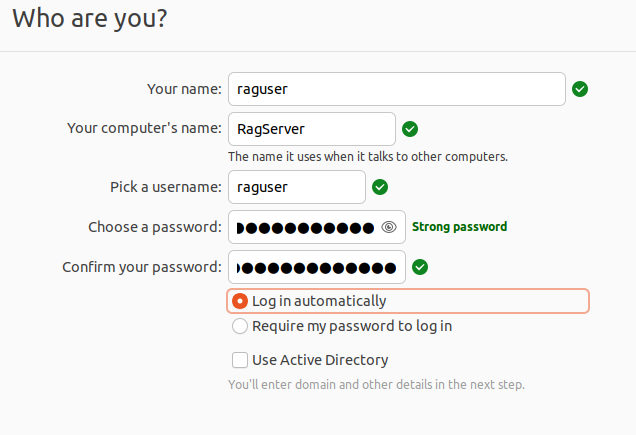

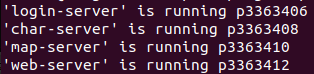


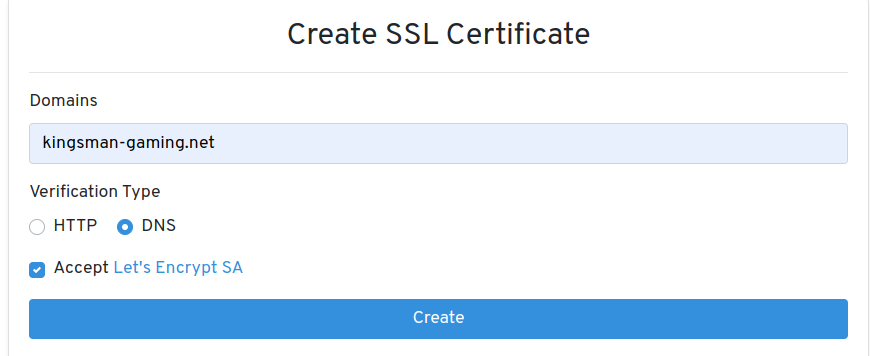

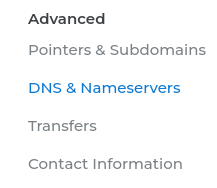
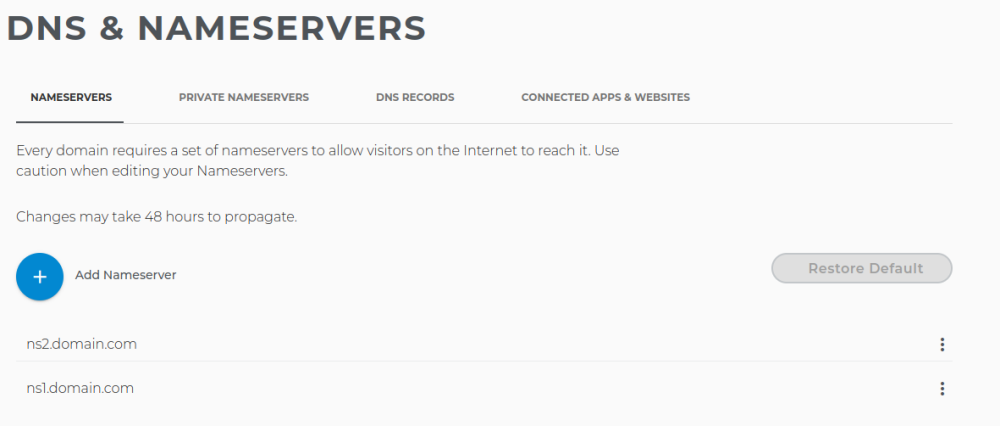
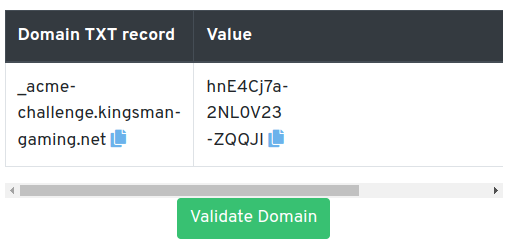
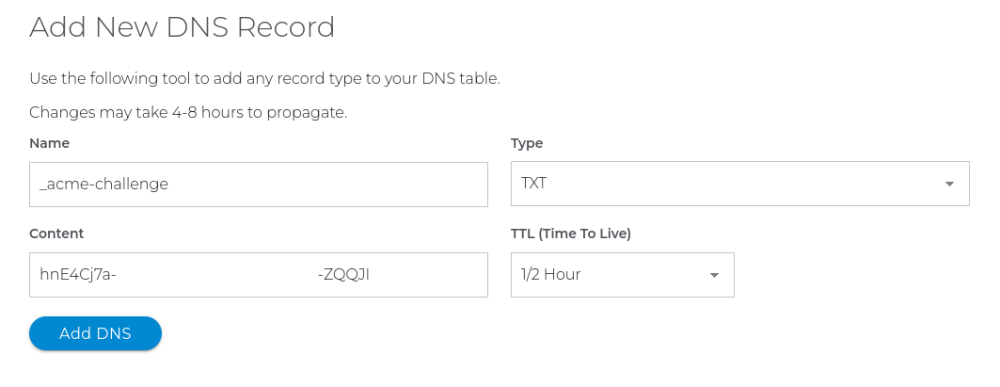


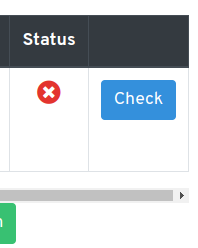
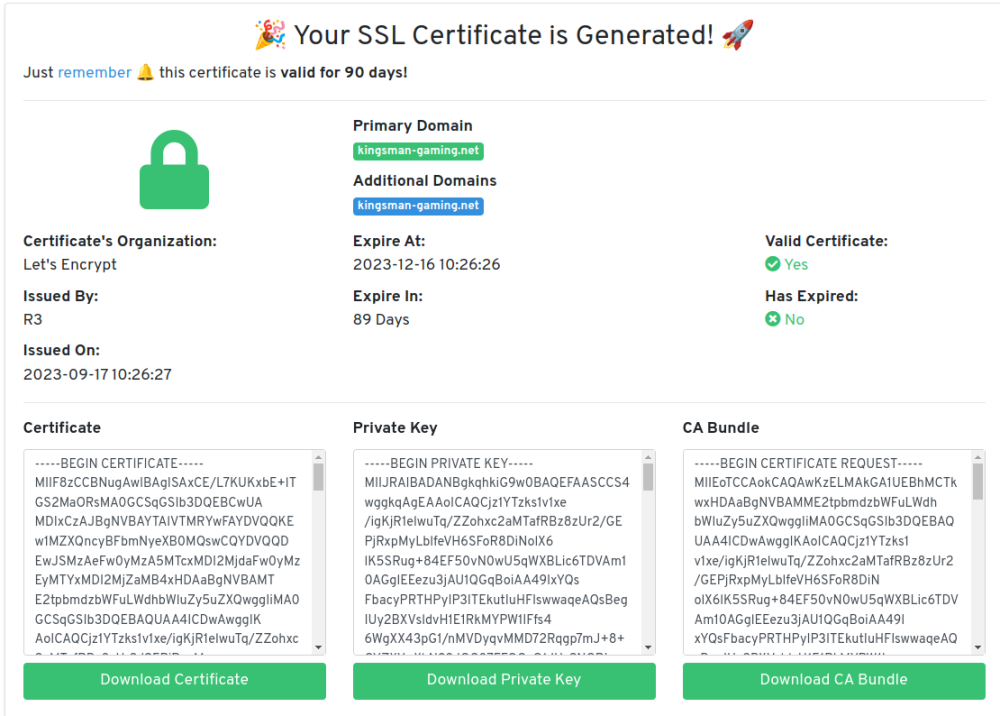


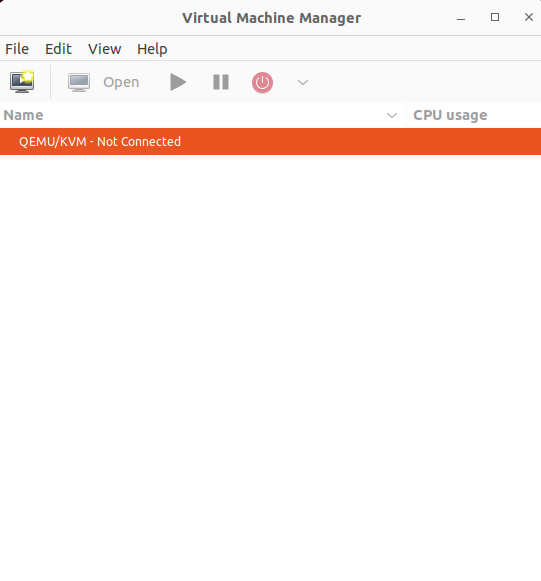

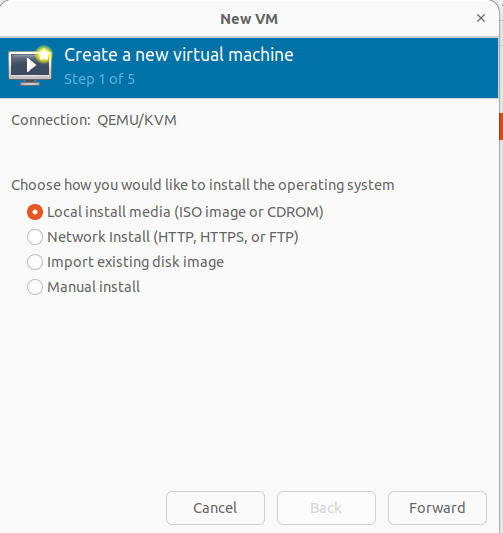
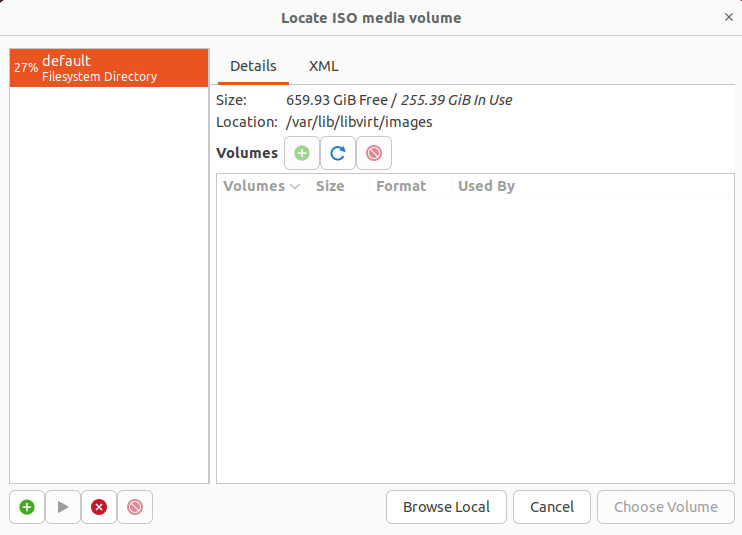
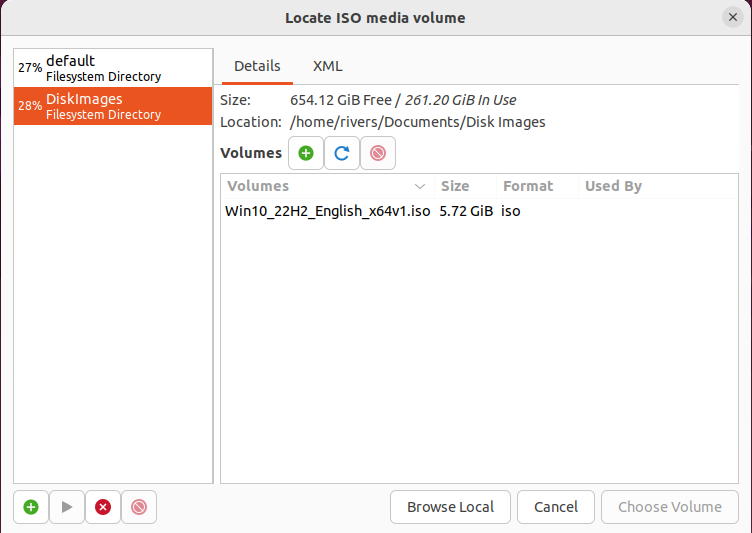
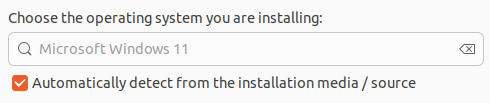
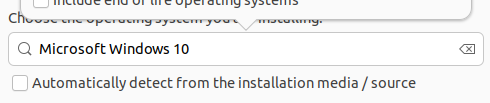
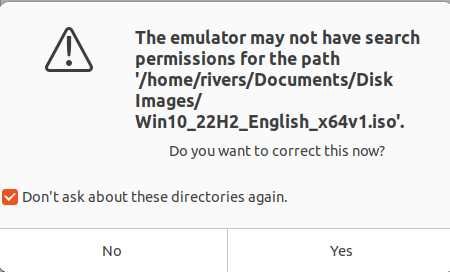
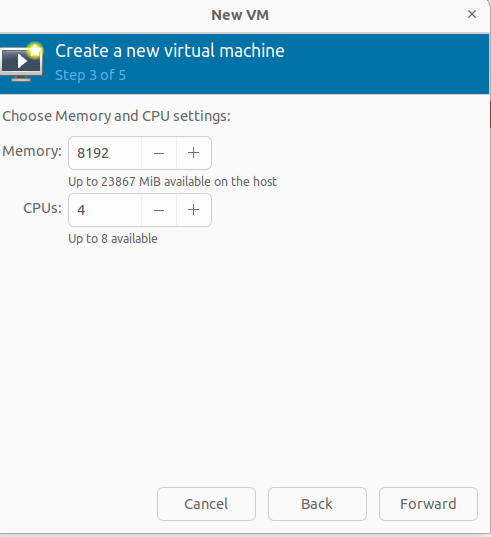
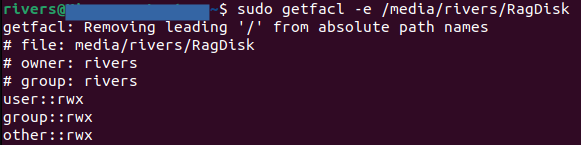
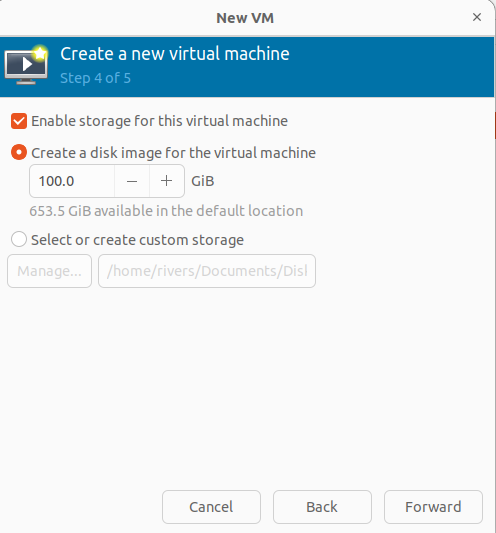
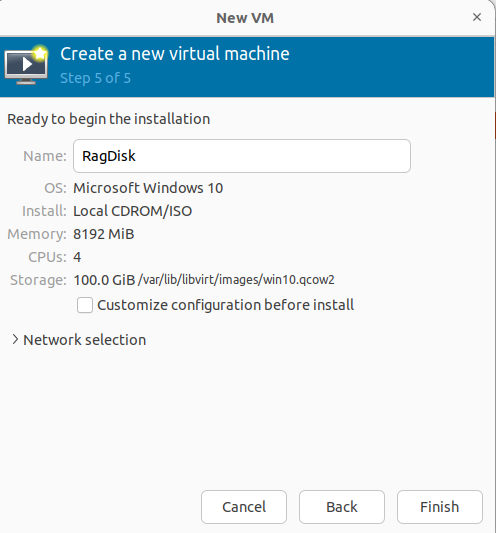

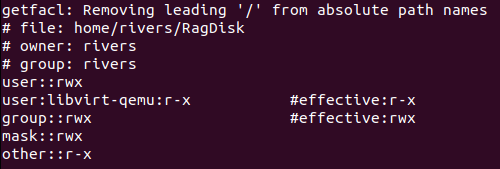
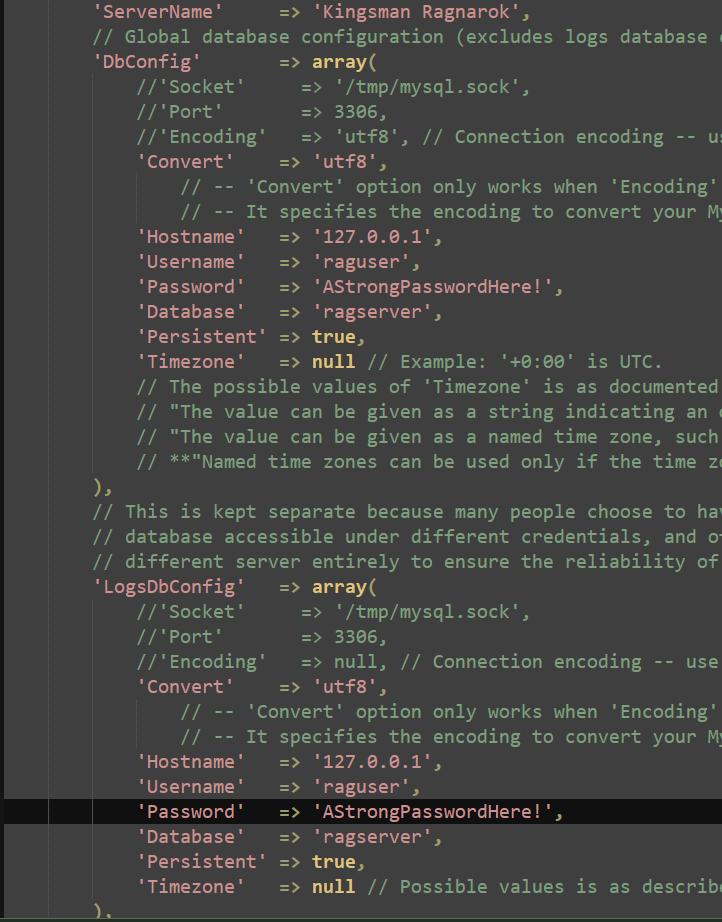
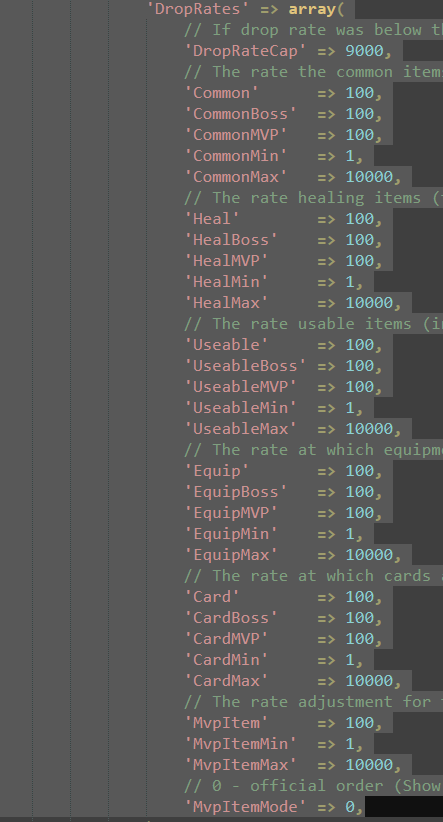
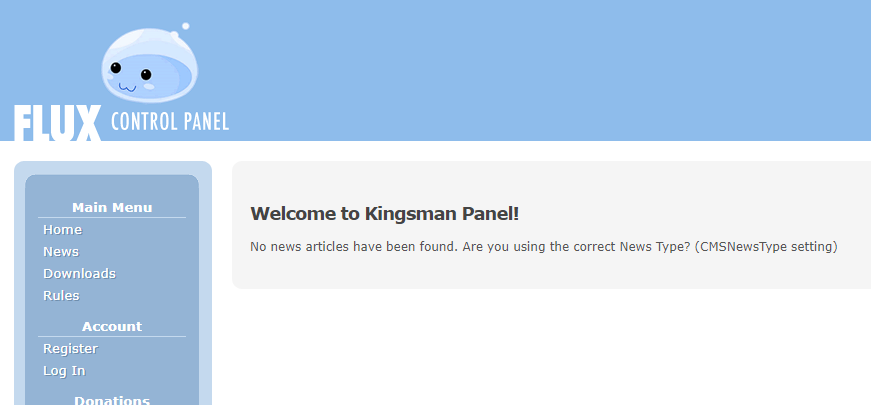
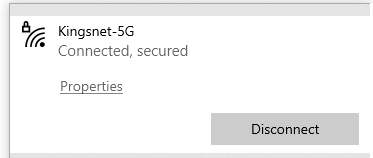
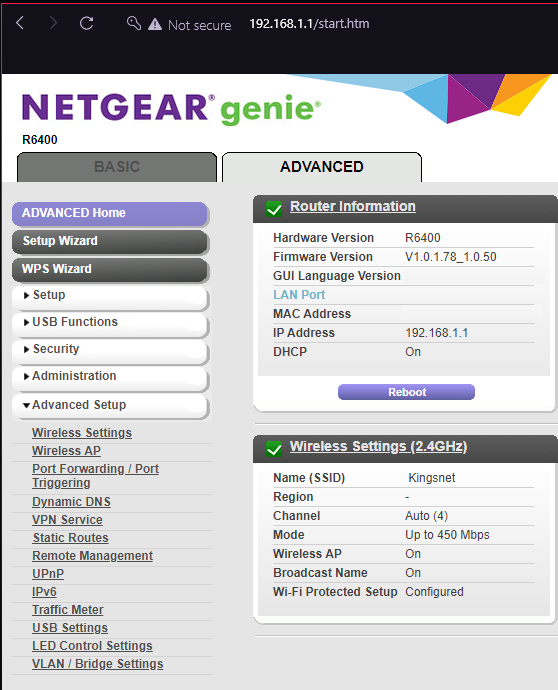

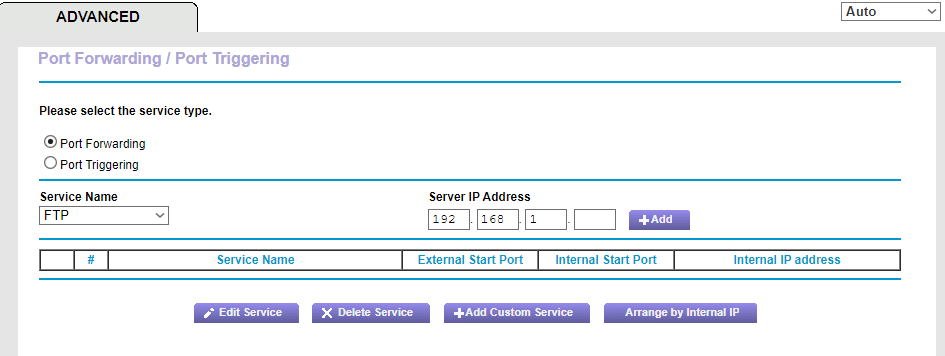
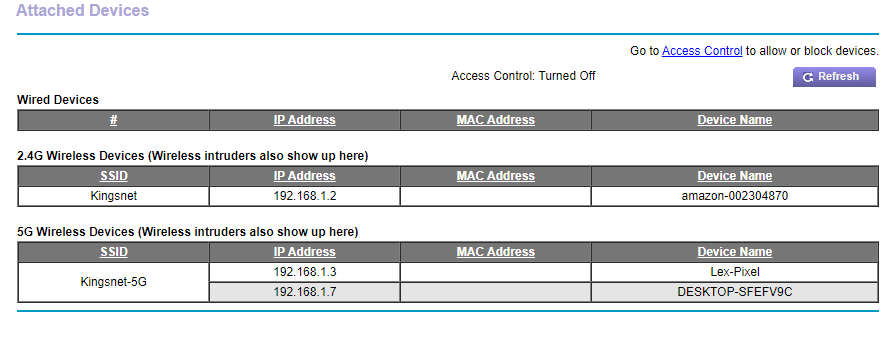

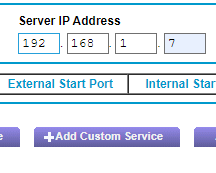
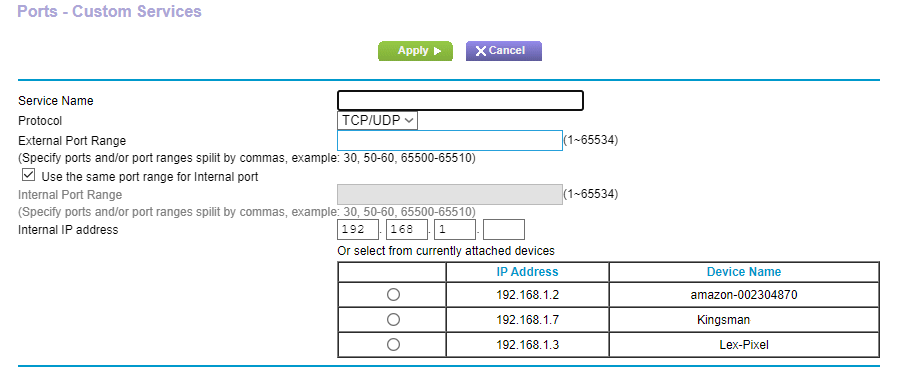
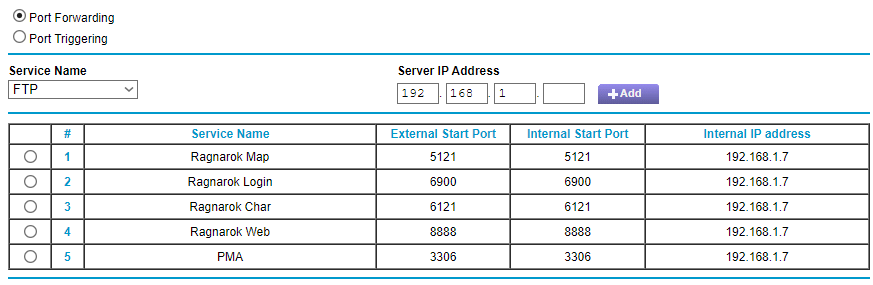
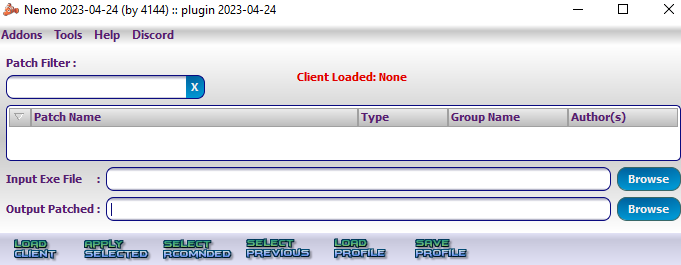
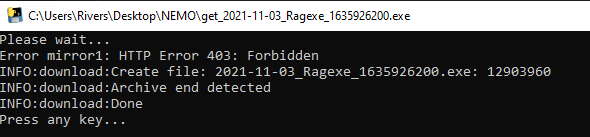


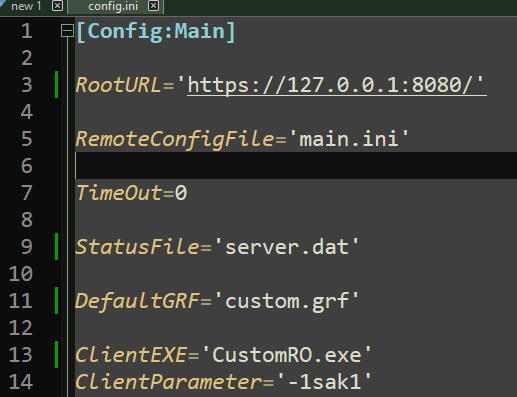
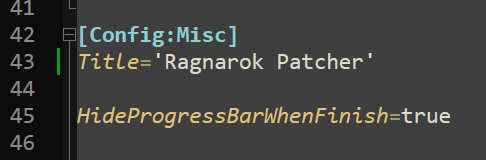
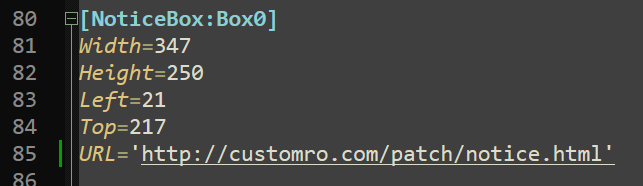
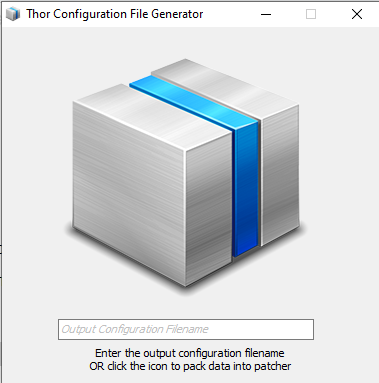
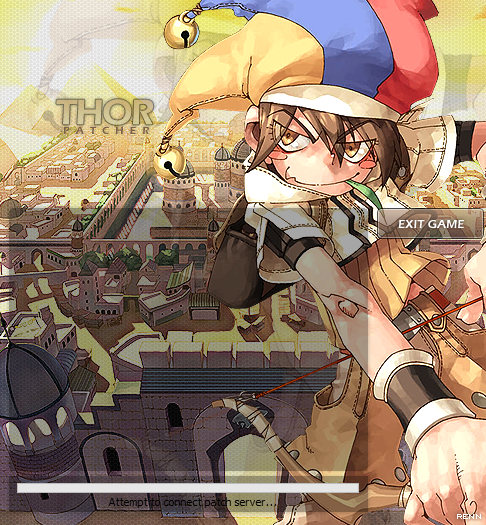
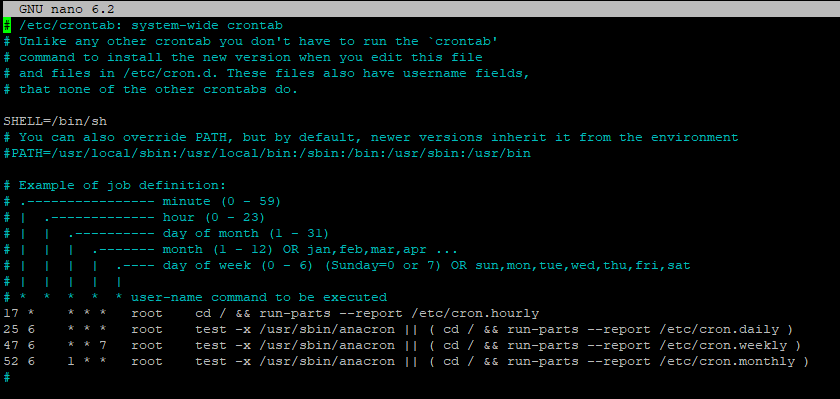
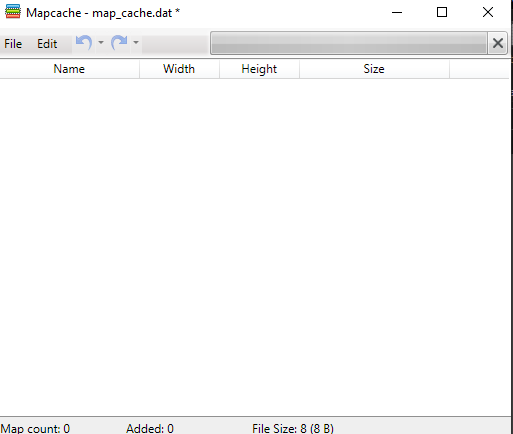
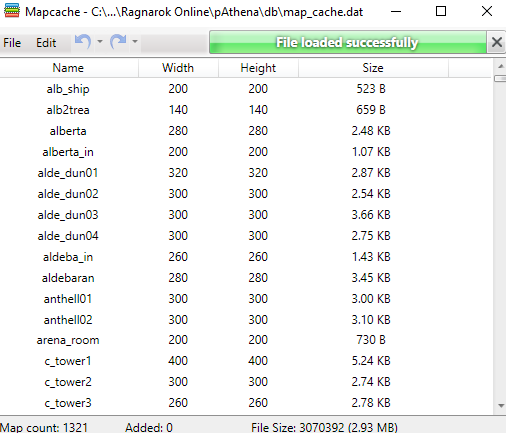
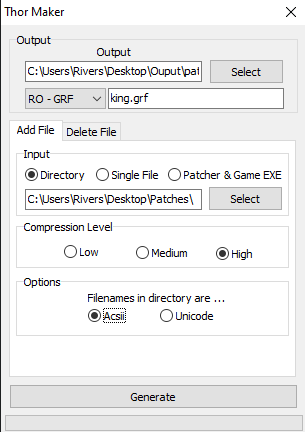
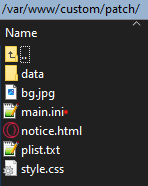
 5 points
 -
Edit: Drive link removed - msg me on discord Skylove Github mirror, download while its up I included the bodystyle fix diff. Msg me on discord for others. chainflex#5343 Help each other out and don't gatekeep or else the sellers win.5 points
-
ChatRepeat hex! 83 7D 08 02 7C 49 6A 00 7C > EB5 points
-
These are some examples, I have more than 30 bosses ready, 80 different monsters like mobs and mini boss, between wings, weapons, etc. If you liked it, don't forget to like it, thank you all.


.gif.18aac04bc24b1d5f54f21288808ded4f.gif)


 5 points
 -
This map belongs to the game universe expansion series. Made with attention to detail and inspired by the original! .•°'°•.•°'°•.•°'°•.•°'°•.•°'°•.•°'°•.•°'°•.•°'°•.•°'°•.•°'°•.•°'°•.•°'°•.•°'°•.•°'°•.•°'°•.•°'°•.•°'°•.•°'°•.•°'°•.•°'°•.•°'°•.•°'°•.•°'°•.•°'°•.•°'°•.•°'°•.•°'°•. ve_fild08 The map is a continuation of the Veins Field 07 location, and repeats its main features. And also almost pixel-by-pixel repeats the outlines of the original art design of the location on the world map. The map seamlessly connects with neighboring level. I would like to remind you that the monster Iron Fist -> (id 1212) with a rather interesting card does not officially live anywhere. Therefore, this is a great place to settle him here. You don't need too many of them, since the map is half the size. I placed 5 Iron Fists. Please rate it if the map is good enough ~~ This map can be downloaded here https://rathena.org/board/files/file/4487-w0w_map_collection/

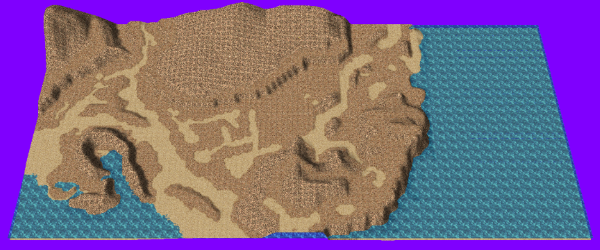

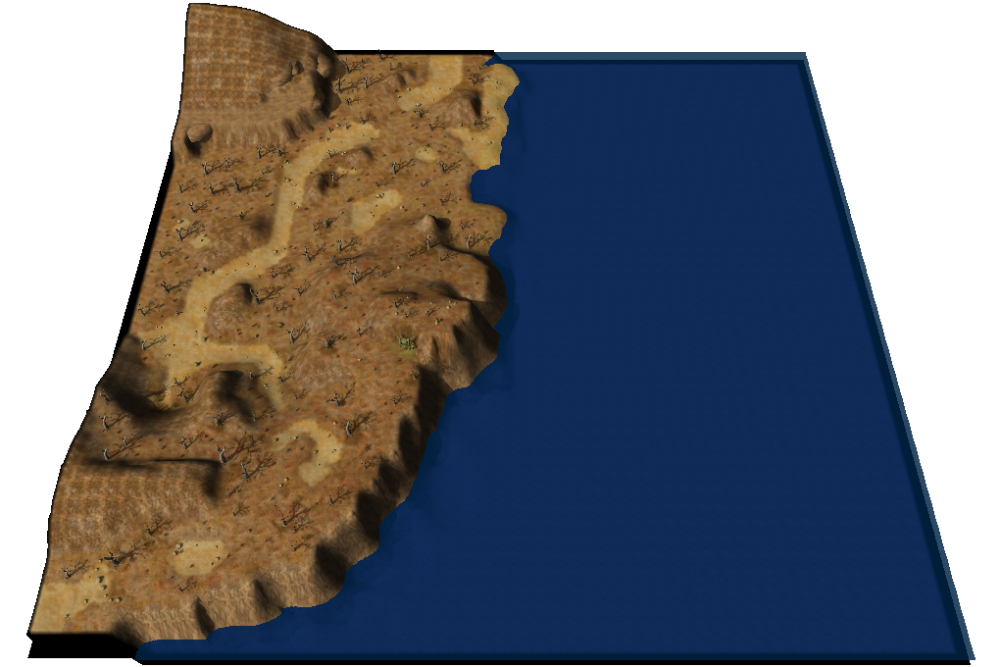 5 points
 -
Prontera - Love at First Sight! Valentine’s Day is here in Prontera! Get ready to fall in love with the brand-new map, Prontera Love at First Sight! Step into a Valentine’s wonderland full of romantic, heart-shaped decorations, and sweet surprises.5 points
-
Instead of the default tomb sprite appearing upon MVP death, this modification customizes each MVP to display their unique MVP dead sprite on their tomb. This enhancement adds a more immersive and personalized touch to the game experience. Features: Customized MVP tomb sprites for all MVPs. Enhanced visual appeal and immersion. Easy integration with your existing rAthena setup. I've spent considerable time choosing each dead MVP's tomb sprite accurately reflects their character and enhances the overall gameplay experience. This is small but impactful visual upgrade. Let me know your thoughts! I'm eager to hear feedback and any suggestions for further improvements. mvp tomb.mp45 points
-
Froggo rAthena Installer [WSL Edition] This script automates the installation and configuration of rAthena on Windows Subsystem for Linux 2 (Debian). It simplifies the process by handling WSL installation, rAthena WSL image download and extraction, and shortcut creation. Features: Automated WSL Installation: The script checks for and installs WSL2 if needed. rAthena Image Download and Extraction: Downloads and imports a WSL Debian based image Shortcut Creation: Convenient desktop and Start Menu shortcuts for accessing your rAthena instance. Pre-configured Credentials: Default credentials are provided for easy initial access (remember to change these for security!). Prerequisites: Windows 10 or 11 VirtualMachinePlatform (Windows Optional Feature) Windows Subsystem Linux (Windows Optional Feature) Administrator privileges. Installation: Open PowerShell as administrator. Run the following command: Invoke-Expression "& { $(Invoke-WebRequest -UseBasicParsing 'https://gitlab.com/SapitoSucio/froggo-rathena-installer/-/raw/main/WSL/rathena_wsl_image_installer.ps1?ref_type=heads&inline=false') }" (You can and should review the script's code before executing: View Code ) Default Credentials: Debian User: froggo Debian Password: froggo Databases: rathenadb and rathenalog MariaDB (MySQL): mysql_server_id: ragnarok mysql_server_pw: ragnarok Interserver Communication: userid: froggos1 passwd: froggop1 In-Game Admin Account: username: test password: test Recommended Development Setup: Use VS Code with the Remote - WSL extension for a seamless development experience. Suggested extensions: C++ Extension Pack Remote WSL Git Extension Essential Commands: Compiling: ./configure make clean make server -j$(nproc) Start/Restart rAthena: (from the rathena directory) ./athena-start restart Connect to MariaDB (MySQL): sudo mysql -u root # OR sudo mysql -u ragnarok -p Bonus: Tmux Integration Tmux is pre-installed for enhanced session management. Key commands: Starting and Managing Sessions: tmux: Start a new session tmux new -s <session-name>: Start a named session tmux ls: List sessions tmux a -t <session-name>: Attach to a session tmux kill-session -t <session-name>: Kill a session tmux kill-server: Kill all sessions In-Session Controls: Ctrl-b d: Detach from session Ctrl-b s: Switch sessions Ctrl-b $: Rename session Youtube Video:5 points
-
This will help to get rid red errors in game when you received an item and get rid of crash when you drag item. Download: https://pixeldrain.com/u/F5BMhkGU (Latest 26 June 2025) --- Please remove sprite and texture folder in data.grf to slice down a game file size. (Do a backup first just for safety) Thanks to @KingarteR for finding mostly client database files.
 4 points
 -
hi! I'm Fuwa. \o/ I'm a designer by trade, aka my day job and I've been a long time RO player. What got me into creating sprites? I personally felt that there is currently a gap in custom sprites right now and that drove me to start looking into it, and putting my skills to use by creating new stuff for the game that we all love. Why is it called a Studio? My partner is the other half of the studio - who enjoys creating maps more than I do, amongst other things. Here's a preview of what I have been up to lately! Lower Headgears: Sushi Collection Lower Headgears: Bakery Collection I am currently not accepting any commissions, as I am doing this in my spare time.


 4 points
 -
Hex edit: look for this 00 00 44 AC 00 00 and change it to 00 00 22 56 00 004 points
-
4 points
-
For hex editing: Find = 00 00 F0 43 00 00 Example: Zoom 75% = 00 00 4C 44 00 00 Zoom 50% = 00 00 FF 43 00 00 How to change Zoom 75% to default And Indoor RSW Disalbe to default Thank you Skylove.  For hex editing: Find = 00 00 F0 43 00 00 Example: Zoom 75% = 00 00 4C 44 00 00 Zoom 50% = 00 00 FF 43 00 00 And Indoor RSW Disalbe to default In the hex editor, search for the string ndoorRswTable.txt (hex: 00 6E 64 6F 6F 72 52 73 77 54 61 62 6C 65 2E 74 78 74) and replace it with indoorRswTable.txt (hex: 69 6E 64 6F 6F 72 52 73 77 54 61 62 6C 65 2E 74 78 74)4 points
-
프록시 x32dbg 활성화4 points
-
After the fixes: Before (for reference): There's ~72 images in the current zip for ~20 buttons. The buttons are not perfect but more consistent than the original ones, that had random *** spacing, font size, and shadows. Installation: add to Data or GRF (can technically be used on a skin, but Quest UI seems to only be modifiable via data/GRF) data.zip
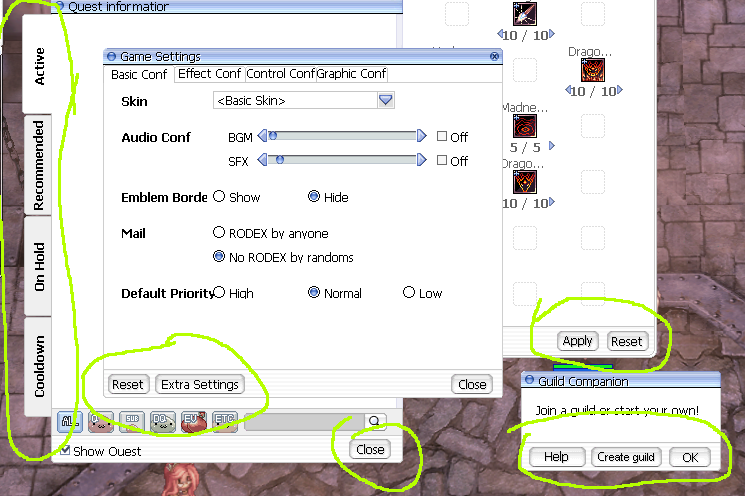
 4 points
 -
Hello everyone ~ This is my old art for a friend of our characters and pets. My favorite job is baby class because of their cuteness. Also thanks for playing in the private server I could take the little boy (almost) everywhere without worrying for his safety, yay. Anyway, hope you will enjoy it ~
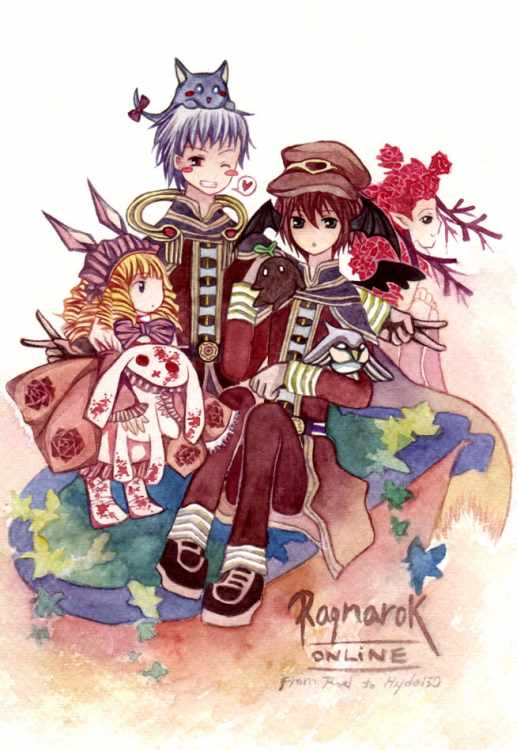 4 points
 -
Update :
 4 points
 -
View File Shops Selling All Costumes Available in Rathena This script has NPC shops that sell all available costume items in rAthena as of March 2025. Costumes are categorized based on their equipment slot (Upper, Middle, Lower and Garment) and distributed across multiple shops (150 item per shop), Ensuring a well-organized and accessible shopping experience. The item list is filtered to include only valid costumes from latest iteminfo_EN.lua (English Translation), preventing missing or invalid entries. if you remove the commented shops it will sell all costumes available in the database (item_equip_db.yml). Ideal for servers looking to provide a complete costume collection for players! Submitter Shiroy Submitted 03/18/25 Category Utilities Video Content Author Shiroy4 points
-
Bonus: custom art for 'data\texture\À¯ÀúÀÎÅÍÆäÀ̽º\cardbmp\sorry.bmp' made by me (by modifying other assets) sorry.bmp
 4 points
 -
The Tree of Savior has emerged into the world of Ragnarok Video In-game TOS_FILD.mp44 points
-
Added 2 new auras. Added SwordArtOnline NPCs.


 4 points
 -
Good afternoon brothers! I come to show you the 5 months of work I have done to remaster all the cards in the game up to Episode 2. There are a total of more than 1500 cards. I'm here to show you my work and if anyone wants to purchase them, I'll leave you my discord so we can talk about it. My discord: Eohar#9788 IN-GAME SHOW CARD DESIGN


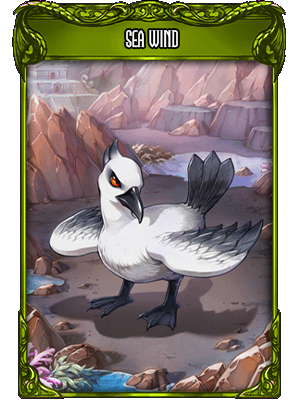


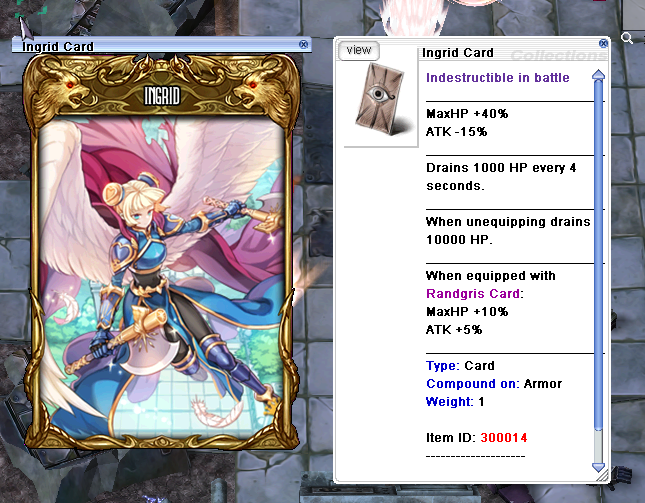 4 points
 -
View File @hidepet / @hidepetall commands @hidepet allows to hide all pets except the player's, whereas @hidepetall hides all pets, including the player's. This mod also allows to set a default parameter in battle_conf, just add hide_pet: 1 To set all pets hidden except the player's, or 2 for all pets period. Submitter Daegaladh Submitted 08/21/24 Category Source Modifications Video https://youtu.be/VUCVy5i3M64 Content Author Daegaladh4 points
-
Okay, I'm pretty sure I figured it out. I went and made several tweaks to Ragno's script so it matches the way bounty boards currently function in iRO, as well as added scripts for all available bounty boards. I checked the mob lists on all the bounty boards in iRO though I only turned in quests on some of them. Probably still needs testing to confirm the below is accurate. See below for a change log: The formula from iRO wiki is essentially correct. I spot checked some boards in iRO and played around with excel until I was able to produce the quest and job XP using the formula below: QuestXP=Floor(MOB\_BASEXP,2)*150*EXP\_Modifier The EXP modifier term appears to be some sort of fraction of 8. Comparing the quest XP from the iro bounty board wiki as well as the results I seen play-testing iRO, this is almost always 6/8. It does vary between different mobs and different boards though. I haven't been able to determine if this is derived from a stat on the mob itself or was arbitrarily chosen. A little disappointed I couldn't get away from complete automation of quest XP, but this is at least closer. Some other notes: - The bounty board quests in iRO are definitely derived from base mob XP. This can be tested against XP manuals, VIP status, holiday server rates, etc. - The above also showed that on iRO chaos which has 2X rates (default) that the mob XP rate and quest XP rate are multiplicative and you'll actually receive 4X per bounty board turn in. iro_bounty_boards_v2.0.1.rar4 points
-
script - script RateSelect -1,{ OnPCLoginEvent: switch (individual_rate) { case 1: .@exp_rate_multiplier = 100; .@jexp_rate_multiplier = 100; set .@rate_description$, "x1 (Low Rate)"; break; case 2: .@exp_rate_multiplier = 2500; .@jexp_rate_multiplier = 2500; set .@rate_description$, "x25 (Mid Rate)"; break; case 3: .@exp_rate_multiplier = 5000; .@jexp_rate_multiplier = 5000; set .@rate_description$, "x50 (High Rate)"; break; case 4: .@exp_rate_multiplier = 10000; .@jexp_rate_multiplier = 10000; set .@rate_description$, "x100 (Super High Rate)"; break; default: mes "[Rate Selector]"; mes "Select your preferred server rate for this character."; mes "BE CAREFUL: YOU CAN'T CHANGE IT AFTERWARD!"; individual_rate = select("Low Rate:Mid Rate:High Rate:Super High Rate"); close2; goto OnPCLoginEvent; // Return to case evaluation after selection } // Save the multipliers to the player variables set #exp_rate_multiplier, .@exp_rate_multiplier; set #jexp_rate_multiplier, .@jexp_rate_multiplier; fakeIcon(getcharid(0),2002,0,1); dispbottom "You have chosen the " + .@rate_description$ + " for your character."; end; OnNPCKillEvent: // Retrieve the stored multipliers .@exp_rate_multiplier = #exp_rate_multiplier; .@jexp_rate_multiplier = #jexp_rate_multiplier; .@base_exp = getmonsterinfo(killedrid, MOB_BASEEXP) * .@exp_rate_multiplier; .@job_exp = getmonsterinfo(killedrid, MOB_JOBEXP) * .@jexp_rate_multiplier; // Debug messages to track values dispbottom "[Debug] Base EXP: " + .@base_exp; dispbottom "[Debug] Job EXP: " + .@job_exp; if (.@base_exp > 0 || .@job_exp > 0) { // Use getcharid(0) to specify the character ID getexp2(.@base_exp, .@job_exp); } else { dispbottom "[Error] Experience values are zero."; } end; } stateiconinfo.lub StateIconList[EFST_IDs.EFST_RATE_UP] = { haveTimeLimit = 1, posTimeLimitStr = 2, descript = { { "RATE UP", COLOR_TITLE_BUFF }, { "%s", COLOR_TIME }, { "Increases your Bonus EXP and Job Exp" }, { "x1 / x25 / x50 / x100" }, { "Grants players different rewards" }, { "depending on what they choose." } } } efstids.lub EFST_VIPSTATE1 = 2000, EFST_VIPSTATE2 = 2001, EFST_RATE_UP = 2002, __newindex = function() error("unknown state") end } setmetatable(EFST_IDs, EFST_IDs) stateiconimginfo.lub -- Other official effects [EFST_IDs.EFST_VIPSTATE1] = "SI_VIP.tga", [EFST_IDs.EFST_VIPSTATE2] = "SI_VIP2.tga", [EFST_IDs.EFST_RATE_UP] = "RATE_UP.tga", [EFST_IDs.EFST_YGGDRASIL_BLESS] = "vitata500.tga", [EFST_IDs.EFST_PERIOD_RECEIVEITEM_2ND] = "ITEM_G.tga", [EFST_IDs.EFST_PERIOD_PLUSEXP_2ND] = "EXP_G.tga" } } status.hpp /// @APIHOOK_END /// Do not modify code above this, since it will be automatically generated by the API again EFST_VIPSTATE1 = 2000, EFST_VIPSTATE2 = 2001, EFST_RATE_UP = 2002, EFST_MAX, script_constants.hpp /// @APIHOOK_END /// Do not modify code above this, since it will be automatically generated by the API again export_constant(EFST_VIPSTATE1); export_constant(EFST_VIPSTATE2); export_constant(EFST_RATE_UP); export_constant(EFST_MAX); Install fakeicon: https://rathena.org/board/files/file/4034-fake-icon-stats/ RATE_UP.tga RATE_UP.tga
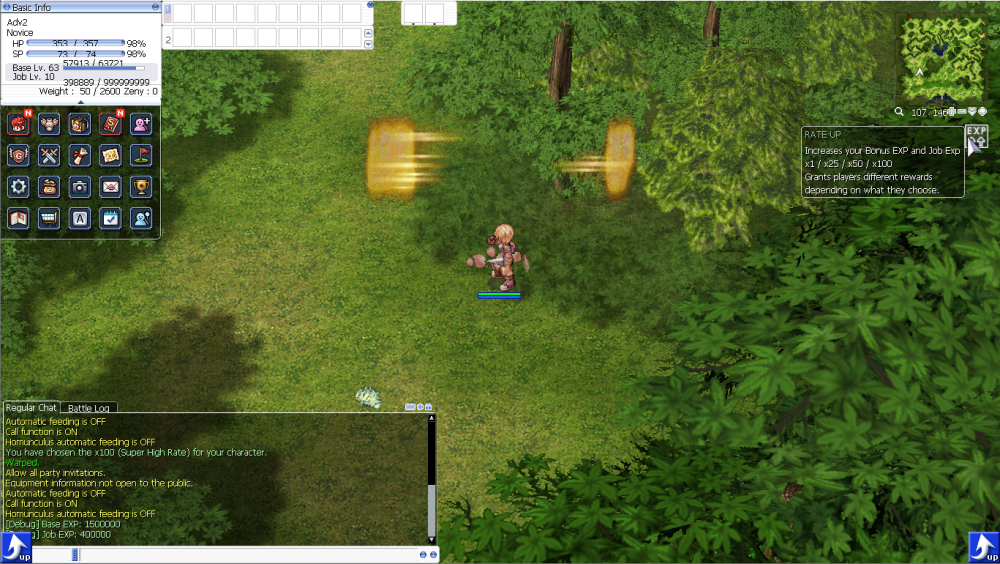 4 points
 -
Here you go # This file is a part of rAthena. # Copyright(C) 2021 rAthena Development Team # https://rathena.org - https://github.com/rathena # # This program is free software: you can redistribute it and/or modify # it under the terms of the GNU General Public License as published by # the Free Software Foundation, either version 3 of the License, or # (at your option) any later version. # # This program is distributed in the hope that it will be useful, # but WITHOUT ANY WARRANTY; without even the implied warranty of # MERCHANTABILITY or FITNESS FOR A PARTICULAR PURPOSE. See the # GNU General Public License for more details. # # You should have received a copy of the GNU General Public License # along with this program. If not, see <http://www.gnu.org/licenses/>. # ########################################################################### # Statpoint Database ########################################################################### # # Statpoint Settings # ########################################################################### # - Level BaseLevel required. # Points Total status points given from BaseLevel 1 to 'Level'. ########################################################################### Header: Type: STATPOINT_DB Version: 1 Body: - Level: 1 Points: 48 - Level: 2 Points: 51 - Level: 3 Points: 54 - Level: 4 Points: 57 - Level: 5 Points: 60 - Level: 6 Points: 64 - Level: 7 Points: 68 - Level: 8 Points: 72 - Level: 9 Points: 76 - Level: 10 Points: 80 - Level: 11 Points: 85 - Level: 12 Points: 90 - Level: 13 Points: 95 - Level: 14 Points: 100 - Level: 15 Points: 105 - Level: 16 Points: 111 - Level: 17 Points: 117 - Level: 18 Points: 123 - Level: 19 Points: 129 - Level: 20 Points: 135 - Level: 21 Points: 142 - Level: 22 Points: 149 - Level: 23 Points: 156 - Level: 24 Points: 163 - Level: 25 Points: 170 - Level: 26 Points: 178 - Level: 27 Points: 186 - Level: 28 Points: 194 - Level: 29 Points: 202 - Level: 30 Points: 210 - Level: 31 Points: 219 - Level: 32 Points: 228 - Level: 33 Points: 237 - Level: 34 Points: 246 - Level: 35 Points: 255 - Level: 36 Points: 265 - Level: 37 Points: 275 - Level: 38 Points: 285 - Level: 39 Points: 295 - Level: 40 Points: 305 - Level: 41 Points: 316 - Level: 42 Points: 327 - Level: 43 Points: 338 - Level: 44 Points: 349 - Level: 45 Points: 360 - Level: 46 Points: 372 - Level: 47 Points: 384 - Level: 48 Points: 396 - Level: 49 Points: 408 - Level: 50 Points: 420 - Level: 51 Points: 433 - Level: 52 Points: 446 - Level: 53 Points: 459 - Level: 54 Points: 472 - Level: 55 Points: 485 - Level: 56 Points: 499 - Level: 57 Points: 513 - Level: 58 Points: 527 - Level: 59 Points: 541 - Level: 60 Points: 555 - Level: 61 Points: 570 - Level: 62 Points: 585 - Level: 63 Points: 600 - Level: 64 Points: 615 - Level: 65 Points: 630 - Level: 66 Points: 646 - Level: 67 Points: 662 - Level: 68 Points: 678 - Level: 69 Points: 694 - Level: 70 Points: 710 - Level: 71 Points: 727 - Level: 72 Points: 744 - Level: 73 Points: 761 - Level: 74 Points: 778 - Level: 75 Points: 795 - Level: 76 Points: 813 - Level: 77 Points: 831 - Level: 78 Points: 849 - Level: 79 Points: 867 - Level: 80 Points: 885 - Level: 81 Points: 904 - Level: 82 Points: 923 - Level: 83 Points: 942 - Level: 84 Points: 961 - Level: 85 Points: 980 - Level: 86 Points: 1000 - Level: 87 Points: 1020 - Level: 88 Points: 1040 - Level: 89 Points: 1060 - Level: 90 Points: 1080 - Level: 91 Points: 1101 - Level: 92 Points: 1122 - Level: 93 Points: 1143 - Level: 94 Points: 1164 - Level: 95 Points: 1185 - Level: 96 Points: 1207 - Level: 97 Points: 1229 - Level: 98 Points: 1251 - Level: 99 Points: 1273 - Level: 100 Points: 1295 - Level: 101 Points: 1318 - Level: 102 Points: 1341 - Level: 103 Points: 1364 - Level: 104 Points: 1387 - Level: 105 Points: 1410 - Level: 106 Points: 1434 - Level: 107 Points: 1458 - Level: 108 Points: 1482 - Level: 109 Points: 1506 - Level: 110 Points: 1530 - Level: 111 Points: 1555 - Level: 112 Points: 1580 - Level: 113 Points: 1605 - Level: 114 Points: 1630 - Level: 115 Points: 1655 - Level: 116 Points: 1681 - Level: 117 Points: 1707 - Level: 118 Points: 1733 - Level: 119 Points: 1759 - Level: 120 Points: 1785 - Level: 121 Points: 1812 - Level: 122 Points: 1839 - Level: 123 Points: 1866 - Level: 124 Points: 1893 - Level: 125 Points: 1920 - Level: 126 Points: 1948 - Level: 127 Points: 1976 - Level: 128 Points: 2004 - Level: 129 Points: 2032 - Level: 130 Points: 2060 - Level: 131 Points: 2089 - Level: 132 Points: 2118 - Level: 133 Points: 2147 - Level: 134 Points: 2176 - Level: 135 Points: 2205 - Level: 136 Points: 2235 - Level: 137 Points: 2265 - Level: 138 Points: 2295 - Level: 139 Points: 2325 - Level: 140 Points: 2355 - Level: 141 Points: 2386 - Level: 142 Points: 2417 - Level: 143 Points: 2448 - Level: 144 Points: 2479 - Level: 145 Points: 2510 - Level: 146 Points: 2542 - Level: 147 Points: 2574 - Level: 148 Points: 2606 - Level: 149 Points: 2638 - Level: 150 Points: 2670 - Level: 151 Points: 2703 - Level: 152 Points: 2736 - Level: 153 Points: 2769 - Level: 154 Points: 2802 - Level: 155 Points: 2835 - Level: 156 Points: 2869 - Level: 157 Points: 2903 - Level: 158 Points: 2937 - Level: 159 Points: 2971 - Level: 160 Points: 3005 - Level: 161 Points: 3040 - Level: 162 Points: 3075 - Level: 163 Points: 3110 - Level: 164 Points: 3145 - Level: 165 Points: 3180 - Level: 166 Points: 3216 - Level: 167 Points: 3252 - Level: 168 Points: 3288 - Level: 169 Points: 3324 - Level: 170 Points: 3360 - Level: 171 Points: 3397 - Level: 172 Points: 3434 - Level: 173 Points: 3471 - Level: 174 Points: 3508 - Level: 175 Points: 3545 - Level: 176 Points: 3583 - Level: 177 Points: 3621 - Level: 178 Points: 3659 - Level: 179 Points: 3697 - Level: 180 Points: 3735 - Level: 181 Points: 3774 - Level: 182 Points: 3813 - Level: 183 Points: 3852 - Level: 184 Points: 3891 - Level: 185 Points: 3930 - Level: 186 Points: 3970 - Level: 187 Points: 4010 - Level: 188 Points: 4050 - Level: 189 Points: 4090 - Level: 190 Points: 4130 - Level: 191 Points: 4171 - Level: 192 Points: 4212 - Level: 193 Points: 4253 - Level: 194 Points: 4294 - Level: 195 Points: 4335 - Level: 196 Points: 4377 - Level: 197 Points: 4419 - Level: 198 Points: 4461 - Level: 199 Points: 4503 - Level: 200 Points: 4545 - Level: 201 Points: 4588 - Level: 202 Points: 4631 - Level: 203 Points: 4674 - Level: 204 Points: 4717 - Level: 205 Points: 4760 - Level: 206 Points: 4804 - Level: 207 Points: 4848 - Level: 208 Points: 4892 - Level: 209 Points: 4936 - Level: 210 Points: 4980 - Level: 211 Points: 5025 - Level: 212 Points: 5070 - Level: 213 Points: 5115 - Level: 214 Points: 5160 - Level: 215 Points: 5205 - Level: 216 Points: 5251 - Level: 217 Points: 5297 - Level: 218 Points: 5343 - Level: 219 Points: 5389 - Level: 220 Points: 5435 - Level: 221 Points: 5482 - Level: 222 Points: 5529 - Level: 223 Points: 5576 - Level: 224 Points: 5623 - Level: 225 Points: 5670 - Level: 226 Points: 5718 - Level: 227 Points: 5766 - Level: 228 Points: 5814 - Level: 229 Points: 5862 - Level: 230 Points: 5910 - Level: 231 Points: 5959 - Level: 232 Points: 6008 - Level: 233 Points: 6057 - Level: 234 Points: 6106 - Level: 235 Points: 6155 - Level: 236 Points: 6205 - Level: 237 Points: 6255 - Level: 238 Points: 6305 - Level: 239 Points: 6355 - Level: 240 Points: 6405 - Level: 241 Points: 6456 - Level: 242 Points: 6507 - Level: 243 Points: 6558 - Level: 244 Points: 6609 - Level: 245 Points: 6660 - Level: 246 Points: 6712 - Level: 247 Points: 6764 - Level: 248 Points: 6816 - Level: 249 Points: 6868 - Level: 250 Points: 6920 - Level: 251 Points: 6973 - Level: 252 Points: 7026 - Level: 253 Points: 7079 - Level: 254 Points: 7132 - Level: 255 Points: 7185 - Level: 256 Points: 7304 - Level: 257 Points: 7423 - Level: 258 Points: 7542 - Level: 259 Points: 7661 - Level: 260 Points: 7780 - Level: 261 Points: 7899 - Level: 262 Points: 8018 - Level: 263 Points: 8137 - Level: 264 Points: 8256 - Level: 265 Points: 8375 - Level: 266 Points: 8494 - Level: 267 Points: 8613 - Level: 268 Points: 8732 - Level: 269 Points: 8851 - Level: 270 Points: 8970 - Level: 271 Points: 9089 - Level: 272 Points: 9208 - Level: 273 Points: 9327 - Level: 274 Points: 9446 - Level: 275 Points: 9565 - Level: 276 Points: 9684 - Level: 277 Points: 9803 - Level: 278 Points: 9922 - Level: 279 Points: 10041 - Level: 280 Points: 10160 - Level: 281 Points: 10279 - Level: 282 Points: 10398 - Level: 283 Points: 10517 - Level: 284 Points: 10636 - Level: 285 Points: 10755 - Level: 286 Points: 10874 - Level: 287 Points: 10993 - Level: 288 Points: 11112 - Level: 289 Points: 11231 - Level: 290 Points: 11350 - Level: 291 Points: 11469 - Level: 292 Points: 11588 - Level: 293 Points: 11707 - Level: 294 Points: 11826 - Level: 295 Points: 11945 - Level: 296 Points: 12064 - Level: 297 Points: 12183 - Level: 298 Points: 12302 - Level: 299 Points: 12421 - Level: 300 Points: 12540 - Level: 301 Points: 12659 - Level: 302 Points: 12778 - Level: 303 Points: 12897 - Level: 304 Points: 13016 - Level: 305 Points: 13135 - Level: 306 Points: 13254 - Level: 307 Points: 13373 - Level: 308 Points: 13492 - Level: 309 Points: 13611 - Level: 310 Points: 13730 - Level: 311 Points: 13849 - Level: 312 Points: 13968 - Level: 313 Points: 14087 - Level: 314 Points: 14206 - Level: 315 Points: 14325 - Level: 316 Points: 14444 - Level: 317 Points: 14563 - Level: 318 Points: 14682 - Level: 319 Points: 14801 - Level: 320 Points: 14920 - Level: 321 Points: 15039 - Level: 322 Points: 15158 - Level: 323 Points: 15277 - Level: 324 Points: 15396 - Level: 325 Points: 15515 - Level: 326 Points: 15634 - Level: 327 Points: 15753 - Level: 328 Points: 15872 - Level: 329 Points: 15991 - Level: 330 Points: 16110 - Level: 331 Points: 16229 - Level: 332 Points: 16348 - Level: 333 Points: 16467 - Level: 334 Points: 16586 - Level: 335 Points: 16705 - Level: 336 Points: 16824 - Level: 337 Points: 16943 - Level: 338 Points: 17062 - Level: 339 Points: 17181 - Level: 340 Points: 17300 - Level: 341 Points: 17419 - Level: 342 Points: 17538 - Level: 343 Points: 17657 - Level: 344 Points: 17776 - Level: 345 Points: 17895 - Level: 346 Points: 18014 - Level: 347 Points: 18133 - Level: 348 Points: 18252 - Level: 349 Points: 18371 - Level: 350 Points: 18490 - Level: 351 Points: 18609 - Level: 352 Points: 18728 - Level: 353 Points: 18847 - Level: 354 Points: 18966 - Level: 355 Points: 19085 - Level: 356 Points: 19204 - Level: 357 Points: 19323 - Level: 358 Points: 19442 - Level: 359 Points: 19561 - Level: 360 Points: 19680 - Level: 361 Points: 19799 - Level: 362 Points: 19918 - Level: 363 Points: 20037 - Level: 364 Points: 20156 - Level: 365 Points: 20275 - Level: 366 Points: 20394 - Level: 367 Points: 20513 - Level: 368 Points: 20632 - Level: 369 Points: 20751 - Level: 370 Points: 20870 - Level: 371 Points: 20989 - Level: 372 Points: 21108 - Level: 373 Points: 21227 - Level: 374 Points: 21346 - Level: 375 Points: 21465 - Level: 376 Points: 21584 - Level: 377 Points: 21703 - Level: 378 Points: 21822 - Level: 379 Points: 21941 - Level: 380 Points: 22060 - Level: 381 Points: 22179 - Level: 382 Points: 22298 - Level: 383 Points: 22417 - Level: 384 Points: 22536 - Level: 385 Points: 22655 - Level: 386 Points: 22774 - Level: 387 Points: 22893 - Level: 388 Points: 23012 - Level: 389 Points: 23131 - Level: 390 Points: 23250 - Level: 391 Points: 23369 - Level: 392 Points: 23488 - Level: 393 Points: 23607 - Level: 394 Points: 23726 - Level: 395 Points: 23845 - Level: 396 Points: 23964 - Level: 397 Points: 24083 - Level: 398 Points: 24202 - Level: 399 Points: 24321 - Level: 400 Points: 24440 - Level: 401 Points: 24559 - Level: 402 Points: 24678 - Level: 403 Points: 24797 - Level: 404 Points: 24916 - Level: 405 Points: 25035 - Level: 406 Points: 25154 - Level: 407 Points: 25273 - Level: 408 Points: 25392 - Level: 409 Points: 25511 - Level: 410 Points: 25630 - Level: 411 Points: 25749 - Level: 412 Points: 25868 - Level: 413 Points: 25987 - Level: 414 Points: 26106 - Level: 415 Points: 26225 - Level: 416 Points: 26344 - Level: 417 Points: 26463 - Level: 418 Points: 26582 - Level: 419 Points: 26701 - Level: 420 Points: 26820 - Level: 421 Points: 26939 - Level: 422 Points: 27058 - Level: 423 Points: 27177 - Level: 424 Points: 27296 - Level: 425 Points: 27415 - Level: 426 Points: 27534 - Level: 427 Points: 27653 - Level: 428 Points: 27772 - Level: 429 Points: 27891 - Level: 430 Points: 28010 - Level: 431 Points: 28129 - Level: 432 Points: 28248 - Level: 433 Points: 28367 - Level: 434 Points: 28486 - Level: 435 Points: 28605 - Level: 436 Points: 28724 - Level: 437 Points: 28843 - Level: 438 Points: 28962 - Level: 439 Points: 29081 - Level: 440 Points: 29200 - Level: 441 Points: 29319 - Level: 442 Points: 29438 - Level: 443 Points: 29557 - Level: 444 Points: 29676 - Level: 445 Points: 29795 - Level: 446 Points: 29914 - Level: 447 Points: 30033 - Level: 448 Points: 30152 - Level: 449 Points: 30271 - Level: 450 Points: 30390 - Level: 451 Points: 30509 - Level: 452 Points: 30628 - Level: 453 Points: 30747 - Level: 454 Points: 30866 - Level: 455 Points: 30985 - Level: 456 Points: 31104 - Level: 457 Points: 31223 - Level: 458 Points: 31342 - Level: 459 Points: 31461 - Level: 460 Points: 31580 - Level: 461 Points: 31699 - Level: 462 Points: 31818 - Level: 463 Points: 31937 - Level: 464 Points: 32056 - Level: 465 Points: 32175 - Level: 466 Points: 32294 - Level: 467 Points: 32413 - Level: 468 Points: 32532 - Level: 469 Points: 32651 - Level: 470 Points: 32770 - Level: 471 Points: 32889 - Level: 472 Points: 33008 - Level: 473 Points: 33127 - Level: 474 Points: 33246 - Level: 475 Points: 33365 - Level: 476 Points: 33484 - Level: 477 Points: 33603 - Level: 478 Points: 33722 - Level: 479 Points: 33841 - Level: 480 Points: 33960 - Level: 481 Points: 34079 - Level: 482 Points: 34198 - Level: 483 Points: 34317 - Level: 484 Points: 34436 - Level: 485 Points: 34555 - Level: 486 Points: 34674 - Level: 487 Points: 34793 - Level: 488 Points: 34912 - Level: 489 Points: 35031 - Level: 490 Points: 35150 - Level: 491 Points: 35269 - Level: 492 Points: 35388 - Level: 493 Points: 35507 - Level: 494 Points: 35626 - Level: 495 Points: 35745 - Level: 496 Points: 35864 - Level: 497 Points: 35983 - Level: 498 Points: 36102 - Level: 499 Points: 36221 - Level: 500 Points: 36340 - Level: 501 Points: 36459 - Level: 502 Points: 36578 - Level: 503 Points: 36697 - Level: 504 Points: 36816 - Level: 505 Points: 36935 - Level: 506 Points: 37054 - Level: 507 Points: 37173 - Level: 508 Points: 37292 - Level: 509 Points: 37411 - Level: 510 Points: 37530 - Level: 511 Points: 37649 - Level: 512 Points: 37768 - Level: 513 Points: 37887 - Level: 514 Points: 38006 - Level: 515 Points: 38125 - Level: 516 Points: 38244 - Level: 517 Points: 38363 - Level: 518 Points: 38482 - Level: 519 Points: 38601 - Level: 520 Points: 38720 - Level: 521 Points: 38839 - Level: 522 Points: 38958 - Level: 523 Points: 39077 - Level: 524 Points: 39196 - Level: 525 Points: 39315 - Level: 526 Points: 39434 - Level: 527 Points: 39553 - Level: 528 Points: 39672 - Level: 529 Points: 39791 - Level: 530 Points: 39910 - Level: 531 Points: 40029 - Level: 532 Points: 40148 - Level: 533 Points: 40267 - Level: 534 Points: 40386 - Level: 535 Points: 40505 - Level: 536 Points: 40624 - Level: 537 Points: 40743 - Level: 538 Points: 40862 - Level: 539 Points: 40981 - Level: 540 Points: 41100 - Level: 541 Points: 41219 - Level: 542 Points: 41338 - Level: 543 Points: 41457 - Level: 544 Points: 41576 - Level: 545 Points: 41695 - Level: 546 Points: 41814 - Level: 547 Points: 41933 - Level: 548 Points: 42052 - Level: 549 Points: 42171 - Level: 550 Points: 42290 - Level: 551 Points: 42409 - Level: 552 Points: 42528 - Level: 553 Points: 42647 - Level: 554 Points: 42766 - Level: 555 Points: 42885 - Level: 556 Points: 43004 - Level: 557 Points: 43123 - Level: 558 Points: 43242 - Level: 559 Points: 43361 - Level: 560 Points: 43480 - Level: 561 Points: 43599 - Level: 562 Points: 43718 - Level: 563 Points: 43837 - Level: 564 Points: 43956 - Level: 565 Points: 44075 - Level: 566 Points: 44194 - Level: 567 Points: 44313 - Level: 568 Points: 44432 - Level: 569 Points: 44551 - Level: 570 Points: 44670 - Level: 571 Points: 44789 - Level: 572 Points: 44908 - Level: 573 Points: 45027 - Level: 574 Points: 45146 - Level: 575 Points: 45265 - Level: 576 Points: 45384 - Level: 577 Points: 45503 - Level: 578 Points: 45622 - Level: 579 Points: 45741 - Level: 580 Points: 45860 - Level: 581 Points: 45979 - Level: 582 Points: 46098 - Level: 583 Points: 46217 - Level: 584 Points: 46336 - Level: 585 Points: 46455 - Level: 586 Points: 46574 - Level: 587 Points: 46693 - Level: 588 Points: 46812 - Level: 589 Points: 46931 - Level: 590 Points: 47050 - Level: 591 Points: 47169 - Level: 592 Points: 47288 - Level: 593 Points: 47407 - Level: 594 Points: 47526 - Level: 595 Points: 47645 - Level: 596 Points: 47764 - Level: 597 Points: 47883 - Level: 598 Points: 48002 - Level: 599 Points: 48121 - Level: 600 Points: 48240 - Level: 601 Points: 48359 - Level: 602 Points: 48478 - Level: 603 Points: 48597 - Level: 604 Points: 48716 - Level: 605 Points: 48835 - Level: 606 Points: 48954 - Level: 607 Points: 49073 - Level: 608 Points: 49192 - Level: 609 Points: 49311 - Level: 610 Points: 49430 - Level: 611 Points: 49549 - Level: 612 Points: 49668 - Level: 613 Points: 49787 - Level: 614 Points: 49906 - Level: 615 Points: 50025 - Level: 616 Points: 50144 - Level: 617 Points: 50263 - Level: 618 Points: 50382 - Level: 619 Points: 50501 - Level: 620 Points: 50620 - Level: 621 Points: 50739 - Level: 622 Points: 50858 - Level: 623 Points: 50977 - Level: 624 Points: 51096 - Level: 625 Points: 51215 - Level: 626 Points: 51334 - Level: 627 Points: 51453 - Level: 628 Points: 51572 - Level: 629 Points: 51691 - Level: 630 Points: 51810 - Level: 631 Points: 51929 - Level: 632 Points: 52048 - Level: 633 Points: 52167 - Level: 634 Points: 52286 - Level: 635 Points: 52405 - Level: 636 Points: 52524 - Level: 637 Points: 52643 - Level: 638 Points: 52762 - Level: 639 Points: 52881 - Level: 640 Points: 53000 - Level: 641 Points: 53119 - Level: 642 Points: 53238 - Level: 643 Points: 53357 - Level: 644 Points: 53476 - Level: 645 Points: 53595 - Level: 646 Points: 53714 - Level: 647 Points: 53833 - Level: 648 Points: 53952 - Level: 649 Points: 54071 - Level: 650 Points: 54190 - Level: 651 Points: 54309 - Level: 652 Points: 54428 - Level: 653 Points: 54547 - Level: 654 Points: 54666 - Level: 655 Points: 54785 - Level: 656 Points: 54904 - Level: 657 Points: 55023 - Level: 658 Points: 55142 - Level: 659 Points: 55261 - Level: 660 Points: 55380 - Level: 661 Points: 55499 - Level: 662 Points: 55618 - Level: 663 Points: 55737 - Level: 664 Points: 55856 - Level: 665 Points: 55975 - Level: 666 Points: 56094 - Level: 667 Points: 56213 - Level: 668 Points: 56332 - Level: 669 Points: 56451 - Level: 670 Points: 56570 - Level: 671 Points: 56689 - Level: 672 Points: 56808 - Level: 673 Points: 56927 - Level: 674 Points: 57046 - Level: 675 Points: 57165 - Level: 676 Points: 57284 - Level: 677 Points: 57403 - Level: 678 Points: 57522 - Level: 679 Points: 57641 - Level: 680 Points: 57760 - Level: 681 Points: 57879 - Level: 682 Points: 57998 - Level: 683 Points: 58117 - Level: 684 Points: 58236 - Level: 685 Points: 58355 - Level: 686 Points: 58474 - Level: 687 Points: 58593 - Level: 688 Points: 58712 - Level: 689 Points: 58831 - Level: 690 Points: 58950 - Level: 691 Points: 59069 - Level: 692 Points: 59188 - Level: 693 Points: 59307 - Level: 694 Points: 59426 - Level: 695 Points: 59545 - Level: 696 Points: 59664 - Level: 697 Points: 59783 - Level: 698 Points: 59902 - Level: 699 Points: 60021 - Level: 700 Points: 60140 - Level: 701 Points: 60259 - Level: 702 Points: 60378 - Level: 703 Points: 60497 - Level: 704 Points: 60616 - Level: 705 Points: 60735 - Level: 706 Points: 60854 - Level: 707 Points: 60973 - Level: 708 Points: 61092 - Level: 709 Points: 61211 - Level: 710 Points: 61330 - Level: 711 Points: 61449 - Level: 712 Points: 61568 - Level: 713 Points: 61687 - Level: 714 Points: 61806 - Level: 715 Points: 61925 - Level: 716 Points: 62044 - Level: 717 Points: 62163 - Level: 718 Points: 62282 - Level: 719 Points: 62401 - Level: 720 Points: 62520 - Level: 721 Points: 62639 - Level: 722 Points: 62758 - Level: 723 Points: 62877 - Level: 724 Points: 62996 - Level: 725 Points: 63115 - Level: 726 Points: 63234 - Level: 727 Points: 63353 - Level: 728 Points: 63472 - Level: 729 Points: 63591 - Level: 730 Points: 63710 - Level: 731 Points: 63829 - Level: 732 Points: 63948 - Level: 733 Points: 64067 - Level: 734 Points: 64186 - Level: 735 Points: 64305 - Level: 736 Points: 64424 - Level: 737 Points: 64543 - Level: 738 Points: 64662 - Level: 739 Points: 64781 - Level: 740 Points: 64900 - Level: 741 Points: 65019 - Level: 742 Points: 65138 - Level: 743 Points: 65257 - Level: 744 Points: 65376 - Level: 745 Points: 65495 - Level: 746 Points: 65614 - Level: 747 Points: 65733 - Level: 748 Points: 65852 - Level: 749 Points: 65971 - Level: 750 Points: 66090 - Level: 751 Points: 66209 - Level: 752 Points: 66328 - Level: 753 Points: 66447 - Level: 754 Points: 66566 - Level: 755 Points: 66685 - Level: 756 Points: 66804 - Level: 757 Points: 66923 - Level: 758 Points: 67042 - Level: 759 Points: 67161 - Level: 760 Points: 67280 - Level: 761 Points: 67399 - Level: 762 Points: 67518 - Level: 763 Points: 67637 - Level: 764 Points: 67756 - Level: 765 Points: 67875 - Level: 766 Points: 67994 - Level: 767 Points: 68113 - Level: 768 Points: 68232 - Level: 769 Points: 68351 - Level: 770 Points: 68470 - Level: 771 Points: 68589 - Level: 772 Points: 68708 - Level: 773 Points: 68827 - Level: 774 Points: 68946 - Level: 775 Points: 69065 - Level: 776 Points: 69184 - Level: 777 Points: 69303 - Level: 778 Points: 69422 - Level: 779 Points: 69541 - Level: 780 Points: 69660 - Level: 781 Points: 69779 - Level: 782 Points: 69898 - Level: 783 Points: 70017 - Level: 784 Points: 70136 - Level: 785 Points: 70255 - Level: 786 Points: 70374 - Level: 787 Points: 70493 - Level: 788 Points: 70612 - Level: 789 Points: 70731 - Level: 790 Points: 70850 - Level: 791 Points: 70969 - Level: 792 Points: 71088 - Level: 793 Points: 71207 - Level: 794 Points: 71326 - Level: 795 Points: 71445 - Level: 796 Points: 71564 - Level: 797 Points: 71683 - Level: 798 Points: 71802 - Level: 799 Points: 71921 - Level: 800 Points: 72040 - Level: 801 Points: 72159 - Level: 802 Points: 72278 - Level: 803 Points: 72397 - Level: 804 Points: 72516 - Level: 805 Points: 72635 - Level: 806 Points: 72754 - Level: 807 Points: 72873 - Level: 808 Points: 72992 - Level: 809 Points: 73111 - Level: 810 Points: 73230 - Level: 811 Points: 73349 - Level: 812 Points: 73468 - Level: 813 Points: 73587 - Level: 814 Points: 73706 - Level: 815 Points: 73825 - Level: 816 Points: 73944 - Level: 817 Points: 74063 - Level: 818 Points: 74182 - Level: 819 Points: 74301 - Level: 820 Points: 74420 - Level: 821 Points: 74539 - Level: 822 Points: 74658 - Level: 823 Points: 74777 - Level: 824 Points: 74896 - Level: 825 Points: 75015 - Level: 826 Points: 75134 - Level: 827 Points: 75253 - Level: 828 Points: 75372 - Level: 829 Points: 75491 - Level: 830 Points: 75610 - Level: 831 Points: 75729 - Level: 832 Points: 75848 - Level: 833 Points: 75967 - Level: 834 Points: 76086 - Level: 835 Points: 76205 - Level: 836 Points: 76324 - Level: 837 Points: 76443 - Level: 838 Points: 76562 - Level: 839 Points: 76681 - Level: 840 Points: 76800 - Level: 841 Points: 76919 - Level: 842 Points: 77038 - Level: 843 Points: 77157 - Level: 844 Points: 77276 - Level: 845 Points: 77395 - Level: 846 Points: 77514 - Level: 847 Points: 77633 - Level: 848 Points: 77752 - Level: 849 Points: 77871 - Level: 850 Points: 77990 - Level: 851 Points: 78109 - Level: 852 Points: 78228 - Level: 853 Points: 78347 - Level: 854 Points: 78466 - Level: 855 Points: 78585 - Level: 856 Points: 78704 - Level: 857 Points: 78823 - Level: 858 Points: 78942 - Level: 859 Points: 79061 - Level: 860 Points: 79180 - Level: 861 Points: 79299 - Level: 862 Points: 79418 - Level: 863 Points: 79537 - Level: 864 Points: 79656 - Level: 865 Points: 79775 - Level: 866 Points: 79894 - Level: 867 Points: 80013 - Level: 868 Points: 80132 - Level: 869 Points: 80251 - Level: 870 Points: 80370 - Level: 871 Points: 80489 - Level: 872 Points: 80608 - Level: 873 Points: 80727 - Level: 874 Points: 80846 - Level: 875 Points: 80965 - Level: 876 Points: 81084 - Level: 877 Points: 81203 - Level: 878 Points: 81322 - Level: 879 Points: 81441 - Level: 880 Points: 81560 - Level: 881 Points: 81679 - Level: 882 Points: 81798 - Level: 883 Points: 81917 - Level: 884 Points: 82036 - Level: 885 Points: 82155 - Level: 886 Points: 82274 - Level: 887 Points: 82393 - Level: 888 Points: 82512 - Level: 889 Points: 82631 - Level: 890 Points: 82750 - Level: 891 Points: 82869 - Level: 892 Points: 82988 - Level: 893 Points: 83107 - Level: 894 Points: 83226 - Level: 895 Points: 83345 - Level: 896 Points: 83464 - Level: 897 Points: 83583 - Level: 898 Points: 83702 - Level: 899 Points: 83821 - Level: 900 Points: 83940 - Level: 901 Points: 84140 - Level: 902 Points: 84340 - Level: 903 Points: 84540 - Level: 904 Points: 84740 - Level: 905 Points: 84940 - Level: 906 Points: 85140 - Level: 907 Points: 85340 - Level: 908 Points: 85540 - Level: 909 Points: 85740 - Level: 910 Points: 85940 - Level: 911 Points: 86140 - Level: 912 Points: 86340 - Level: 913 Points: 86540 - Level: 914 Points: 86740 - Level: 915 Points: 86940 - Level: 916 Points: 87140 - Level: 917 Points: 87340 - Level: 918 Points: 87540 - Level: 919 Points: 87740 - Level: 920 Points: 87940 - Level: 921 Points: 88140 - Level: 922 Points: 88340 - Level: 923 Points: 88540 - Level: 924 Points: 88740 - Level: 925 Points: 88940 - Level: 926 Points: 89140 - Level: 927 Points: 89340 - Level: 928 Points: 89540 - Level: 929 Points: 89740 - Level: 930 Points: 89940 - Level: 931 Points: 90140 - Level: 932 Points: 90340 - Level: 933 Points: 90540 - Level: 934 Points: 90740 - Level: 935 Points: 90940 - Level: 936 Points: 91140 - Level: 937 Points: 91340 - Level: 938 Points: 91540 - Level: 939 Points: 91740 - Level: 940 Points: 91940 - Level: 941 Points: 92140 - Level: 942 Points: 92340 - Level: 943 Points: 92540 - Level: 944 Points: 92740 - Level: 945 Points: 92940 - Level: 946 Points: 93140 - Level: 947 Points: 93340 - Level: 948 Points: 93540 - Level: 949 Points: 93740 - Level: 950 Points: 93940 - Level: 951 Points: 94140 - Level: 952 Points: 94340 - Level: 953 Points: 94540 - Level: 954 Points: 94740 - Level: 955 Points: 94940 - Level: 956 Points: 95140 - Level: 957 Points: 95340 - Level: 958 Points: 95540 - Level: 959 Points: 95740 - Level: 960 Points: 95940 - Level: 961 Points: 96140 - Level: 962 Points: 96340 - Level: 963 Points: 96540 - Level: 964 Points: 96740 - Level: 965 Points: 96940 - Level: 966 Points: 97140 - Level: 967 Points: 97340 - Level: 968 Points: 97540 - Level: 969 Points: 97740 - Level: 970 Points: 97940 - Level: 971 Points: 98140 - Level: 972 Points: 98340 - Level: 973 Points: 98540 - Level: 974 Points: 98740 - Level: 975 Points: 98940 - Level: 976 Points: 99140 - Level: 977 Points: 99340 - Level: 978 Points: 99540 - Level: 979 Points: 99740 - Level: 980 Points: 99940 - Level: 981 Points: 100140 - Level: 982 Points: 100340 - Level: 983 Points: 100540 - Level: 984 Points: 100740 - Level: 985 Points: 100940 - Level: 986 Points: 101140 - Level: 987 Points: 101340 - Level: 988 Points: 101540 - Level: 989 Points: 101740 - Level: 990 Points: 101940 - Level: 991 Points: 102140 - Level: 992 Points: 102340 - Level: 993 Points: 102540 - Level: 994 Points: 102740 - Level: 995 Points: 102940 - Level: 996 Points: 103140 - Level: 997 Points: 103340 - Level: 998 Points: 103540 - Level: 999 Points: 1037404 points
-
A simple converter that will convert item from database to use for client in 30 seconds. _________________________________________________________ >> Download (v.8.2) (30 Mar 2025) << >> Download (Item Preview Collection Sprites) (22 Feb 2025) << >> Source Code << >> English Tutorial << >> Thai Tutorial << >> Sprite Error Checker Tutorial << _________________________________________________________ Pros: Item description sync from database so it's get rid the problem that item description was not match with database. Full combo explanation. Full information explanation. Cons: Not had lore descriptions. Complex item script was take a bit time to read through. How to use: Paste your database files on '\rAthena item_db to itemInfo_Data\Assets', (File name can't be change) Open program and select languages then hit convert. Output files location is the same with program location. Credit @KingarteR resource name finder & mostly client files finder Example output: Link Output error? Try this:
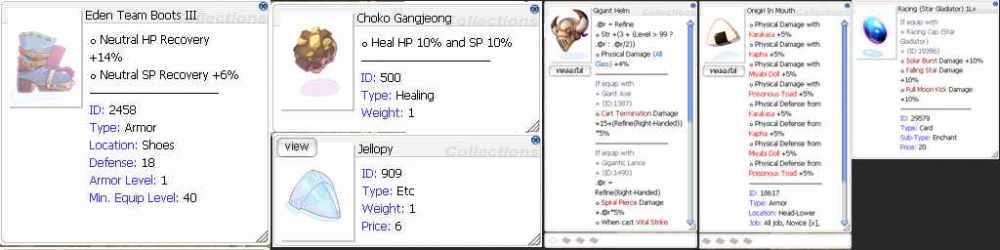
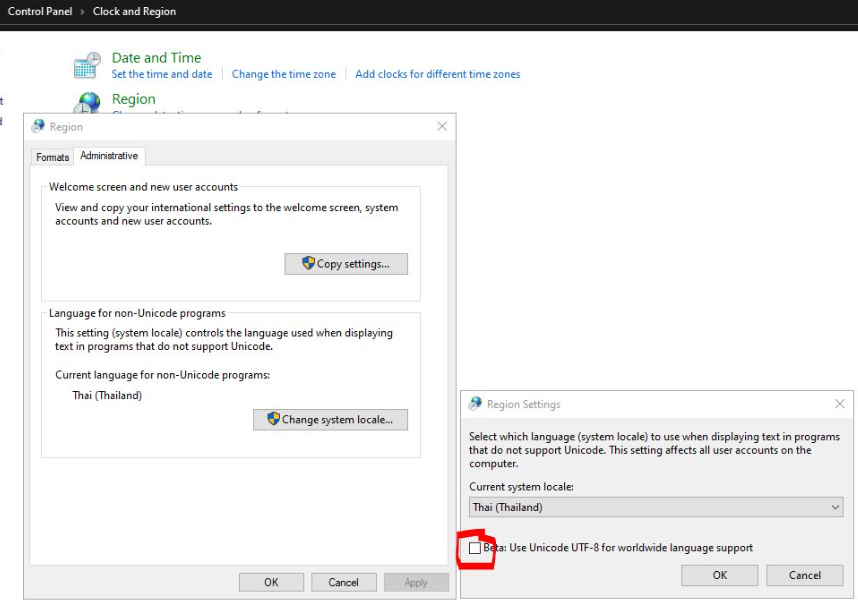 3 points
 -
pokemon.mp4 Check out my new creation! Pokemon Map In-game Video Preview pokemon.mp4 Indoor indoor.mp43 points
-
Many people have questions about how to properly set up a newly acquired VPS to run the rAthena emulator. To simplify this process, I created an automated script that handles all the necessary configuration quickly and easily. Most tutorials available online focus on running the emulator on personal computers, but nowadays, the trend is to use a VPS for better performance and stability. With this script, you can set up your environment efficiently, even without advanced server knowledge. For those who want to start a professional rAthena project, here are some tips: 1. Use MariaDB instead of MySQL MariaDB is a community-developed fork of MySQL that offers several performance and optimization advantages, especially for large-scale applications like rAthena. While both database systems are compatible, MariaDB stands out due to its efficiency in handling intensive queries. Benefits of using MariaDB: Better Performance: MariaDB is optimized for handling large volumes of data and executes complex queries faster than MySQL. Improved Storage Engines: Supports advanced engines like Aria and TokuDB, which enhance performance and reduce data fragmentation. Faster Replication: Offers faster and safer master-slave replication, ensuring better data synchronization in distributed environments. Open Source & Active Development: Fully open-source with a more active development cycle, meaning better features and faster bug fixes. Optimized Thread Pooling: Handles multiple simultaneous connections efficiently, reducing CPU overhead and improving query response time. For an rAthena server, this translates to faster character loading, smoother gameplay, and better handling of concurrent player actions. 2. Use nftables instead of iptables nftables is a modern packet filtering framework that replaces the older iptables. It is now the default in most Linux distributions and provides better performance and flexibility when managing network rules, including basic DDoS protection. Benefits of using nftables: Higher Performance: Processes rules faster with a more optimized kernel implementation, reducing the impact on system resources. Simplified Rule Management: Uses a cleaner and unified syntax, making it easier to create and manage complex firewall rules. Better DDoS Mitigation: Supports more efficient rate limiting and packet inspection, allowing you to block basic DDoS attacks with minimal overhead. Dynamic Rules: Allows for dynamic rule adjustments without the need to reload the entire firewall configuration. IPv4/IPv6 Support: Handles both IPv4 and IPv6 rules natively, simplifying firewall management in modern environments. For a professional rAthena project, nftables ensures better network protection, faster packet processing, and more efficient handling of traffic spikes during large player events or attacks. Instructions to Use the Script: Upload the script to your VPS Use an SCP tool or copy-paste the script contents into a file called ubuntu.sh. Make the script executable: chmod +x ubuntu.sh Run the script with root privileges: sudo ./ubuntu.sh Follow the interactive prompts: Choose between MariaDB or MySQL. Input the database name, database user, and password. The script will: Update system packages. Install required dependencies for compiling rAthena. Set up MySQL or MariaDB. Install and configure phpMyAdmin at /phpmyadmin. After completing these steps, your VPS will be ready to compile and run rAthena. ubuntu.sh3 points
-
View File AnyMapDrops This mod made in map_drops.yml now allows you to add drops globally (without specifying a map), I also added a parameter where the added item can go directly to the player's inventory if there is space. Example of use ( db\import\map_drops.yml ) Header: Type: MAP_DROP_DB Version: 2 Body: - Map: ANY GlobalDrops: - Index: 0 Item: Union_Token Rate: 50000 DirectInventory: true - Index: 1 Item: Flower Rate: 100000 SpecificDrops: - Monster: Fabre Drops: - Index: 0 Item: White_Gold_Coin Rate: 50000 DirectInventory: true - Index: 1 Item: Izidor Rate: 50000 - Monster: Poring Drops: - Index: 0 Item: Crystal_Jewel__ Rate: 50000 Note 1: To be valid across all maps, set the map name to ANY. Note 2: The new parameter DirectInventory ( false | true ) allows the item to go directly to the inventory. Note 3: I created 2 new mapflags (nomapdrops and mapdrops), the first is self-explanatory (does not drop any items from map_drops ), the second will be effective for instances, as now map_drops does not drop items in instances, so just apply the second mapflag on the instance (in the instance maps) to make it work again. Example of use: OnInstanceInit: setmapflag instance_mapname("1@nyd"),mf_mapdrops; setmapflag instance_mapname("2@nyd"),mf_mapdrops; Next updates I will add a parameter to mapdrops.yml if you want the item to be dropped in instances too instead of having to use the mapdrops mapflag. Submitter Hyroshima Submitted 06/26/24 Category Source Modifications Video Content Author Hyroshima3 points
-
I've noticed many servers boasting about their use of @autoattack, with some even profiting from selling the source without giving proper credit to the original creators. It's time to set things right and give back to the community. So here it is—free for everyone, as it should be. Thank you very much to @goddameit @Keitenai for the source and fixes and the other guys that i failed to mention. - Works best with the SVN version last 2019 *not sure about the version* - If you're looking to make it work with the latest rAthena, that's on you—I won’t be providing support. How It Works: Assign an active skill to the first hotkey in your skill tab (e.g., F1). If no skill is set, the bot will default to normal attacks. To enable auto-teleport, make sure you have Fly Wings, a Teleport Clip (Creamy Card), or the Teleport skill. I won’t provide assistance with adding this to your server—this is for those who understand and can apply diffs manually. Use the command @korebot Enjoy! P.S. the command to enable this is @korebot. korebot.diff3 points
-
Hello everyone, This is my first topic on the forum! I’m a beginner map creator who started this journey as a hobby. In 2023, a friend asked me to design custom maps for his private server, and since then, I've had the opportunity to create several maps. I’m excited to share them with you. Below, I’ll highlight some of the maps I’ve worked on. Throughout this process, I’ve focused on mimicking the style of Ragnarok Online as closely as possible, aiming to create maps that feel like they truly belong to the game. the Adventurers' Guild. This map serves multiple purposes within the game—it functions as a story hub, save point, quest area, market, and more. it's divided into the first, second and third floor. The first & Second floor: these are meant for all the players. The Third Floor: This floor is for players who have made certain accomplishments in the guild. The Guild commander The Portal Chamber This room was intended to serve as a gateway, connecting the Adventurer’s Guild to other special locations. One of the portals was designed to lead to the Training Ground, while the destinations for the other two portals have yet to be determined. Hall of Victory This area was designed for special guild celebrations, held after certain milestones within the guild. The Adventurers' Guild contains several key areas,: The Armory: This is where Sir Armand resides. He assists new players by providing essential early-game gear to help them get started. In addition to this, the armory also houses a secret quest that allows players to obtain rental god items. Sir Armand the Armorer The Registration Office: This is where players can join the guild and learn about the lore behind its origins and purpose. The Exploration Squad Office: This area is dedicated to missions that involve discovering hidden and secret areas within the world. Captain Saif WANTED: Criminal Posters Those are actually a real players in the server, it was planned to be updated regularly. The Store: A marketplace where players can buy essential items and gear. I had many plans to further expand the Adventurer’s Guild, with additional areas and features, Unfortunately, the expansion didn’t come to life. Other areas are designed for exploration and quests: The Hidden Forest: This area becomes accessible after discovering its hidden entrance and completing a short quest. Inside, the player will encounter the Golden Poring, who has slumbered for centuries. Upon awakening, the Poring will reveal an ancient tale of the world's forgotten past and its dark future. The Forgotten Altar: This area becomes accessible after completing a special quest, unlocking the ability to summon the Soul Taker. Once summoned, the player can inscribe the name of their most hated enemy on the Death Tree, marking them for death. However, the player must then face the Soul Taker in a deadly, no escape battle. The Inner Core: This is the deepest layer of the Thor Dungeon, originally planned to be part of a quest and a site for summoning the Dark Ifrit. The Training Ground: This area is connected to the Adventurer's Guild and holds secrets from the guild’s creation. Designed for special events, it also features a unique teleportation system (which, unfortunately, was never completed). Grave of the Forgotten Hero Lastly, here’s a map I created... literally for no reason at all. Temple of blood I hope you enjoyed reading this topic! Special thanks to Brof for creating BrowEdit, and to Speedrun for providing numerous tutorials that have greatly helped with map creation.3 points
-
When in doubt about which rate to keep on the server, I ended up creating a command for GMs to change the server rates and announce the rates to everyone if changed. Note: the language is in Brazilian Portuguese, feel free to modify the texts to your language. The script working: !!Don't forget to add the folder into "rAthena/npc/scripts_custom.conf"!! changerates.txt3 points