Leaderboard


Popular Content
Showing content with the highest reputation on 08/01/23 in all areas
-
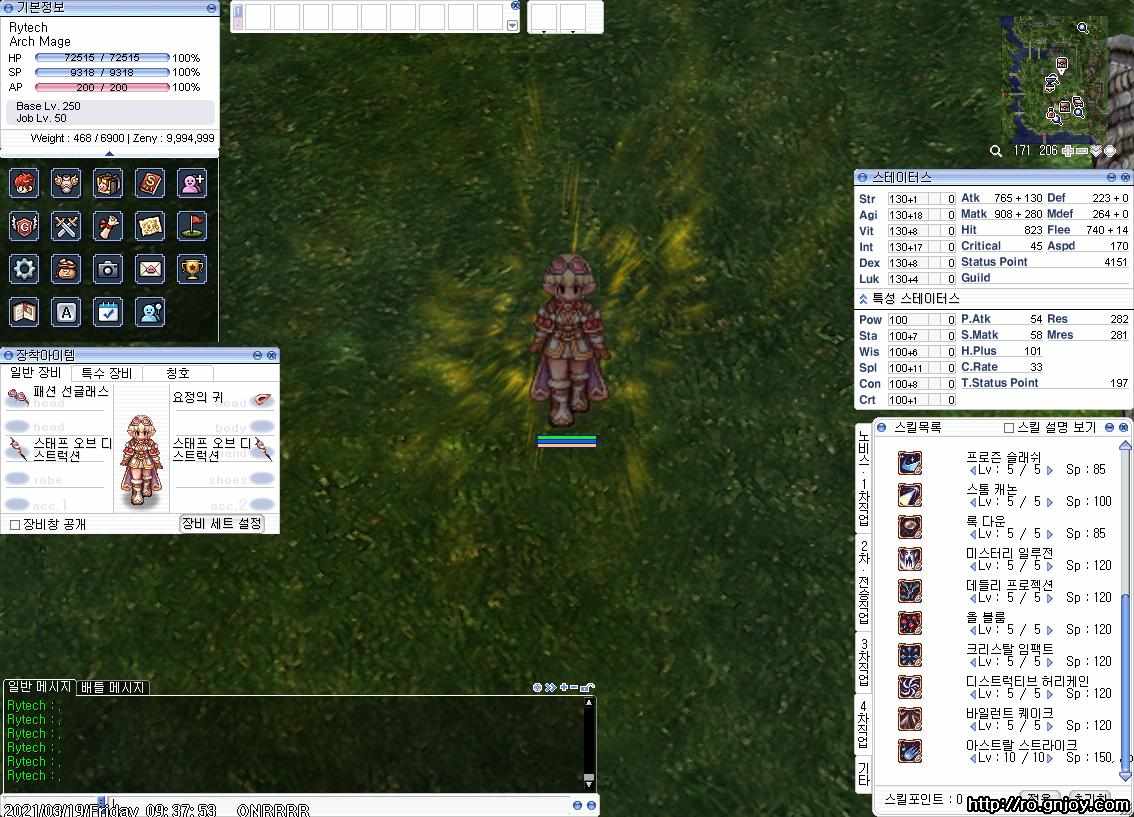
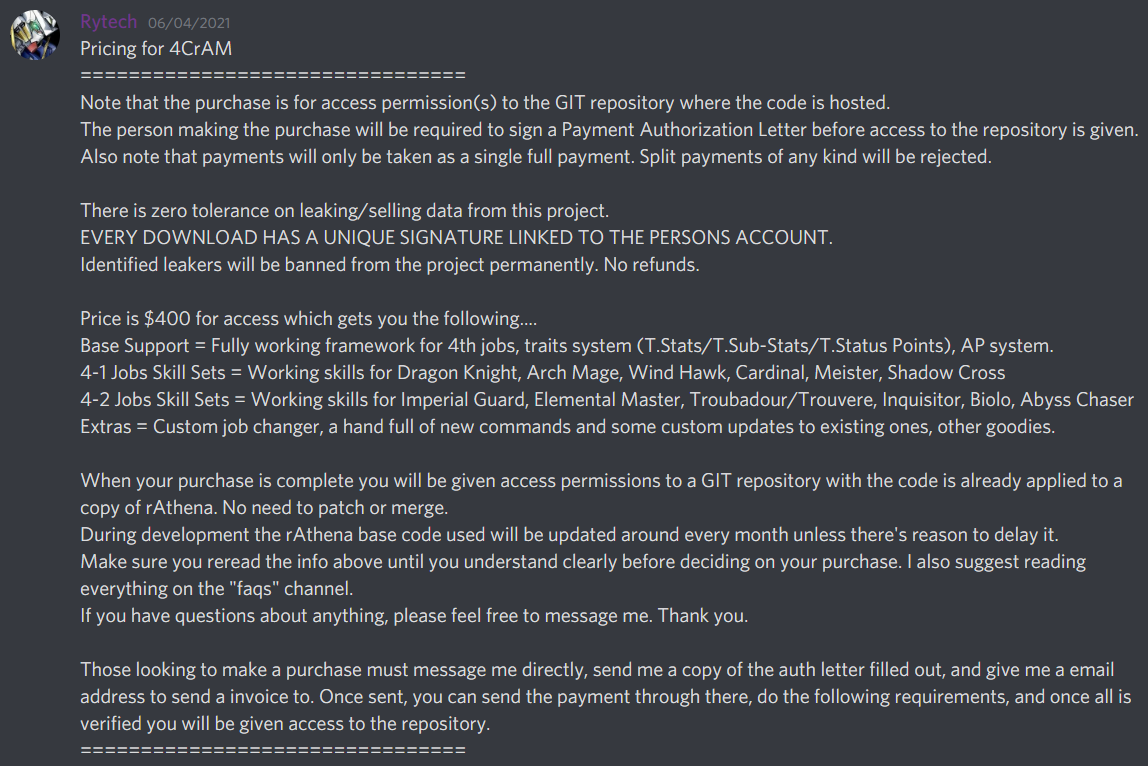
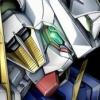
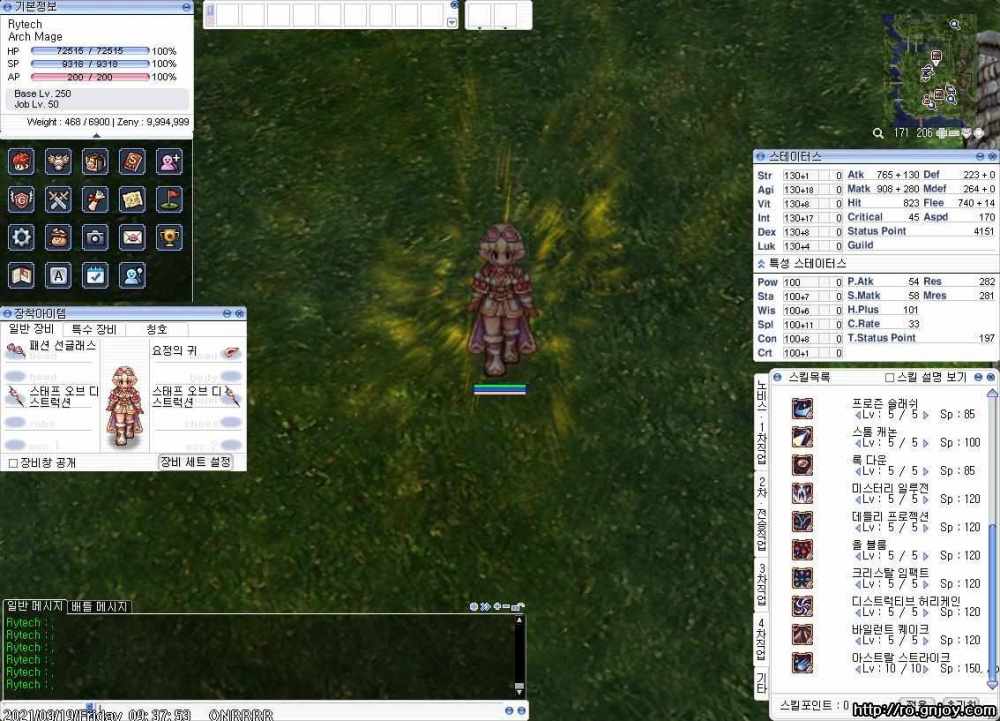
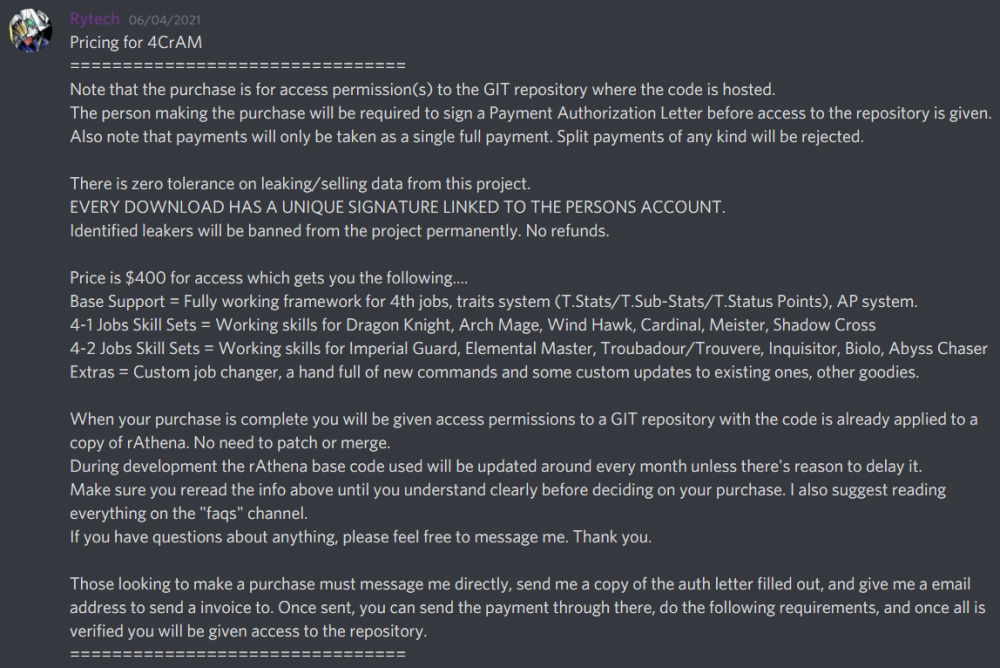
4CrAM - 4th Class rAthena Mod Welcome to the topic page for 4CrAM, a project that adds fully working support for 4th jobs (and other future trait era jobs) and all the systems that comes with them. This mod was started back in July of 2020 and slowly revealed to people a few months later as development progressed. The project's development is split into multiple phases with each one focusing on the development of certain things and as of the time of typing this 2 of the 3 phases are completed. With 6 of the 12 jobs completed I feel its time to fully reveal the project here to the public. So what are the 4th jobs and what do they offer? 4th jobs are a new era of jobs I like to call "Trait Era" jobs. These jobs are very unique compared to other jobs due to a number of new game mechanics that comes with them call the trait system and the AP system. To the right side you will see a lower half of the stats window with a bunch of new stats related info. This is the traits system and only trait era jobs can access it. When a player changes into a trait era job and levels above 200, they get trait or T.Status Points which can be spent on one of the 6 T.Stats which will increases the T.Sub-Stats and even affect regular sub-stats. This system adds a whole new layer to a character's build, allowing for a bigger variety of builds. T.Stats are also very powerful as the T.Sub-Stats they affect have a big impact on a character's performance. The other thing to the top left is a 3rd gauge that appears in the UI once you become one of these trait era jobs. This is the AP (Action Point) system. AP can be gained by using certain skills and is used as a requirement for casting some of the most powerful skills. You can even see a white bar below the character on screen right below the HP/SP bars. Finally, (not shown here as its not coded in yet) trait era jobs have access to new level 5 weapons and level 2 armors which offer more attack and defense increase per refine and also another new system called the ranking system which adds a rank mark on the equip, making the gains from refinements much higher. With all these new mechanics its clear that these jobs are much more powerful and more fun to play then the previous jobs and brings a new era to the world of RO. Im excited to finally reveal the project to the public and bring this new era to the private server community. However, unlike my previous project 3CeAM, 4CrAM is a closed source project that can only be accessed by purchasing access permissions to the repository's im hosting the code on. To keep it short, im treating this project as my job and a source of income due to these difficult times (Fuck you COVID). But on the bright side it means im able to spend most of my time working on this project instead of working at some place outside my home and having little time for the project. If your interested you can check out the project's facebook page and join my discord server where you can chat with the community, see screenshots of the progress, get announcements, and also get more info on the project and its pricing. 4CrAM Facebook Page https://www.facebook.com/4CrAM 4CrAM Discord Server https://discord.gg/K8wnRTZNFY

 1 point
 -
yes stil working first prepare new iteminfolua file to collect all item info files here my example for collect data for chris item info file and you can add add new custom item at this rile dofile("System/itemInfo_EN.lua") tbl_custom = { [15035] = { unidentifiedDisplayName = "Unidentified Armor", unidentifiedResourceName = "¿ìµç¸ÞÀÏ", unidentifiedDescriptionName = { "Can be identified by using a ^990099Magnifier^000000." }, identifiedDisplayName = "2010 Love Dad", identifiedResourceName = "2010·¯ºê´ëµð", identifiedDescriptionName = { "Bonus Allstat +1.", "_______________________", "MaxHP +150", "_______________________", "MaxSP+150.", "_______________________", "Increases ^663399Stone Curse^000000 resistance by 90%.", "Increases ^663399Frozen^000000 resistance by 90%.", "Increases ^663399Stun^000000 resistance by 90%.", "Increases ^663399Sleep^000000 resistance by 90%.", "Increases ^663399Silence^000000 resistance by 90%.", "Increases ^663399Curse^000000 resistance by 90%.", "Increases ^663399Confusion^000000 resistance by 90%.", "Increases ^663399Blind^000000 resistance by 90%.", "Increases ^663399Poison^000000 resistance by 90%.", "Increases ^663399Bleeding^000000 resistance by 90%.", "_______________________", "^0000CCType:^000000 Armor", "^0000CCDefense:^000000 6", "^0000CCWeight:^000000 10", "^0000CCArmor Level:^000000 1", "^0000CCEnchantable:^000000 No", "_______________________", "^0000CCRequirement:^000000", "Base Level 1", "All Job" }, slotCount = 0, ClassNum = 0, costume = false }, } -- Now for a helper function because i hate repetitions -- It adds items from curTable if it is not present in refTable function itemAdder(curTable, refTable) for ItemID,DESC in pairs(curTable) do if refTable == nil or refTable[ItemID] == nil then result, msg = AddItem(ItemID,DESC.unidentifiedDisplayName,DESC.unidentifiedResourceName,DESC.identifiedDisplayName,DESC.identifiedResourceName, DESC.slotCount, DESC.ClassNum) if not result then return false, msg end for k,v in pairs(DESC.unidentifiedDescriptionName) do result, msg = AddItemUnidentifiedDesc(ItemID, v) if not result then return false, msg end end for k,v in pairs(DESC.identifiedDescriptionName) do result, msg = AddItemIdentifiedDesc(ItemID, v) if not result then return false, msg end end if nil ~= DESC.EffectID then result, msg = AddItemEffectInfo(ItemID, DESC.EffectID) end if not result == true then return false, msg end if nil ~= DESC.costume then result, msg = AddItemIsCostume(ItemID, DESC.costume) end if not result == true then return false, msg end end end return true, "good" end -- And the newly designed main function function main() result, msg = itemAdder(tbl_custom, nil) -- add custom items (including official overrides) if result then result, msg = itemAdder(tbl, tbl_custom) -- add non-overridden official items end return result, msg end please look at this part dofile("System/itemInfo_EN.lua") here the main function to get data from other item info files. and make sure your client to read this iteminfo file.1 point
-
read from Chris Translation. its reading sclientinfo.xml1 point
-
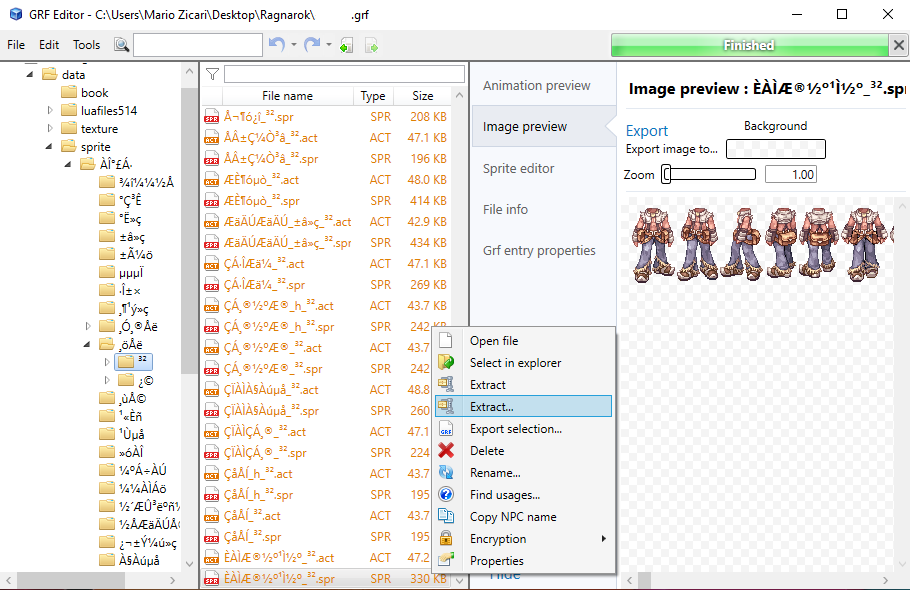
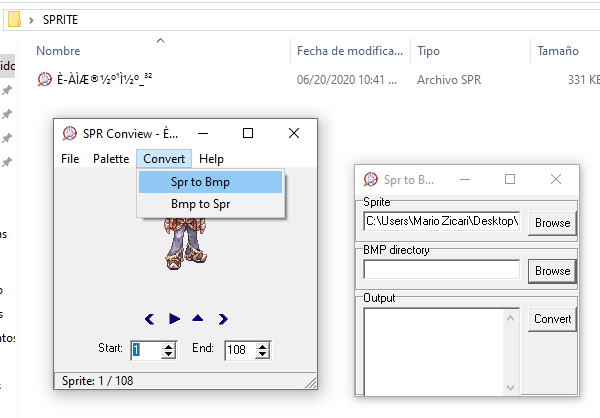
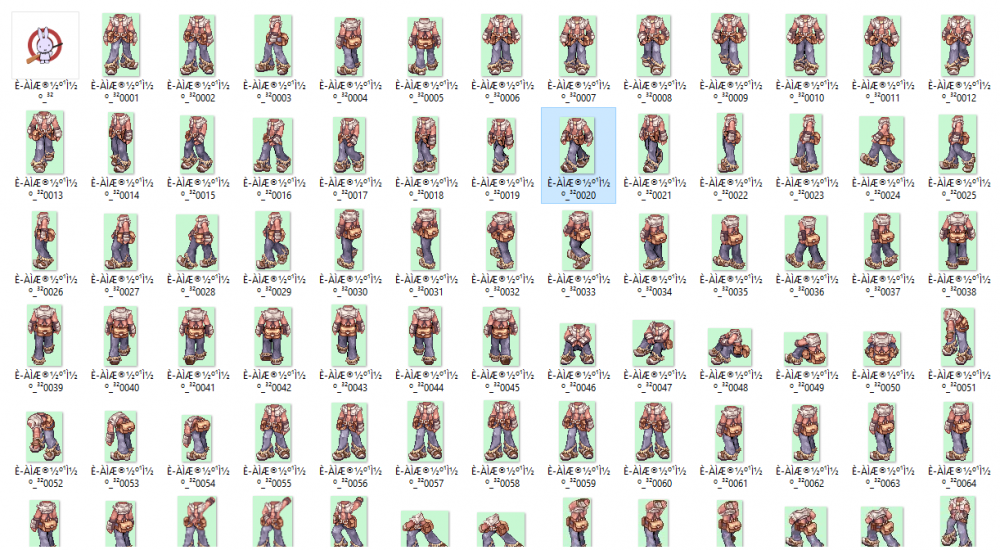
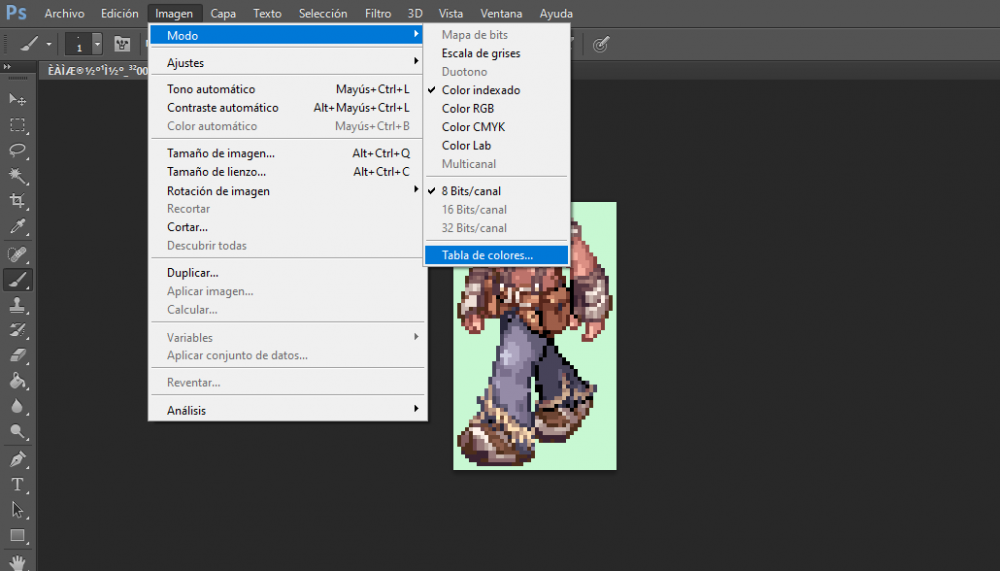
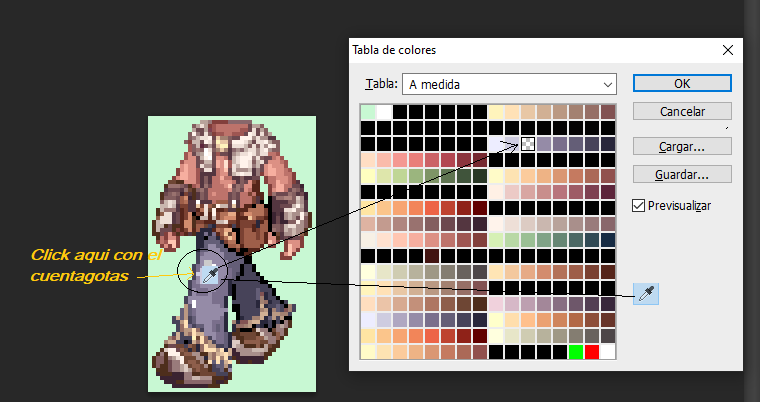
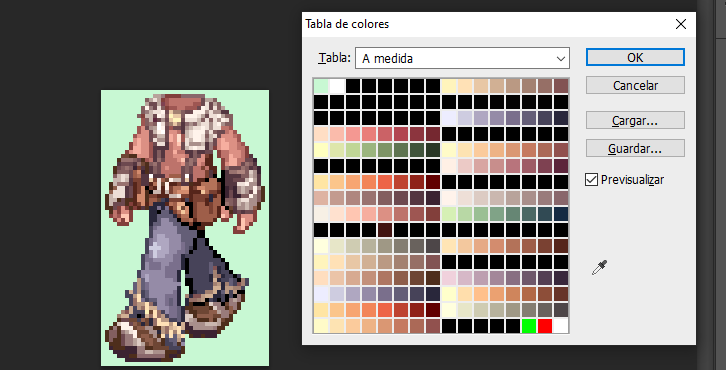
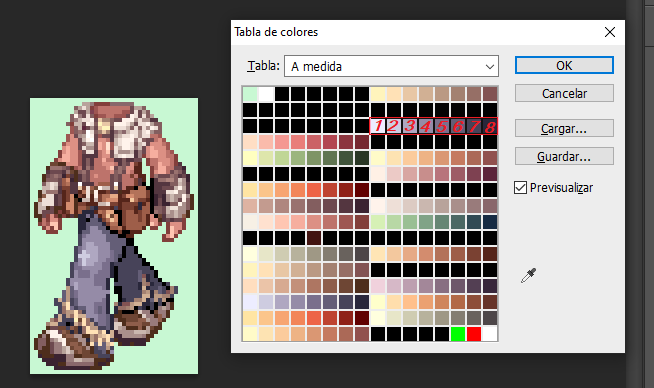
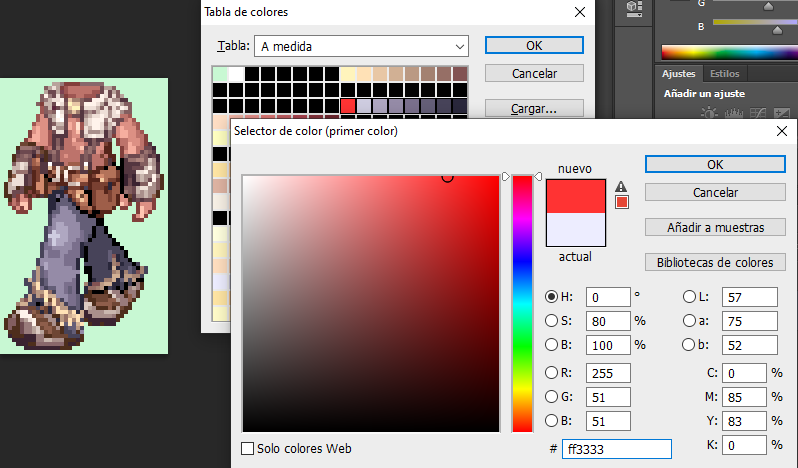
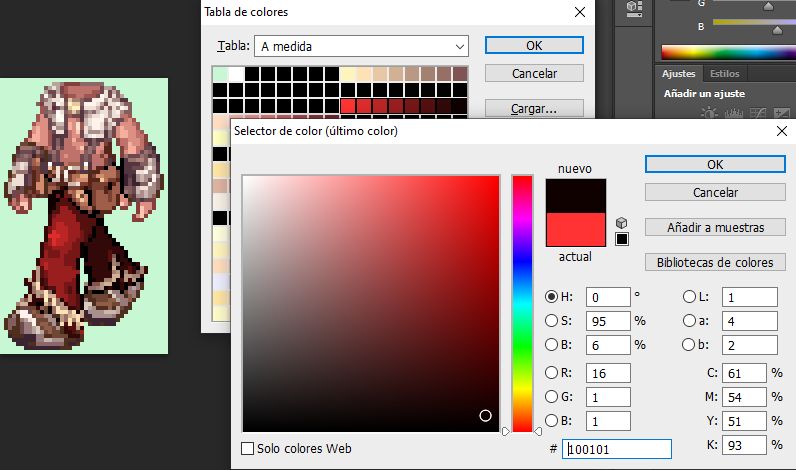
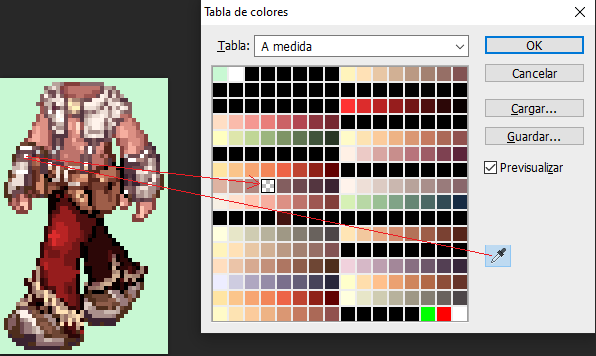
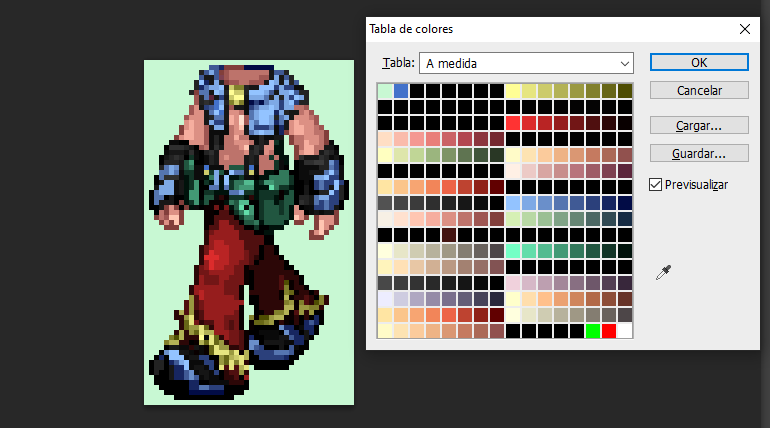
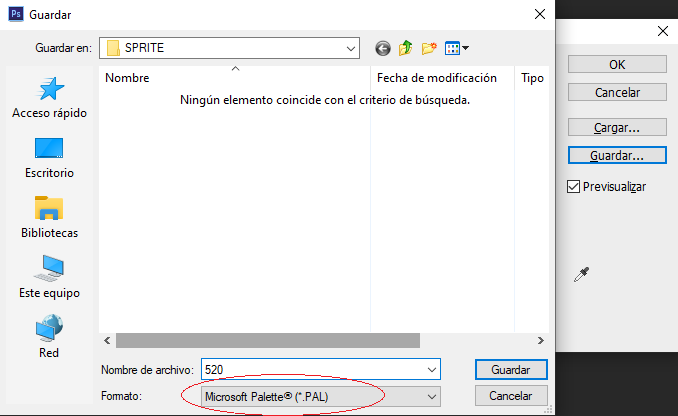
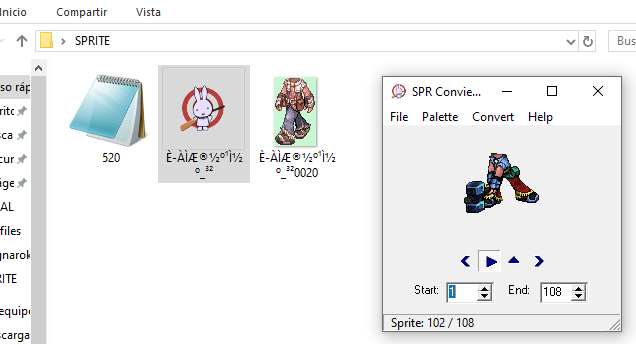
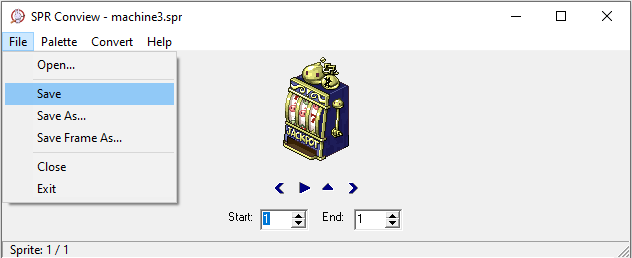
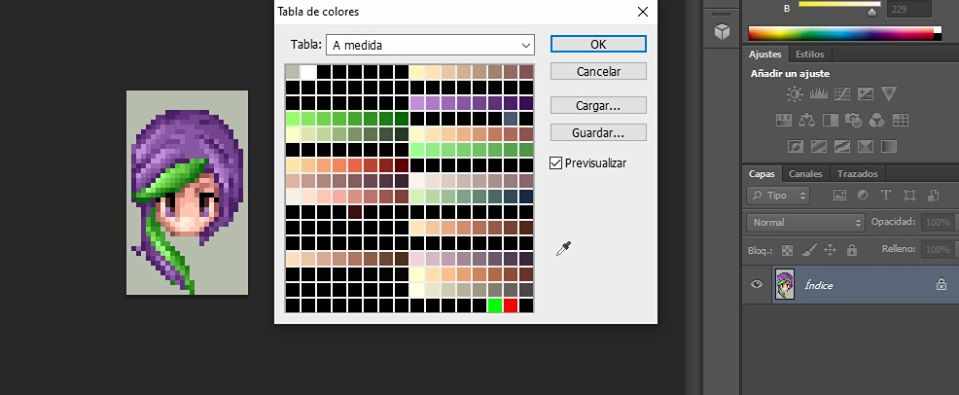
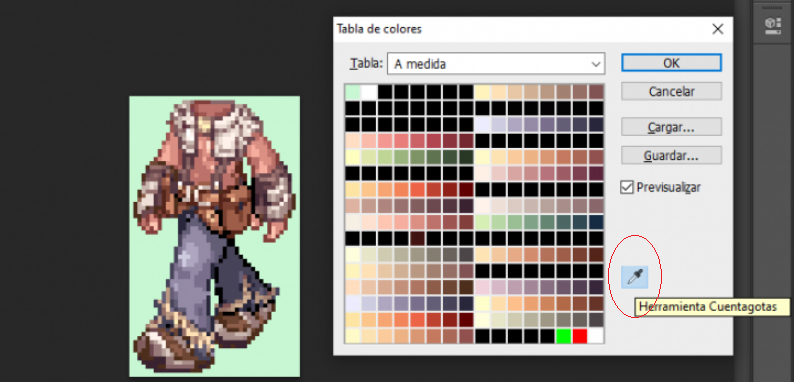
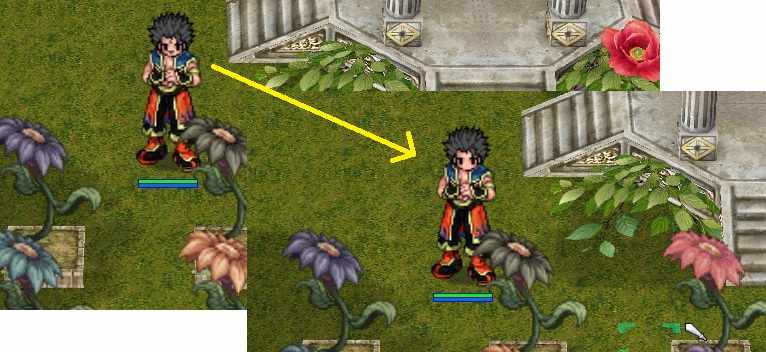
- Necesitaremos el GRF EDITOR para extraer del GRF el sprite que queramos modificar - Extraemos unicamente el SPR del objeto a editar, Aislaremos nuestro SPRITE en una carpeta, lo rompemos (extraemos todos los bitmaps) con el programa SPRCONVIEW, para hacer esto tenemos que darle a la opción convert Spr to Bmp. En el primer boton Browse que muestra la imagen, eliges el sprite que descargaste y le das a convert. las imagenes que se van a extraer de este sprite van a ir a parar en la misma carpeta donde esta ubicado el sprite, por lo que no elegimos BMP directory. Se recomienda tener el sprite aislado en una carpeta nueva.... no queras llenar tu escritorio con mas de 100 iconos de bitmaps ? Elegimos nuestra imagen Modelo, Preferiblemente una donde se vean todas las cualidades del objeto que vamos a RECOLOREAR, ELIMINAMOS EL RESTO El BITMAP elegido lo debemos abrir con el programa ADOBE CS6, Yo uso el portable Una vez abierto el Adobe CS6. Nos vamos a la parte que dice Archivo, y le damos a Abrir, ahí elegimos el bitmap que habíamos seleccionado, y una vez abierto nos vamos a la barra superior y elegimos imagen, Luego Modo, y por ultimo TABLA DE COLORES Cuando se Abre la Tabla de Colores Elegimos la Cuenta Gotas, le Damos un solo Click Buscamos la Porción de color que querramos editar! Y le damos SOLAMETE UN CLICK con el cuentagotas, Esto nos indicara de que cuadrante de la paleta procede el color que elegimos. YO CLICKIE EL PANTALON DEL WHITESMITH PARA SABER DONDE ESTABAN ESOS COLORES MUY IMPORTANTE A LA HORA DE EDITAR PALETAS, Es que no podemos editar lo que nos de la gana, NO PODEMOS ELEGIR UN SOLO CUADRITO! Tienes que elegir los 8 Cuadros de la regla donde se descubrió el color que acabas de clickear con el cuentagotas, PARA SELECCIAR LOS COLORES DEBES VOLVER A CLICKEAR EN EL CUENTAGOTAS PARA DESACTIVAR LA HERRAMIENTA. SI TE FIJAS EN LA IMAGEN AL VOLVER A CLICKEAR EL CUENTAGOTAS YA NO ESTARA EN HILIGHT! y ya con esto puedes seleccionar la rama de colores que descubriste Seleccionamos la regla de colores que habíamos descubierto, SIEMPRE TIENES QUE ELEGIRLA desde el Extremo Izquierdo hasta el Derecho, MANTENIENDO PRESIONADO EL CLICK Y ARRASTRANDO EL CURSOR A LO LARGO DE ESOS 8 BITS.. ASEGURARTE DE SELECCIONAR UNICAMENTE ESOS 8 DONDE DESCUBRISTE EL COLOR CON EL CUENTAGOTAS, No puedes pasarte porque editarias otra porcion del dibujo que no quisieras. CUANDO LO TIENES SELECCIONADO SUELTA EL CLICK DEL MOUSE Y SALDRA LA PANTALLA DE EDICIÓN DE COLORES ELIGES EL PRIMER COLOR Y LE DAS OK CUANTO ELIGES EL PRIMER COLOR, SE ABRIRÁ EL SELECTOR DEL ULTIMO COLOR, Cuando vas seleccionando el ultimo color vas a ir viendo como va cambiando el color de regla que elegiste... Lo que conseguimos con haber seleccionado los 8bits de la regla del color es un efecto mate que se ira aplicando en el color que descubrimos con el cuentagotas. La clave de un buen paletaje es Elegir Un primer color claro, y un ultimo color oscuro. Pero tu podrás hacerlo como mas te guste. Volvemos a utilizar nuestro cuentagotas para ver que mas podemos encontrar, esta vez seleccione los guantes del Whitesmith y descubri la regla de colores del Guante Repetiré el paso anterior, Desmarcare el gotero, Luego elegiré los 8 bits de la regla de colores donde encontré el color del guante! Usare un gris claro como primer color y un negro oscuro como ultimo color, para ver que me resulta. Descubrí que esta regla no solo abarca los guantes, si no que también comparte el color de los sujetadores de la camisa de nuestro Withesmith, y aquí es donde hago valido lo que dije anteriormente, QUE NO PODEMOS EDITAR LO QUE NOS DE LA GANA A VOLUNTAD. Solo podemos cambiar el matiz de la regla de colores. Tras experimentar mas con el gotero, encontramos varias reglas de colores que pudimos editar en nuestro whitesmith y este es el resultado final, Felicidades pues poseemos un color que ni el mismo Kamishi y su popular pack de paletas ha hecho. Le damos a guardar, y lo guardamos como MICROSOFT PAL Ya tenemos nuestro Archivo PAL, Para visualizarlo deberemos abrir el SPRITE! ojo el spr no el bitmap. Y en la pestaña Palette ponemos OPEN PALETE y seleccionamos la que recien guardamos. Podras ver el objeto en accion con la nueva gama de colores que le aplicaste Ese archivo pal puedes enviarlo al grf donde tenga las palettes siempre y cuando utilizes el nombre correspondiente de job, y el numero de paleta en la cual quieres que se muestre ese color. Debo aclarar que para que esas paletas se muestren correctamente en el cliente deberás abrir el archivo y remover la firma, ESTO APLICA UNICAMENTE PARA PALETAS DE COLOR DE PELO Y COLOR DE ROPA DE JOBS. La firma que debes borrar es la que muestro seleccionada aqui en la imagen. ----------------------------------------------------------------------------------------------------------------------------- SI EN LUGAR DE UN JOB, EDITASTE UN ITEM, UN MONSTRUO O UN NPC, ARMA ETC, SIMPLEMENTE ABRE EL SPRITE, CARGA LA PALETA Y DALE SAVE, aqui no hace falta remover firmas. Con el tiempo y dedicación seras un experto, podrás crear armas nuevas a bases de recolor, Podrás generar nuevos colores de cabello Podrás reparar las caras de algunos sprites donde los tintes o paletas manchan la cara Podrás crear tus propios escudos y armas, insertando y modificando imágenes y armando los sprites a partir de bitmaps. s

 1 point
 -
Version 3.0
12136 downloads
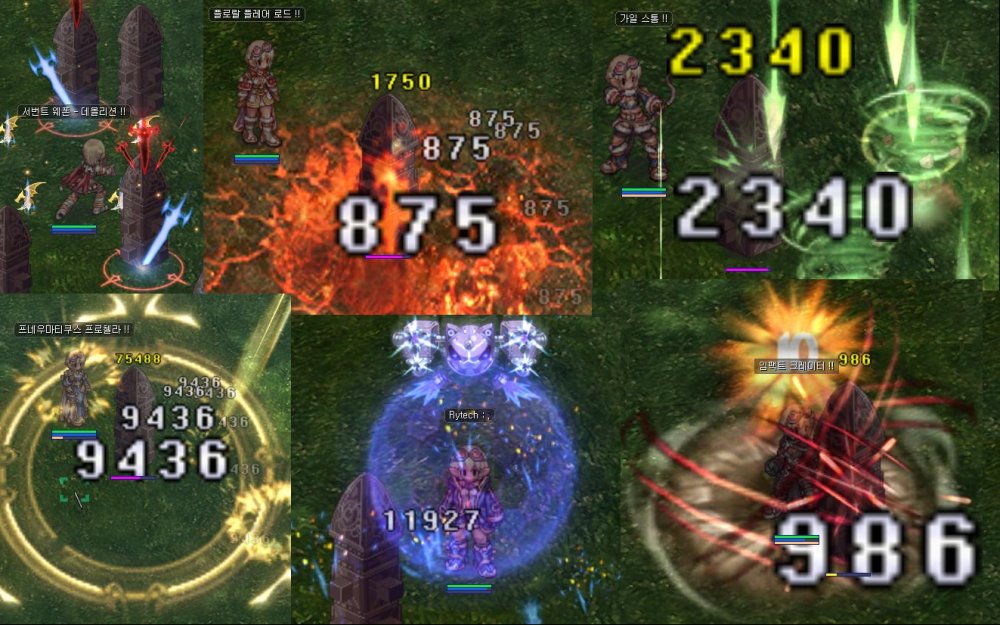
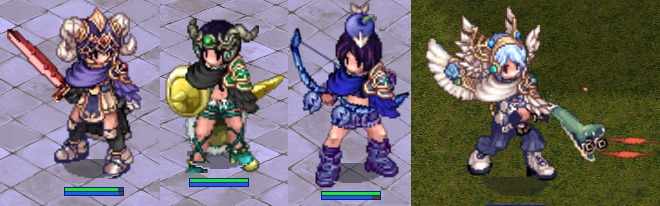
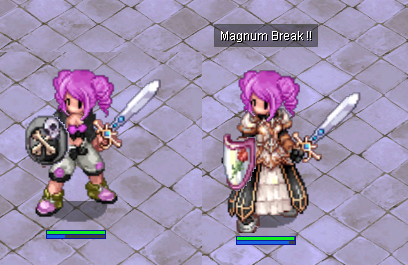
This pack corrects the bad pixels on ragnarok classes and heads with nose or coloured eyes. It makes palletes looks better in general. Take a look at the screenshots for samples. Contains: First classes corrected 2nd Job classes corrected Rebirth classes corrected Special classes corrected (Ninja, taekwon..) Gryphon corrected (for Rune Knight) Official Head Sprites from 1 to 27 corrected. Also contains an extra file: FIX FOR WARLOCK (Credits to Vach ). Use it only if you experience issues with Warlock sprite. If you get any issue with one of the sprites (that shouldn't happen though ), like gravity error when using skill, or moving, just delete the bad-working sprite, update it to the last gravity official version, and make me know about it. Sometimes gravity update a sprite (it happened once in 6 years...so...) and it can crash with new clients. I'm able to fix it very quickly if it happens. If you want the best looking palettes with this pack, take a look at my free Palettes and my 700 Palettes set!Free1 point