Leaderboard


Popular Content
Showing content with the highest reputation on 02/17/20 in all areas
-
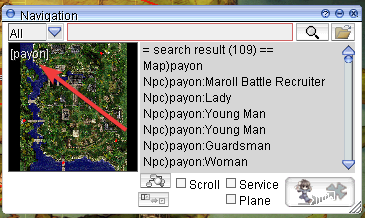
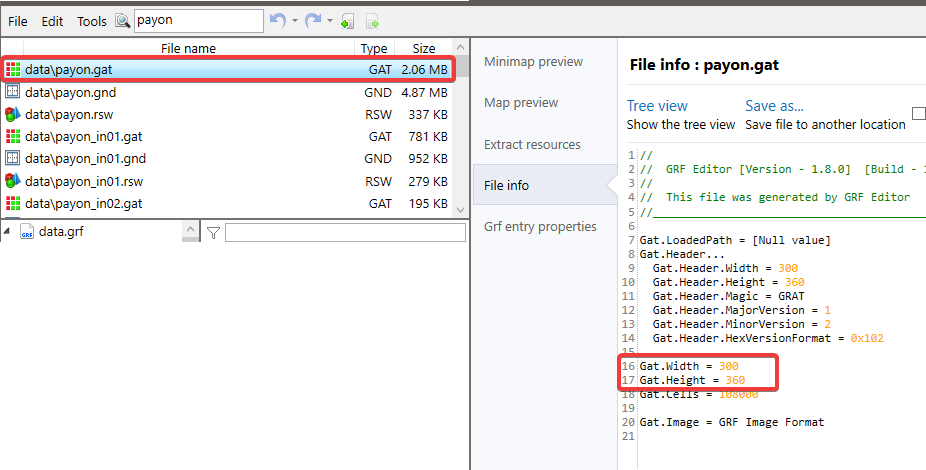
Adding custom maps to RO server - Part 1. In this Part you will learn how to add your custom maps to your Ragnarok server. · Clientside: Download/create the map you want to add to your Ragnarok Server. a. You should have 3 files of the map. i. [mapname].gat ii. [mapname].rsw iii. [mapname].bmp Place your .gat and .rsw files inside your GRF within data\ as well as your .bmp file inside your data\texture\À¯ÀúÀÎÅÍÆäÀ̽º\map\ directory. Go to your data\mapnametable.txt and add the Area display name of your map in the following format “[mapname].rsw#Map Display Name#”, without the quotation marks. · Serverside: Now go to your server directory and do the following: a. Go to your db\import\ directory and open map_index.txt - (!) Do not confuse it with db\map_index.txt i. In the text file add at the bottom of the file [mapname]<tab>{index(1250+)} - Once done, Save and close the file. b. Now go to your conf\import\ directory and open map_conf.txt: i. Once there - add your maps like so: map: [mapname] - Once done, Save and close the file. Once the above steps are done. Download either WeeMapCache or MapCacheEditor in order to add your [map].gat file to your map_cache.dat a. Open your server Project and recompile it. Congratulations, you have now successfully added a new map to your server. In part 2 of the guide, we will be adding the custom map to your world map view. Adding custom maps to your RO server - Part 2. In Part 2 of the guide, you will be learning how to add your custom map to World map view and Kafra move animations - The good news is: It's all client-side. Go to data\mappostable.txt a) At the top of the file you should see #@ (probably 12@), change that to 13@ (That is the array size of the mappostable) b) Scroll down to the bottom of the file and add the the map you want to add (as well as its coordinates on the map where it should appear) in the following format [index]#[mapname].rsw#x¹#y¹#x²#y²# i) **x¹, y¹, x², y² stand for the start and end coordinates of the map box which gets drawn on the world map. Navigate to data\luafiles514\lua files\worldviewdata\ a) Find files worldviewdata_table.lub as well as worldviewdata_language.lub (if your files are inside a GRF, extract them). i) Open your worldviewdata_language.lub and add the following line: MSI_###_[MAPNAME] = "Map Display Name", (if you’re adding it at the end of the array, don’t forget to remove the comma, as it’s the last element of the array. ii) Now open your worldviewdata_table.lub and add the following line: {###, "[mapname].rsw", x¹, y¹, x², y², WORLD_MSGID.MSI_###_[MAPNAME], ""} (!) IMPORTANT - the ### number at the start of this array appears to be corresponding to a general “block” location on the map. e.g.: If you’re adding a map somewhere in the Payon area, you would want this number to be “111”, however if you’re adding it in the area of Rachel, you’d want the number to be “105”. – In short, whenever you’re adding maps, always take a look at the numbers of the maps close to your new map, use those numbers. If your map doesnt appear on the worldmap, this is more than often the culprit behind it! Go to data\luafiles514\lua files\datainfo\ - (Optional) This is where you will be adding the kafra teleporting service animations. b) Open the file kaframovemapservicelist.lub and add Kafra teleport service information to your map as well as KafraMinimapPos I am not certain what the parameters in this array do, if anyone has any idea, please let me know ? Adding custom maps to your RO server - Part 3. In Part 3 of this guide, you will be learning how to add links between your maps and/or NPCs within the maps for your navigation system! (!) Important - Before you can start with Part 3, you will be required to know how to: *navigate through your GRF, **Implement your custom maps, ***Add your custom maps to the Ragnarok world map! Firstly, what you want to do, is go to your data\luafiles514\lua files\ and extract your entire \navigation\ folder. Naturally - remember to make a backup of it before you start working on it. Once you have the folder extracted, what you want to do first of all is to add your custom map to the navi_map_krpri.lub. To do that, open up the file, scroll all the way down the list and add your map in the following format: { "[mapname]", "Display name", ID, xSize, ySize } (!) Important things to note - (!) The "Display name" is going to be name displayed over your map like so: (!)There are 3 values for the IDs (I am not 100% certain about what they are exactly, will need to research it more - then I will update the information here) 5001 is used for standard maps, such as Towns, Fields, Dungeons. 5002 appears to be used for maps which have clone counterparts? Lastly 5003 is used for indoor maps. (!) xSize and ySize correspond to thevalues of gat.Width as well as gat.Height Secondly, we will be adding connections between neighbouring maps. To do that, you want to open navi_link.lub and add connections to; as well as from the neighbouring maps in the following format: { "[yourmap]" , [index], 200, 99999, "[yourmapname]_[destmapname]_[index]", "", xCoord, yCoord, "payo2", destCoord_x, destCoord_y}, e.g.: { "pay_arche", 14056, 200, 99999, "pay_arche_payon_706", "", 81, 17, "payon", 228, 327 }, { "payon", 15327, 200, 99999, "payon_pay_arche_1977", "", 228, 329, "pay_arche", 81, 22 }, (i) - Because of the way the navi_link.lub is built I decided to write a small program which will make adding connections between new custom maps and old ones cleaner and hopefully easier ? - Perhaps I will also expand it to also editing the other navi files. P.S: If you believe that guide is useful, but could be improved upon, please do drop your suggestion. - You can also contact me either via PM on the forums or adding me on Discord - Shinsei#3451 I will be adding further parts of the navigation guide over the next couple of days. Hope it helps!
 1 point
 -
Several such releases exist on the forum but all of them are old and don't work anymore. I updated one of them, this now works on the latest Rathena, apply both in this order : https://github.com/SeravySensei/rathena/commit/e02ba8bd88c626baca4619bbb2dbaecd30c93f9b https://github.com/SeravySensei/rathena/commit/b928ee02b19ef18460a82a37c170473877bf11f1 (add .diff or .patch to the url to get those)1 point
-

Version 1.0.2
5483 downloads
Heya, This is a tool to edit mapcache files for rAthena (db/(pre-)re/map_cache.dat). It is already part of Server Database Editor as a sub tool, but I've made it a tool on its own instead. It was made to fix the issue with WeeMapCache not assigning the water tiles properly. Otherwise, it's pretty much the same interface, but easier to use. The most recent version will always be found from the mediafire link below: http://www.mediafire.com/file/tjlnooebx6am673 Source files: https://github.com/Tokeiburu/Mapcache-EditorFree1 point -
Version 1.1.0
1088 downloads
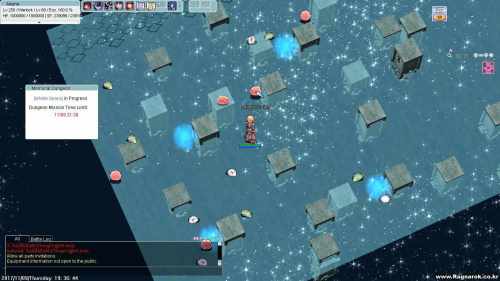
Hello peoples, I've been asked recently to create official instances that aren't release on rathena yet. So here's my version of Infinite Space instance, based over infos took here and there, videos and divine-pride database. In the rar, you'll find all you need, including Instance file, mob, item and quest db. You'll still need up to date client (I personnaly use 20160201) to ensure the mobs are created client side. Have fun.Free1 point