Leaderboard


Popular Content
Showing content with the highest reputation on 07/25/13 in all areas
-
This is already being worked on. ^.^2 points
-
Hello guys!! This is my first time to write a tutorial. I hope it can help many beginner that don't know how to create your own ragnarok world. This server setting is just made to play offline. So if you want to make your own private server there are several things you need to learn more on setting ip, opening ports etc, and i'm not going to explain it in here Credits goes to: Nickyzai for kRO client K3dt for decompiled ragexe Mleo1 for Loki launcher Shakto, Yommy, MStream for xDiffPatcher Michieru, Dastgirpojee for Data folder translation Magicaltux for Grf Builder Ai4rei for Open Setup Okay let's get started, please follow all the steps correctly! This is all the things you need to create your own ragnarok world: 1. TortoiseSVN - http://tortoisesvn.net/downloads.html 2. Visual Basic - http://www.microsoft.com/visualstudio/eng/products/visual-studio-express-products 3. MySQL - http://dev.mysql.com/downloads/installer/ 4. MySQL Workbench 5.2.47 http://dev.mysql.com/downloads/tools/workbench/ 5. rAthena SVN Repository - https://rathena.svn.sourceforge.net/svnroot/rathena/ 6. kRO client by nickyzai - http://www.nickyzai.com/?p=kro 7. Loki Launcher by mleo1 - http://hercules.ws/board/topic/1070-loki-launcher/ 8. Decompiled ragexe by k3dt - http://k3dt.eu/Ragexe/unpacked/ 9. xDiffPatcher v2 - http://www.mediafire.com/?fibc47gzvdshp8o 10. DiffFiles - http://k3dt.eu/Ragexe/unpacked/Diffs/ 11. Data folder translation - https://subversion.assembla.com/svn/client-side-translation/ 12. Grf Builder - http://www.grfbuilder.com/#download 13. RO Open Setup - http://rathena.org/board/topic/63177-ro-open-setup-v280277-last-updated-20130702/ After you download all that things, do this: 1. Install tortoise 2. Install visual basic 3. Install MySQL (please remember your root password! If you change it but if you did not change then the default root password is ‘root’) 4. Install MySQL Workbench 5. Install kRO client After you install all of that, let’s prepare the client: 1. Open your kRO client and update it until completed. 2. Download your ragexe file in this (http://k3dt.eu/Ragexe/unpacked/) In this tutorial i used 2013-07-03aRagexe.exe 3. Download your xDiffFiles in this (http://k3dt.eu/Ragexe/unpacked/Diffs/) in this tutorial I used 2013-07-03aRagexe.exe so I must download the same date for Diff files which is “Diff 2013-07-03 v1” in order the xDiffPatcher to work. 4. Open your xDiffPatcher.exe select your ragexe file you download before which is I used (2013-07-03aRagexe.exe) and then select your Diff files which is I used (Diff 2013-07-03 v1) and click LOAD. Now look in “diff option” there are several choice to pick, I recommended you to check this option: - Disable Ragexe Filename Check - Disable HShield - Disable Packet Encryption - Enable Multiple GRFs -@ Bug Fix - Ignore Missing File Error - Ignore Missing Palette Error - Increase Headgear ViewID to 5000 - Increase Zoom - Load ItemInfo.lua before lub - Read Data Folder First - Read msgstringtable.txt - Read questid2display.txt - Translate Client In English - Use Normal Guild Brackets - Use Ragnarok Icon - eXtract MsgStringTable.txt - eXtract txt file strings After you finish check the option click Diff’n’Save! Move the patched ragexe you made to your kRO client folder 5. Open the loki launcer folder and right-click loki.ini, change this: ; Must be on same dir of Loki Exe = "ragexe.exe" Into ; Must be on same dir of Loki Exe = "2013-07-03aRagexe_patched.exe" (I change into 2013-07-03aRagexe_patched.exe because I patched my 2013-07-03aRagexe.exe. if you use another ragexe please changed into yours) Save it and move all of file in loki launcher folder into your kRO client folder. 6. Create new folder and name it ‘Data Folder Translation' right-click on ‘Data Folder Translation’ folder and choose ‘SVN checkout…’ Fill this link https://subversion.a...de-translation/ in “url of repository” and click ok, this will download your 'data translation folder' from latest revision. After complete click ok. Open your data translation folder you download before then open folder “data” right click clientinfo.xml and choose edit. Edit into your version, I’m changed it into 38 because I used 2013-07-03aRagexe.exe. You can find your version in folder Server\trunk\db\packet_db.txt note: If you can’t find clientinfo.xml just open notepad and copy code below to your notepad and save it as clientinfo.xml <?xml version="1.0" encoding="euc-kr" ?> <clientinfo> <servicetype>korea</servicetype> <servertype>primary</servertype> <connection> <display>Ragnarok</display> <balloon>Ragnarok</balloon> <desc>Ragnarok</desc> <address>127.0.0.1</address> <port>6900</port> <version>38</version> <langtype>0</langtype> <registrationweb></registrationweb> <aid> <admin></admin> <yellow></yellow> </aid> </connection> </clientinfo> 7. Open your grfbuilder click ‘new’ to create grf, name it to rathena and save it, then choose ‘merge dir’ find your data translation folder you download before. And then choose the folder ‘data’ inside data translation folder then click Ok. wait after complete. click close. Move the rathena.grf you’ve made to kRO client folder. 8. Now change all lua extension to lub extension in your data translation folder you've download place this script in your data translation folder data/luafiles514 folder And run it. Script Link: http://www.mediafire.com/download/jvtac0j8f6m604v/luatolub.bat note: rename 'luatolub.bat.txt' into 'luatolub.bat and double click (to run) it. After you done. Copy the 'data' and 'system' folder inside the data translation foder you've download to your kRO client and replace any same files with that. 9. Edit your DATA.ini in your kRO client folder into this: [Data] 0=rathena.grf 1=data.grf 2=rdata.grf Then save it. note: If you can’t find DATA.ini just open notepad and copy code up there to your notepad and save it as DATA.ini 10. Extract the 'Open Setup' you've download before and move the 'opensetup.exe' into your kRO client folder Now your kRO client is ready. Now for the Server 1. Create new folder and name it ‘Server’ 2. right-click on ‘Server’ folder and choose ‘SVN checkout…’ 3. Fill this link (https://rathena.svn.sourceforge.net/svnroot/rathena/) in “url of repository” and click ok, this will download your server files from latest rathena server. After complete click ok. 4. Open Server\trunk\conf then rename ‘import-tmpl’ folder into ‘import’ 5. Open Server\trunk\conf open file ‘char_athena.conf’ with notepad and look for this: // Server Communication username and password. userid: s1 (change ‘s1’ to whatever you want but here I use ‘username’ as userid for tutorial only) passwd: p1 (change ‘p1’ to whatever you want but here I used ‘password’ as password) *note: I suggest you to fill the username and password as I do, to prevent human error, because if you put wrong userid and passwd the server connection between login and map can’t be establish. //login_ip: 127.0.0.1 (REMOVE THE ‘//’ IN FRONT OF login_ip: 127.0.0.1 so it will look like this login_ip: 127.0.0.1) //char_ip: 127.0.0.1 (REMOVE THE ‘//’ IN FRONT OF char_ip: 127.0.0.1 so it will look like this char_ip: 127.0.0.1) Once you done save it. 6. Still in Server Server\trunk\conf now you open file ‘inter_athena.conf’ with notepad and search for all of this: sql.db_username: ragnarok (change ‘ragnarok’ into your MySQL username which is I use default ‘root’) sql.db_password: ragnarok (change ‘ragnarok’ into your MySQL password which is I use default ‘root’) sql.db_database: ragnarok (change ‘ragnarok’ into ‘rathena’ because later we make database using name ‘rathena’) char_server_id: ragnarok (change ‘ragnarok’ into ‘root’) char_server_pw: ragnarok (change ‘ragnarok’ into ‘root’) char_server_db: ragnarok (change ‘ragnarok’ into ‘rathena’) map_server_id: ragnarok (change ‘ragnarok’ into ‘root’) map_server_pw: ragnarok (change ‘ragnarok’ into ‘root’) map_server_db: ragnarok (change ‘ragnarok’ into ‘rathena’) log_db_id: ragnarok (change ‘ragnarok’ into ‘root’) log_db_pw: ragnarok (change ‘ragnarok’ into ‘root’) log_db_db: ragnarok (THIS ONE YOU CHANGE INTO ‘logs’ because later we make database ‘logs’ Once you’ve done SAVE it. 7. Still in Server Server\trunk\conf now you open file ‘map_athena.conf’ with notepad and search for: // Interserver communication passwords, set in account.txt (or equiv.) userid: s1 (Change ‘s1’ into ‘username’ because as I explain on up there before) passwd: p1 (Change ‘p1’ into ‘password’ because as I explain on up there before) // Character Server IP // The map server connects to the character server using this IP address. // NOTE: This is useful when you are running behind a firewall or are on // a machine with multiple interfaces. //char_ip: 127.0.0.1 (Remove the ‘//’) // Map Server IP // The IP address which clients will use to connect. // Set this to what your server's public IP address is. //map_ip: 127.0.0.1 (Remove the ‘//’) Done and Save it. 8. Still in Server Server\trunk\conf now you open file ‘subnet_athena.conf’ with notepad and change this: subnet: 255.0.0.0:127.0.0.1:127.0.0.1 you must find your subnet by opening ‘command prompt’ (start menu > all programs> accessories> command prompt) after you open your command prompt, type this ‘-ipconfig’ it will look like this 9. Open your MySQL Workbench double click on ‘Local instance MySQL’ as in the picture to open. Input your password which is ‘root’ if you haven’t change it on first time you install it. 10. Click on ‘Create new Schema’ just like on the pic below to create new ‘schema’ and name it ‘rathena’ then click ‘apply’ and then ‘apply’ and ‘finish’. Now close and reopen your MySQL workbench. 11. repeat the step 10 but name the schema as a ‘logs’ then click ‘apply’ and then ‘apply’ and ‘finish’. Now close and reopen your MySQL Workbench. 12. Enter again to you ‘Local instance MySQL’ just like the step 9 and double click on ‘rathena’ to select it, and then click ‘file’ and choose ‘Open SQL Script’ and go to rAthena\trunk\sql-files and open ‘main.sql’ click OPEN and click the ‘Lightning button’ on picture below. Wait until its done and close your MySQL Workbench and Open it again to refresh. repeat step 12 but now you 'Open SQL Script’ and go to rAthena\trunk\sql-files open 'logs.sql' click OPEN and click the ‘Lightning button’ on picture below. Wait until its done and close your MySQL Workbench and Open it again to refresh. 13. After you re-open your MySQL Workbench, double click on ‘rathena’ then double click on ‘table’ and find ‘login’ right click on it and choose ‘Select Rows – Limit 1000’ just like the picture below: 14. Change the ‘s1’ and ‘p1’ on the right table to ‘username’ and ‘password’ by double click on each of them and type it. Just like the picture below, when you done click ‘apply’ then ‘apply’ and ‘finish’ 15. Now Open folder Server\trunk\src\common and right-click mmo.h choose edit and search this line #define PACKETVER YYYYMMDD Change it with the date version you choose for your client before Example: #define PACKETVER 20130703 (My client ragexe is 2013-07-03aRagexe.exe that’s why I write 20130703) And save it. 15. Now let’s recompile your server, open Server\trunk\ right-click ‘rAthena-10.sln’ open with Microsoft Visual c++ 16. Change the ‘debug’ into ‘release’ like the picture below. 17. Block (select) char-server.sql, login-server.sql, map-server.sql, mapcache and then right click and choose ‘build selection’ like in the picture below: 18. Go to your Server\trunk\db and open file ‘packet_db.txt’ with notepad and add this line in bottom //2013-07-03 Ragexe packet_ver: 38 0x0369,7,actionrequest,2:6 0x083C,10,useskilltoid,2:4:6 0x0437,5,walktoxy,2 0x035F,6,ticksend,2 0x0930,5,changedir,2:4 0x07E4,6,takeitem,2 0x0362,6,dropitem,2:4 0x07EC,8,movetokafra,2:4 0x0364,8,movefromkafra,2:4 0x0438,10,useskilltopos,2:4:6:8 0x0366,90,useskilltoposinfo,2:4:6:8:10 0x096A,6,getcharnamerequest,2 0x0368,6,solvecharname,2 0x0838,12,searchstoreinfolistitemclick,2:6:10 0x0835,2,searchstoreinfonextpage,0 0x0819,-1,searchstoreinfo,2:4:5:9:13:14:15 0x0811,-1,reqtradebuyingstore,2:4:8:12 0x0202,6,reqclickbuyingstore,2 0x0817,2,reqclosebuyingstore,0 0x0815,-1,reqopenbuyingstore,2:4:8:9:89 0x0365,18,bookingregreq,2:4:6 // 0x0363,8 CZ_JOIN_BATTLE_FIELD 0x0281,-1,itemlistwindowselected,2:4:8:12 0x022D,19,wanttoconnection,2:6:10:14:18 0x0802,26,partyinvite2,2 // 0x0436,4 CZ_GANGSI_RANK 0x0360,26,friendslistadd,2 0x094A,5,hommenu,2:4 0x0873,36,storagepassword,2:4:20 If you choose another date of your ragexe you can find your ‘packet’ in this link http://rathena.org/board/topic/82726-2013-ragexe-and-diff-up-to-date-2013-07-03/ Just copy and paste it to your ‘packet_db.txt’ like I did. 19. Now you are ready to start your server, open rAthena\trunk and open file ‘runserver-sql.bat’ wait until all server loaded like the pic below: 20. Now go to your kRO client Folder and open ‘Loki.exe’ in the login screen you can create account by doing this; In ID you can fill your ID with _M for male and _F for female And then input your password, After that you may login to your id without _M or _F anymore. 21. Some Screenshoot in the game I think that's all guys. sorry for any mistake and good luck creating your own Ragnarok World don't forget to clik the button if you found this post useful and thx for reading this bad tutorial ________________________________________________________________________________________________________ Note: only do this step if you found the problem below. Problem 1: setup resolution problem: there is missing file in kRO client\system\lua514\ that file name is optioninfo.lub you may download from here and put on that folder. Problem 2: 'queryNavi_Distance_Map' problem: go to Data Folder Translation\Data\luafiles514\lua files\navigation then deleted the file below: navi_linkdistance_krpri.lub navi_linkdistance_krsak.lub navi_npcdistance_krpri.lua navi_npcdistance_krsak.lua _________________________________________________________________________________________________________ edited : - adding missing step in client - adding new file Open Setup from Ai4rei - adding missing step in server (repeat step 12 but now you 'Open SQL Script’ and go to rAthena\trunk\sql-files open 'logs.sql' click OPEN and click the ‘Lightning button’ on picture below. Wait until its done and close your MySQL Workbench and Open it again to refresh.) - fixing some step in client about grf builder because if change lua to lub first then merge give error query_navi_map but don't worry now the step are correct. - adding missing step about downloading 'data translation folder' from repository link - fix some unclear words and fix the repository link. - deleted fixcamera angle from patch list because for shift right click issue, and add some note about setup resolution problem - fix xdiff files link1 point
-
Borf (the author of BrowEdit Mapping Software) is in need of developers for his new BrowEdit 2.0 project. He is looking for skilled developers who are comfortable working in environments of C++, Open GL & User Interfaces to help him with his new BrowEdit 2.0 project. Please submit an application via a message to my rAthena forum name Syouji if you are interested in being a part of his team. This is a volunteered based project. BrowEdit 2.0 SVN Log: http://svnlog.borf.info/browedit.log New Feature Possibilities for BrowEdit 2.0 Real-Time Rendering of Changes Made Multi-User Share Mapping (Multiple users working on the same map in real-time) Proper Lightmap Calculations Across Models Faster & More Efficient Under a Java Build Re-Designed Edit Modes Quick Easy Copy/Paste Everything (E.g - Models/Lightbulbs/Effects/Sounds/Terrain) External Tool - Lightmaps Exporting to Other Tools for Easy Editing (E.g - Blender) Application Details - Name - Age - Time Zone - Programming Languages you're skilled with - Any portfolio work you've made (optional) - Contact Email BrowEdit 2.0 Preview1 point
-
ROChargenPHP Features Core Support for .spr, .act, .pal, .grf, ... .act file completed support (transparency, scale, color, rotate, ...) Characters fully implemented ( body, head, hats, weapon, shield, robe, mount) with palettes support. Can modify action, animation and direction. Class to generate : Full Character / Character Head only / Monster-NPC-Homunculus / Avatar / Signature. Cache system available (and can be set off) with configurable time to cache. Emblem Loader available. Client Data.ini file support (to list your GRFs) Support GRF (0x200 version only without DES encryption - repack before uploading) - the data folder is always read first. Auto-Extract files from GRF if needed (optimize performance) Updater script available to convert some lua files to PHP. How to use Really url-friendly: myserver.com/chargen/<controller>/<data> // with url-rewriting myserver.com/chargen/index.php/<controller>/<data> // without url-rewriting Example for my character called "KeyWorld": myserver.com/chargen/avatar/KeyWorld // avatar myserver.com/chargen/signature/KeyWorld // signature myserver.com/chargen/character/KeyWorld // full Character myserver.com/chargen/characterhead/KeyWorld // Character's head You can change the default link by modify the array $routes in the index.php file: // $routes['url'] = controller $routes['/avatar/(.*)'] = 'Avatar'; $routes['/character/(.*)'] = 'Character'; $routes['/characterhead/(.*)'] = 'CharacterHead'; $routes['/monster/(\d+)'] = 'Monster'; $routes['/signature/(.*)'] = 'Signature'; Custom display At least, the tool is really easy to use, here an example on how to display a static character: $chargen = new CharacterRender(); $chargen->action = CharacterRender::ACTION_READYFIGHT; $chargen->direction = CharacterRender::DIRECTION_SOUTHEAST; $chargen->body_animation = 0; $chargen->doridori = 0; // Custom data: $chargen->sex = "M"; $chargen->class = 4002; $chargen->clothes_color = 0; $chargen->hair = 5; $chargen->hair_color = 12; // ... head_top, head_mid, head_bottom, robe, weapon, shield, ... // Generate Image $img = $chargen->render(); imagepng($img); Examples / Demos Sources Get the source (Thanks to report all bugs) License Instead of selling it, I give a try to "Open Source project with Donation". So if you think, you would have buy it if i was selling it, think to give a donation ? Notes A directory "client" is in the project, it will be a good idea to move it to a directory not accessible by the user (for example /home/client/). If you use generate images from GRFs you have to know it's a little slower, i recommend you in this case to allow the "AutoExtract" option to gain performance. GRFs have to be save as 0x200 version without any encryption (even the official DES), good idea is to remove unused folders ( textures, wav, models).. If you use the options Cache and AutoExtract, don't forget the script need to have a write access to the client and cache folder. Thanks to Khazou for the acces to his server to fully testing the tool1 point
-
File Name: Forcibly Strip File Submitter: goddameit File Submitted: 24 Jul 2013 File Category: Source Modifications Content Author: Goddameit Info : http://goo.gl/RXACXL Preview : ---------------------------------------------------------------------- Transform request (hercules --> rA) by Adam Click here to download this file1 point
-
BrowEdit Tutorial Videos Here is a list of free tutorial videos I made about a year ago that gives BrowEdit users a good grasp on using the BrowEdit Mapping Program. The tutorial videos teaches young BrowEdit users from the ground up of how to install BrowEdit, get familar with the interface and functions and finally actually producing a fully functional map you can integrate in a ragnarok server. I plan on expanding this list to cover a broader range of topics. Browedit Tutorial #1 - Getting Started Video Information: Downloading and setting up BrowEdit. Configuring BrowEdit to be usable & providing recommendations on BrowEdit revisions. - Browedit Tutorial #2 - Basics of Designing Video Information: Understanding the user inferface of BrowEdit & editing functions. Teaches navigational controls and introduces how to properly setup a map for editing. Part 1 - Part 2 - Part 3 - Browedit Tutorial #3 - Intermediate Level Terrain Editing Video Information: Teaches how to apply textures, build walls, making slopes and environmental terrain changes, and controlling water levels. Part 1 - Part 2 - Browedit Tutorial #4 - Intermediate Level Light Editing Video Information: Introduces how to implement lights to brighten and colorize a map. Gives recommended RGB combinations and lighti strength parameter settings in giving ideal light and shadow outputs. Part 1 - Part 2 - Browedit Tutorial #5 - Adding Effects Video Information: How to add effects to a map to fit the needs of the environment. Examples can be torches, flying bats, magic circles etc.. - Browedit Tutorial #6 - Adding Sounds Video Information: How to add ambient sounds to your map. This includes noises you hear in niflheim, prontera, geffen etc.. - Browedit Tutorial #7 - Making a Sky Map Video Information: Ever wanted to make a sky map? Well this tutorial will show you how to make a floating blue sky based map with cloud formations. - Browedit Tutorial #8 - Adding Custom Textures to BrowEdit Video Information: How to add your own custom textures to BrowEdit and using them in your custom map. - Browedit Tutorial #9 - Adding Custom BGM Music to a Map Video Information: How to add your own personal background music to a map as well as making sure the BGM file is compatible with the client. - Browedit Tutorial #10 - Adding a Custom Map to a Server Video Information: How to add your own personal map to a eAthena test server so you can test your own maps. - Browedit Tutorial #11 - Adding a Duplicate Model that Utilizes Custom Textures Video Information: Ever wanted to use a model in a map that doesn't come into conflict with another model. Perhaps for the sake of the maps theme? - Browedit Tutorial #12 - Quick Tips/Tricks & Useful Hotkey Info Video Information: Creating a new map can take a while. This tutorial will cover useful tips/tricks to reduce the development time of your map as well as avoiding long processes to complete a task. - Browedit Tutorial #13 - New Lightmaps Tutorial Video Information: This tutorial is a revamp of the previous lightmaps video tutorial. This particular tutorial is a more concise and easier to learn version of how to create lightmaps with ease in the areas of shadows/sun/colors/global lighting and light fixes. - Browedit Tutorial #14 - Making Slopes Video Information: This is a quick tutorial that explains how to create sloped terrain primarily based on ramps that can lead up to raised areas. It also shows how to make slopes on the edge of a map. - Browedit Tutorial #15 - Making Map Minimaps Video Information: Want to make a minimap that matches your coordinates perfectly whether it be a minimap with color or black/white gradient? Well this tutorial will cover just that! - Browedit Tutorial #16 - GAT Editing Video Information: Explains the main kinds of gats, how to place them, slope them, and what applications they are used in. - Browedit Tutorial #17 - 3ds Max Modeling [Acquiring Models] Video Information: A quick video covering several different sites you can get models for free that are supported by 3ds Max. - Browedit Tutorial #18 - 3ds Max Modeling [importing/Apply Textures to Model] Video Information: Using 3ds Max, you will be able to import models supported by 3ds Max, apply textures to them, and UV Unwrap the model to have it ready for RO. - Browedit Tutorial #19 - 3ds Max Modeling [Polygon Limit & Splitting Models] Video Information: RO has limits to how many polygons it can draw per model. This tutorial will explain what those limits are and how to split a model into parts. - Browedit Tutorial #20 - Exporting & Importing Lightmap Shadows for Editing Video Information: How to remove or add specific shadows on a map without having to redo all of the lightmaps through means of exporting & editing the shadow png file directly. - Browedit Tutorial #21 - Cleaning Up Shadows Along Walls & Ground Video Information: Didn't like the shadow drop across the edge of a map or lifted platform/wall? - Browedit Tutorial #22 - How to Create Transparent Objects Video Information: How to provide transparency in a model by means of TGA support. - NOTE: If you wish to see a certain topic covered in a future tutorial video, please make a request by leaving a comment in this thread!1 point
-
Hello rAthena Users. . . Fine day today, here's I want to share a Script Made by Me 100% So, even i'm just 14th years old, I kinda good at scripting like this though xD So please respect younger users okay ? Say thanks if it works okay ? ox-manual.txt Regards, Rava ^,^1 point
-
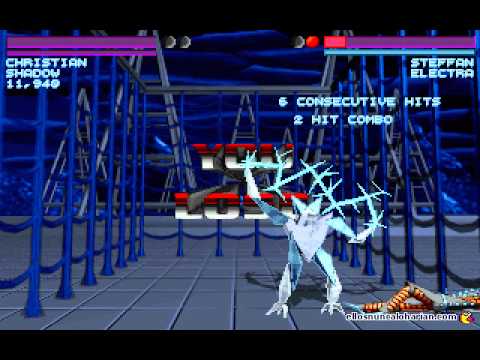
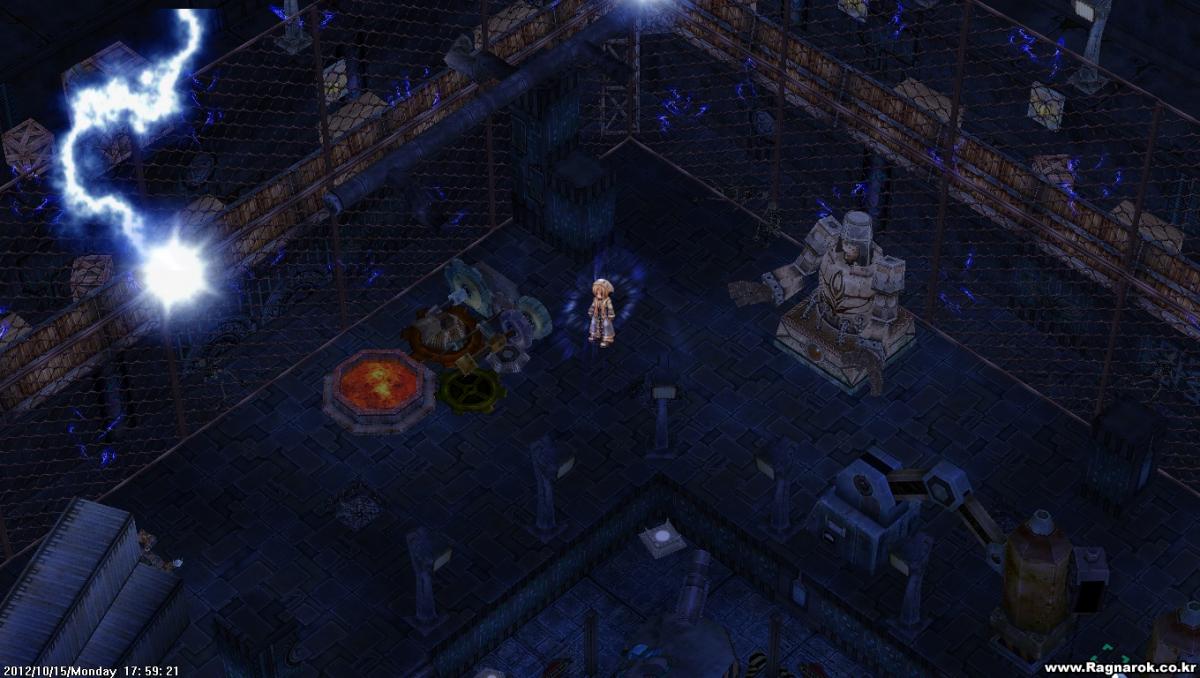
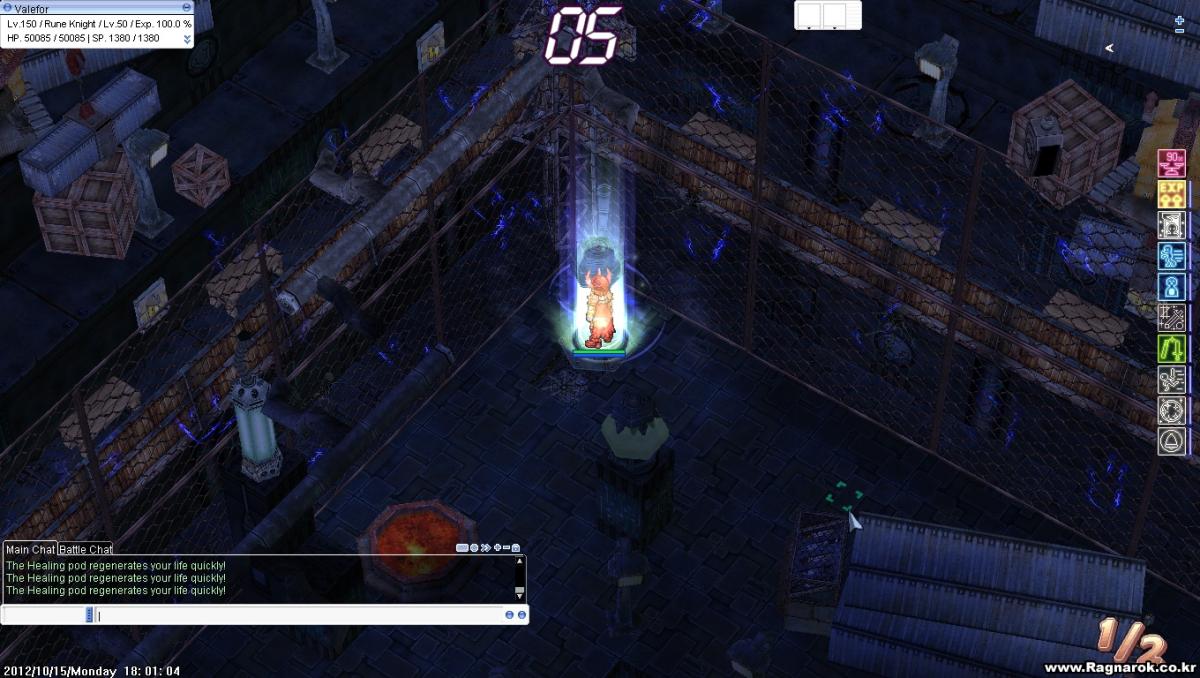
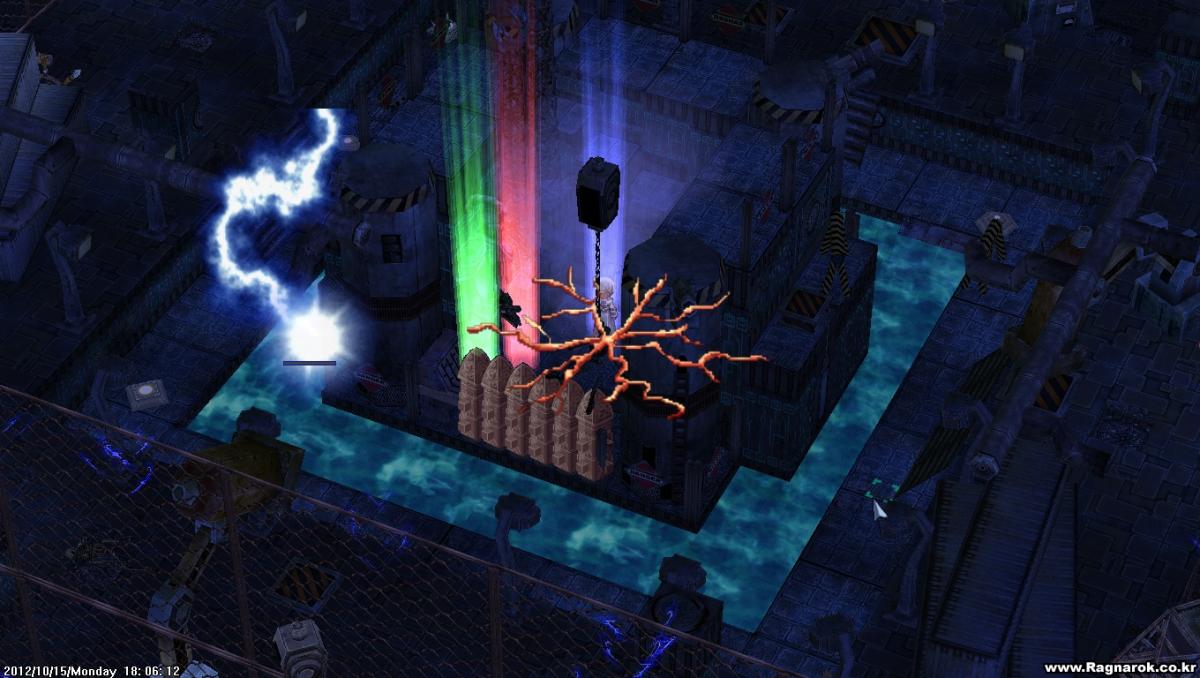
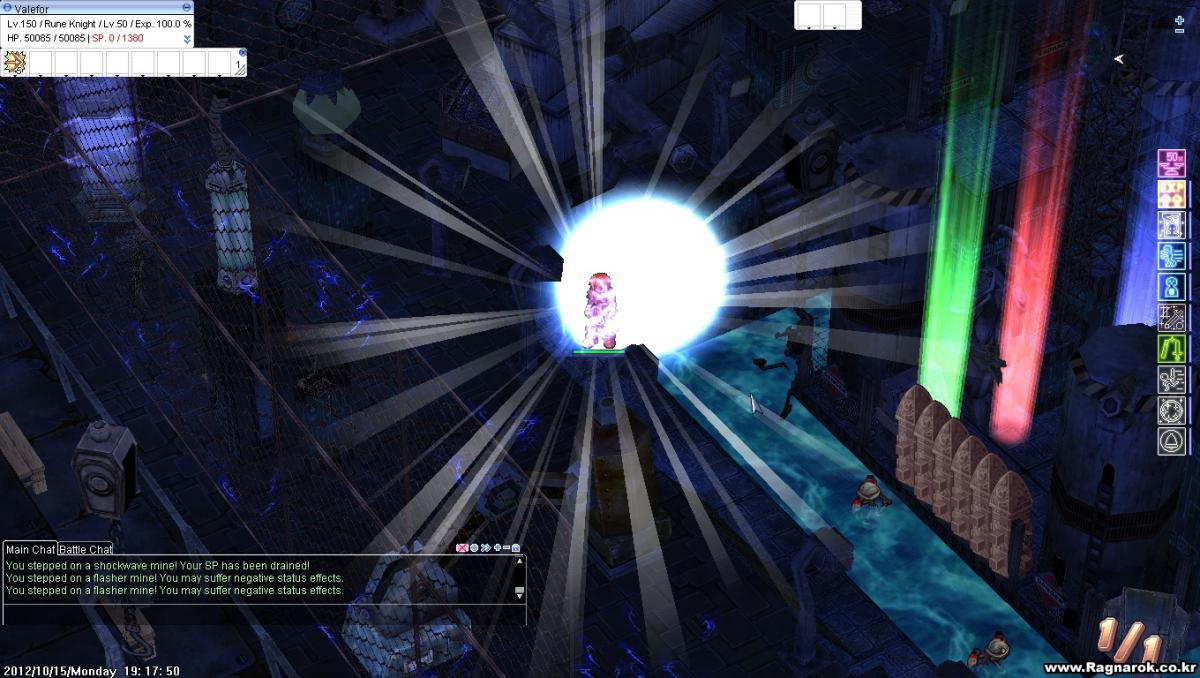
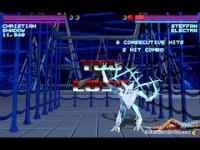
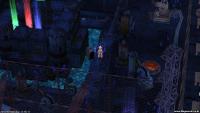
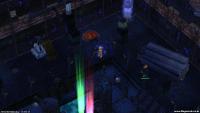
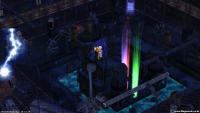
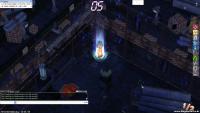
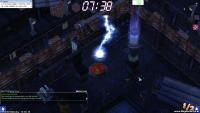
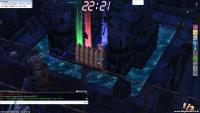
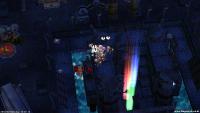
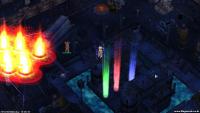
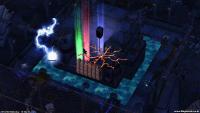
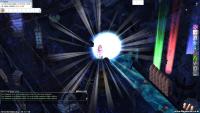
Not quite sure if this should go under PVP section or Event/Game section... Anyways. Introduction : Based on a "One Must Fall" game, I made this ragnarok map with a few different things. It has been adapted to be a PvP Map The Power Plant (From "One Must Fall" game) : Map : Video : Music Preview : www.youtube.com/watch?v=xjj9umuLn0w (Download at end of post) Screenshots : (Direct Link) (Tinypic mirror) http://i47.tinypic.com/2je4vie.jpg http://i46.tinypic.com/2n71r2r.jpg http://i49.tinypic.com/wivsoy.jpg http://i45.tinypic.com/apa44g.jpg Scripts : Okay, well, in the map there are certain "features". The map is "divided" in two parts, the outer arena and the inner fortress. Here's what you can do: Outer Arena : Heal pods : Regenerate your life quickly while you're inside. Eletrified Fence : Touch it, and you'll turn into toast. If you stay close it'll kill you quickly. You can also knockback other players into the fence, just like in the original game. Traps : On the floor, you can step on traps, they can do three different things, deal damage, drain SP or inflict you with random negative statuses. Inner Fortress : Barricade Control Panel : Touch this control panel and it'll invoke a barricade at the fortress entrance preventing other players to walk inside. (Delay 300 Seconds) Power Plant Guardians : They will protect the person that invoke them, the guardians are : 3 Dimiks and 6 Venatus. (Delay 150 Seconds) Fortress Cannons : You can trigger the cannons by stepping on them, they will burst a bomb in the corner of the outer arena, probably killing everyone in the area. They are also usefull to kill players in heal pods. (Delay 30 Seconds) Power Plant Generator : The power plant generator will discharge lightning in the water around the inner fortress. Every player that is standing on the water will take the discharge and probably die. (Delay 90 Seconds) Downloads : Updated to version 1.1: fixed minor script and map issues. Full Pack (Map + BGM + Scripts) : Direct link v1.2 : Power Plant v1.2.rar Mediafire link v1.2 : http://www.mediafire...1qkl1usi4n08qoc Map Only : Direct link v1.1 : Power_Plant_Map.rar Mediafire link v1.1 : http://www.mediafire...fs339kaglaz53f3 Music Only : Direct link : Kenny Chou-One Must Fall 2097-01 - Power Plant.mp3 Mediafire link : http://www.mediafire...u2544upar884tcj Script Only : Direct link v1.2 : power_plant.txt Pastebin link v1.2 : http://pastebin.com/hS2F4csk

 1 point
 -
@Brian I had a feeling this was the case. You are completely right. But if we wouldn't continue to use revisions, how could comeone send a bugreport and tell what version does he/she have? Send a hash of the whole project as it is? Or send a list of every single applied change? Ok, I'm only joking, but still, what's the best practice for this? Is it even possible to compare the versions in a non-linear system? Or simply there are 2 cases: fully or partially applied changesets. &the examples: Holy Molly! That's like my usual route in the supermarket searching for milk!1 point
-
http://rathena.org/board/files/file/2527-34-kamishis-hair-dyes-from-127-hair-dyes-pack/1 point
-
I thought the same way, until I understood Git better. Git commits are not linear, that's why incremental revision numbers would not make sense (SVN commits are linear). Here are examples of how Git commits can be branched & merged: https://github.com/csswizardry/CSS-Guidelines/network https://github.com/propublica/upton/network https://github.com/libgit2/libgit2/network1 point
-
Hello! Japanese Localization All FIX http://pastebin.com/nJLJGeYk1 point
-
ok ty i already fixed the colors, how i can "edit/add/delete" news, in-game? this is my script: /* Run this query before installing this script... CREATE TABLE IF NOT EXISTS `news` ( `id` bigint(20) unsigned NOT NULL auto_increment, `post_name` varchar(30) NOT NULL default '', `post_id` int(11) unsigned NOT NULL default '0', `title` varchar(45) NOT NULL default '', `message` varchar(255) NOT NULL default '', `time` date NOT NULL default '0000-00-00', `status` tinyint(2) NOT NULL default '0', PRIMARY KEY (`id`) ) ENGINE=MyISAM; */ //Version 1 prontera.gat,151,184,5 script Server News 857,{ query_sql("SELECT * FROM `news` ORDER BY `id` DESC",.@id,.@post_name$,.@post_id,.@title$,.@message$,.@time$,.@status); set .@len, getarraysize(.@post_id); copyarray .@og_stat[0],.@status,128; set @menu, -1; if(getgmlevel()>10) { mes .npc$; mes "Would you like to view the normal player menu?"; next; if(select("No:Yes")&2) goto L_Menu; L_GM_Menu: mes .npc$; mes "Hello, "+strcharinfo(0)+", what would you like to do?"; next; switch(select("(^11772dAdd^000000)"+((.@len)?":(^FF0000Remove^000000)^0000FFFeature^000000):[^8700c9Submit^000000]":""))) { case 1: mes .npc$; mes "#Title# (45 Character Limit)"; input(.@title$[.@len]); mes "#Message# ("+.in_len+" Character Limit)"; input(.@message$[.@len]); next; while(getstrlen(.@message$[.@len])<.in_len) { set(.@length, .in_len-getstrlen(.@message$[.@len])); mes .npc$; mes "Would you like to add more to the message?"; mes "^656565("+.@length+" Characters Left)^000000"; next; if(select("Yes:No")&2) break; input(.@tmp$); set .@message$[.@len],.@message$[.@len]+.@tmp$; } set .@post_name$[.@len], strcharinfo(0); set .@post_id[.@len], getcharid(0); if(.rathena) set .@time$[.@len], gettimestr("%Y-%m-%d",21); else { query_sql("SELECT CURDATE()",.@tym$); set .@time$[.@len],.@tym$; } set .@status[.@len], 2; set .@og_stat[.@len], 2; set .@len, getarraysize(.@post_id); set .@id[.@len-1], .@len; mes .npc$; mes "Added!"; next; goto L_GM_Menu; case 2: mes .npc$; mes "Select a notice to remove or restore it."; next; Rm_Menu: set .@menu$, ""; set .@a, -1; while(set(.@a,.@a+1)<.@len) if(.@status[.@a]==1) set .@menu$,.@menu$+ .@post_name$[.@a]+ " [^0000FF"+.@title$[.@a]+ "^000000] ~ ("+.@time$[.@a]+"):"; else if (!.@status[.@a]) set .@menu$,.@menu$+ "^C0C0C0//"+.@post_name$[.@a]+ " ["+.@title$[.@a]+ "] ~ ("+.@time$[.@a]+")^000000:"; else if (.@status[.@a]==2) set .@menu$,.@menu$+ "^11772d+"+.@post_name$[.@a]+ " ["+.@title$[.@a]+ "] ~ ("+.@time$[.@a]+")^000000:"; else if (.@status[.@a]==-1) set .@menu$,.@menu$+ "^FF0000-"+.@post_name$[.@a]+ " ["+.@title$[.@a]+ "] ~ ("+.@time$[.@a]+")^000000:"; set .@menu$,.@menu$+"[^8700c9Back^000000]"; select(.@menu$); if(@menu-1>=.@len) goto L_GM_Menu; set .@status[@menu-1], ((.@status[@menu-1]==-1)? .@og_stat[@menu-1]:-1); goto Rm_Menu; case 3: mes .npc$; mes "Select a notice to enable or disable it."; next; Ft_Menu: set .@menu$, ""; set .@a, -1; while(set(.@a,.@a+1)<.@len) if(.@status[.@a]==1) set .@menu$,.@menu$+ .@post_name$[.@a]+ " [^0000FF"+.@title$[.@a]+ "^000000] ~ ("+.@time$[.@a]+"):"; else if (!.@status[.@a]) set .@menu$,.@menu$+ "^C0C0C0//"+.@post_name$[.@a]+ " ["+.@title$[.@a]+ "] ~ ("+.@time$[.@a]+")^000000:"; else if (.@status[.@a]==2) set .@menu$,.@menu$+ "^11772d+"+.@post_name$[.@a]+ " ["+.@title$[.@a]+ "] ~ ("+.@time$[.@a]+")^000000:"; else if (.@status[.@a]==-1) set .@menu$,.@menu$+ "^FF0000-"+.@post_name$[.@a]+ " ["+.@title$[.@a]+ "] ~ ("+.@time$[.@a]+")^000000:"; set .@menu$,.@menu$+"[^8700c9Back^000000]"; select(.@menu$); if(@menu>.@len) goto L_GM_Menu; set .@status[@menu-1], ((.@status[@menu-1])? 0:((.@og_stat[@menu-1])?.@og_stat[@menu-1]:1)); goto Ft_Menu; case 4: set .@a, -1; set .@b, 0; while(set(.@a,.@a+1)<.@len) { if(.@og_stat[.@a]==2&&.@status[.@a]==-1) set .@b, .@b+1; if(.@og_stat[.@a]==2&&.@status[.@a]!=-1) query_sql("INSERT INTO `news` (`post_name`,`post_id`,`title`,`message`,`time`,`status`) "+ "VALUES ('"+.@post_name$[.@a]+ "',"+.@post_id[.@a]+ ",'"+escape_sql(.@title$[.@a])+ "','"+escape_sql(.@message$[.@a])+"',"+ "CURDATE(),"+((.@status[.@a]>=1)?1:0)+")"); if(.@status[.@a]!=.@og_stat[.@a]&&.@status[.@a]!=-1) query_sql("UPDATE `news`"+ "SET `status`="+((.@status[.@a]>=1)?1:0)+" "+ "WHERE `id`="+(.@id[.@a]+.@+";"); if(.@status[.@a]<0&&.@og_stat[.@a]!=2) query_sql("DELETE FROM `news`"+ "WHERE `id`="+(.@id[.@a]+.@+";"); } mes .npc$; mes "Server News Updated!"; close; } } L_Menu: set .@a, -1; while(set(.@a,.@a+1)<.@len) if(.@status[.@a]) { set @menu, .@a; break; } L_PC_Menu: set .@a, -1; set .@menu$, ""; set .@f, 0; while(set(.@a,.@a+1)<.@len) { if(.@status[.@a]) { set .@menu$,.@menu$+ .@post_name$[.@a]+ " [^0000FF"+.@title$[.@a]+ "^000000] ~ ("+.@time$[.@a]+"):"; setarray .@b[.@a], .@f; } else set(.@f,.@f+1); } if(!.@len||.@menu$=="") { mes .npc$; mes "I'm sorry no news has been posted."; close; } mes "[^0000FF"+.@title$[@menu]+"^000000]"; if(compare(.@message$[@menu],.line$)) { if(.rathena) explode(@explode$,.@message$[@menu],.line$); else callfunc("str_explode","@explode$[0]",.@message$[@menu],"/"); set .@a, -1; set .@str_len, getarraysize(@explode$); while(set(.@a,.@a+1)<.@str_len) { if(.case&&!.rathena) { callfunc "str_toarray", @explode$[.@a], "@tmp$[0]"; set @tmp$[0],callfunc("str_changecase", @tmp$[0], 1); set @explode$[.@a],""; set .@i,0; while(getstrlen(@explode$[.@a])<getarraysize(@tmp$)) { set @explode$[.@a],@explode$[.@a]+@tmp$[.@i]; set .@i,.@i+1; } } mes @explode$[.@a]; } } else { mes .@message$[@menu]; } mes "By: "+.@post_name$[@menu]+"."; mes "^656565(@ "+.@time$[@menu]+")^000000"; next; set .@menu$,.@menu$+"Cancel"; select(.@menu$); if(@menu>(.@len-.@f)) close; set @menu, ((@menu-1)+.@b[(@menu-1)]); goto L_PC_Menu; end; OnInit: set .npc$, "[^0000FFServer News^000000]"; waitingroom "Server News!",0; set .rathena, 1; // If you're running rAthena or not. 0=off/1=on set .case, 1; // For non-rAthena only restores upper-case strings. set .in_len, 210; // Max input length. set .line$, "/"; // Line break used to seperate lines. /* Changing the linebreak for non-rAthena clients doesn't work You have to find callfunc("str_explode","@explode$[0]",.@message$[@menu],"/"); and change "/" to what ever you want. (Example "|").*/ } function script str_explode { if ( getarg(2,"") == "" ) return callfunc("str_toarray", getarg(1), getarg(0) ); sleep2 1; setarray .@char$, getarg(2), " ", "0", "1", "2", "3", "4", "5", "6", "7", "8", "9", "e", "i", "a", "s", "r", "n", "t", "o", "u", "l", "c", "p", "m", "d", "v", "h", "g", "f", "b", "y", "q", "k", "z", "x", "j", "w", "_", "-", "|", "/", ".", "'", "[", "]", "(", ")", "=", "*", "&", "#", "@", "!", "+", "`", "~", "%", "<", ">", "?", ",", "^", ":"; set .@charsize, getarraysize(.@char$); set .@tmp$, "|~key~|"; set .@str$, .@tmp$ + getarg(1) ; set .@len, getstrlen(getarg(1)); set .@parse_len, getstrlen(getarg(2)); while( .@len > .@s ) { set .@i, 0 ; while( .@i < .@charsize ) { if ( ! ( set(.@l,.@l+1) % 600) ) sleep2 1; if ( compare( .@str$ , .@tmp$ + .@char$[.@i] ) ) { set .@tmp$, .@tmp$ + .@char$[.@i]; if ( .@i ) set .@arr$[.@p], .@arr$[.@p] + .@char$[.@i]; else { set .@p, .@p + 1; set .@s, .@s + .@parse_len-1 ; } break; } set .@i, .@i+1 ; } if ( .@i == .@charsize ) return 0; else set .@s, .@s+1 ; } deletearray getd(getarg(0)); copyarray getd(getarg(0)), .@arr$, .@p+1; return .@p+1; } function script str_changecase { sleep2 1; if ( getarg(1) ) { setarray .@char$[ 0 ], " ", "0", "1", "2", "3", "4", "5", "6", "7", "8", "9", "E", "I", "A", "S", "R", "N", "T", "O", "U", "L", "C", "P", "M", "D", "V", "H", "G", "F", "B", "Y", "Q", "K", "Z", "X", "J", "W", "_", "-", "(", ")", ";", ",", ":", ".", "*", "!", "?", "'"; } else { setarray .@char$[ 0 ], " ", "0", "1", "2", "3", "4", "5", "6", "7", "8", "9", "e", "i", "a", "s", "r", "n", "t", "o", "u", "l", "c", "p", "m", "d", "v", "h", "g", "f", "b", "y", "q", "k", "z", "x", "j", "w", "_", "-", "(", ")", ";", ",", ":", ".", "*", "!", "?", "'"; } set .@charsize, getarraysize(.@char$); set .@str$, "|~key~|" + getarg(0) ; set .@len, getstrlen(getarg(0)); while( .@len>.@s ) { set .@i,0; while( .@i<.@charsize ) { if ( ! ( set(.@l,.@l+1) % 650) ) sleep2 1; if ( compare( .@str$ , "|~key~|" + .@tmp$ + .@char$[.@i] ) ) { set .@tmp$, .@tmp$ + .@char$[.@i]; break; } set .@i, .@i+1; } if ( .@i == .@charsize ) return ""; else set .@s, .@s+1; } return .@tmp$; } function script str_toarray { sleep2 1; if ( getstrlen( getarg(0) ) > 128 ) return 0; setarray .@char$[ 0 ], " ", "0", "1", "2", "3", "4", "5", "6", "7", "8", "9", "e", "i", "a", "s", "r", "n", "t", "o", "u", "l", "c", "p", "m", "d", "v", "h", "g", "f", "b", "y", "q", "k", "z", "x", "j", "w", "_", "-", "(", ")", ";", ",", ":", ".", "*", "!", "?", "'"; set .@charsize, getarraysize(.@char$); set .@tmp$, "|~key~|"; set .@str$, .@tmp$ + getarg(0) ; set .@len, getstrlen(getarg(0)); while( .@len>.@s ) { set .@i,0; while( .@i<.@charsize ) { if ( ! ( set(.@l,.@l+1) % 650) ) sleep2 1; if ( compare( .@str$ , .@tmp$ + .@char$[.@i] ) ) { set .@tmp$, .@tmp$ + .@char$[.@i]; set .@arr$[.@s], .@char$[.@i]; break; } set .@i, .@i+1; } if ( .@i == .@charsize ) return 0; else set .@s, .@s+1; } deletearray getd(getarg(1)); copyarray getd(getarg(1)), .@arr$, .@len; return .@len; }1 point
-
There is a custom label called OnPCcalc, I thinks its name. It would work great, look it up ( think its by annieruru ) ill edit post if I find it when home.1 point
-
Updated russian localization http://pastebin.com/A3C9Qvk61 point