Leaderboard
Popular Content
Showing content with the highest reputation on 12/17/12 in all areas
-
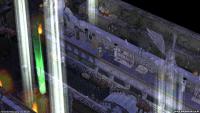
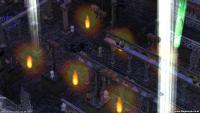
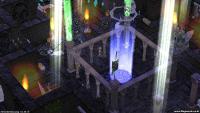
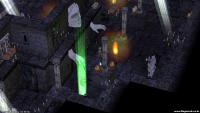
Briefing & Concept Hello rathena. This is one of those special times were I'm ready to post one of my most beautiful works all the time. A map that goes well for this holiday season and... it is really unique for it. This map is used for event purposes for the server who comissioned me to make it possible. The idea is to celebrate -christmas- in a very innovate way with what I name as "The Ice Palace". I have to say that I had to give all my experience with this one. All these time I have worked with numerous .Winter. style maps: Jazeera Xmas, Icecrown citadel, Prontera Deck Halls, Lake Bresha Map. Each map, have teached me very well that it is NOT the same to deal with making Crystal, Ice, Frost Ice, or Snow. Each element is different and to recreate the presention of the difference of each one is a hard task. All that experience is now present in this palace that is, like something made from a dream. I have to say, the map is beautiful, and I'm really proud of the final result. Hope you will like this work I did with a lot of effort About this map So, what do we have new on this map? Ice Palace is, a really beautiful high class place... made completely with ice!. It was necesary to try some innovations on this map to have this concept sucessfull. I will point 3 of them, that are mentioned in the previous 3 images: Multi Layer Ice Glass: The main dance area that has a big glass on center, is made with, 8 different levels of opacity multilayers textures to have the "frozen" effect. Reflection is added by duplicating the chandelier on top. "Frozen" effect increases by adding frost diffusing light, a technique that I tried first in my Lake Bresha Map Ice Behaviour Interior room Structure: This is really a new concept for interior maps. When I was doing the map I realized that "Ice" grows in no particular way. Ice grows everywhere and it attachs into every possible area it can do. To make a "Rough" room with 4 walls was not a good idea and it would be against the ice principles. The idea was, to make the effect like the "Ice" cropped some walls on the palace. That means, like the ice made some holes on the palace walls and commed out from there, or even, like if the Ice eated some walls in the palace, BUT WITH a lot of caution. This is a palace afterall and make the effect to presencial, would harm the main idea of this. You will surely notice this addition, if you take a look at the walls on the map. They dont end in normal corners Multi Opacity Models: All, all the models of this map, have opacity levels made with TGA Textures. I cant count how many levels of different opacities I did, but... the fun thing of this map is, that everywhere you walk you can see your character trough the ice. Making the ice recreation even better. Recreative Video! ... Watch it in 720p! This is a very VERY SPECIAL VIDEO... not like the others. The first one of what I call as "Recreative Videos". It means they are videos of an example of implementation of the map, with quest, dialogues, fun moments. Watch it enterily You will love it! HD Screenshots Screens are in Full HD resolution. You can allways hit the image thumbnaill to check the images on full size, and check some details that can only be appreciated in HD resolution. Beautiful View 1 Beautiful views are, views that comes out of the camera limits of an interior map just to show a pretty view of it. This view says it all... an angel statue on center, a big stained glass window on the back. An Ice chandelier on top reflected on a ice dance floor area, Ice winter blowing effect crossing the air, sunlight from the roof, ... all matches and gives a very beautiful view here! Beautiful View 2 Angle that is out of the limits of the map, but I liked it. Shows the palace way across the bar room, and hang out area. Overview 1 Shows the main area, entrance and dance area of the ice palace. Overview 2 Shows the midle center of the map. Overview 3 Overview 4 Here we have the same areas, another angle. Detailed 1 Shows the entrance of the palace. If you pay attention, the tiles on the floor are not linear. The ice is even represented on that too, since, Ice covers the floor in random way, that is how I did it... On the back area, you have what I was naming as "Ice Behaviour", where the fountain is. That is what I name as really "an Ice Wall". Detailed 2 The dance area... one of my favorites. Reflection is well represented here, and the ice dance area is really well done. It all matches. Detailed 4 Yeah... an Ice Piano. Model fully texturized by me, to make it look as made of ice. Detailed 5 Oh one of my favorites. The ice stained glass window. It is a huge stained glass window made by me... it is covered all with ice. To make the "structure" looks like that it was necessary a HIGH amount of models and a lot of ice styles. It was REALLY necessary to make the stained glass looking as "coming out of the ice", like something that the ice itself molded by magic. It had to look like that, and not like I just placed it. Detailed 6 Opacity. Shows an example of the ice angel on center, how opacity is managed and you can see your character in almost all the structures in the map. Detailed 7 Passage. Some Ice Lions wall fountains on the back. And here is also well represented the Ice Behaviour Walls. Ice is growing from the roof of that wall and ends, by cropping it on the left and right corner of this wall. Detailed 8 Hang out area. An ice fountain on center with a great detail on top to make all this place looks so high class really Detailed 9 Entrance to the bar area. Again, Ice is cropping the walls! Detailed 10 The ice bar. A very great place where seems like the ice molded those stained glass windows and let that corner be alive.! Okay, that was all. Really guys, this is one of these maps were, I come so far and here is where I believe I have learned a lot from the previous requests. Without the experience of doing custom maps for someone, this map could not be possibe as how it looks here! I hope you will like this map! I know it is only a showcase but particulary this map brings new elements to the map scene, that I'm sure a lot of mappers will find helpfull. Thank you all for all the comments. Every rate counts!. Dont forget the video, to see a teaser of a quest idea of this map... it is really enjoyable. See you later!2 points
-
Aerie's Guide for BrowEdit HTML version The aim of this guide is to help BrowEdit users, and novices, to realize a good map. There are already a number of guides on mapping for Ragnarok, especially for BrowEdit, I don't wish here to make here a simple overview of the steps, but add a real value. I will present, but briefly, the major steps for creating a map. I will focus in each part on advices, tips and possible difficulties. Many links, programs, methods, images are also available for you to build up tools for a good mastery of BrowEdit. I will also detail the addition of textures, models, water and effects. I recommand you the YukiTsuki guide for know how use BrowEdit : http://browedit.excalibur-nw.com/?a=viewtopic&id=533 And another, really important for get all keys with a nice interface, made by Steph81 : http://mappingro.prauds.fr/ (Click on BrowEdit, I'll refer to other sections too) If you want to know all possibilities (with keys) of each section. I wanna render thanks to Borf and his team for have create this program. (I'm still talking about BrowEdit ;D) Let me know if you want me to develop another part in this guide or to discuss another concept. (If a moderator thinks, it's not in the right section, please move it in the proper one. I've choose to put this guide here because it's for mappers or interested people, I hope they won't miss it ;D). Table of Contents : Configuration of BrowEdit I - Create a map and Apply textures. II - Relief III - Models IV - Gat V - Walls VI - Editing Water VII - Lightmaps VIII - Effects IX - Finishes X - Add Custom Textures XI - Add Custom Models XII - Tips Configuration of BrowEdit. Open data/configs/rocheaptop.xml per default in some versions or look for your configuration file, you must open and follow the link given in config.txt in the BrowEdit folder. Let's see what we can see in : <config> <ro directory="c:\program files\gravity\ro\"> <grf>c:\program files\gravity\ro\sdata.grf</grf>[color="#FF0000"] //You must configure it for link your grf, the program'll only read ressources linked[/color] <grf>c:\program files\gravity\ro\data.grf</grf> </ro> <files> <models> [color="#FF0000"] //Change it, if you want use alternate list of items, check [url="http://mappingro.prauds.fr/"]http://mappingro.prauds.fr/[/url] , you can get alternate list, classed by theme[/color] <model>data/romodels.txt</model> <model>data/alphamodels.txt</model> <model>data/randommodels.txt</model> </models> <textures> <texture>data/rotextures.txt</texture> <texture>data/texturescustom.txt</texture> </textures> <sounds> <sound>data/rosounds.txt</sound> </sounds> </files> <graphics>[color="#FF0000"] //You can choose the resolution of BrowEdit to fit it to size of your screen[/color] <resx>1024</resx> <resy>768</resy> <fullscreen>false</fullscreen> [color="#FF0000"] //write true for fullscreen mod[/color] <bpp>32</bpp> <font>tahoma</font> [color="#FF0000"] //check other font in data/fonts[/color] <skin>data/skins/hamvista.xml</skin> [color="#FF0000"] //Checl skins in data/skins[/color] <notilecolor>FFFF80</notilecolor> <bgcolor>8000FF</bgcolor> </graphics> <undo size="50" /> <language>english</language> <firstmap>prontera</firstmap> <splash>data/hamtaro.tga</splash> <water> [color="#FF0000"] //Check water section of the guide[/color] <directory>data\texture\¿öÅÍ\</directory> <extension>.jpg</extension> <count>8</count> </water> <gattiles> <tile>0</tile> <tile>1</tile> <tile>2</tile> <tile>3</tile> <tile>4</tile> <tile>5</tile> <tile>6</tile> </gattiles> <wm> [color="#FF0000"] //Here for a modification of some windows, don't need to be detailled[/color] <minimap> <x>598<> <y>70</y> </minimap> <hotbar> <x>744<> <y>0</y> </hotbar> <sprite> <x>237<> <y>184</y> </sprite> <textures> <x>25<> <y>25</y> <w>974</w> <h>718</h> </textures> <modelswindow> <x>25<> <y>25</y> <w>974</w> <h>718</h> </modelswindow> <texturetools> <x>0<> <y>586</y> <w>56</w> <h>124</h> </texturetools> <texturebrush> <x>56<> <y>53</y> <w>905</w> <h>665</h> </texturebrush> </wm> </config> ________________________________________________________ I - Create a map and Apply textures. - Under the version 600, create a map by File/New/ occure some problems. You can use File/Open From Grf/ save the map and with Tools/Clear Map, clear it. - An important things too, is the border of the map. If you don't let 2 tiles, you'll have dirty borders after when you'll add lightmaps. So, I always using a black border like that : It'll really usefull for make clean borders. Players won't see under the map when they approching sides : I don't have many things to say about this part, for know keys and opportunities, please refer to Steph81's work : http://mappingro.prauds.fr/ ________________________________________________________ II - Relief : Some Maps are particularly flat monotone, you must use the terrain, here in two parts, I'll show you how to make a single mountain, and then show you how to use the inclined surfaces and walls while using the copy / paste in BrowEdit. 1) Make Mountains : Place textures : With F2 mod chosse the height of the upper part : F3 mod and F key for link texture, soft it with S key after. 2) Tilt & Walls : This is an important part, you can make many things with it and it'll done a complexe relief to your map. How tilt textures : Then like the previous step for keys : The aim is to alternate tilts, flat textures and walls, for doing something like that : You must use copy/past system who is really usefull for make. With F2 mod select a part of your map or a tile and past where you want. It breaks the monotony of flat maps with a few simple walls. With some try you should obtain more complexe forms, like that : ________________________________________________________ III - Models : 1) Choose the right size : Always check the size of your models, you don't need to wait for a test IG, you can use Edit Mode/ Sprite Edit. Once selected make ctrl + Left Click : A Random character'll appears, and'll serve of scale. Another advice is the utilisation of different Scales, turn them, also use different rotations. It'll adding a new kind of variety in your models : Only one model used. 2) Using Object Group Edit: This is an important part to know for be faster. (F11 mod) Use different models and size like that : Select them and press D (for Duplicate), you can rotate them too. It's the better way for make maps with different models, a huge vegetation and a variety of situations. ________________________________________________________ IV - Gats : It's an easy part, you'll not have difficulties. But some notes : If you can't move in your map IG, it can be due to the creation of map in BE versions under 600, who don't support New Maps option. If you modify an original map, becareful with the priority read of gat files by the emulator (if use grf enable) and to rebuilt your mapcache if you're using it. In the gat mod, you can use the key I in the tile choosen for get exacts coordinates. (Usefull for place NPC on not walkable tiles) 1) Different type of Gat : Let's see what we get in src/map/map.c : inline static struct mapcell map_gat2cell(int gat) { struct mapcell cell = {0}; switch( gat ) { case 0: cell.walkable = 1; cell.shootable = 1; cell.water = 0; break; // walkable ground case 1: cell.walkable = 0; cell.shootable = 0; cell.water = 0; break; // non-walkable ground case 2: cell.walkable = 1; cell.shootable = 1; cell.water = 0; break; // ??? case 3: cell.walkable = 1; cell.shootable = 1; cell.water = 1; break; // walkable water case 4: cell.walkable = 1; cell.shootable = 1; cell.water = 0; break; // ??? case 5: cell.walkable = 0; cell.shootable = 1; cell.water = 0; break; // gap (snipable) case 6: cell.walkable = 1; cell.shootable = 1; cell.water = 0; break; // ??? default: ShowWarning("map_gat2cell: unrecognized gat type '%d'\n", gat); break; } Walkable : Where players and monsters can walk Not Walkable : Unvaible part of the map (but you can place npcs) Not Walkable (no snipe) : You can't walk and can't snipe too Not Walkable (snipable) : You can't walk but you can snipe. The Yellow wakable seems be used for skills who requieres water. (Holy Water) Use them in PvP / GvG maps or for your scenari. Here an, attack of a lime : 2) Tilt Gats : When you have finished your map relief, you can started the gat editing. First you are gats aren't at the good level if you have using F3 mod and a big pencil. You have different tools proposed for automatic gat editing : - Edit / Set Gat Height : You must use it each time you arrive at this step. All tiles will become similar in level and angle to the ground under them. - Edit / Set Gat Collision : Make walkable all flat ground and non-walkable all section inclined. (like mountains). - Edit / Set Gat Collision 2 : This option will calculate all models and make non-walkables tiles under them. But It's not perfect and you must verifiy everywhere. So I recommand you to use Gat Height, then increaze the size of the pencil and make all your map non-walkable, then only use walkable option. It'll be faster. Becareful for suspended tiles, when done don't use Set Gat Height option or you'll be ready to restart all again ;D You can make tilt gat, copy and past them, ... refet to the Relief section for get some keys. 3) Using Scripting for more type of gat : As we have see, we're limited in the choice of gat. Only use detailled one. Now, I'll present you some new cell type and a basic script for using them : - script Chat-Vending Zone -1,{ OnInit: setcell "prontera",0,0,360,360,cell_novending,1; setcell "prontera",137,268,147,235,cell_novending,0; setcell "prontera",163,267,172,235,cell_novending,0; setcell "prontera",0,0,360,360,cell_nochat,1; setcell "prontera",139,173,147,153,cell_nochat,0; setcell "prontera",163,267,172,235,cell_nochat,0; } (Here the 1 = means activate) Here, I'm forbidden the using of vending and chat in the City of Prontera, but i'm giving some exceptions on specific zones. Can be use in temporary scripts, for non-walkable per example. List of avaible cell : (db/const.txt) cell_walkable cell_shootable cell_water cell_npc cell_basilica cell_landprotector cell_novending cell_nochat ________________________________________________________ V - Adding Walls : Here, we'll see how set a wall. Really interesting to put some walls, you'll get less limitations, it's open you new possibilities of complexe maps. First, you must select a texture, you're permitted to use a part of the texture. You got upper and lower part of the wall, apply textures depending of your orientation in the map. 1) Automatic mod : Press : or ; touch for set walls, one click and it'll be one part who'll be set : Let this touch press then you'll get the texture fit along the entire wall. (Sometimes, this function doesn't work, depending of version of program and the loading of the program ... try to relaunch it, 3-4 times) Now, you can apply a texture well sized. Press Z touch (or Z and sweep along the purple wall indication OR alt + Z). Depending of position of the wall. You can also set a part of a texture and fit it automatically to the wall : (Same keys) 2) Manual mod : With F4 mod you can open the WallTexture window. You can flip to horizontal or vertical. And also selecting with a square the part of the texture, you can move each sommet for get original part of the selected texture. ________________________________________________________ VI - Editing Water : 1) Configure water in my map : This part is kinda easy to understood : Windows/Water You got 6 options, I'm gonna present them : - Amplitude : (0 = none) means the movement of the water, for a rough sea or a calm one. - Height : (0 = default height of map) positive figures = the water goes deeper under default height / negative figures = the water goes upper the default height. - Phase : the speed of the amplitude resolution. - SurfaceCycle : The speed of the texture moving (a water type is composed of 32 frames) - Type : Change the texture of Water - Speed : ... 2) Create new water type : A water is composed by 32 frames in *.jpg format. They are read continuously for make an animation. An automatic transparency effet happens too. Create a folder data/texture/¿öÅÍ/ It'll be in this folder that you'll put all your water files. All files must be in this format : So you have to make 32 textures for an entire water cycle. XX means the number type of your water (Check step 1 / Type option). I've created 8 new waters type, you can get them here : http://www.eathena.ws/board/index.php?showtopic=253679 3) Adding new water type : Make a grf in 0x200 format with your data. You must configure BrowEdit so the program can read the addition : Go to BrowEdit folder : data/configs/rocheaptop.xml (Don't forgot to link the grf, open data/configs/rocheaptop.xml per default in some versions or for nom your configuration file, you must open and follow the link given in config.txt in the BrowEdit folder.) Now take your configuration file : And modify your water count. Water count must be equal to latest XX + 1 (previous step). ________________________________________________________ VII - Lightmaps : Generally, it's the most dfficult part to configure, many mappers asking for it in support section. You have two parts to configure a global one who gives the ambiance of your map, and lightmaps for make some touches of colored lights in parts of your map. I'll also present you how make shadows and some tools. Don't forgot, lightmaps looks generally pretty with Browdit but IG you'll have some dirty apply, if it's your first time, take time for check them before know exactly what you're doing. 1) Global Lighting : Windows/ Global Lighting : Diffuse Light gives you the light of shadows cast by the position of the sun. (In models and in textures). You can choose with the longitude and latitude angle for the basic sun. Colors should never be upper 1, it's in RGB colors (check tools in the last part). Ambient Light, it's a kind of filter on your textures and models. It's in RGB system too. Intensity'll be another way of configure darkness / brightness. 2) Lightmaps Configuration : Light windows : Color stil works in RGB system. Intensity : Generally I'm using 127, upper it's really to pronounce (depends of your idea) Max Light Increment : It's for make priority between different lightmaps. (Just becareful for the shadow light, 4) section). Casts Shadows : recommand you to desactivate it, except for the one who'll serve for make global shadows. 3) Favorite Lights : It's very helpful, for be faster, you won't configure each time a light with same properties. Configurable in Windows/ Favorite lights. Here, I'll share my lightmaps, you'll have some colors and well configured. In your BrowEdit folder : data/lights.txt (replace lines) <?xml version="1.0" encoding="UTF-8" ?> <lights> <light> <name>default</name> <color r="0" g="0" b="0" /> <range>200</range> <brightness>127</brightness> <maxlight>256</maxlight> <givesshadow>0</givesshadow> <lightfalloff>1</lightfalloff> <height>10</height> </light> <light> <name>ambient light</name> <color r="0" g="0" b="0" /> <range>200000</range> <brightness>127</brightness> <maxlight>127</maxlight> <givesshadow>1</givesshadow> <lightfalloff>0.00001</lightfalloff> <height>50</height> </light> <colors> <light> <name>red</name> <color r="0.5" g="0" b="0" /> <range>200</range> <brightness>127</brightness> <maxlight>256</maxlight> <givesshadow>1</givesshadow> <lightfalloff>1</lightfalloff> <height>10</height> </light> <light> <name>green</name> <color r="0" g="0.5" b="0" /> <range>200</range> <brightness>127</brightness> <maxlight>256</maxlight> <givesshadow>1</givesshadow> <lightfalloff>1</lightfalloff> <height>10</height> </light> <light> <name>blue</name> <color r="0" g="0" b="0.5" /> <range>200</range> <brightness>127</brightness> <maxlight>256</maxlight> <givesshadow>1</givesshadow> <lightfalloff>1</lightfalloff> <height>10</height> </light> <light> <color r="0.5" g="0" b="0.5" /> <name>purple</name> <range>100</range> <brightness>127</brightness> <maxlight>256</maxlight> <givesshadow>1</givesshadow> <lightfalloff>1</lightfalloff> <height>10</height> </light> <light> <color r="0.5" g="0.2" b="0.2" /> <name>Torche</name> <range>100</range> <brightness>127</brightness> <maxlight>256</maxlight> <givesshadow>1</givesshadow> <lightfalloff>1</lightfalloff> <height>10</height> </light> </colors> <MyLight> <light> <color r="0.6" g="0.4" b="0.2" /> <name>Jaune Sombre</name> <range>30</range> <brightness>300</brightness> <maxlight>200</maxlight> <givesshadow>0</givesshadow> <lightfalloff>1</lightfalloff> <height>10</height> </light> <light> <color r="1" g="1" b="0" /> <name>Jaune</name> <range>100</range> <brightness>70</brightness> <maxlight>256</maxlight> <givesshadow>0</givesshadow> <lightfalloff>1</lightfalloff> <height>10</height> </light> <light> <color r="1" g="0" b="0" /> <name>Rouge</name> <range>100</range> <brightness>100</brightness> <maxlight>256</maxlight> <givesshadow>0</givesshadow> <lightfalloff>1</lightfalloff> <height>10</height> </light> <light> <color r="0" g="0" b="0" /> <name>Lumiere</name> <range>70</range> <brightness>500</brightness> <maxlight>256</maxlight> <givesshadow>1</givesshadow> <lightfalloff>1</lightfalloff> <height>10</height> </light> <light> <color r="0" g="0" b="1" /> <name>Bleu</name> <range>100</range> <brightness>100</brightness> <maxlight>256</maxlight> <givesshadow>1</givesshadow> <lightfalloff>1</lightfalloff> <height>10</height> </light> <light> <color r="0" g="1" b="1" /> <name>Cyan</name> <range>50</range> <brightness>127</brightness> <maxlight>256</maxlight> <givesshadow>0</givesshadow> <lightfalloff>1</lightfalloff> <height>10</height> </light> <light> <color r="1" g="0.9" b="0.9" /> <name>Blanche</name> <range>50</range> <brightness>100</brightness> <maxlight>256</maxlight> <givesshadow>0</givesshadow> <lightfalloff>1</lightfalloff> <height>10</height> </light> <light> <color r="0.5" g="1" b="0.5" /> <name>Verte</name> <range>60</range> <brightness>120</brightness> <maxlight>256</maxlight> <givesshadow>0</givesshadow> <lightfalloff>1</lightfalloff> <height>10</height> </light> <light> <color r="0.5" g="0" b="0.5" /> <name>Violet</name> <range>50</range> <brightness>127</brightness> <maxlight>256</maxlight> <givesshadow>0</givesshadow> <lightfalloff>1</lightfalloff> <height>10</height> </light> <light> <color r="0.6" g="0.4" b="0.2" /> <name>Orange (mine)</name> <range>50</range> <brightness>500</brightness> <maxlight>256</maxlight> <givesshadow>0</givesshadow> <lightfalloff>1</lightfalloff> <height>10</height> </light> <light> <color r="0" g="0" b="0" /> <name>Orange leg</name> <range>100</range> <brightness>127</brightness> <maxlight>256</maxlight> <givesshadow>1</givesshadow> <lightfalloff>1</lightfalloff> <height>10</height> </light> <light> <color r="1" g="0" b="1" /> <name>Rose</name> <range>40</range> <brightness>127</brightness> <maxlight>256</maxlight> <givesshadow>0</givesshadow> <lightfalloff>1</lightfalloff> <height>10</height> </light> <light> <color r="0" g="0" b="0" /> <name>Rose</name> <range>100</range> <brightness>127</brightness> <maxlight>256</maxlight> <givesshadow>1</givesshadow> <lightfalloff>1</lightfalloff> <height>10</height> </light> <light> <color r="0" g="0.3" b="0.3" /> <name>cyan dark</name> <range>30</range> <brightness>127</brightness> <maxlight>256</maxlight> <givesshadow>1</givesshadow> <lightfalloff>1</lightfalloff> <height>10</height> </light> <light> <color r="0.3" g="0" b="0.3" /> <name>rose dark</name> <range>40</range> <brightness>127</brightness> <maxlight>256</maxlight> <givesshadow>1</givesshadow> <lightfalloff>1</lightfalloff> <height>10</height> </light> <light> <color r="0" g="0" b="0" /> <name>rose dark</name> <range>100</range> <brightness>127</brightness> <maxlight>256</maxlight> <givesshadow>1</givesshadow> <lightfalloff>1</lightfalloff> <height>10</height> </light> </MyLight> </lights> 4) How make Shadows ? It's really simple, when you put all your lightmaps for color, you'll adding the two last one for create shadows. It should seems like that : First Light : Second Light : The first'll cast shadows and the second one mitigate the previous one. (Without it's really too dark, but if you prefer don't put the second one). Color 0,0,0 is the perfect light (you can of course modificate it for get another color but Global Lighting is generally enough). The Second light must be always inferior to the first or you'll not have shadows. Once calculate, use Generate/Smooth lightmaps. (2-3 times is enough) 5) Tools : For RGB colors : http://www.drpeterjones.com/colorcalc/ ________________________________________________________ VIII - Effects : 1) How Using an Effects ? Easy to use, but difficult to make them useful, why ? Because the loop time still don't work under BrowEdit, so with many effects (more than 4 seconds of duration)'ll be flooded IG and your game'll become really slow (or Freeze). Thats why, I'm using some of them directly by Script : - script EP7_lightanim -1,{ OnLight: donpcevent "#ep7effectAby1::OnAction"; sleep2 1000; donpcevent "EP7_lightanim::OnLight"; end; } //=============== ars_fild58,95,103,0 script #ep7effectAby1 139,{ OnAction:specialeffect 14;end; } Place the npc on the coordinates you wish and choose the loop with the sleep2. Here for the list of effects and images : http://mappingro.prauds.fr/ 2) Testing Effects : For make an effect avaible, you need to have ressources in your client and also them hexed in your launcher. BrowEdit list effects can be updated in data/effects.txt, just add in this format some lines : Tested them until you get a Gravity Error ;D 3) Tips for set the Loop Time : This method have been report by Akira-Toriyama : http://board.frathena.net/index.php?showtopic=1453&hl= Put your effect, then open the window Effect. For each change in each case you must press Enter touch before click on ok button. Re-open the window and your Loop Time have been changed ;D ________________________________________________________ IX - Finishes of a Map : This is an important part of this guide, you should apply this method for each maps, don't do it will occure problems, like black textures (cliping effect) and missing models. I recommand you to work on the version 586 of BrowEdit, available here : http://browedit.excalibur-nw.com/release/ (Use svn tool) for his stability and his saves function. 1) What is a Quadtree ? Quadtrees are a division of the map in small square for make a faster loading of the map. The map'll be loading gradually when the player walk onto, but the problem is the reading speed of the client, it never goes enough fast so many black textures (cliping)'ll appears. 2) Why I've got missing models when I'm IG? This happens when you use the quick save. The quick save don't calculate each models per quadtree but make a whole one, fatest yes, but occure some random vanish models. You should always use the classical Save, by the way take of your BrowEdit version, some of them only does quick save (like version 620). For be sure about your version, check your console during the save : If you got this, change your BE version : 3) How fix the Cliping Effect ? Operation to make each time you modify your maps when done. You'll need a hexadecimal editor for realize this. Example : http://www.pspad.com/en/ (freeware) Select your *.rsw files and open it with your hexadecimal editor : Look to 3rd column, first line. Here 0201, modify to 0109 and save ! Don't forget : BrowEdit always saves your map in 0x201 version. Each time you'll save your map, you must restart this manipulation. 4) How fix vanish models ? Tips from Angst. The first way can works but you will sometimes get some vanish models (with 0x201 version). The 201 version seems to don't accept objects to high. Please follow the process if you get vanish models : 5) Make a Minimap : It's really simple, when your map is done, just click on View/Top Camera. Then press Alt + Print Screen, and paste it on Paint (or another program, if you have). Save in *.bmp format / 256 colours. Name your file with the same name as your map, and put it in : Should look like that : You can resize it for save some Ko. (I'm using 400*400 generally) ________________________________________________________ X - Adding new textures : Note before, you must respect the original format : *.bmp / 256*256 / 24 bits / 71 ppp, or it won't be read by the program. 1) Where put them in the client side ? Make a folder "data", open it, inside create a one "texture" called, open it, then another called "event" (for example, if you decide to use another one, you must change the adresse in the step 2) and put all your custom textures in. (TEXTURENAME.bmp) 2) How adding them to BrowEdit ? In your BrowEdit folder : data/texturescustom.txt Open it and write with this format for each textures added : 3) Link textures to BrowEdit You must repack your data folder in 0x200 grf format for be read by BrowEdit. (Don't forgot to link the grf, open data/configs/rocheaptop.xml per default in some versions or for nom your configuration file, you must open and follow the link given in config.txt in the BrowEdit folder.) 4) Add transparency effect to a model or texture : You can apply some transparency effect on your models / textures. You must have a program using layers like photoshop : (explanations from Angst) TGA format(Photoshop): File>Save: (In the save dialogue make sure "Alpha Channels" is Checked. A popup will ask : Also on the Alpha 1 channel I find the client can't read anything below 15-25% transparency. (Black/white value) IG it shows up as fully invisible if the transparency is set below the values stated above.. Also I've found you can use larger textures for better resolution IG (Less pixelation) Common size: 256x256 Higher res: 512x512 Even Higher res: 1024x1024 Note: these sizes are for custom models using textures you create, not ones used with the RSM Editor. Wall images can be any size, though I generally do not go less than 256 wide. Please follow instructions in Adding texture part for adding it to your browedit / client. Here some examples of works on : http://www.eathena.ws/board/index.php?showtopic=269326 / http://www.eathena.ws/board/index.php?showtopic=272164 You can also get examples of TGA files in those map packs. 5) Add new water type : You can get here my new water pack : http://www.eathena.ws/board/index.php?showtopic=253679 How install them ? - Go to BrowEdit folder : data/configs/rocheaptop.xml - You must link the grf first (water.grf) in <grf></grf> - Change the count of water type like this (depending of the total of water type : officials + customs) : For make a new one, look to texture/¿öÅÍ/ . There is 32 images in jpg format per water type. So texture/¿öÅÍ/water800.jpg means 8th type frame 00 (00 to 31). You can go upper like 15th type frame : it will looks like texture/¿öÅÍ/water1502.jpg ________________________________________________________ XI- Adding new models : I recommand you first to create a database of models (and also textures who are very usefull for editing them or get the good format of models's textures). You should decompress all your grf and keep only "model" & "texture" folders (make this operation for all your grf with this kind of stuff). Then apply Unbollox to get the right names, like those one uses in BrowEdit. I'll not speak about 3ds models here, just show how add a new model and retexturing it. (For a custom one, it's the same schema). I'll also show you how use Arcturus models separately. 1) How find a model and isolate it ? Choose a model : It's this link in my database : Make a folder "data", open it, then a folder called "model", open it, then another called "event" (for example, if you decide to use another one, you must change the adresse in the step 3) and put all your custom models in. (MODELNAME.rsm) Copy and paste in : 2) Editing your model : Select Windows/RSM Editor, and select your custom model (or the copy in your data/model/event/) As you can see, you can modify the used texture (here only one), just double click in the mini-texture and a new windows'll open then choose a new texture. (For adding a custom texture check the previous chapter.) Save it. (Sometimes the mini-texture don't change until a save or reboot program). *You must replace and repack the grf used by this model each time you editing it.* 3) How adding your model in BrowEdit ? In your BrowEdit folder : data/romodels.txt Open it and write with this format for each models added : 4) Link models to BrowEdit : You must repack your data folder in 0x200 grf format for be read by BrowEdit. (Don't forgot to link the grf, open data/configs/rocheaptop.xml per default in some versions or look for your configuration file, you must open and follow the link given in config.txt in the BrowEdit folder.) 5) Using Arcturus Models : Here a special note for Arcturus model a previous game of Gravity using the same client mechanisms and formats. Link to the pack : http://www.eathena.ws/board/index.php?show...amp;hl=arcturus [by Akayoo] Check his indications for know how adding this pack, all have been already preparate in BrowEdit for those models. It can provide an interesting quantity of models and textures really useful for made original maps. But be careful you must relink all models and textures by adding them separetly. So use the Adding textures / Adding custom sections. Please don't use the whole pack for your map, it'll be really useless, nobody wants a maps with a grf of 200 Mo ;D ________________________________________________________ XII- Tips : I'll put here some tips for BrowEdit, you can of course prupose yours. 1) Two Maps in one window Launch your program, then open a map, then another one. Now you can press the tabulation touch and switch from a map to another. You can pick an object and put it in the other map. You can also copy/paste entire parts of the map. If you copy a part of a map on another becareful of Global Lighting they must be the same. When you paste, save, you'll get a Sanitary Lightmap : Boundary Light map. After saved, just relaunch the programm and it'll be done ;D 2) Added Blue Sky This question frenquently remains. It's possible to make it but you're really limited. So, I'll explain you 3 differents method for make this effect. First method : Replace an existing map with this effect. I list here all maps : Second method : Use a Hexadecimal editor, open your executable with it then search for a map with sky effect. Replace the name found by the name of your map : Third method, use a blue texture around your map and use mapflag clouds / clouds2. (Check Arcturus grf for get some sky textures.) When you're creating your map, you must put per default yellow texture and let it empty. I'll do some tests for get other effects maps like bilfrost or thanatos one. ________________________________________________________1 point
-
BrowEdit Tutorial Videos Here is a list of free tutorial videos I made about a year ago that gives BrowEdit users a good grasp on using the BrowEdit Mapping Program. The tutorial videos teaches young BrowEdit users from the ground up of how to install BrowEdit, get familar with the interface and functions and finally actually producing a fully functional map you can integrate in a ragnarok server. I plan on expanding this list to cover a broader range of topics. Browedit Tutorial #1 - Getting Started Video Information: Downloading and setting up BrowEdit. Configuring BrowEdit to be usable & providing recommendations on BrowEdit revisions. - Browedit Tutorial #2 - Basics of Designing Video Information: Understanding the user inferface of BrowEdit & editing functions. Teaches navigational controls and introduces how to properly setup a map for editing. Part 1 - Part 2 - Part 3 - Browedit Tutorial #3 - Intermediate Level Terrain Editing Video Information: Teaches how to apply textures, build walls, making slopes and environmental terrain changes, and controlling water levels. Part 1 - Part 2 - Browedit Tutorial #4 - Intermediate Level Light Editing Video Information: Introduces how to implement lights to brighten and colorize a map. Gives recommended RGB combinations and lighti strength parameter settings in giving ideal light and shadow outputs. Part 1 - Part 2 - Browedit Tutorial #5 - Adding Effects Video Information: How to add effects to a map to fit the needs of the environment. Examples can be torches, flying bats, magic circles etc.. - Browedit Tutorial #6 - Adding Sounds Video Information: How to add ambient sounds to your map. This includes noises you hear in niflheim, prontera, geffen etc.. - Browedit Tutorial #7 - Making a Sky Map Video Information: Ever wanted to make a sky map? Well this tutorial will show you how to make a floating blue sky based map with cloud formations. - Browedit Tutorial #8 - Adding Custom Textures to BrowEdit Video Information: How to add your own custom textures to BrowEdit and using them in your custom map. - Browedit Tutorial #9 - Adding Custom BGM Music to a Map Video Information: How to add your own personal background music to a map as well as making sure the BGM file is compatible with the client. - Browedit Tutorial #10 - Adding a Custom Map to a Server Video Information: How to add your own personal map to a eAthena test server so you can test your own maps. - Browedit Tutorial #11 - Adding a Duplicate Model that Utilizes Custom Textures Video Information: Ever wanted to use a model in a map that doesn't come into conflict with another model. Perhaps for the sake of the maps theme? - Browedit Tutorial #12 - Quick Tips/Tricks & Useful Hotkey Info Video Information: Creating a new map can take a while. This tutorial will cover useful tips/tricks to reduce the development time of your map as well as avoiding long processes to complete a task. - Browedit Tutorial #13 - New Lightmaps Tutorial Video Information: This tutorial is a revamp of the previous lightmaps video tutorial. This particular tutorial is a more concise and easier to learn version of how to create lightmaps with ease in the areas of shadows/sun/colors/global lighting and light fixes. - Browedit Tutorial #14 - Making Slopes Video Information: This is a quick tutorial that explains how to create sloped terrain primarily based on ramps that can lead up to raised areas. It also shows how to make slopes on the edge of a map. - Browedit Tutorial #15 - Making Map Minimaps Video Information: Want to make a minimap that matches your coordinates perfectly whether it be a minimap with color or black/white gradient? Well this tutorial will cover just that! - Browedit Tutorial #16 - GAT Editing Video Information: Explains the main kinds of gats, how to place them, slope them, and what applications they are used in. - Browedit Tutorial #17 - 3ds Max Modeling [Acquiring Models] Video Information: A quick video covering several different sites you can get models for free that are supported by 3ds Max. - Browedit Tutorial #18 - 3ds Max Modeling [importing/Apply Textures to Model] Video Information: Using 3ds Max, you will be able to import models supported by 3ds Max, apply textures to them, and UV Unwrap the model to have it ready for RO. - Browedit Tutorial #19 - 3ds Max Modeling [Polygon Limit & Splitting Models] Video Information: RO has limits to how many polygons it can draw per model. This tutorial will explain what those limits are and how to split a model into parts. - Browedit Tutorial #20 - Exporting & Importing Lightmap Shadows for Editing Video Information: How to remove or add specific shadows on a map without having to redo all of the lightmaps through means of exporting & editing the shadow png file directly. - Browedit Tutorial #21 - Cleaning Up Shadows Along Walls & Ground Video Information: Didn't like the shadow drop across the edge of a map or lifted platform/wall? - Browedit Tutorial #22 - How to Create Transparent Objects Video Information: How to provide transparency in a model by means of TGA support. - NOTE: If you wish to see a certain topic covered in a future tutorial video, please make a request by leaving a comment in this thread!1 point
-
You can't create permanent character or account arrays. There's a limit on the total number you can use (or your server will lag), so you should definitely try reducing the number - either using bit variables, if possible, or storing multiple values inside a string (using implode/explode).1 point
-
1 point
-
This is complete: the irc.rathena.net IRC server is stopped. Updated IRC information is on the wiki, IRC.1 point
-
Adding custom palettes to your server can be a very long task. Fortunately, I am here to help ! :3 This day, is very special. I'm proud to announce a fresh new palette race pack. Available for payment, as also to whoever purchased the previous pack for Free!. Enough words. Here is a quick preview of what you will get on the next update: Thanks for choosing KaniShi Paletting Services. A Neon race free small pack will ve available soon for download.1 point
-
solo como una recomendación sana, trata que tus scripts sean codigos ligeros y claros, ya casi nadie hace los scripts como el que has hecho. Te dejo un ejemplo, espero que te sirva. pvpexit.txt1 point
-
- script kjhfksjdhfks -1,{ OnPCDieEvent: if ( strcharinfo(3) == "prontera" ) warp "Save", 0,0; end; } - script kjhfksjdhf2ks -1,{ OnPCLoadMapEvent: if ( strcharinfo(3) == "guild_vs1" ) @death_count = 0; end; OnPCDieEvent: if ( strcharinfo(3) == "guild_vs1" ) { @death_count++; if ( @death_count >= 2 ) warp "Save", 0,0; } end; } guild_vs1 mapflag loadevent1 point
-
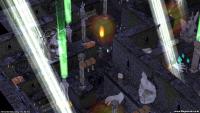
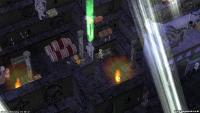
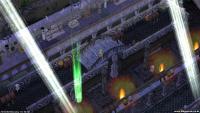
Hello folks, here's the map I came up with, the idea is to be a spooky/creepy cathedral (perhaps a dungeon?). Feedbacks/Criticism always welcome! By the way, the map doesn't have shadows. Screenshots : Direct Links : Tinypic Links : http://i50.tinypic.com/9k055z.jpg http://i46.tinypic.com/wldev5.jpg http://i50.tinypic.com/1zcnyps.jpg http://i46.tinypic.com/2m2j1ir.jpg http://i48.tinypic.com/2r2yzhx.jpg http://i45.tinypic.com/2rwlt01.jpg http://i47.tinypic.com/4fe5j.jpg http://i49.tinypic.com/15ge9k.jpg Download Links : Direct Link : Grand_Cathedral.rar Mediafire : http://www.mediafire...qoqol3kd3ecpcy21 point
-
File Name: Old Payon Christmas / Winter File Submitter: gaga File Submitted: 09 Nov 2012 File Category: Maps & Textures Content Author: Scotto, GaGA I've made a Winter Edition from the beloved Old Payon. 7zip Include: Old Payon Winter Edition Old Payon Inn 01 Old Payon Inn 02 Mini-Maps Old Payon Script (Warps, NPC's..) Click here to download this file1 point
-
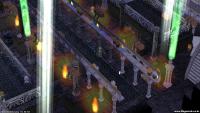
This free release has already been provided on eAthena however since eA is no longer in development, I'm migrating the release to rAthena to make sure everyone has a chance of choosing whether or not they wish to use it. A warp script is provided with this release. To download this map, refer to the attached file to this thread. The Lounge comes with the following areas: - Main Entrance Hall (Here you can choose to walk into 4 different warps) - Lounge (Couches, tables, resting zone for chit-chat) - Weaponry/Vending Area (NPCs can sell exclusive gear here) - Games Room (there's a poker table with some couches) - Courtyard (complete with a pool, wedding area, and some walkways) Overview Screenshot VIP Lounge - Syouji.7z1 point


