Jump to content

Sapito Sucio

Members
  • Posts

    150
  • Joined

  • Last visited

  • Days Won

    15

Everything posted by Sapito Sucio

  1. Oh I see! Sorry, I misread it xD I think that's only visual, because, if DirectX9 was really selected the FroggoClient wouldn't start.
  2. This is so true, even on the latest Windows 11 True, I should mention the client's patches applied that requires src side editing, I will look into that. And, no, the 2022-04-06 is not capable of DirectX9, that's for really new clients ( > 2023-10-00), which are not publicly available yet, stick with DirectX7 for the moment.
  3. Honestly, mirroring the download link feels a bit pointless to me. The repo's getting updates overtime, and trying to keep up with mirroring every new version? Nah, not really my jam. I recommend redownloading it, as it appears your initial download may have been corrupted.
  4. Sure, you can use whatever you need, if you don't need/want the packet viewer just rename the extension (.mix) to whatever you want or just simply delete the file
  5. Have you tried not opening it with the explorer? Try with Winrar, or 7Zip or Bandizip
  6. It says you haven't created the account you trying to log in. You can try by adding the _M suffix at the end of the username.
  7. You can use Act Editor to edit it
  8. Yo hice este tutorial (está en inglés con subs en español), por si a alguien le sirve, únicamente cubre cómo descargar y compilar el emulador en windows:
  9. Thank you, guys, I really hope this helps the newbies struggling with setting up the client. At least for a renewal environment...
  10. Search for this line in your emulator, and you will find it int counter = static_cast<int>(pc_readreg2( sd, ATTENDANCE_COUNT_VAR ));
  11. Yo me hice una mini guía para poder seguir cada vez que tenía que hacerlo, espero te sirva xd, ojo que algunas configuraciones están basadas en mi PC, debes ajustar los valores a tus necesidades @Franko Instala Subsistema de Linux Comando para activar instalar WSL, se agrega el flag -d para indicar que quiero instalar Debian wsl --install -d Debian Crear un archivo .wslconfig en C:\Users\YOUR_USER_HERE con lo siguiente dentro # Settings apply across all Linux distros running on WSL 2 [wsl2] # Limits VM memory to use no more than 4 GB, this can be set as whole numbers using GB or MB memory=8GB # Sets the VM to use six virtual processors processors=6 # Sets amount of swap storage space to 8GB, default is 25% of available RAM swap=3GB # Turn off default connection to bind WSL 2 localhost to Windows localhost # localhostforwarding=true # Disables nested virtualization nestedVirtualization=false [experimental] autoMemoryReclaim=gradual sparseVhd=true networkingMode=mirrored firewall=true dnsTunneling=true autoProxy=true Para cambiar la contraseña del usuario root en WSL2, puedes seguir estos pasos: Abre el Símbolo del sistema como administrador. Escribe el comando wsl.exe -u root, esto abrirá una terminal de WSL como usuario root. Escribe el comando passwd. Ahora te pedirá la nueva contraseña de root. Ya dentro del WSL Debian corres el siguiente comando: sudo nano /etc/wsl.conf [boot] systemd=true Reiniciamos WSL para que haga efecto el cambio Instala Dependencias sudo apt-get update && sudo apt-get upgrade -y sudo apt-get install git make tmux htop gcc mariadb-client mariadb-server zlib1g-dev libpcre3-dev build-essential libmariadb-dev-compat cmake gdb -y Configuramos Mysql Entramos a la consola de MySQL sudo systemctl start mysql sudo mysql_secure_installation sudo mysql -u root Creamos los usuarios y asignamos contraseñas - CAMBIA LO QUE TENGAS QUE CAMBIAR AQUÍ CREATE USER 'rathenausr'@'%' IDENTIFIED BY 'dietpi'; GRANT ALL PRIVILEGES ON *.* TO 'rathenausr'@'%' WITH GRANT OPTION; FLUSH PRIVILEGES; DROP DATABASE IF EXISTS rathenadb; CREATE DATABASE IF NOT EXISTS rathenadb DEFAULT CHARACTER SET utf8 COLLATE utf8_general_ci; DROP DATABASE IF EXISTS rathenalog; CREATE DATABASE IF NOT EXISTS rathenalog DEFAULT CHARACTER SET utf8 COLLATE utf8_general_ci; GRANT SELECT,INSERT,UPDATE,DELETE,CREATE ON rathenadb.*TO 'rathenadbusr'@'localhost' IDENTIFIED BY 'dietpi'; FLUSH PRIVILEGES; GRANT SELECT,INSERT,UPDATE,DELETE,CREATE ON rathenalog.* TO 'rathenadbusr'@'localhost'; FLUSH PRIVILEGES; Agregamos el contenido a las base de datos sudo mysql -u root -proot rathenadb < main.sql sudo mysql -u root -proot rathenadb < web.sql sudo mysql -u root -proot rathenalog < logs.sql sudo mysql -u root -proot rathenadb < roulette_default_data.sql sudo mysql -u root -proot rathenadb < item_db.sql sudo mysql -u root -proot rathenadb < item_db2.sql sudo mysql -u root -proot rathenadb < item_db_re.sql sudo mysql -u root -proot rathenadb < item_db2_re.sql sudo mysql -u root -proot rathenadb < item_db_equip.sql sudo mysql -u root -proot rathenadb < item_db_etc.sql sudo mysql -u root -proot rathenadb < item_db_usable.sql sudo mysql -u root -proot rathenadb < item_db_re_equip.sql sudo mysql -u root -proot rathenadb < item_db_re_etc.sql sudo mysql -u root -proot rathenadb < item_db_re_usable.sql sudo mysql -u root -proot rathenadb < mob_db.sql sudo mysql -u root -proot rathenadb < mob_db2.sql sudo mysql -u root -proot rathenadb < mob_db_re.sql sudo mysql -u root -proot rathenadb < mob_db2_re.sql sudo mysql -u root -proot rathenadb < mob_skill_db.sql sudo mysql -u root -proot rathenadb < mob_skill_db2.sql sudo mysql -u root -proot rathenadb < mob_skill_db_re.sql sudo mysql -u root -proot rathenadb < mob_skill_db2_re.sql sudo mysql -u root -proot rathenadb < extended_vending.sql Agregamos S1 y P1, y una cuenta in-game admin sudo mysql -u root use rathenadb UPDATE login set `userid` = "s1", `user_pass` = "p1" where `account_id` = 1; INSERT INTO `login` (`account_id`, `userid`, `user_pass`, `sex`, `email`, `group_id`, `state`, `unban_time`, `expiration_time`, `logincount`, `lastlogin`, `last_ip`, `birthdate`, `character_slots`, `pincode`, `pincode_change`, `vip_time`, `old_group`, `web_auth_token`, `web_auth_token_enabled`) VALUES (2000000, 'tester', 'tester', 'M', '[email protected]', 99, 0, 0, 0, 0, NULL, '', NULL, 0, '', 0, 0, 0, NULL, 0);
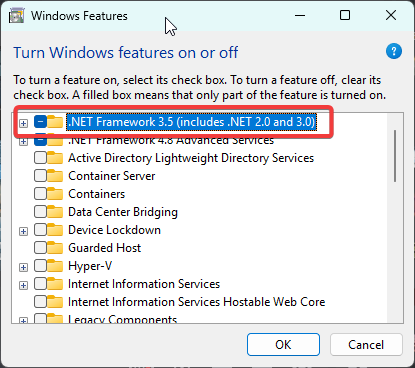
  12. Froggo Rö Folder This is a simple RO folder that contains everything you need to run a 2022-04-06 client, the latest publicly available. I have cleaned and compressed the data.grf file to reduce its size from 3.47GB to 2.44GB. I have also compressed the official_data.grf file from 1.24GB to 477MB. Before BGM, the Rö folder has a total size of 2.96GB, after BGM it reaches 3.30GB Screenshots Requirements Server Up & Running with ‎‏‏‎ PACKETVER=20220406 Visual C++ Redistributables DirectX Runtime Features Includes latest RoEnglishRE - 16/mar/2024 Custom Lua Support jRO Enchantment Display Includes rsu-kro-rag-lite (kRO updater) - v4.2.2.1316 Includes opensetup - v3.1.0.627 Includes iRO's Setup.exe, thanks to relzz! Includes AzzyAI 1.55 Includes Packet Viewer Download click here to download a .zip file of this ro-folder Extra Warp Profile for 2022-04-06 used for FroggoClient.exe (mirror) 2022-04-06 Vanilla Ragexe Client Login Screen Creator Official Ragnarok Complete Installer (08/Jan/2024)(mirror) Froggö Ro Folder Gitlab's Repo FAQ Why am I getting CHARACTER_INFO size error when trying to log in? Possible reasons: You are using outdated rAthena which doesn't work with 2022-04-06 client. You haven't set correct PACKETVER or done it with mistakes (skill issue ). You haven't recompiled rAthena. You haven't restarted server after recompilation. Why am I getting errors about MSVCP140.dll, VCRUNTIME140.dll when executing FroggoClient.exe? You haven't installed Visual C++ Redist, check requirements section, if problem persists, try installing this too Visual C++ Redist for VS 2012u4 What is official_data.grf ? official_data.grf is from the ROResourceCollection project, which brings many items, mobs and npc files from other RO Regions and merges it into one convenient grf. Why does the Setup.exe opens instead of the FroggoClient.exe? In your Windows registry there is no data about your selected graphic card, to fix it, just set up your settings in Setup.exe and click on OK, be aware to don't select DirectX9, stay on DirectX7 What was removed from the data.grf? Several unnecessary files were removed from the data.grf . These included residual files such as thumbs.db and stray BMP Screenshots. However, the majority of the cleanup was performed in the mob and npc sprite folders. In these folders, some .spr files contained sprites (images) that were not utilized in their corresponding .act files. For example, the monster katrinn's .spr file contained approximately 140 images, but only 6 of them were actually used. In total, out of nearly 90,000 collective images, around 9,400 were removed alv.
  13. int counter = static_cast<int>(pc_readreg2( sd, ATTENDANCE_COUNT_VAR )); // Check if we have a remaining counter from a previous period if( counter >= 25 && !pc_attendance_rewarded_today(sd) ){ pc_setreg2( sd, ATTENDANCE_COUNT_VAR, 0 ); return 0; }
  14. In this tutorial we are going to use Chocolatey Package Manager to help us install all the needed components without using the browser to click here, click there, unzip this, unzip that. We are going to use some plain commands, all righty? You can follow the tutorial with this video Install Chocolatey Set-ExecutionPolicy Bypass -Scope Process -Force; [System.Net.ServicePointManager]::SecurityProtocol = [System.Net.ServicePointManager]::SecurityProtocol -bor 3072; iex ((New-Object System.Net.WebClient).DownloadString('https://community.chocolatey.org/install.ps1')) Disable confirmation for each installation choco feature enable -n allowGlobalConfirmation Installing Packages choco install git mariadb visualstudio2022community notepadplusplus Install Visual Studio Open Visual Studio Installer Select Desktop Development with C++ and its following components: MSVC v143 - VS 2022 C++ x64/x86 Just-in-Time-debugger C++ tools for Windows IntelliCode C++ AddressSanitizer Windows SDK vcpkg package manager You can also choose to do the minimal setup if you want, although this is not recommended. Minimal Setup: MSVC v143 - VS 2022 C++ x64/x86 Windows SDK Clone rAthena Repository We will only clone the master branch, that will save us space and download time. git clone https://github.com/rathena/rathena.git -b master OPTIONAL STEP Cloning the ro-folder project git clone https://gitlab.com/sapitosucio/ro-folder Create Databases and user We access the MariaDB console mysql -u root We create the database rathenadb DROP DATABASE IF EXISTS rathenadb; CREATE DATABASE IF NOT EXISTS rathenadb DEFAULT CHARACTER SET utf8 COLLATE utf8_general_ci; We create the database rathenalog DROP DATABASE IF EXISTS rathenalog; CREATE DATABASE IF NOT EXISTS rathenalog DEFAULT CHARACTER SET utf8 COLLATE utf8_general_ci; We create users and grant permissions on the databases rathenadb and rathenalog Remember to change the froggopass to anything you want, don't forget the password. GRANT SELECT,INSERT,UPDATE,DELETE,CREATE ON rathenadb.*TO 'rathenadbusr'@'localhost' IDENTIFIED BY 'froggopass'; FLUSH PRIVILEGES; GRANT SELECT,INSERT,UPDATE,DELETE,CREATE ON rathenalog.* TO 'rathenadbusr'@'localhost'; FLUSH PRIVILEGES; We exit the MariaDB console exit Once the database is created, we can populate it with tables; cd rathena/sql-files Get-Content main.sql | mysql -u root rathenadb Get-Content web.sql | mysql -u root rathenadb Get-Content logs.sql | mysql -u root rathenalog Get-Content roulette_default_data.sql | mysql -u root rathenadb Get-Content item_db.sql | mysql -u root rathenadb Get-Content item_db2.sql | mysql -u root rathenadb Get-Content item_db_re.sql | mysql -u root rathenadb Get-Content item_db2_re.sql | mysql -u root rathenadb Get-Content item_db_equip.sql | mysql -u root rathenadb Get-Content item_db_etc.sql | mysql -u root rathenadb Get-Content item_db_usable.sql | mysql -u root rathenadb Get-Content item_db_re_equip.sql | mysql -u root rathenadb Get-Content item_db_re_etc.sql | mysql -u root rathenadb Get-Content item_db_re_usable.sql | mysql -u root rathenadb Get-Content mob_db.sql | mysql -u root rathenadb Get-Content mob_db2.sql | mysql -u root rathenadb Get-Content mob_db_re.sql | mysql -u root rathenadb Get-Content mob_db2_re.sql | mysql -u root rathenadb Get-Content mob_skill_db.sql | mysql -u root rathenadb Get-Content mob_skill_db2.sql | mysql -u root rathenadb Get-Content mob_skill_db_re.sql | mysql -u root rathenadb Get-Content mob_skill_db2_re.sql | mysql -u root rathenadb Add S1, P1 and a new admin account We access the MariaDB console again mysql -u root We select the rathenadb database use rathenadb We add the user S1 and the password P1 UPDATE login set `userid` = "froggos1", `user_pass` = "froggop1" where `account_id` = 1; Create a GM Lvl 99 account (Optional). INSERT INTO `login` VALUES (2000000, 'test', 'test', 'M', '[email protected]', 99, 0, 0, 0, 0, NULL, '', NULL, 0, '', 0, 0, 0, NULL, 0); Exit the MariaDB console exit Conf Folder In import\inter_conf.txt login_server_id: rathenadbusr login_server_pw: froggopass login_server_db: rathenadb ipban_db_id: rathenadbusr ipban_db_pw: froggopass ipban_db_db: rathenadb char_server_id: rathenadbusr char_server_pw: froggopass char_server_db: rathenadb map_server_id: rathenadbusr map_server_pw: froggopass map_server_db: rathenadb web_server_id: rathenadbusr web_server_pw: froggopass web_server_db: rathenadb log_db_id: rathenadbusr log_db_pw: froggopass log_db_db: rathenalog In import\map_conf.txt userid: froggos1 passwd: froggop1 In import\char_conf.txt userid: froggos1 passwd: froggop1 pincode_enabled: no In src/custom/defines_pre.hpp We need to declare the packetver in our emulator, and the packetver is based on the RO client of your choosing, in this tutorial, we are using a 2022-04-06 client to connect, so that's what we declare, remember the format (YYYYMMDD) #define PACKETVER 20220406 Remember to compile and restart server after changing the source code!
  15. Por nada, compañero sureño
  16. Has intentado esta guía? Debian - rAthena User Guides Es específicamente para Debian, pero no deberías tener ningún problema si lo aplicas en tu ubuntu
  17. Why don't use @Keitenai's delay system ?
  18. While using acteditor, did you use any script to replace all image of a single sprite or was hand by hand ? @Balfear
  19. You can't use EAC on your private RO sv, well, you could, by contacting them I guess xd
  20. I am not sure, but I believe you can't use it via script, although you can add it. The SRC function which triggers the pick up animation is clif_takeitem
  21. View File Encode & Decode .CSV files New clients are ditching some .txt based files to use .csv encoded files instead. The .CSV files are base64 encoded, provided scripts will decode and encode ass you wish. Both scripts will work the following way: Decoder Decoder will look for all .csv files on the folder that doesn't have "_decoded" on its filename. Decoder will iterate over each element, decoding from base64. Finally, generates a file with the suffix "_decoded" added to its filename. Encoder Encoder will look for all .csv files on the folder with "_decoded" on its filename. Encoder will iterate over each element, encoding to base64. Finally, generates a file with the suffix "_encoded" added to its filename. Submitter Sapito Sucio Submitted 09/16/23 Category Client Resources Video Content Author Sapito Sucio  
×
×
  • Create New...