.png.266baf26dc7889b6968019ac714a48ce.png)

Chaos92
-
Posts
1583 -
Joined
-
Last visited
-
Days Won
39
Content Type
Profiles
Forums
Downloads
Jobs Available
Server Database
Third-Party Services
Top Guides
Store
Crowdfunding
Everything posted by Chaos92
-
I didnt saw you mention about what clientdate are you using. if you are using 2020 clients and above, web server is needed for http emblem server. The settings in externalsettings will be used for the web server. So that will fixed the first one. About the second line, it just the information since that client might support /showshop. /showshop — Toggles the ability to see/hide vendor shops. From what I saw its originally in red too.
-
for latest rathena, ./configure is enough because it will compile web server too automatically. btw, usually the blue debug not running, sleeping 1 second usually just occur once, not a few times as what happen in your log. have you check your web server port 8888 default didnt being used by another process ? or maybe try to change the port to another then ?
-
most probably your map in GRF is in renewal, but your set is pre-renewal, maybe ? If u want to use the current map that u can see for now, maybe u need to update the mapcache. Use WeeMapCache maybe. Or use the correct map in your GRF that exactly works with your default mapcache.
-
I think he use client older than 2020 so thats why he need that diff. Or else he doesnt need to use web server. For Client 2020 and above its already using http emblem so doesnt need to patch that.
-
Try use the langtype that you want. https://github.com/llchrisll/ROenglishRE/wiki/Langtype-and-service_*-folder
-
what error ? And are u sure that getrefine error is from this line ?
-
you didnt specify which part for the refine. Example : if (getequiprefinerycnt(EQI_HAND_R) >= 7) { autobonus "{ bonus bIgnoreDefClass,Class_Normal; }",1000,3000,BF_SHORT|BF_NORMAL; }
-
https://github.com/llchrisll/ROenglishRE/pull/53/files I read about this a few minutes ago, maybe related to your issue, try to disable that 2 line.
-
this is weapontable error. did u edit weapontable then since u use Chris Translation ?
-
First, make sure your kRO is 2023 and above. And Chris Translation might help you, read the Wiki and also maybe can use the profiles that he share in his translation. https://github.com/llchrisll/ROenglishRE
-
Chris have the profiles, use the profiles. or make sure u set it to the right file _EN and everything.
-
make sure u already run web files part in the sql-files. and also make sure web server is already running. use latest rathena if possible because its 100% working for latest rathena.
-
you need to set the IP in externalsettings depends on what service u set in sclientinfo.xml https://github.com/llchrisll/ROenglishRE/wiki/Webservice-Guide
-
what do u mean by too large ? can u show something, and what size did u prefer ?
-
try another langtype for example langtype 0.
-
Maybe try to play with your langtype in sclientinfo.xml ? or try default font if you diffed client with any specific font ?
-
Thank you, let me know if there any improvements needed.
-
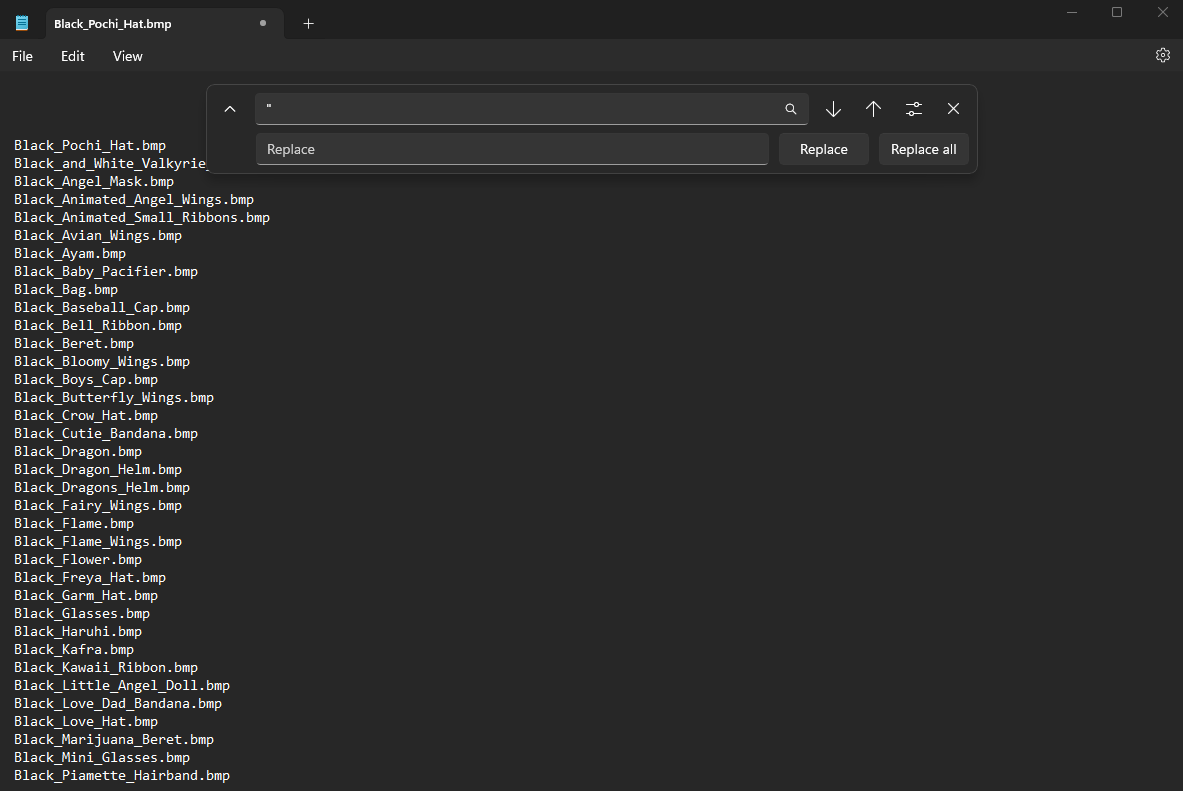
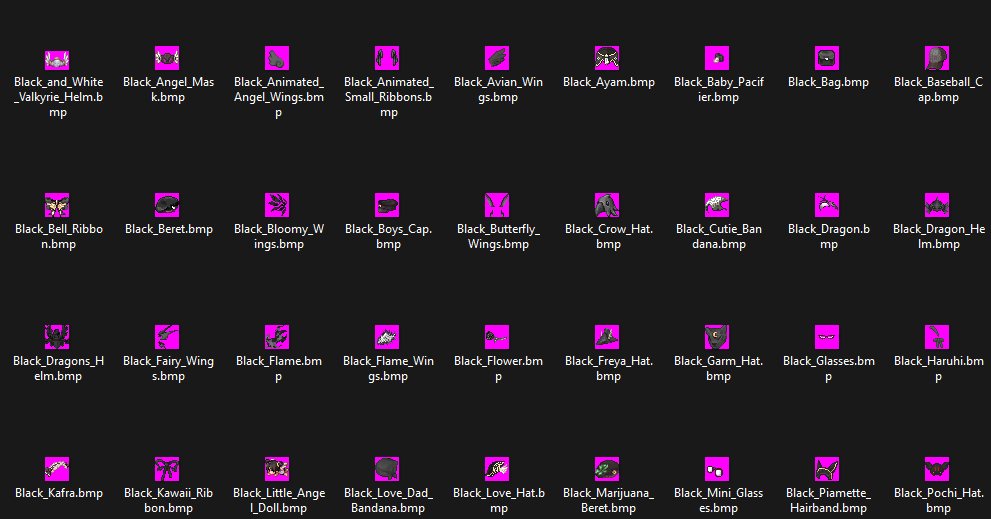
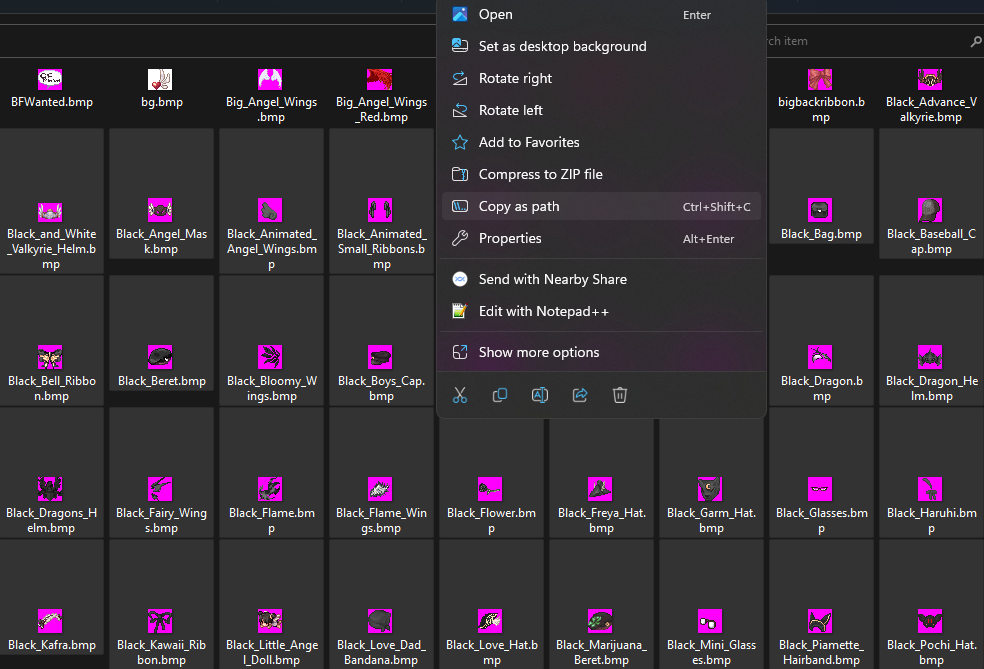
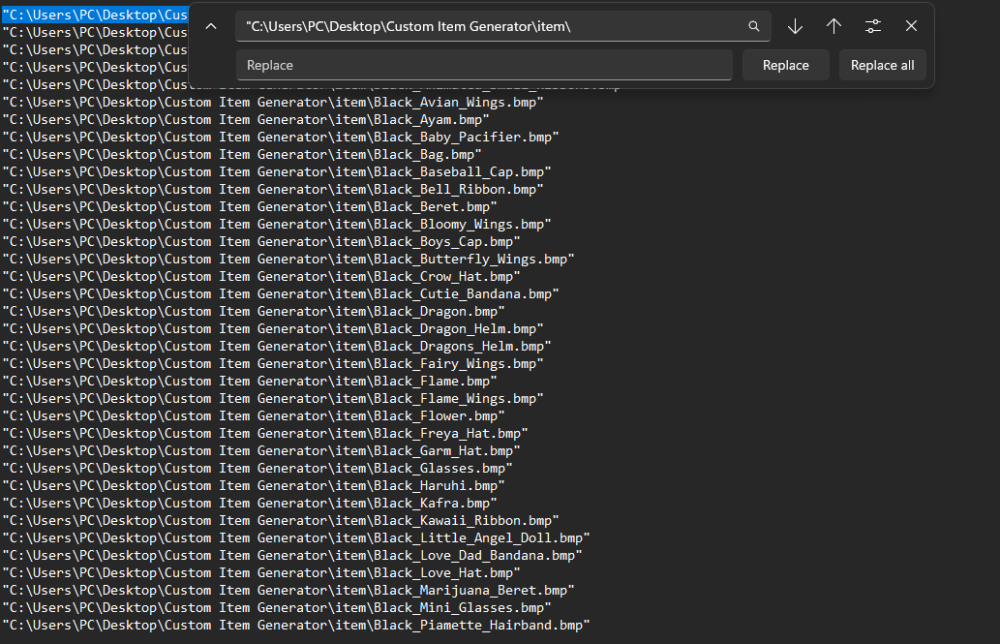
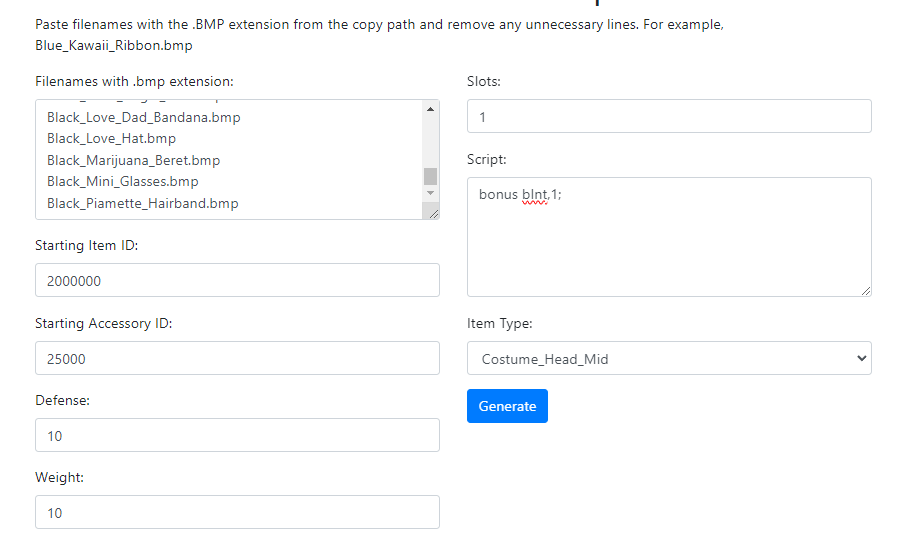
Hello, I'm sharing this project, since this might help someone who need to generate this easily. Right now, this project support custom file generator for : 1. Custom headgear. 2. Custom robe/garment. 3. Custom weapon. 4. Custom NPC. The required file generated depends on which generator that you used. The scenario on how to generate for custom headgear file : 1. Maybe extract data\texture\유저인터페이스\item\ folder and u will have the listed one .BMP that u want to add. 2. Select all the item u want to add, right click mouse and right click, copy as path. Then open notepad, paste it. 3. Get the only .BMP in list, so replace your directory path and replace all with blank/nothing . And lastly the " with blank/nothing. So the result is as below. Copy all of it, insert in https://x-files.amirazman.my/customfilegenerator and change your : - Starting ItemID you want it to start with. Make sure the itemID is supported by your client. - Starting AccessoryID that you didnt use yet. Also make sure the final accessoryID didnt reach the maximum of your client can support/set. - Defense, so you can set all the defense in bulk. - Weight. - Slots. - Script. Insert any scripts or anything that you can replace all easily later on in itemdb and also custom_iteminfo.lua (yes, its generated inside the description). - Item Type for now only support headgears and costume headgears, I will add another item types soon if possible (yes, its generated inside the description). And click Generate. Download, extract, add it in your System folder and server file or create a patch or anything. You can access to this simple project here : https://x-files.amirazman.my/customfilegenerator. Let me know if you having issues and I'll update it if possible & have some leisure time to play with.

- 30 replies
-
- 11
-

-

-

-

-
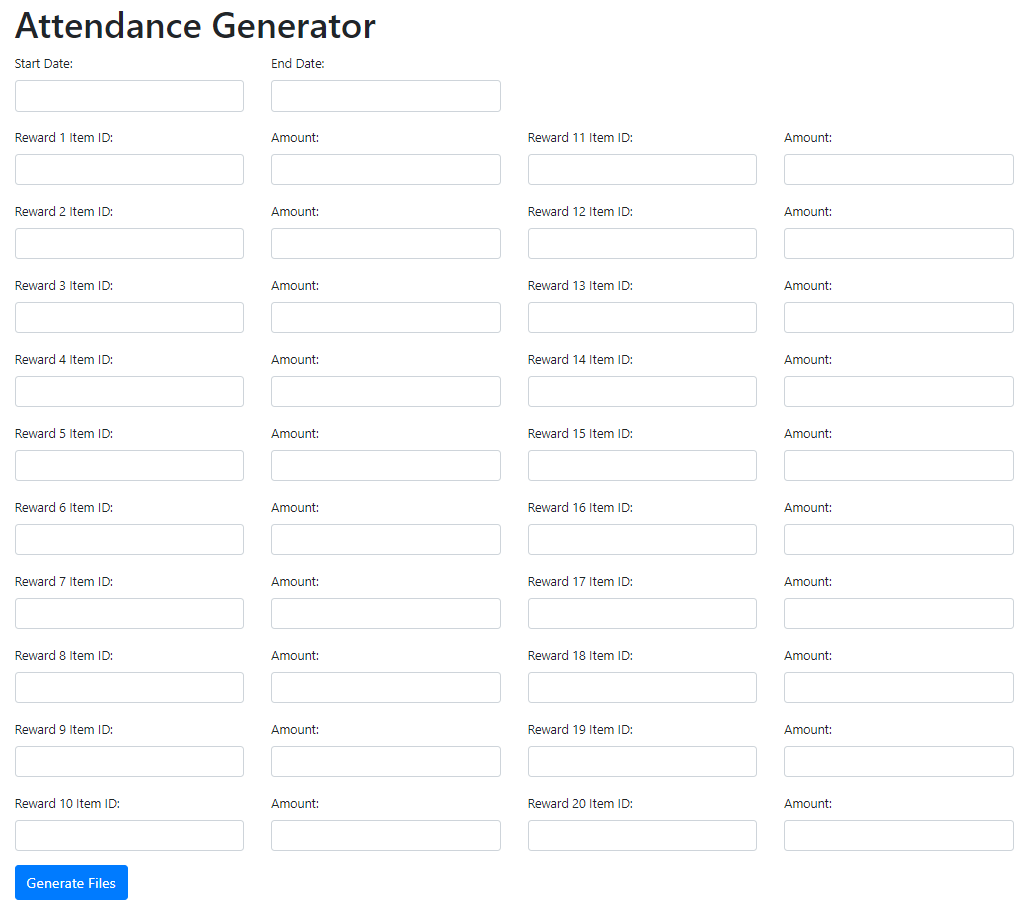
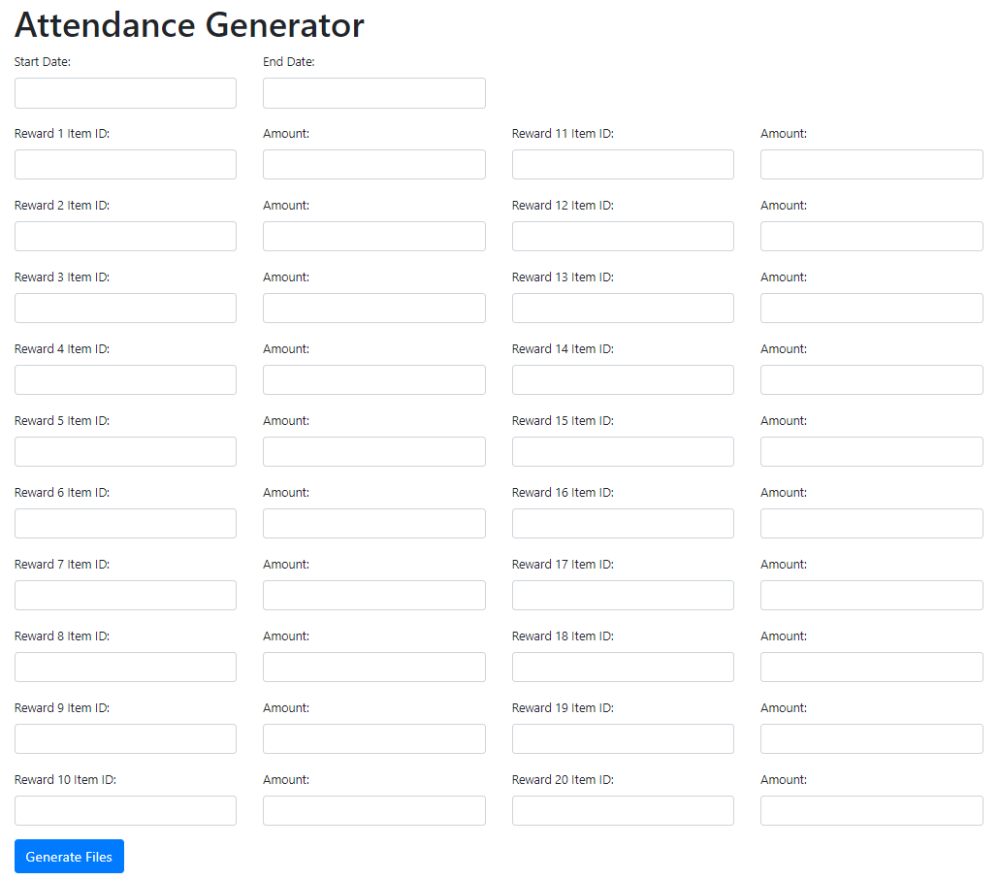
Hello, I'm sharing this project, since this might help someone who need to generate this easily. The file that generated = CheckAttendance_EN.lub & attendance.yml Download, extract, add it in your System folder and server file or create a patch or anything. You can access to this simple project here : https://x-files.amirazman.my/attendance. Let me know if you having issues and Ill update it if possible & have some leisure time to play with.
-
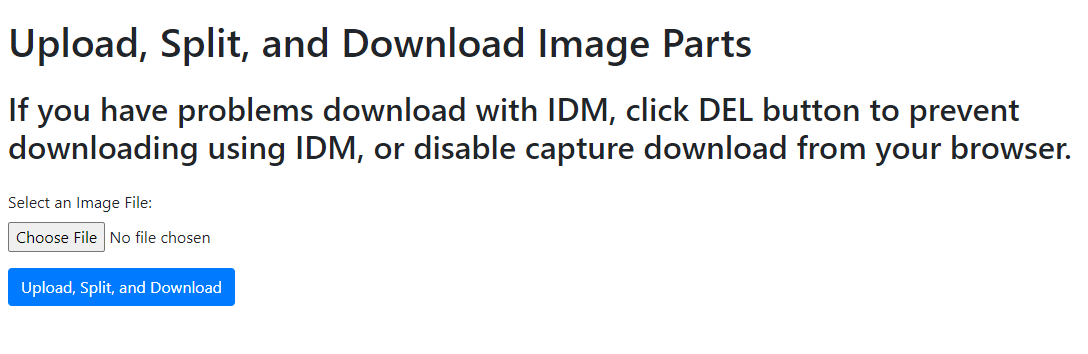
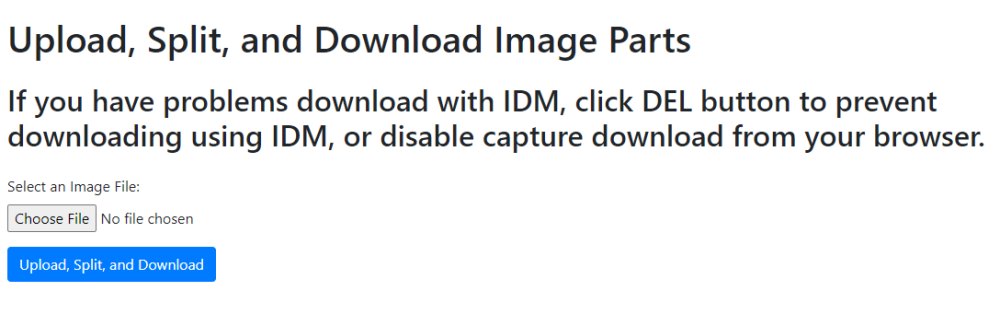
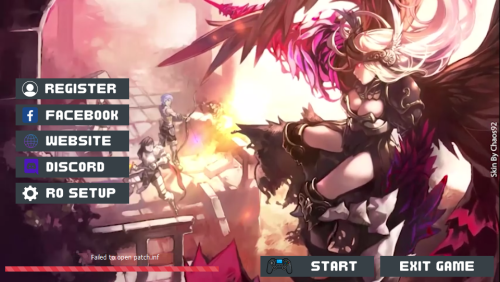
Hello, I'm sharing this project, since this RO Login Screen Generator might help someone who need to generate this easily. The only allowed extension file that can be uploaded = .BMP, .JPG, and .JPEG and the max file size is 5MB with resolution 1024*768 (I recommend this). As stated above, IDM can click DEL button to prevent downloading using IDM, or just disable the capture download from your current browser. Download, extract, add it in your GRF or create a patch or anything. Its already in korean encoding. You can access to this simple project here : http://x-files.amirazman.my/rolsg. Let me know if you having issues and Ill update it if possible & have some leisure time to play with.
-

Patcher: Elurair Patcher - Valkyrie Randgris Skin
Chaos92 replied to Chaos92's topic in Third Party Releases
Thank you. Just an example so that creative people can take advantage of this and redo the skin better. -
I think itemmap got some script that doesnt need to use src. Ahh .. from my post 2015. Maybe can try but I think need some modification since its from 2015.
-
View File Elurair Patcher - Valkyrie Randgris Skin I'm sharing this skin because it might helps someone who want to explore and edit elurair skin easier, and not a lot of people share or release Elurair skin in rAthena forum. 1. Download Elurair Patcher from Ai4rei website : http://ai4rei.net/p/skal and extract it. 2. Extract this uploaded file elurair-valkyrie_skin.zip and add it in Elurair Patcher folder. 2. Use builder.exe in builder folder to create Elurair.exe. Target Patcher file elurair.exe, Configuration file elurair.Chaos92.ini. 3. Tick compile, and add all the skin files in skin_valkyrie folder. Maybe purge existing skins if you want to replace with your own skin. 4. Insert Icon file and Window Title (optional) and then click 'Build'. 5. Use the web files and upload if needed. *** To run Elurair Patcher, you need .inf generated from here : http://ai4rei.net/make/patch.inf/<desired numeric id>. For example, to start from patch number 0, you can open the link : https://ai4rei.net/make/patch.inf/0 . And include the .inf file in the same folder with Elurair.exe. Things that you need to replace depends on your setup. InfFile=patch.inf PakFile=main.grf WebList=patch_main.txt WebPath=/data/ WebSite=patch.example.com And also all the ActionData= in the elurair.Chaos92.ini if needed. I include web files folder too just incase this might help you (without main.inf, you can generate it yourself as told above). The ONLY files that you need in client folder after 'Build' Elurair.exe : - inf file - elurair.exe (no problem to rename it) - media folder (contains media for the skin) - your own client files Documentation & example for elurair settings you can found in elurair.default.ini. Website Elurair : http://ai4rei.net/p/skal . Discord NN (Creator of Elurair Patcher) : http://ai4rei.net/p/discord . Not all the resources for the skin are created by me. Video source : https://steamcommunity.com/sharedfiles/filedetails/?id=1964715704 . Skin file compiled and released by Chaos92. rAthena Profile : https://rathena.org/board/profile/6755-chaos92 . Facebook Page : https://www.facebook.com/hostingmalaya . Can contact me via links above for web hosting & services. Wanna treat me some coffee ? https://www.buymeacoffee.com/chaos92 . Submitter Chaos92 Submitted 09/13/23 Category Patchers Video https://youtu.be/06e3Pi4OsRk Content Author Chaos92
-
That is your client ? The error = GRF Encryption means that the client needed for the GRF arent there.
-
Version 1.0.0
298 downloads
I'm sharing this skin because it might helps someone who want to explore and edit elurair skin easier, and not a lot of people share or release Elurair skin in rAthena forum. 1. Download Elurair Patcher from Ai4rei website : http://ai4rei.net/p/skal and extract it. 2. Extract this uploaded file elurair-valkyrie_skin.zip and add it in Elurair Patcher folder. 2. Use builder.exe in builder folder to create Elurair.exe. Target Patcher file elurair.exe, Configuration file elurair.Chaos92.ini. 3. Tick compile, and add all the skin files in skin_valkyrie folder. Maybe purge existing skins if you want to replace with your own skin. 4. Insert Icon file and Window Title (optional) and then click 'Build'. 5. Use the web files and upload if needed. *** To run Elurair Patcher, you need .inf generated from here : http://ai4rei.net/make/patch.inf/<desired numeric id>. For example, to start from patch number 0, you can open the link : https://ai4rei.net/make/patch.inf/0 . And include the .inf file in the same folder with Elurair.exe. Things that you need to replace depends on your setup. InfFile=patch.inf PakFile=main.grf WebList=patch_main.txt WebPath=/data/ WebSite=patch.example.com And also all the ActionData= in the elurair.Chaos92.ini if needed. I include web files folder too just incase this might help you (without main.inf, you can generate it yourself as told above). The ONLY files that you need in client folder after 'Build' Elurair.exe : - inf file - elurair.exe (no problem to rename it) - media folder (contains media for the skin) - your own client files Documentation & example for elurair settings you can found in elurair.default.ini. Website Elurair : http://ai4rei.net/p/skal . Discord NN (Creator of Elurair Patcher) : http://ai4rei.net/p/discord . Not all the resources for the skin are created by me. Video source : https://steamcommunity.com/sharedfiles/filedetails/?id=1964715704 . Skin file compiled and released by Chaos92. rAthena Profile : https://rathena.org/board/profile/6755-chaos92 . Facebook Page : https://www.facebook.com/hostingmalaya . Can contact me via links above for web hosting & services. Wanna treat me some coffee ? https://www.buymeacoffee.com/chaos92 .Free