Leaderboard


Popular Content
Showing content with the highest reputation on 10/12/22 in Posts
-
Hey there everyone, long time no see! So it's been a very long time since I have been on these boards and I do miss it all. Feeling a little nostalgia looking through all of these, I decided to release them all to the public, completely free. Going in no particular order after the first few, they are just my favorites. I hope you guys love them as I have. Sanctum Main town oriented map. My absolute favorite and latest work (When I was mapping). The idea I had for this was a chunck of a mountain broke off and landed here, subsequently creating a waterfall from atop and surrounding the town. Giving it protection and a perfect center for life. I never got around to finishing the outside of the map, I don't even know what I thought for the surroundings, perhaps just trees. Sanctum In And here is the inside map for Sanctum. The first picture is the general area where various NPC's can be placed. The second picture is where I planned to use a script to automatically place anyone who wished to vend in the one walkable/edited Gat. It would cycle through and remove those vending for a prolonged period of time and also anyone not vending at all. Guild Base This map was designed for the top guilds or just those who hold castles to have a domain of their own. The first picture is just a hangout spot for anyone in the guild. The second picture is for any combat/training/monster summoning to be done. The third picture is for the guild master where special NPC's can be placed as the server owners desire. Novice Starter Grounds PvP Valkyrie A little small for a PvP map but I enjoyed making it and like how it turned out. Trinity The first main town I made some time back around 2010. Don't judge me on some of the rookie mistakes I made with lighting and such haha. The following Trinity ___ maps are connected via a warp on the edges of the map. Trinity In Trinity Courtyard Before the Sanctum maps, this was my favorite creation. I just liked the feel of this one. Trinity Vending Similar to the Sanctum In vending idea, I wanted to limit vending to only those tiles with the colored objects on it. Trinity Port Anexus A simple instance based map with a boss at the end. Another one of my earlier works. Works The beginnings of my templates map. I would urge any current mapper to use this technique to create unique model compilations and copy it over to the map in progress. I have used this to create a forest that looks completely customized in a matter of minutes. Well there they are, open to any and all. I hope to hear your feedback on these! Thanks, Truly ~1 point
-
(UPDATED 2022-05-16) Unlike popular believe, Brasilis actually existed in pre-renewal, but only on bRO and jRO. Since it never existed on kRO, it is undefined in what rAthena consider "official stats". As of today I pushed the pre-renewal Brasilis monsters stats (jRO version) to rAthena master. Originally we left the guessed values as they were, but as we now have the YAML format that allows overwriting only selected stats of a monster rather than having to copy over the whole line, it's better to have as many official values as possible already in the base file. Now the only thing you need to do to get the bRO version of pre-renewal is to overwrite the ATK values. I've attached mob_db_bra_atk.yml which includes these changes. If you have no custom changes to your monsters, then you can just name it "mob_db.yml" and overwrite the file in \db\import\. Otherwise just copy the monster lines into the "Body" section of your file. I originally released the monster stats already in 2013, but the jRO values were guessed based on Doddler's comment that they seem to be about "3x" as high. In the meantime jRO actually released their customized values so we know the real ATK stats now. I also fixed the ATK in my original release from 2013, but keep in mind that the mob_db.txt format changed. This monster lines in the file will only work until rAthena from March 2016. After that you will need to fix the "mode" of the monsters (see here: https://github.com/rathena/rathena/commit/55e4df14c2141f291a985c391408a045ec1b25c4) or just use latest rAthena which uses YAML format. My old file also includes the spawns, they should still be working, but I did not test it (alternatively you can just use the renewal spawn files for bra_fild and bra_dun). bRO and jRO have slightly different versions, here are the differences: - the bRO version is the original version, but features really low monster attack, jRO considered this as too easy / exploitable and decided to strongly increase the ATK of the monsters (around 3x as much) - bRO's field map mainly has Headless Mule's and Curupira spawning, first floor is mainly Piranha and second floor is mainly Iara - jRO removed Headless Mule from the field map completely and added more Toucan and Jaguar spawns instead - jRO added Thara Frog and Headless Mule to the first dungeon floor - jRO removed all weaker monsters except Hydra on the second dungeon floor and added Headless Mule instead Issues that are not 100% official because a leak is missing: - monster modes in pre-renewal are unknown (both bRO and jRO), jRO reported that Iara was actually aggressive, however since we have no leaks on the monster modes, I simply used the renewal ones - the spawn types of jRO are 100% official, but the amounts are estimated Everything else should be 100% accurate. bra_all.txt mob_db_bra_atk.yml1 point
-
Hi all, as of today's commit (https://github.com/rathena/rathena/commit/d3cc0c56563769aafd78c976d6e76d83dbf6df88) rAthena will include the pre-renewal jRO Brasilis monster values in YAML format. If you want to use the bRO values instead (lower ATK), I've attached a YAML file in the original post to overwrite these. I also corrected the ATK values for jRO in my original release as they were just guessed before and now they use the official values (but that release only works for rAthena 2013-2016).1 point
-
data\luafiles514\lua files\datainfo\tb_cashshop_banner.lub <--- for the banner msgstringtable.txt line 3302 for button charging links.1 point
-
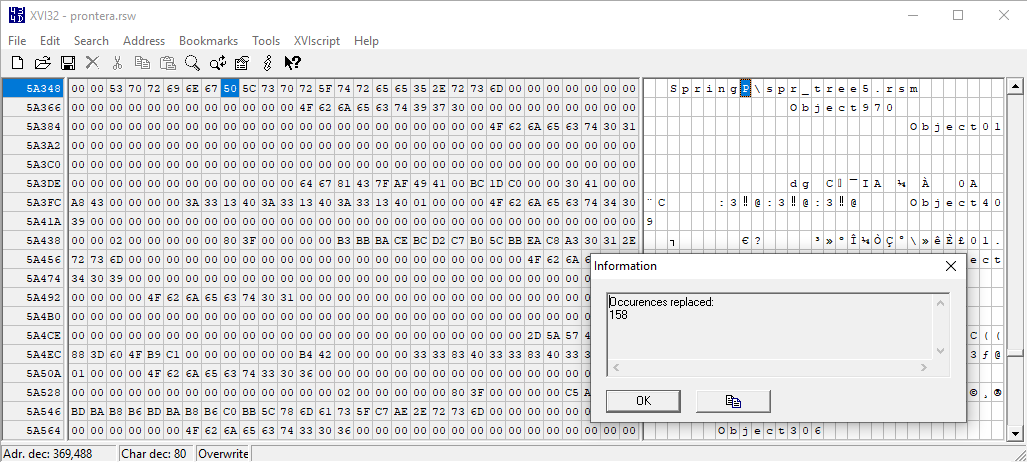
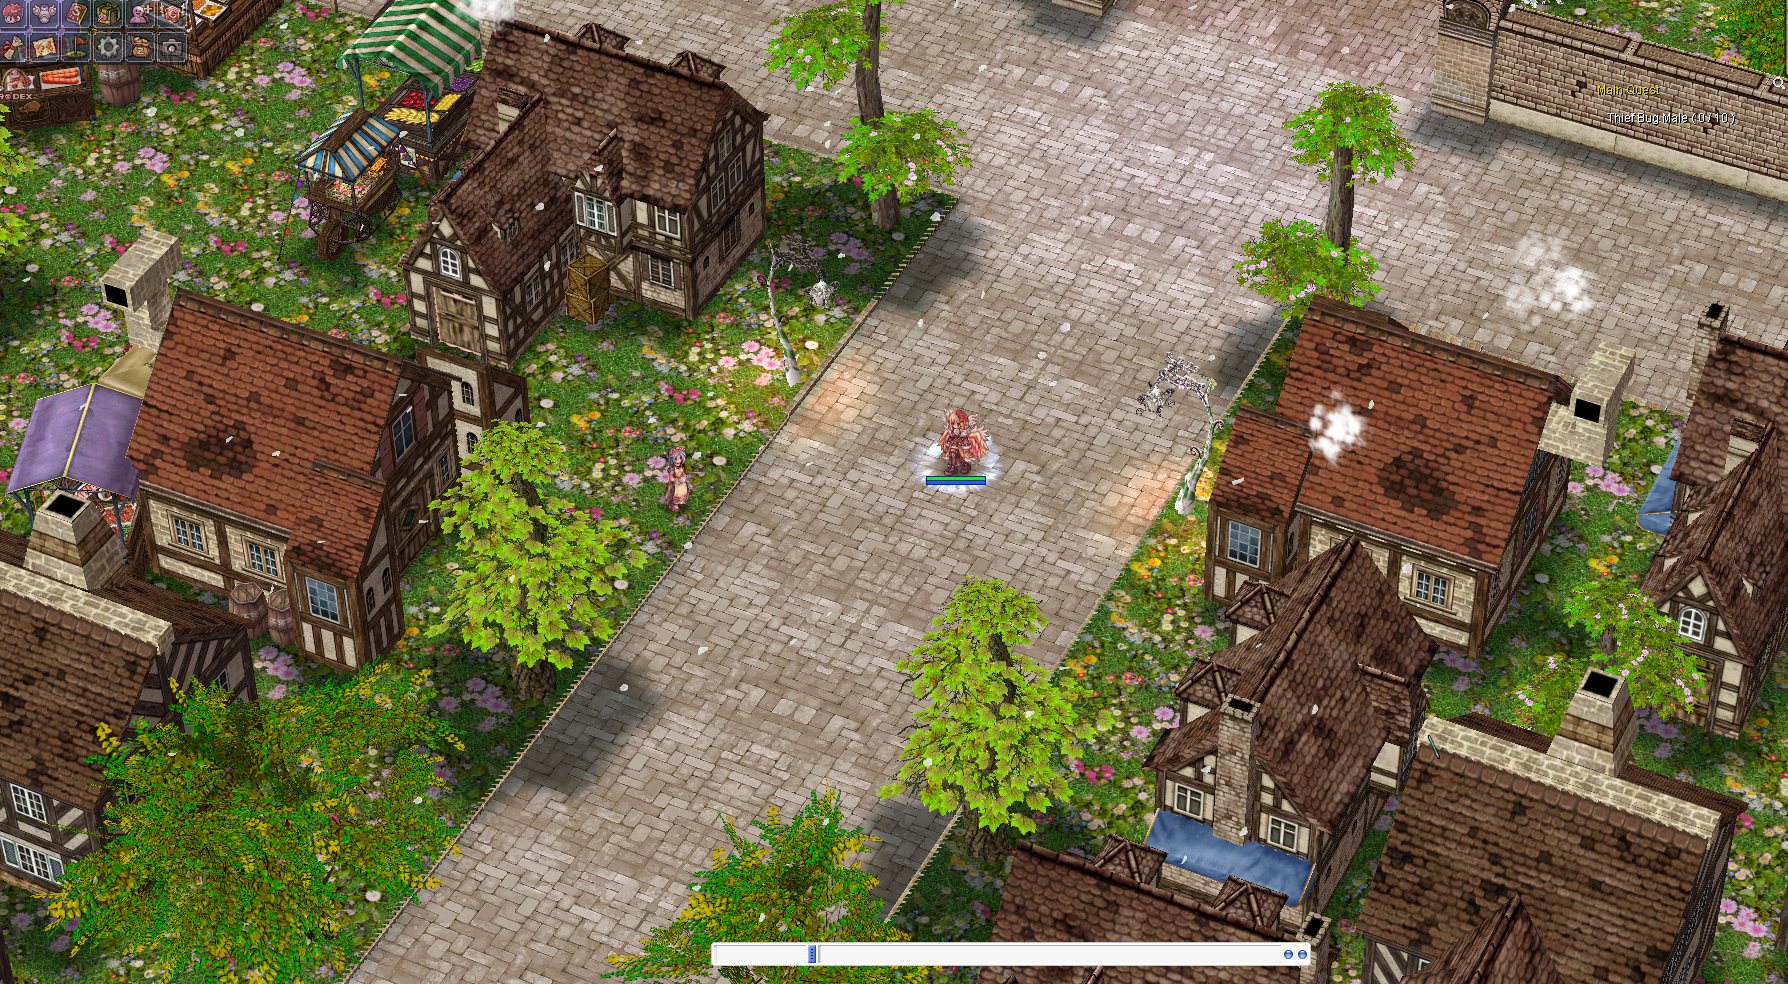
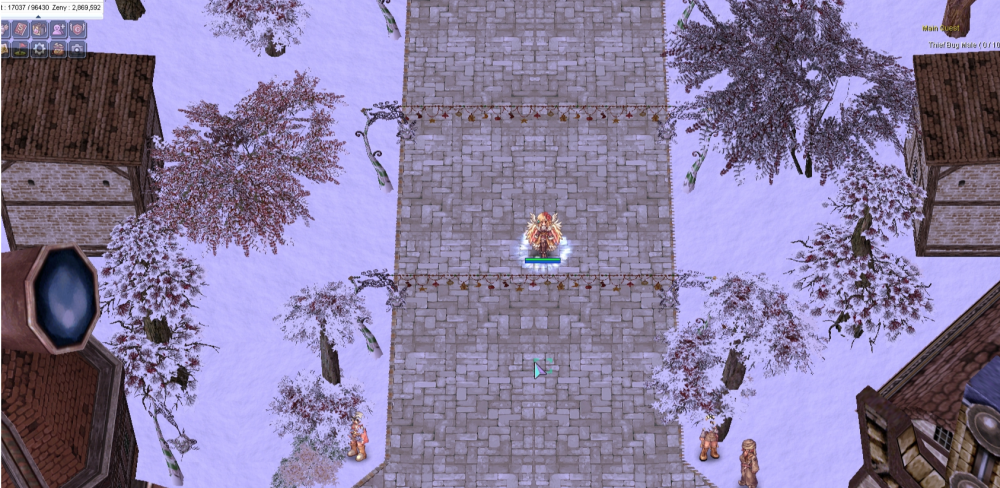
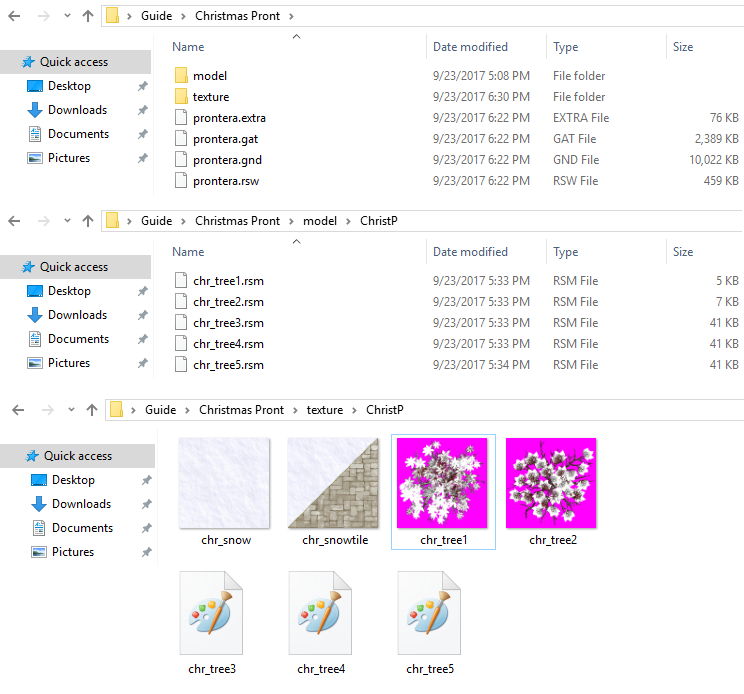
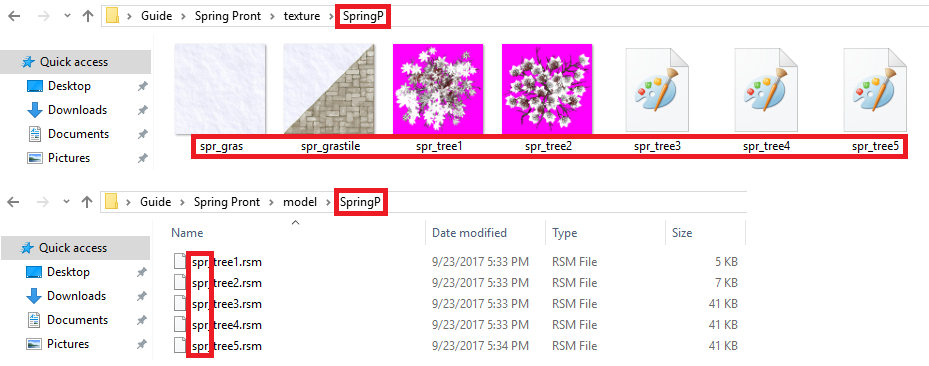
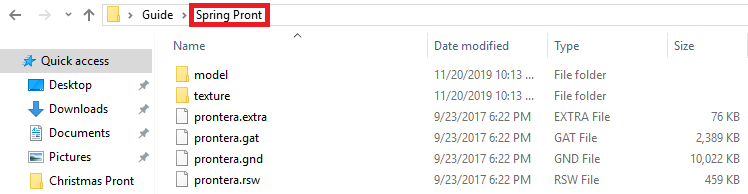
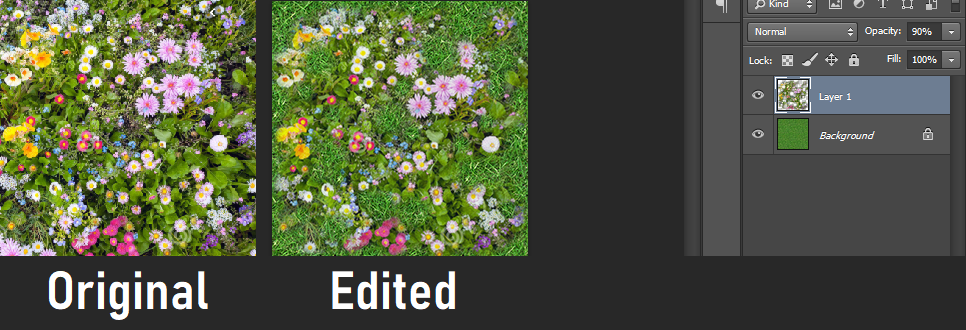
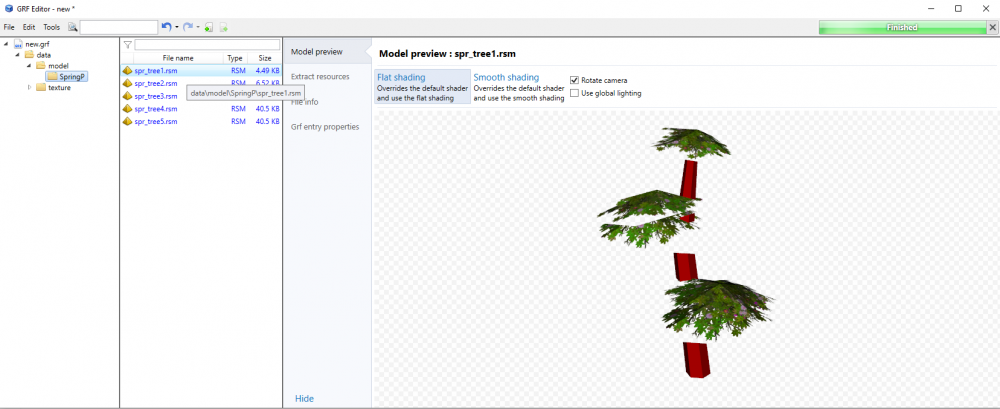
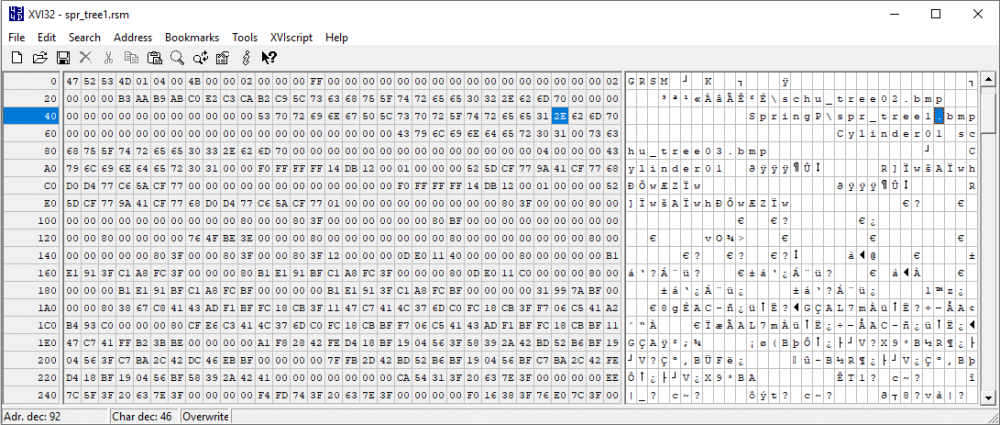
Hey all! It's been too long, hasn't it? I guess you could say I've been quite busy lately. However the other day I realized wanted to do something for the community once again (because honestly it's been forever since I contributed), hence why I'm here now. But then I wondered, what can I do? Of course there was the possibility of doing a free release, but I've done many of those already in the past. What else? Creating yet another guide how to develop maps in browedit from the ground up? Hm, we already have several amazing ones that effectively cover everything. What if I give you something different? Something - more like a neat little trick - that I've figured out through sheer exploration about two years ago. And what's that, precisely? As the title implies: Mapping through hexing. Over-hauling existing maps, without having to touch browedit. Also- This post might seem long, but rest assured it is super easy. The screenshots simply take up a lot of space. Before we start..... What is hexing? I could go the extra mile and explain it in my own words, but rAthena's GitHub gives an informative description what hexing is. As most of you may know, experts have developed tools with an user-friendly interface to make client hexing - AKA 'diffing' - even easier for us, however what the majority does not know is that hexing isn't specifically limited to .exe modifications and can be applied to many different file extensions- RO map files and models among them. Having that said, I think you have an idea in which direction I'll be heading. Okay, before anything else... I need to state that this method is recommendable to set the base design. You can in theory over-haul your entire map this way, but I highly encourage it to only be done with the repetitive textures and models (such as trees, bushes, buildings). Preferably, your map uses custom textures/models, they're easier to memorize (and thus replace) than the official gibberish components. What are the pros and cons? Pros: Once you get the hang of this, you could save yourself a lot of valuable time and make fresh layouts rapidly. No need to generate (custom textured) models through the build-in browedit RSM editor tool. We'll take a different approach. Gats remain unaltered and models will remain facing the same way. Lastly - probably the main reason what I like about this - texture and model files from your previous design will be preserved and not over-written. New ones are created which are fetched from a different texture/model directory. After implementation the only thing that will be over-written are the map files themselves (which also means less heavy patches). Cons: While you don't have to, you will likely still want to open browedit for some finishing touches. You can easily slip up and corrupt your map with a single typo. Back things up and be focused when you get to step 3! What will we need? GRF Tool (i.e GRF Editor). Hex Editor (i.e XVI32). Image Editing Software (i.e Photoshop). A custom map - seasonal/holiday themed is preferred, but not necessary. Basic ~ moderate client-side & browedit knowledge. ~~~~~~~~~~~~~~~~~~~~~~~~~~~~~~~~~~~~~~~~~~~~~~~~~~~~ Now, since we've got all that covered... Let's begin! For this guide, we're going to use my Christmas Prontera (screenshot below) map as sample, and turn it into a Spring Prontera (screenshot at the bottom of the post). - Files - We're going to need to locate the map and its contents that we're going to edit. So let's do that, here are the resources... Step #1 - Copying & Renaming What you need to do first, is go back to the main directory and copy the entire 'Christmas Pront' directory. Paste it and rename it - in this case - 'Spring Pront'. If you've done this correctly, you should now have two directories. Spring Pront and Christmas Pront, both containing files of Christmas Pront. Open the 'Spring Pront' folder and begin re-naming all the files that still contain an abbreviation of the Christmas Prontera layout. Keep it simple for yourself. For example, I recommend replacing the 'chr' and make it 'spr', like this: Note: If there's a lot to edit, consider pulling up a notepad and writing down the old texture/model/directory names and the new ones next to it. I'm telling you this, because you're going to need to check back to the old names later. Better safe than sorry. "Why does a snow texture display 'spr_gras?" - I know, it doesn't make sense yet. Disregard, you'll understand in step #2. "Can the abbreviations I choose exceed the amount of characters that the original files use? (i.e spring_grass instead of spr_gras)" - It probably could with additional steps but...Let's not for now, okay? If you've done everything as per tutorial, you will have no texture, model or directory left anymore including 'chr' or 'Christ'. Double-check in order to confirm. Step #2 - The Artsy Stuff Got a graphic artist on your team? Lucky you- because then you can simply skip this (most time-consuming) step and instruct your artist to present you with something appealing. But we're not going to do that, are we? No, we're going to pretend you're a solo developer. Go to google images and look for a square texture that you wish to replace the snow texture with. Since this is a spring themed map, I went with something green and flowery. Admittedly though, I wasn't too fond of the original image I chose because it seemed a little too crowed/clustered(?) and the borders didn't align, so I decided to look for a plain grass image and combine it with the initial flowery tile of my choice. Still a lil clustered but better. Here's the result: Okay so clearly this isn't a Photoshop guide - my Photoshop skills are far from perfect - but I think you get the idea. ;-; Seamless images are the best, however it isn't always possible to find them. Fear not, young grasshopper- You need not be an expert in Photoshop but at the very least try to edit the texture sufficiently (with the eraser tool on the top layer) for the borders to have a relatively smooth over-flow. Needless to say, if flowers are being cut off at the border of a texture, it does not exactly look attractive. Done? Resize the image(s) to 256x256 and save as 24 bit bmp. Do this with all the textures you've redesigned, your texture directory should somewhat look like this: Again, this might take a while if you're doing everything alone and aren't that familiar with Photoshop. Note: spr_tree3~5 are tga files, but they have been adjusted as well. Step #3 - Hex It! This step is the most technical one and you'll need to look back every now and then to your other layout's textures and models - in this case my Christmas Pront - as name replacement reference. Please be aware that you can screw up easily here! Yes, it's easy but you've gotta pay attention! Double check everything you do and make sure you don't typo anything or miss anything out. Map Files Let's do these first. Boot your Hex Editor software and locate 'prontera.gnd' in your 'Spring Prontera' directory. Access the replacement feature, in XVI32's case: Search > Replace... What we're going to do is ensure the .gnd file reads the new textures, alright? We don't want the map files looking for the Christmas Pront textures/models anymore because this isn't going to be a Christmas Pront. ? Replaced them all? Great. Do the exact same for the models with the .rsw file: 158 entries. Pretty sweet, right? Model Files We're almost done! The last step will be hexing the models. Open them 1 by 1 in your Hex Editor software like you did with the map files and adjust the entries accordingly so the models are no longer searching for the incorrect texture files. Like this... And that's.... basically it. To see if you err'd anywhere, just open GRF Editor and put all the resources into it. If done correctly you'll see that your map and model files have adapted to your edits made through hexing. What was previously snow-covered, now returns something else entirely. Take this lovely flowery tree for example... ? Some of you may wonder- "How is this different than just regular (existent) texture replacement/recoloring? The answer is, exactly that. You're not replacing or changing the original texture/model resources at all. Quite the contrary- You're preserving your previous theme, all while generating an entire new theme with separate contents and directories that are being read. Convenient to server owners, too. No more messing around with different texture and model directories, worrying about if you might've missed something out when adding/removing files with the patcher. Using this methods, when the time comes where you want/need to switch theme, simply patch in the new map files (prontera.rsw and prontera.gnd) and you're good to go (unless if you've made gat edits of course- in which case you'll need to add the prontera.gat as well!). Needless to say, for the first-time implementation, you do need to include all the texture/model components. But that's obvious. And now, the final result? This is how Prontera will look like~ We went from winter wonderland to a refreshing and colorful spring design~ Fair enough- you'll still see the occasional wintry lantern, and the center higher up still has a giant pine tree, fine. Light-maps intensity need to be re-considered, too. But for the most part? Your map is about 3/4 done. What's left is just the small details that will likely only take you an hour or two at most to wrap up. ? Well, I hope this makes the life easier for some of you! ♥


 1 point
 -
Hi there, I downloaded the script from that link and I still get: [Error]: buildin_getmapxy: Player with nick 'ECwarp_1' is not found. [Error]: buildin_getmapxy: Player with map id '0' is not found. [Info]: [Instance] Created: Endless Cellar (1). Edit: Fixed it. There was a getmapxy(.@map$,.@x,.@y,1,("ECwarp_"+'EC_Floor)); which needed to be getmapxy(.@map$,.@x,.@y,BL_NPC,("ECwarp_"+'EC_Floor));1 point
-
http://pastebin.com/raw.php?i=98Hxhjbh try it1 point