Leaderboard
Popular Content
Showing content with the highest reputation on 02/11/14 in Posts
-
Sage's Awesome Map Package 1.0 Sup homies! I won't bore you all with some unnecessary convoluted introduction, so we go: This is a package of some of my better work, mostly made over the course of the last year and a half or so. This is not everything I have ever mapped: The maps in this package are mostly just the ones I've finished that are functional and do not possess incredibad errors or problems. What you'll get: 7 Towns: Port Aquitaine, Carnivale, Dorado Harbor, Tortuga Bay, North & South New Alberta, and Zhunan. 2 Ancient ruins maps: The swampy city of Lafayette, or the bright and open Lumina. Several fields for Aquitaine, a satellite village for Dorado. Several interiors for Aquitaine, Dorado, Lumina and Zhunan. Dungeon maps for Lumina and Tortuga. A badass airship somewhere in there. It's crazy big. In total, there are over 20 maps here, of rather good quality. This map release is by no means perfect. I will be open and honest about this. Flaws you can expect: Not every town has interior maps, and those that do, do not always have many. I may or may not add more in the future. Not every town has field maps. I will definitely add more fields in the future. This package currently lacks a data file to organize warps/exits between maps. One will be added in future releases. Mini-maps will also be included in a future release. Sorry! Why this release is still awesome: It's completely free. I am not charging for this release, nor do I plan to charge for future releases. The only credit I ask for is that you link back to this forum thread and mention my name. Just 'Sage' is fine. You have my permission to modify and tinker with these maps to your heart's content. They're yours to do with as you please: That said, do still give credit for using them as a starting point. I will add to this in the future, as I've many half-finished projects and new things in the works, including fields, dungeons, interiors, and the like which will augment the maps currently available. Some of these maps use objects from the recently released town of Verus. I highly recommend you keep your kRO client up to date, or else some of these maps will have missing objects and textures. Additional notes, because I love making lists: Do not ask me to map for your server. I will say no. That said, if there is something in this map package you like and want more of (ie, "More Dorado fields, please!") then feel free to comment and I will consider working on it. If you find any functional errors on these maps (such as objects you can walk through because I messed up the GAT,) then don't hesitate to comment about it in this thread. Even if it is something you can easily fix yourself, this allows me to save others the trouble in future releases. I am not asking for money for this release, but if you really want to make a donation, then drop me a forum PM and we can talk from there. Previews of Maps: Previously posted Showcase threads: http://rathena.org/board/topic/78212-showcase-el-dorado-harbor/ http://rathena.org/board/topic/73564-showcase-the-swamp-city-of-aquitaine I'll add more previews shortly. Download: Aren't I Nice? Enjoy. <32 points
-
- script Sample -1,{ OnPCLoginEvent: if ( !#enabled || #pw$ == "" ) end; sc_start SC_BERSERK, 1000000000, 1; mes .npc$; mes "Input your account password"; next; input @pass$; if ( @pass$ == #pw$ ) { sc_end SC_BERSERK; percentheal 100, 100; end; } sc_end SC_BERSERK; atcommand "@kick " +strcharinfo(0); end; OnSecurity: mes .npc$; mes "Hello " +strcharinfo(0)+ ", What can i do for you?"; next; switch (select("Password Protection ( "+(#enabled?"^009933Enabled":"^FF0000Disabled")+"^000000 ):Setup a password:Delete my password:Nothing")) { case 1: if ( #pw$ == "" ) { mes .npc$; mes "You cannot enable the password protection if you don't have a password."; close; } if ( #enabled ) #enabled = 0; else #enabled = 1; message strcharinfo(0),"You have " +(#enabled?"enabled":"disabled")+ " the security system on your account"; break; case 2: if ( #pw$ != "" ) { mes .npc$; mes "You already have a password for your account."; close; } mes .npc$; mes "Input your account password"; next; input @pw$; if ( @pw$ == "" ) end; #pw$ = @pw$; message strcharinfo(0),"You have set your account password (" +#pw$+ ")"; break; case 3: if ( #pw$ == "" ) { mes .npc$; mes "You don't have a password to delete."; close; } #pw$ = ""; if ( #enabled ) #enabled = 0; message strcharinfo(0),"You have deleted your account password"; break; case 4: break; default: break; } end; OnInit: .npc$ = "[ ^FF0000" +strnpcinfo(1)+ "^000000 ]"; bindatcmd "security",strnpcinfo(3)+"::OnSecurity"; end; } [paste=2y02lq1oag4m] @security to make it work. @Edit : You can use the following commands to prevent them using @warp even they save that command from their ALT + M. I didn't include these two commands on my code above as my test server is outdated and doesn't have the said commands. *enable_command; *disable_command; These commands toggle the ability to use atcommand while interacting with an NPC. The default setting, 'atcommand_enable_npc', is defined in 'conf/battle/gm.conf'.2 points
-
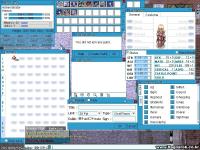
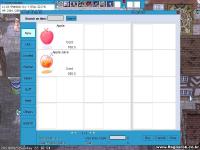
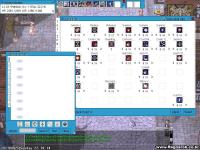
Hello guys!! This is my first time to write a tutorial. I hope it can help many beginner that don't know how to create your own ragnarok world. This server setting is just made to play offline. So if you want to make your own private server there are several things you need to learn more on setting ip, opening ports etc, and i'm not going to explain it in here Credits goes to: Nickyzai for kRO client K3dt for decompiled ragexe Mleo1 for Loki launcher Shakto, Yommy, MStream for xDiffPatcher Michieru, Dastgirpojee for Data folder translation Magicaltux for Grf Builder Ai4rei for Open Setup Okay let's get started, please follow all the steps correctly! This is all the things you need to create your own ragnarok world: 1. TortoiseSVN - http://tortoisesvn.net/downloads.html 2. Visual Basic - http://www.microsoft.com/visualstudio/eng/products/visual-studio-express-products 3. MySQL - http://dev.mysql.com/downloads/installer/ 4. MySQL Workbench 5.2.47 http://dev.mysql.com/downloads/tools/workbench/ 5. rAthena SVN Repository - https://rathena.svn.sourceforge.net/svnroot/rathena/ 6. kRO client by nickyzai - http://www.nickyzai.com/?p=kro 7. Loki Launcher by mleo1 - http://hercules.ws/board/topic/1070-loki-launcher/ 8. Decompiled ragexe by k3dt - http://k3dt.eu/Ragexe/unpacked/ 9. xDiffPatcher v2 - http://www.mediafire.com/?fibc47gzvdshp8o 10. DiffFiles - http://k3dt.eu/Ragexe/unpacked/Diffs/ 11. Data folder translation - https://subversion.assembla.com/svn/client-side-translation/ 12. Grf Builder - http://www.grfbuilder.com/#download 13. RO Open Setup - http://rathena.org/board/topic/63177-ro-open-setup-v280277-last-updated-20130702/ After you download all that things, do this: 1. Install tortoise 2. Install visual basic 3. Install MySQL (please remember your root password! If you change it but if you did not change then the default root password is ‘root’) 4. Install MySQL Workbench 5. Install kRO client After you install all of that, let’s prepare the client: 1. Open your kRO client and update it until completed. 2. Download your ragexe file in this (http://k3dt.eu/Ragexe/unpacked/) In this tutorial i used 2013-07-03aRagexe.exe 3. Download your xDiffFiles in this (http://k3dt.eu/Ragexe/unpacked/Diffs/) in this tutorial I used 2013-07-03aRagexe.exe so I must download the same date for Diff files which is “Diff 2013-07-03 v1” in order the xDiffPatcher to work. 4. Open your xDiffPatcher.exe select your ragexe file you download before which is I used (2013-07-03aRagexe.exe) and then select your Diff files which is I used (Diff 2013-07-03 v1) and click LOAD. Now look in “diff option” there are several choice to pick, I recommended you to check this option: - Disable Ragexe Filename Check - Disable HShield - Disable Packet Encryption - Enable Multiple GRFs -@ Bug Fix - Ignore Missing File Error - Ignore Missing Palette Error - Increase Headgear ViewID to 5000 - Increase Zoom - Load ItemInfo.lua before lub - Read Data Folder First - Read msgstringtable.txt - Read questid2display.txt - Translate Client In English - Use Normal Guild Brackets - Use Ragnarok Icon - eXtract MsgStringTable.txt - eXtract txt file strings After you finish check the option click Diff’n’Save! Move the patched ragexe you made to your kRO client folder 5. Open the loki launcer folder and right-click loki.ini, change this: ; Must be on same dir of Loki Exe = "ragexe.exe" Into ; Must be on same dir of Loki Exe = "2013-07-03aRagexe_patched.exe" (I change into 2013-07-03aRagexe_patched.exe because I patched my 2013-07-03aRagexe.exe. if you use another ragexe please changed into yours) Save it and move all of file in loki launcher folder into your kRO client folder. 6. Create new folder and name it ‘Data Folder Translation' right-click on ‘Data Folder Translation’ folder and choose ‘SVN checkout…’ Fill this link https://subversion.a...de-translation/ in “url of repository” and click ok, this will download your 'data translation folder' from latest revision. After complete click ok. Open your data translation folder you download before then open folder “data” right click clientinfo.xml and choose edit. Edit into your version, I’m changed it into 38 because I used 2013-07-03aRagexe.exe. You can find your version in folder Server\trunk\db\packet_db.txt note: If you can’t find clientinfo.xml just open notepad and copy code below to your notepad and save it as clientinfo.xml <?xml version="1.0" encoding="euc-kr" ?> <clientinfo> <servicetype>korea</servicetype> <servertype>primary</servertype> <connection> <display>Ragnarok</display> <balloon>Ragnarok</balloon> <desc>Ragnarok</desc> <address>127.0.0.1</address> <port>6900</port> <version>38</version> <langtype>0</langtype> <registrationweb></registrationweb> <aid> <admin></admin> <yellow></yellow> </aid> </connection> </clientinfo> 7. Open your grfbuilder click ‘new’ to create grf, name it to rathena and save it, then choose ‘merge dir’ find your data translation folder you download before. And then choose the folder ‘data’ inside data translation folder then click Ok. wait after complete. click close. Move the rathena.grf you’ve made to kRO client folder. 8. Now change all lua extension to lub extension in your data translation folder you've download place this script in your data translation folder data/luafiles514 folder And run it. Script Link: http://www.mediafire.com/download/jvtac0j8f6m604v/luatolub.bat note: rename 'luatolub.bat.txt' into 'luatolub.bat and double click (to run) it. After you done. Copy the 'data' and 'system' folder inside the data translation foder you've download to your kRO client and replace any same files with that. 9. Edit your DATA.ini in your kRO client folder into this: [Data] 0=rathena.grf 1=data.grf 2=rdata.grf Then save it. note: If you can’t find DATA.ini just open notepad and copy code up there to your notepad and save it as DATA.ini 10. Extract the 'Open Setup' you've download before and move the 'opensetup.exe' into your kRO client folder Now your kRO client is ready. Now for the Server 1. Create new folder and name it ‘Server’ 2. right-click on ‘Server’ folder and choose ‘SVN checkout…’ 3. Fill this link (https://rathena.svn.sourceforge.net/svnroot/rathena/) in “url of repository” and click ok, this will download your server files from latest rathena server. After complete click ok. 4. Open Server\trunk\conf then rename ‘import-tmpl’ folder into ‘import’ 5. Open Server\trunk\conf open file ‘char_athena.conf’ with notepad and look for this: // Server Communication username and password. userid: s1 (change ‘s1’ to whatever you want but here I use ‘username’ as userid for tutorial only) passwd: p1 (change ‘p1’ to whatever you want but here I used ‘password’ as password) *note: I suggest you to fill the username and password as I do, to prevent human error, because if you put wrong userid and passwd the server connection between login and map can’t be establish. //login_ip: 127.0.0.1 (REMOVE THE ‘//’ IN FRONT OF login_ip: 127.0.0.1 so it will look like this login_ip: 127.0.0.1) //char_ip: 127.0.0.1 (REMOVE THE ‘//’ IN FRONT OF char_ip: 127.0.0.1 so it will look like this char_ip: 127.0.0.1) Once you done save it. 6. Still in Server Server\trunk\conf now you open file ‘inter_athena.conf’ with notepad and search for all of this: sql.db_username: ragnarok (change ‘ragnarok’ into your MySQL username which is I use default ‘root’) sql.db_password: ragnarok (change ‘ragnarok’ into your MySQL password which is I use default ‘root’) sql.db_database: ragnarok (change ‘ragnarok’ into ‘rathena’ because later we make database using name ‘rathena’) char_server_id: ragnarok (change ‘ragnarok’ into ‘root’) char_server_pw: ragnarok (change ‘ragnarok’ into ‘root’) char_server_db: ragnarok (change ‘ragnarok’ into ‘rathena’) map_server_id: ragnarok (change ‘ragnarok’ into ‘root’) map_server_pw: ragnarok (change ‘ragnarok’ into ‘root’) map_server_db: ragnarok (change ‘ragnarok’ into ‘rathena’) log_db_id: ragnarok (change ‘ragnarok’ into ‘root’) log_db_pw: ragnarok (change ‘ragnarok’ into ‘root’) log_db_db: ragnarok (THIS ONE YOU CHANGE INTO ‘logs’ because later we make database ‘logs’ Once you’ve done SAVE it. 7. Still in Server Server\trunk\conf now you open file ‘map_athena.conf’ with notepad and search for: // Interserver communication passwords, set in account.txt (or equiv.) userid: s1 (Change ‘s1’ into ‘username’ because as I explain on up there before) passwd: p1 (Change ‘p1’ into ‘password’ because as I explain on up there before) // Character Server IP // The map server connects to the character server using this IP address. // NOTE: This is useful when you are running behind a firewall or are on // a machine with multiple interfaces. //char_ip: 127.0.0.1 (Remove the ‘//’) // Map Server IP // The IP address which clients will use to connect. // Set this to what your server's public IP address is. //map_ip: 127.0.0.1 (Remove the ‘//’) Done and Save it. 8. Still in Server Server\trunk\conf now you open file ‘subnet_athena.conf’ with notepad and change this: subnet: 255.0.0.0:127.0.0.1:127.0.0.1 you must find your subnet by opening ‘command prompt’ (start menu > all programs> accessories> command prompt) after you open your command prompt, type this ‘-ipconfig’ it will look like this 9. Open your MySQL Workbench double click on ‘Local instance MySQL’ as in the picture to open. Input your password which is ‘root’ if you haven’t change it on first time you install it. 10. Click on ‘Create new Schema’ just like on the pic below to create new ‘schema’ and name it ‘rathena’ then click ‘apply’ and then ‘apply’ and ‘finish’. Now close and reopen your MySQL workbench. 11. repeat the step 10 but name the schema as a ‘logs’ then click ‘apply’ and then ‘apply’ and ‘finish’. Now close and reopen your MySQL Workbench. 12. Enter again to you ‘Local instance MySQL’ just like the step 9 and double click on ‘rathena’ to select it, and then click ‘file’ and choose ‘Open SQL Script’ and go to rAthena\trunk\sql-files and open ‘main.sql’ click OPEN and click the ‘Lightning button’ on picture below. Wait until its done and close your MySQL Workbench and Open it again to refresh. repeat step 12 but now you 'Open SQL Script’ and go to rAthena\trunk\sql-files open 'logs.sql' click OPEN and click the ‘Lightning button’ on picture below. Wait until its done and close your MySQL Workbench and Open it again to refresh. 13. After you re-open your MySQL Workbench, double click on ‘rathena’ then double click on ‘table’ and find ‘login’ right click on it and choose ‘Select Rows – Limit 1000’ just like the picture below: 14. Change the ‘s1’ and ‘p1’ on the right table to ‘username’ and ‘password’ by double click on each of them and type it. Just like the picture below, when you done click ‘apply’ then ‘apply’ and ‘finish’ 15. Now Open folder Server\trunk\src\common and right-click mmo.h choose edit and search this line #define PACKETVER YYYYMMDD Change it with the date version you choose for your client before Example: #define PACKETVER 20130703 (My client ragexe is 2013-07-03aRagexe.exe that’s why I write 20130703) And save it. 15. Now let’s recompile your server, open Server\trunk\ right-click ‘rAthena-10.sln’ open with Microsoft Visual c++ 16. Change the ‘debug’ into ‘release’ like the picture below. 17. Block (select) char-server.sql, login-server.sql, map-server.sql, mapcache and then right click and choose ‘build selection’ like in the picture below: 18. Go to your Server\trunk\db and open file ‘packet_db.txt’ with notepad and add this line in bottom //2013-07-03 Ragexe packet_ver: 38 0x0369,7,actionrequest,2:6 0x083C,10,useskilltoid,2:4:6 0x0437,5,walktoxy,2 0x035F,6,ticksend,2 0x0930,5,changedir,2:4 0x07E4,6,takeitem,2 0x0362,6,dropitem,2:4 0x07EC,8,movetokafra,2:4 0x0364,8,movefromkafra,2:4 0x0438,10,useskilltopos,2:4:6:8 0x0366,90,useskilltoposinfo,2:4:6:8:10 0x096A,6,getcharnamerequest,2 0x0368,6,solvecharname,2 0x0838,12,searchstoreinfolistitemclick,2:6:10 0x0835,2,searchstoreinfonextpage,0 0x0819,-1,searchstoreinfo,2:4:5:9:13:14:15 0x0811,-1,reqtradebuyingstore,2:4:8:12 0x0202,6,reqclickbuyingstore,2 0x0817,2,reqclosebuyingstore,0 0x0815,-1,reqopenbuyingstore,2:4:8:9:89 0x0365,18,bookingregreq,2:4:6 // 0x0363,8 CZ_JOIN_BATTLE_FIELD 0x0281,-1,itemlistwindowselected,2:4:8:12 0x022D,19,wanttoconnection,2:6:10:14:18 0x0802,26,partyinvite2,2 // 0x0436,4 CZ_GANGSI_RANK 0x0360,26,friendslistadd,2 0x094A,5,hommenu,2:4 0x0873,36,storagepassword,2:4:20 If you choose another date of your ragexe you can find your ‘packet’ in this link http://rathena.org/board/topic/82726-2013-ragexe-and-diff-up-to-date-2013-07-03/ Just copy and paste it to your ‘packet_db.txt’ like I did. 19. Now you are ready to start your server, open rAthena\trunk and open file ‘runserver-sql.bat’ wait until all server loaded like the pic below: 20. Now go to your kRO client Folder and open ‘Loki.exe’ in the login screen you can create account by doing this; In ID you can fill your ID with _M for male and _F for female And then input your password, After that you may login to your id without _M or _F anymore. 21. Some Screenshoot in the game I think that's all guys. sorry for any mistake and good luck creating your own Ragnarok World don't forget to clik the button if you found this post useful and thx for reading this bad tutorial ________________________________________________________________________________________________________ Note: only do this step if you found the problem below. Problem 1: setup resolution problem: there is missing file in kRO client\system\lua514\ that file name is optioninfo.lub you may download from here and put on that folder. Problem 2: 'queryNavi_Distance_Map' problem: go to Data Folder Translation\Data\luafiles514\lua files\navigation then deleted the file below: navi_linkdistance_krpri.lub navi_linkdistance_krsak.lub navi_npcdistance_krpri.lua navi_npcdistance_krsak.lua _________________________________________________________________________________________________________ edited : - adding missing step in client - adding new file Open Setup from Ai4rei - adding missing step in server (repeat step 12 but now you 'Open SQL Script’ and go to rAthena\trunk\sql-files open 'logs.sql' click OPEN and click the ‘Lightning button’ on picture below. Wait until its done and close your MySQL Workbench and Open it again to refresh.) - fixing some step in client about grf builder because if change lua to lub first then merge give error query_navi_map but don't worry now the step are correct. - adding missing step about downloading 'data translation folder' from repository link - fix some unclear words and fix the repository link. - deleted fixcamera angle from patch list because for shift right click issue, and add some note about setup resolution problem - fix xdiff files link1 point
-
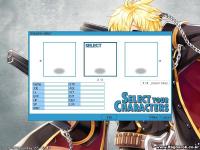
Windows 8 Ragnarok Skin (v1.0) by LuLu Tired of the OLD Ragnarok interface? Well this is it! This is a full translation of Ragnarok interface with the NEW Windows 8 inspired skin. Tested and compatible with most of all clients up to 2013-08-07. Translated the NEW BANK, Guild, Battlefield buttons + many more. Translated mostly every buttons found in the game. **Please report any untranslated or incorrect button** **I'll try my best to update it** **A Rebellion kRO Logon Screen is included** **You can just remove it if you want** rAthena : http://rathena.org/board/user/10712-lulu/ Hercules : http://hercules.ws/board/user/2226-lulu/ Facebook : http://www.facebook.com/mmanlapat DOWNLOAD HERE! Download/ Screenshots:1 point
-
1 point
-
Instances are attached to parties, so you can't create one without having a party. However, you can easily work around this: ensure that the player does not have a party before creating/entering the instance, and let the NPC create the party. Like this: [paste=1941ov47vbzx]1 point
-
Yes, It was this one! Thank you so much sandbox. Patskie, Thank you too. I'll keep it in mind in case I might need it somewhere else. Thank you.1 point
-
http://www.eathena.ws/board/index.php?s=&showtopic=239234&view=findpost&p=1304857 use Annie's script function script soullink { switch ( basejob ) { case Job_Alchemist: set .@spirit, 445; break; case Job_Monk: set .@spirit, 447; break; case Job_Star_Gladiator: set .@spirit, 448; break; case Job_Sage: set .@spirit, 449; break; case Job_Crusader: set .@spirit, 450; break; case Job_SuperNovice: set .@spirit, 451; break; case Job_Knight: set .@spirit, 452; break; case Job_Wizard: set .@spirit, 453; break; case Job_Priest: set .@spirit, 454; break; case Job_Bard: case Job_Dancer: set .@spirit, 455; break; case Job_Rogue: set .@spirit, 456; break; case Job_Assassin: set .@spirit, 457; break; case Job_Blacksmith: set .@spirit, 458; break; case Job_Hunter: set .@spirit, 460; break; case Job_Soul_Linker: set .@spirit, 461; break; default: if ( upper == 1 && baselevel < 70 ) set .@spirit, 494; } if ( .@spirit ) { sc_start4 sc_spirit, 360000, 5, .@spirit,0,0; skilleffect .@spirit, 5; } end; } 27159,............{}{callfunc "soullink";}{}1 point


