


Euphy
-
Posts
2997 -
Joined
-
Last visited
-
Days Won
72
Content Type
Profiles
Forums
Downloads
Jobs Available
Server Database
Third-Party Services
Top Guides
Store
Crowdfunding
Posts posted by Euphy
-
-
@hendra814: That's easy but will take a while to do; change all the dungeon labels to the "Go" function manually.
@rosfus: Yes, just find and replace #Mission_Points with #Event_Points.
-
-
It's possible to effectively automate the events by triggering a check OnMinute and storing the events to trigger for each hour as a bit integer (that's exactly what I use in my manager XD). It'll take some time to code, but once it's done you won't have to worry about it again.
-
 1
1
-
-
They've been in correctly in sync for a few weeks now, and you can check revisions by clicking the "Timeline" link under "SVN".
-
1
-
-
Might've been an issue with parentheses, sorry about that.
set .@i, party_create("i"+rand(100000000)); -
This is the bare minimum to enter an instance:
set .@instance$,"Endless Tower";
if (!getcharid(1)) { // Generate a party if needed.
	while(.@i < 1)
		set .@i, party_create "i"+rand(100000000);
	sleep2 100;
}
instance_create(.@instance$); // Create the instance.
instance_enter(.@instance$); // Enter the instance.
end;
-
-
TXT servers were dropped long ago, the "_sql" suffix was no longer necessary.
-
Brian wrote a similar script here (definitely more efficient, check it out)
-
Implemented in 66a2bfd.
-
The configuration array is just in there for convenience; you can ignore it and replace the 'getitem ...' line with anything you'd like.
-
-
-
No, but it's possible with a source edit.
Moving to "Source Requests".
-
Good to see that you're back. Thanks for sharing! ^^
-
Transitioning from SVN to GIT
While switching your server to GIT may sound like a daunting task, it's relatively simple and straightforward, even for servers with heavy modifications. We strongly encourage you to do so, since our primary efforts will now be directed towards our repository on GitHub. Simply follow the steps listed below, depending on your OS:
Windows Instructions
For this process, we'll be using msysgit and TortoiseGit. Download and install both (in that order) if you don't have them already.
-
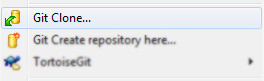
In TortoiseGit, right-click and select "Git Clone..." where you want to create your new repository.
-
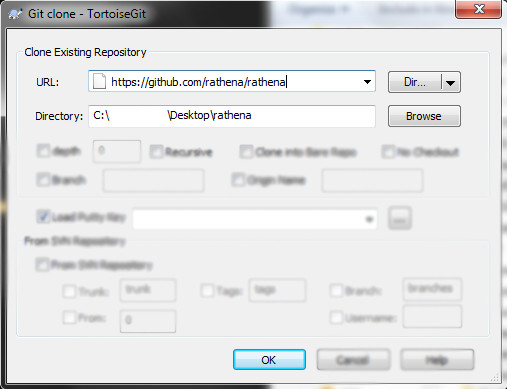
Enter rAthena's GitHub URL and hit "OK":
https://github.com/rathena/rathena
-
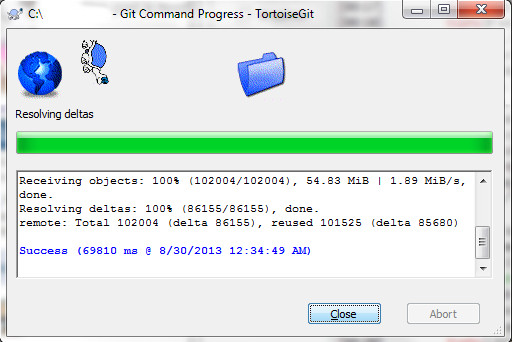
Cloning may take a minute or two. Hit "Close" after it finishes.
-
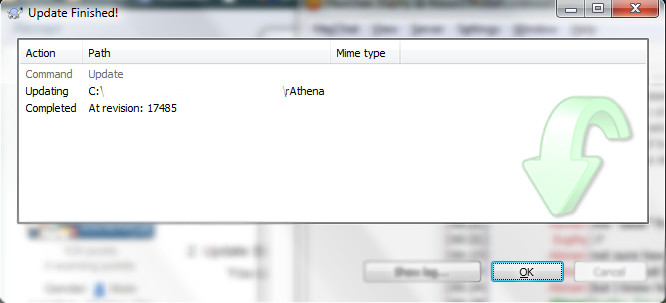
Update your SVN repository using TortoiseSVN's "SVN Update".

-
Hit "OK" after it finishes. Resolve any conflicts now (read more below).
-
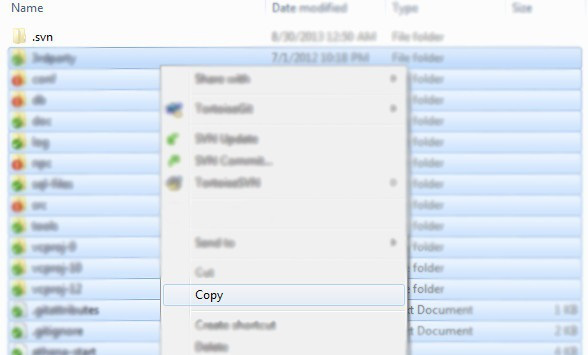
Copy all files in your SVN directory, excluding the .svn folder itself.
-
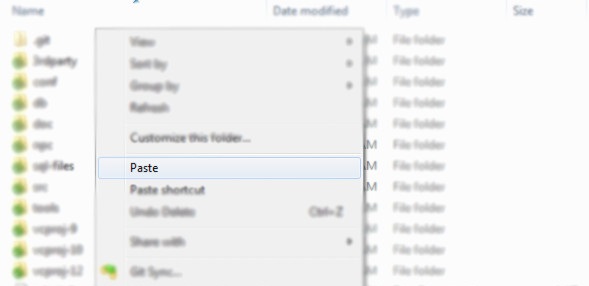
In your new GIT directory, paste the files you just copied.
-
When prompted, opt to merge all folders and replace all files.


-
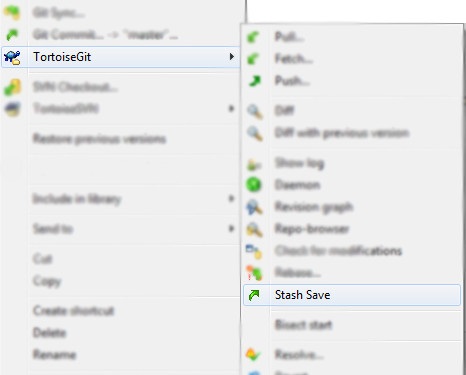
In TortoiseGit, right-click and select "Stash Save" to store all your changes.
-
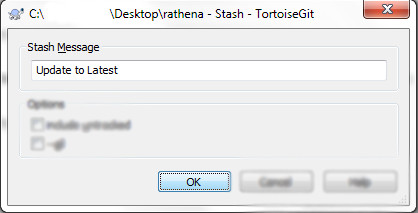
Create a name that you'll recognize later, like "Update to Latest".
That's it, you're finished. When you want to update your GIT repository, follow these steps:
-
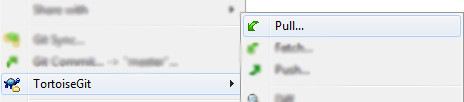
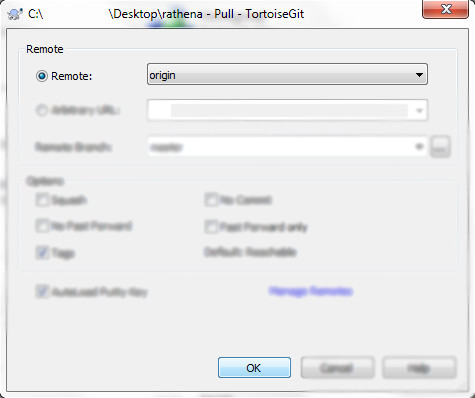
Right-click and select "Pull..." to merge all new changes.
-
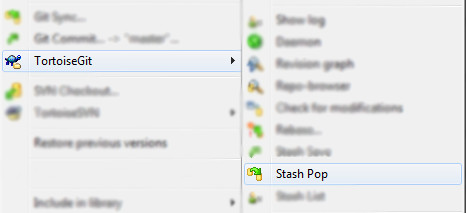
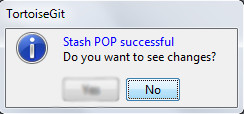
Right-click and select "Stash Pop" to restore your custom changes.
Linux Instructions
-
Clone the GIT repository:
git clone https://github.com/rathena/rathena.git
This creates the new directory named "rathena" and will be the new server location, but can be changed is desired. -
Update SVN Repo to latest:
svn co http://svn.code.sf.net/p/rathena/svn/trunk/
You can solve conflicts later, but it's best to do it now and make sure you can compile, and even test the server, before continuing. -
Copy the files over:
cp -rf trunk/* rathena/
Recursive tag to copy all sub-directories and files, forced so you don't have to manually accept overwriting each file. -
Configure and compile new GIT server location:
./configure && make clean sql
If there are any specific functions you enable when configuring, modify this command. -
Shut down old server and start-up new one.
If you have any server auto-restart scripts, you can either edit the cronjob to point to a new location, or rename directories:
mv trunk trunk-bak && mv rathena trunk
-
You can now pull GIT changes by typing:
git pull
*These commands assume you have changed directory to new GIT directory.
When doing a pull, you may receive a message saying:
Please, commit your changes or stash them before you can merge.
Aborting
In order to pull changes into your local repository, you have a couple options. The one which will be most used by our users is going to be to stash the changes and recall these changes after a pull. If you're just starting using GIT, then you'll need to configure a name and email before doing a stash.
git config --global user.email "[email protected]"
git config --global user.name "Your Name"
Now, stash local changes:
git stash save "Update to Latest"
"Update to Latest" can be anything, it's just a note.Do the pull - Followed by a 'pop' to replace your code:
git pull
git stash pop
No conflicts? You're good to complete your update! Otherwise, keep reading...
Conflicts
It's possible that you'll run into conflicts along the way, with messages such as:
CONFLICT (content): Merge conflict in src/map/atcommand.c
When you see these messages, a conflict in merging your code occurred. Much like resolving code conflicts in SVN, these conflicts create points within the files which show your code compared to the code pulled from the remote repo. To fix them, open your files and find the conflict locations denoted by:
<<<<<<<: Indicates the start of the lines that had a merge conflict.
=======: Indicates the break point used for comparison. Breaks up changes that user has committed (above) to changes coming from merge (below) to visually see the differences.
>>>>>>>: Indicates the end of the lines that had a merge conflict.
Then you can choose which piece of code you wish to keep. After all shown conflicts are corrected, you can continue your normal update process.
References
- Setting your email in git
- How do I resolve git saying "Commit your changes or stash them before you can merge"?
- CONFLICT (content): Merge conflict in
-
6
-
In TortoiseGit, right-click and select "Git Clone..." where you want to create your new repository.
-
63, not 16.
-
There's no command to make a SPR appear; not sure if the client would even support this, but you'd have to look further.
-
It is stored as #langtype, as you can see here:
pc_setaccountreg(sd, "#langtype", lang); //For login/char
It's an account variable, so you can directly call it (no need to use an SQL query). -
-
Make sure your "VIP" player group has the 'can_trade' and 'can_party' permissions.
Read: doc/permissions.txt
-
It seems the general consensus is that this is unnecessary, and I agree. Moving to "rejected".
-
We've covered our policy towards this in our rAthena Goals statement. Moving to "rejected".
-
'63' contains '15' in it (1+2+4+8), so that's why it also works. The beauty of flags~wut?!
i just added 63 and it worked perfectly o.o
Euphy's Quest Shop debug
in Scripting Support
Posted
It means exactly what it says. 30545 isn't a valid item ID, so it was skipped.