Hello! If you're here it likely means you want to learn, or learn more about, your Ragnarok Art Tools. Feel free to browse the entire post for bits of information you want. This guide will show the basics of how to run most applications and where to officially download them from. To avoid virus and scams please follow only the links posted in thie guide & by the official rAthena crew.
Requirements:
A Computer with at least 32 GB of space & 2 GB of RAM (4GB Recommended).
Now that we got a few things to get us started let's get editing...
Section 1 - Installation
STEP ONE: Understanding Software (Learn the tools) i1.1.0
Before we get starter we are going to open up and make sure we have an understanding of our tools we want to use. in this example we will be using GIMP 2.10 as our editor of choice. It's free & open-sourced.
Once we've download Gimp, & have run it for the first time, we are going to now see a screen that looks similar to the one below...
This layout is quite similar to most GNU programs. The tools are on the Left and the stats/properties are on the right. Let's start with the tools.
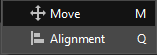
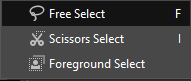
Starting at the top left and moving right we have the default Move Tools, Shaped Select Tool, Free Select Tool & the Magic Select Tools. These are usually going to be the primary tools you will want to use for editing.
The Move tools allow you to move and allign the images, frames, or selections. This is very simple way to crop out areas of an image you don't want or need.
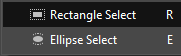
The Shaped & Free select tools will be used to select specific areas we want to manipulate. This is great for choosing set spots that we might need to change the colour of, or even just remove completely from the frame.
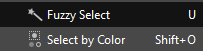
And finally, for this example, we have our Magic Select tools. These are especially important for colour manipulation & photo editing as it will allow us to select an exact pixel-point selection around, or of, an object. You will likely use these tools frequently when editing for Ragnarok Online.
That's the basics of GIMP, for now. Moving on, we have the basics of GRF editing.
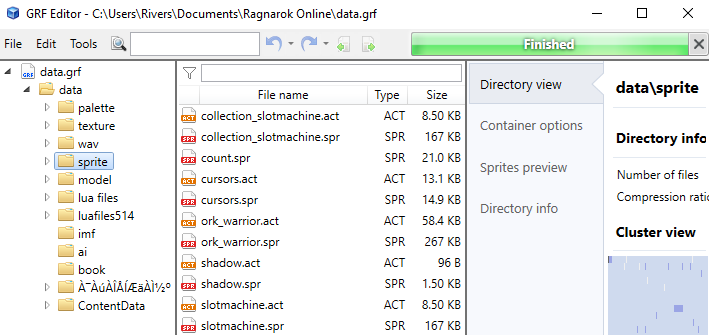
GRF Editor is a gret tool used to extract & read files from Gravity made files. We will use GRFE to extract and import our images we want. In the image below we have opened a dara.grf and are ready to view the files.
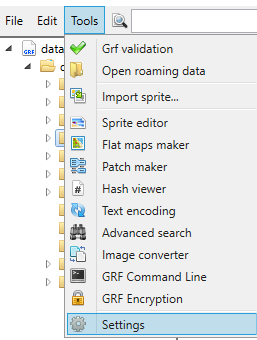
GRFE is going to be used in this example primarily for extracting images & adding new ones in. On the top we have our Menu. For this first part we are going to navigate to Tools and select Settings.
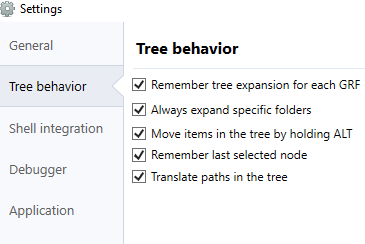
In here we will be presented with the settings menu. We are not going to touch on all the options here, instead, we will just do the translation so we can see where we are adding/removing files to and from. Go ahead and select the "Tree Behaviour" tab. You'll see some radio boxes here. We want to Check the last one. It should say "Translate paths in the tree". This will turn make most of the titles with ASCII characters into plain English. Close and relaunch the application for this to take effect.
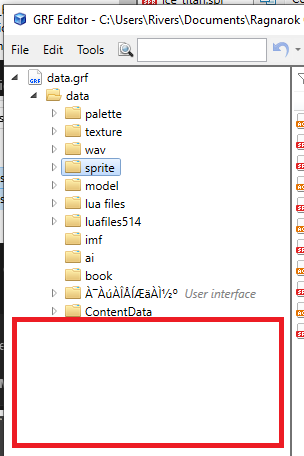
Our GRFE will now read like this so we cans ee where we want to make changes easier.
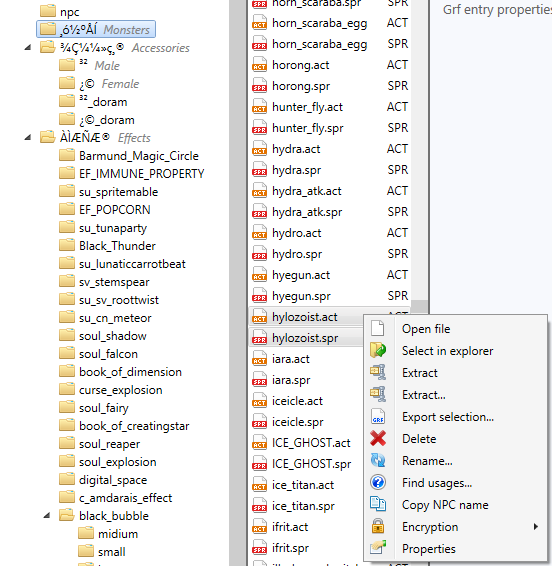
Now you can find everything much easier. For this example moving forward, we will be editing the Hylozoist monster. to extract just that mosnter, hold SHIFT and click with your mouse the files you want to extract. Right click and hit "Extract".
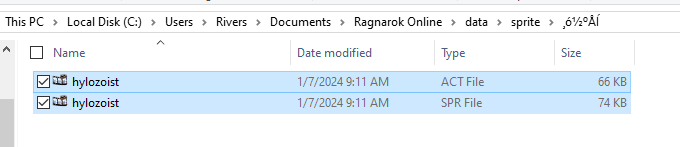
It should automatically pop up with the extracted files. It will be where ever the GRF is and extracted into a /data folder.
Once we've made changes to the file we can simply drag these files back into the GRF exactly how it is. So take the entire /data folder and drag it into the witespace of GRFE.
Save (CTRL+S) and wait for it to pack everything together. You've now made your first change to the GRF.
......
But did we really? We didn't actually make any changes to the file, just yet.
We'll need Act Editor (actOR) to unpack the sprites out of the .act/.spr files now. To make things easier first right click the .ACT file and click "Open with...". We will associate the Act Editor with the .act files in Windows so it's quicker to open later.
Once open we will have a window similar to this:
At the top we have our Menu where we can do just about everything the application allows.
The very bottom we have the frames. These are all the different images used in the actor. This will show all the angles and directions it can face.
The center shows the actor at it's current (or final) state after the changes and on the right of that we have the stats window for each sprite. This is where we can manipulate the directions, angles, animation playing, state of the animation, and much more.
Sounds compliacted but it's really simple. Just get a feel for everything and you will learn to understand how everything works over time.
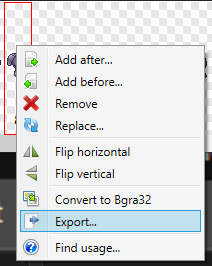
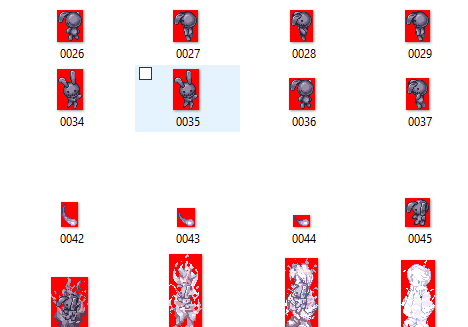
At the bottom, where we have our sprites, we can right click any one of them and another menu will appear. This is how we will extract an individual frame for editing using the "Export" button.
Select where you want to extract it and we can start editing the image. I've went ahead and extracted all the images for this example. We will make colour changes to start.
With the images now extracted we can open them up using our photo editing software, GIMP.
We're in and ready to start editing!
In this example I'm going to use the Colour Select tool and change the threhold to be higher, or lower, depending how much of the colours I want to take over. At threshold of 15 it select a small portio of the colours I want. I will increase this to 30 and see how I like it next.
15 Threshold
30 Threshold
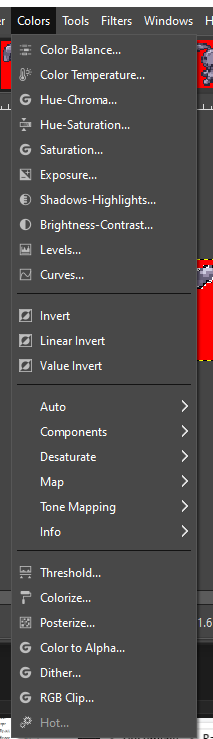
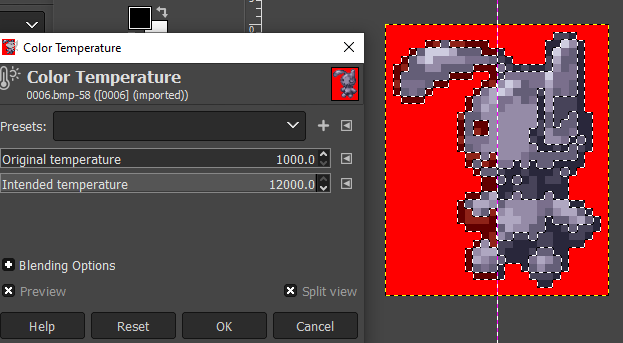
It looks like 30 is strong enough for what I want to achieve. With this selection we can now change only those bits of the image. Go ahead and select "Colors" from the menu.
Many options, yes. For now we just want to change the "Temperature" of the selection to be different.
Select "Split view" and we can see the changes before we apply them to save time.
Making the image hot worked for what I need to do. Now I can hit apply and save this image,
just make this change to all the frames you want and save them using the "Export" option (CTRL+SHIFT+E by default). Replace the file and DO NOT CHANGE THE FORMAT AT ALL. Ragnarok has a very specific format that requires the following settings to be EXACT or it won't read:
Without those settings it won't read. So don't change anything if you can avoid it.
Once all changes are made we can repack it into the Actor Editor. So get actOR ready loaded with the sprite you are editing.
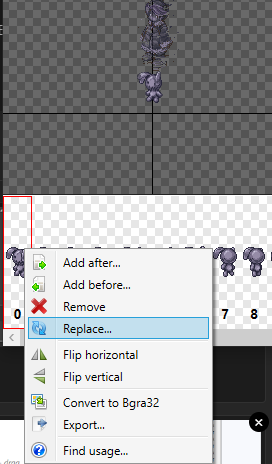
Inside the editor we can now go back to the bottom and select the frame we just edited. We want to, this time, select "Replace" and this will take the image we have and put it in the exact same position as we left it in. This is important so we don't mess around with the placement of the image.
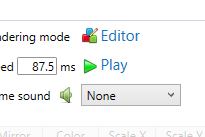
Once we've processed this for all the frames we can take a look at our final product with the Play button.
It looks good! (For the example)
Now this sprite was a bad colour choice for editing simply because the RED we changed was actually a transparency colour for Ragnarok Online. There are, if I recall correctly, 3 colours of transparency in Ragnarok. Red, Blue and Purple.
This is the primary one (Purple):
Save your Actor file and we are ready to open the GRFE again to import the newly changed sprite.
Simply drag and drop the files and hit save! That's it!
You've made your first edit and packed it back into the GRF for use in-game.
We've got a headgear all spited out and tucked into an actor file in the GRF. Ready. To. Go. Now what?
Well.... It's time to add... The Code. That's right. I said it. Artists have to code just as much as coders have to art. To start, we're going to extract a few default files from the data.grf we downloaded earlier. The files we want are:
The accessoryid.lub is where we will add the "ACCESSORY_IDs" that are in the item_db_equip.yml file of our server. We will go through this next.
Inside your rAthena trunk you will find the file item_db_equip.yml which we are going to open and examine.
Notice inside we have a structure. This is what the server reads in order to tell the client what item to display and when. Follow this structure exactly as it is and do not change any of the syntax or else nothing will work.
Our layout is telling the server take a;; ACCESSORY_IDs based on their ACCESSORY_NAME followed by their ID.
This is telling the server that is the end of the file and it has reached thelast headgear.
We're going to edit from here by adding a comma to this ending, extending it to our new headgears. We also want to take into consideration the updates of the future. This game is always being added on to and it's important to not conflict our numbers with possible future updates. We're going to give our future updates a good distance in headgears, with the highest possible limit we think we'll reach for ourselves. In this example we will give future devs up to Accessory ID 9999 and we will claim anything above 10,000.
Save those and repack them into the Custom.grf (or data.grf if you're using that).
That's it for the GRF section. Onward to the Client files now. Open up /CustomRO/System/itemInfo.lua and we are going to edit near the bottom. Last item in the list. A new item.
The item info we are entering in must surpass the tieminfo that is going to exist as well. Let's jump right to 60,000 in this example:
So we've got Server files save and Client files asved. Lastly we need to do the Sprites for the client. The art portion. Let's go ahead and open up GRF Editor and import those files we created. The file structure for each file is below. The sprite and texture files we want are: (Example name is Majora_Mask2) Some characters are not displayed correctly in the text.
data majorabw\sprite\_’AIU\Majora_Mask2.act
data majorabw\sprite\_’AIU\Majora_Mask2.spr
data majorabw\sprite\_€¬¬¯‡,r\3ý\3ý_Majora_Mask2.act
data majorabw\sprite\_€¬¬¯‡,r\3ý\3ý_Majora_Mask2.spr
data majorabw\sprite\_€¬¬¯‡,r\¨c\¨c_Majora_Mask2.act
data majorabw\sprite\_€¬¬¯‡,r\¨c\¨c_Majora_Mask2.spr
data majorabw\texture\A_A£AII’„AI«§\collection\Majora_Mask2.bmp
data majorabw\texture\A_A£AII’„AI«§\item\Majora_Mask2.bmp
Save the GRF and it's now ready to use your new item in-game!
Section 2 - Additional Resources
actOR: Actor Editor (Bulk Export) a2.1.0
Editing in Actor is very easy. Scripting it is just as easy! In this step we are going to discuss and go through various methods of exporting and importing images using actOR.
To start we want to create an export script. We'll call it "export.cs" to start. Open a Notepad or Code editor and paste the following inside:
using System;
using System.Collections.Generic;
using System.Globalization;
using System.IO;
using System.Linq;
using System.Windows;
using System.Windows.Controls;
using System.Windows.Documents;
using System.Windows.Media;
using System.Windows.Media.Imaging;
using ErrorManager;
using GRF.FileFormats.ActFormat;
using GRF.FileFormats.SprFormat;
using GRF.FileFormats.PalFormat;
using GRF.Image;
using GRF.Image.Decoders;
using GRF.Graphics;
using GRF.Core;
using GRF.IO;
using GRF.System;
using GrfToWpfBridge;
using TokeiLibrary;
using TokeiLibrary.WPF;
using Utilities;
using Utilities.Extension;
using Action = GRF.FileFormats.ActFormat.Action;
using Frame = GRF.FileFormats.ActFormat.Frame;
using Point = System.Windows.Point;
namespace Scripts {
public class Script : IActScript {
public const int Magnify = 2;
public object DisplayName {
get { return "Export"; }
}
public string Group {
get { return "Custom"; }
}
public string InputGesture {
get { return "{Scrips.Export}" ; }
}
public string Image {
get { return "scale.png"; }
}
public void Execute(Act act, int selectedActionIndex, int selectedFrameIndex, int[] selectedLayerIndexes) {
// Script for extraction
string basepath = @"C:\GRFsprites";
var name = act.LoadedPath;
var outputFolder = GrfPath.Combine(basepath, Path.GetFileNameWithoutExtension(name));
if (Directory.Exists(outputFolder)) {
var files = Directory.GetFiles(outputFolder);
if (files.Length > 0) {
if (!ErrorHandler.YesNoRequest("Do you want to replace the existing extracted files?", "Possible overwrite"))
return;
}
}
for (int i = 0; i < act.Sprite.Images.Count; i++) {
var image = act.Sprite.Images[i].Copy();
var ext = ".bmp";
if (image.GrfImageType == GrfImageType.Bgra32) {
ext = ".png";
}
var output = GrfPath.Combine(basepath, Path.GetFileNameWithoutExtension(name), String.Format("{0:0000}", i) + ext);
GrfPath.CreateDirectoryFromFile(output);
image.Save(output);
}
Utilities.Services.OpeningService.OpenFolder(GrfPath.Combine(basepath, Path.GetFileNameWithoutExtension(name)));
}
public bool CanExecute(Act act, int selectedActionIndex, int selectedFrameIndex, int[] selectedLayerIndexes) {
return true;
}
}
}
Save that as "exprot.cs" and make sure the file type is changed to be a .CS file.
Inside actOR select "Scripts" in the menu at the top and navigate to "Open scritps folder".
Simply paste the export.cs script inside this folder and actOR will do the rest by linking it with a DLL file. Close and reload actOR for changes to take effect.
If all worked well you should see a new menu called "Custom" and it will have the export script inside it.
Select Export with your active sprite file open and it will extract all the images included in it to your C:/ drive with the folder named after the sprite.
You can now extract all images with one click! This is perfect and will save you so much time
Rgnarok BMP: Converting to BMP (Ragnarok Compatible BMP) a2.2.0
Oh noe! I made all my files in .png and not .bmp! How can I fix this? I have over 9,000 files!
Ever done that? I have. It really sucks. Kind of.
There's a way through it without starting all over from scratch or going deep into your files and resaving them all as BMP one by one...
In this section we'll go through how to mass-convert all your files to be copatible with Ragnarok Online's file format. Start by downloading ImageMagick from their website and installing it. You'll maybe want (maybe need) "Legacy Tools" which can be checked during the installation process.
After installation you will likely have no visuals on how to operate this application. There is no drag-and-drop process for bulk operations. That would be quite complicated to code as well. BUt that's oaky. We have all the tools necessary built into both Linux and Windows operating systems already. The Terminal! (CMD)
Open up your terminal.
With ImageMagick they have now built in commands that we can execute from the terminal. This is going to prove very useful for the fastest and most effective conversion. This is partly because it skips all UI lag and extra garbage in an application. It processes this directly without any middle-man.
The file format we mentioned earlier is actually going to be very useful in filling out our command. To go over that again we have the following format to deal with: A Bitmap image with no alpha channel processed under the palette layer with 255 colours at an 8 depth with no compression on a BMP3 level.
Broken down we can take their aspects from that description and put it into a line of code. Simple right? I knew you got it!
Change the directory to match your directory and enter in the following command to conver your first image: (Highlighted areas are what you will change)
- magick mogrify is the command to tell our computer what program we need to use. Every command must start with this.
- format bmp sets the intial format we want to change the file type to. We must declare this first.
- alpha off will disable the alpha channel. Very necessary to avoid bad transparency issues. (Ragnarok Transparency runs on colours)
- type palette will change the layer we are operating on to the palette layer. This is our primary layer to work in when editing sprites and textures.
- colors 255 is going to set that maximum colours allowed for the final format. If this is 256 it will not work.
- depth 8 is going to set the bit depth to 8-bit which is the only size readable by Ragnarok for most things. This is because in 2002 code was much more limited in what it could possibly do.
- compress none will remove any compression. Ragnarok can't read compressed files.
- BMP3:"C:/Location" is going to be the final piece of the code that will set the file type one final time to be a BMP3 and save it in the location we designate.
Now that we have a better understanding we can learn from this while we continue to make all the images pixel perfect and compatible in the GRF.
In this part of the guide we will go through how to edit multiple files with a single modification. This is called Batch Image Manipulation. There's even a great plugin we're going to use that is built for GIMP. The plugin is called Batch image Manipulation Plugin or BIMP for short. So in this section we will cover how to download, install, and user BIMP.
Installing BIMP
Here's where things get slightly trickier. Follow the exact paths moving forward and you'll be bulk editing in no time.
Run BIMP installer. A window similar to this will appear:
Once you're at the window to select installation destination you'll need to navigate to and select the directory exactly as is below:
%AppData%\Roaming\GIMP
If it continues without requesting to select a destination then you're good to go!
After installation is done you can launch GIMP and navigate to the top menu:
File > Batch Image Manipulation Plugin
This will be the primary window you need to operate in.
As you can see here there are many options you can play around with, including the very popular "Watermark" feature which will add a watermark to all your images for you. This will save so much time later on.
That's just about it for this part of the guide. Happy editing!
Keep posted for more updates to this section. Want to see something specific? Leave a comment and I'll do what I can!


Question
Rivers
Hello! If you're here it likely means you want to learn, or learn more about, your Ragnarok Art Tools. Feel free to browse the entire post for bits of information you want. This guide will show the basics of how to run most applications and where to officially download them from. To avoid virus and scams please follow only the links posted in thie guide & by the official rAthena crew.
Requirements :
Optional Requirements :
Now that we got a few things to get us started let's get editing...
Section 1 - Installation
STEP ONE : Understanding Software (Learn the tools)
i1.1.0
Before we get starter we are going to open up and make sure we have an understanding of our tools we want to use. in this example we will be using GIMP 2.10 as our editor of choice. It's free & open-sourced.
Once we've download Gimp, & have run it for the first time, we are going to now see a screen that looks similar to the one below...
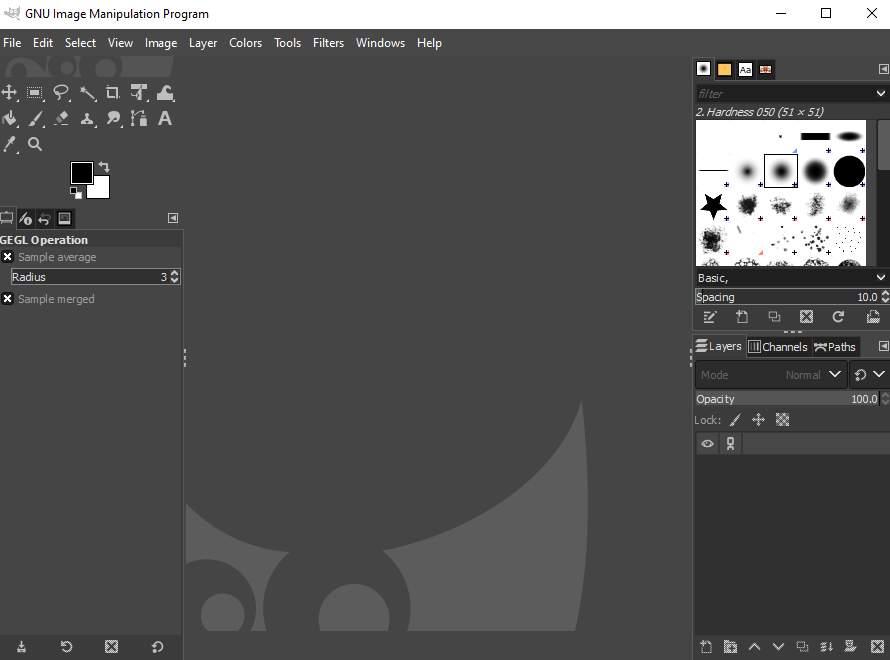
This layout is quite similar to most GNU programs. The tools are on the Left and the stats/properties are on the right. Let's start with the tools.
Starting at the top left and moving right we have the default Move Tools, Shaped Select Tool, Free Select Tool & the Magic Select Tools. These are usually going to be the primary tools you will want to use for editing.
The Move tools allow you to move and allign the images, frames, or selections. This is very simple way to crop out areas of an image you don't want or need.
The Shaped & Free select tools will be used to select specific areas we want to manipulate. This is great for choosing set spots that we might need to change the colour of, or even just remove completely from the frame.
And finally, for this example, we have our Magic Select tools. These are especially important for colour manipulation & photo editing as it will allow us to select an exact pixel-point selection around, or of, an object. You will likely use these tools frequently when editing for Ragnarok Online.
That's the basics of GIMP, for now. Moving on, we have the basics of GRF editing.
GRF Editor is a gret tool used to extract & read files from Gravity made files. We will use GRFE to extract and import our images we want. In the image below we have opened a dara.grf and are ready to view the files.
GRFE is going to be used in this example primarily for extracting images & adding new ones in. On the top we have our Menu. For this first part we are going to navigate to Tools and select Settings.
In here we will be presented with the settings menu. We are not going to touch on all the options here, instead, we will just do the translation so we can see where we are adding/removing files to and from. Go ahead and select the "Tree Behaviour" tab. You'll see some radio boxes here. We want to Check the last one. It should say "Translate paths in the tree". This will turn make most of the titles with ASCII characters into plain English. Close and relaunch the application for this to take effect.
Our GRFE will now read like this so we cans ee where we want to make changes easier.
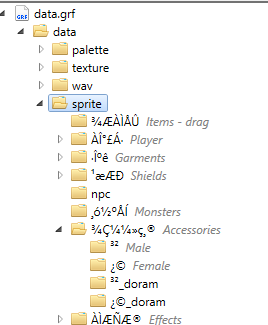
Now you can find everything much easier. For this example moving forward, we will be editing the Hylozoist monster. to extract just that mosnter, hold SHIFT and click with your mouse the files you want to extract. Right click and hit "Extract".
It should automatically pop up with the extracted files. It will be where ever the GRF is and extracted into a /data folder.
Once we've made changes to the file we can simply drag these files back into the GRF exactly how it is. So take the entire /data folder and drag it into the witespace of GRFE.
Save (CTRL+S) and wait for it to pack everything together. You've now made your first change to the GRF.
......
But did we really? We didn't actually make any changes to the file, just yet.
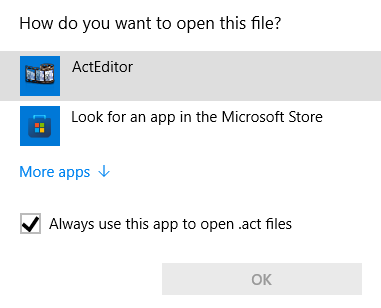
We'll need Act Editor (actOR) to unpack the sprites out of the .act/.spr files now. To make things easier first right click the .ACT file and click "Open with...". We will associate the Act Editor with the .act files in Windows so it's quicker to open later.
Once open we will have a window similar to this:
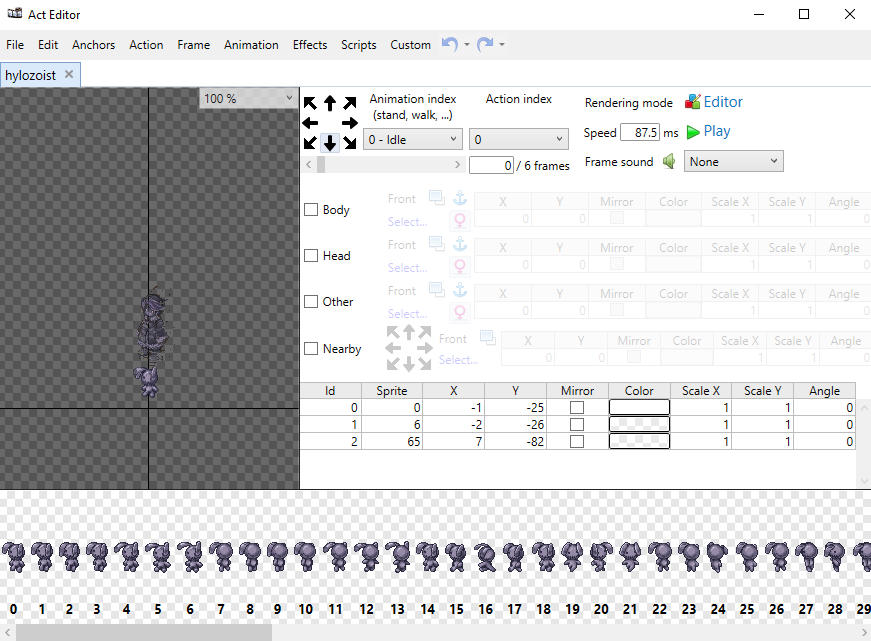
At the top we have our Menu where we can do just about everything the application allows.
The very bottom we have the frames. These are all the different images used in the actor. This will show all the angles and directions it can face.
The center shows the actor at it's current (or final) state after the changes and on the right of that we have the stats window for each sprite. This is where we can manipulate the directions, angles, animation playing, state of the animation, and much more.
Sounds compliacted but it's really simple. Just get a feel for everything and you will learn to understand how everything works over time.
At the bottom, where we have our sprites, we can right click any one of them and another menu will appear. This is how we will extract an individual frame for editing using the "Export" button.
Select where you want to extract it and we can start editing the image. I've went ahead and extracted all the images for this example. We will make colour changes to start.
With the images now extracted we can open them up using our photo editing software, GIMP.
We're in and ready to start editing!
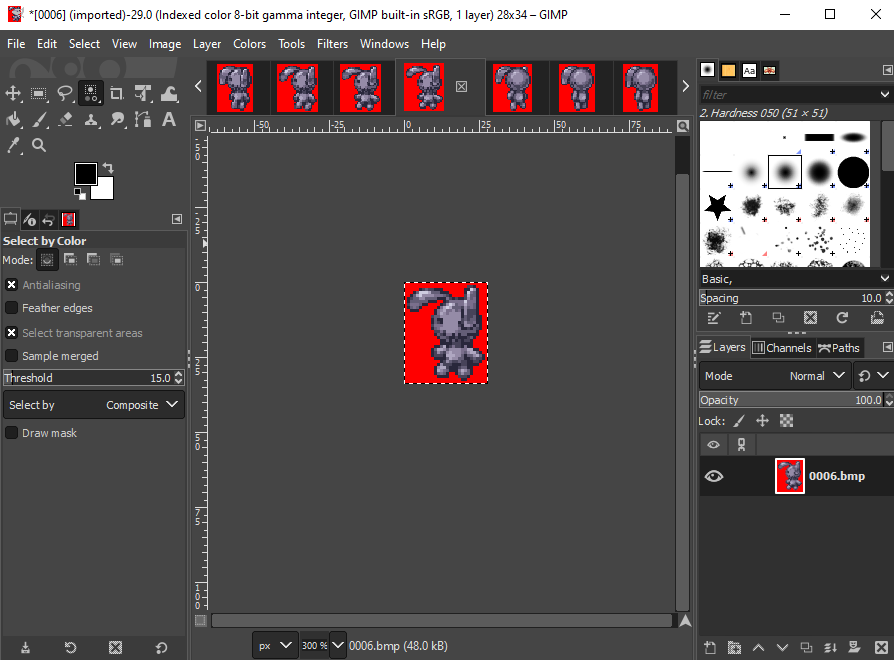
In this example I'm going to use the Colour Select tool and change the threhold to be higher, or lower, depending how much of the colours I want to take over. At threshold of 15 it select a small portio of the colours I want. I will increase this to 30 and see how I like it next.
15 Threshold
30 Threshold
It looks like 30 is strong enough for what I want to achieve. With this selection we can now change only those bits of the image. Go ahead and select "Colors" from the menu.
Many options, yes. For now we just want to change the "Temperature" of the selection to be different.
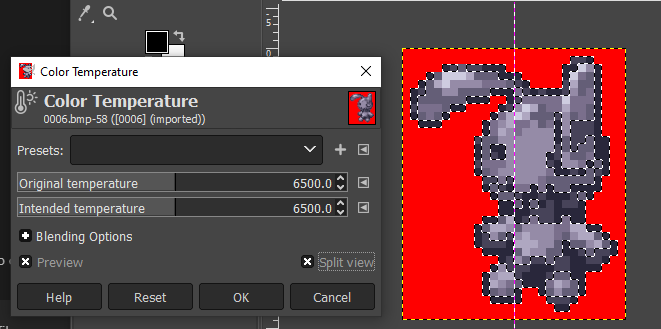
Select "Split view" and we can see the changes before we apply them to save time.
Making the image hot worked for what I need to do. Now I can hit apply and save this image,
just make this change to all the frames you want and save them using the "Export" option (CTRL+SHIFT+E by default). Replace the file and DO NOT CHANGE THE FORMAT AT ALL. Ragnarok has a very specific format that requires the following settings to be EXACT or it won't read:
-format bmp
-alpha off
-type palette
-colors 255
-depth 8
-compress none BMP3:
Without those settings it won't read. So don't change anything if you can avoid it.
Once all changes are made we can repack it into the Actor Editor. So get actOR ready loaded with the sprite you are editing.
Inside the editor we can now go back to the bottom and select the frame we just edited. We want to, this time, select "Replace" and this will take the image we have and put it in the exact same position as we left it in. This is important so we don't mess around with the placement of the image.
Once we've processed this for all the frames we can take a look at our final product with the Play button.
It looks good! (For the example)
Now this sprite was a bad colour choice for editing simply because the RED we changed was actually a transparency colour for Ragnarok Online. There are, if I recall correctly, 3 colours of transparency in Ragnarok. Red, Blue and Purple.

This is the primary one (Purple):
Save your Actor file and we are ready to open the GRFE again to import the newly changed sprite.
Simply drag and drop the files and hit save! That's it!
You've made your first edit and packed it back into the GRF for use in-game.
STEP TWO : Headgears & Implementation (Custom Headgears)
a1.2.0
We've got a headgear all spited out and tucked into an actor file in the GRF. Ready. To. Go. Now what?
Well.... It's time to add... The Code. That's right. I said it. Artists have to code just as much as coders have to art. To start, we're going to extract a few default files from the data.grf we downloaded earlier. The files we want are:
data\lua files\datainfo\accessoryid.lub
data\lua files\datainfo\accname.lub
data\luafiles514\lua files\datainfo\accessoryid.lub
data\luafiles514\lua files\datainfo\accname.lub
data\luafiles514\lua files\datainfo\accname_eng.lub
The accessoryid.lub is where we will add the "ACCESSORY_IDs" that are in the item_db_equip.yml file of our server. We will go through this next.
Inside your rAthena trunk you will find the file item_db_equip.yml which we are going to open and examine.
Notice inside we have a structure. This is what the server reads in order to tell the client what item to display and when. Follow this structure exactly as it is and do not change any of the syntax or else nothing will work.
Our layout is telling the server take a;; ACCESSORY_IDs based on their ACCESSORY_NAME followed by their ID.
ACCESSORY_IDs = {
	ACCESSORY_GOGGLES = 1,
	ACCESSORY_CATTYHAIRBAND = 2,
	ACCESSORY_GLASS = 3,
...
Notice each item is separated by a comma then proceeds to the next line. However, at the end, there is a break in the comma streak.
...
	ACCESSORY_Chocolat_Rabbit_Hair = 2369,
	ACCESSORY_Cookie_PinkRibbon = 2370
}
This is telling the server that is the end of the file and it has reached thelast headgear.
We're going to edit from here by adding a comma to this ending, extending it to our new headgears. We also want to take into consideration the updates of the future. This game is always being added on to and it's important to not conflict our numbers with possible future updates. We're going to give our future updates a good distance in headgears, with the highest possible limit we think we'll reach for ourselves. In this example we will give future devs up to Accessory ID 9999 and we will claim anything above 10,000.
File structure must remain the same:
  - Id: 30000
    AegisName: Majora_Mask2
    Name: Majora's Mask
    Type: Armor
    Locations:
      Costume_Head_Mid: true
    ArmorLevel: 1
    EquipLevelMin: 1
    View: 10000
Inside /data/lua files/datainfo/accessoryid.lub:
...
	ACCESSORY_Chocolat_Rabbit_Hair = 2369,
	ACCESSORY_Cookie_PinkRibbon = 2370,
	ACCESSORY_Majora_Mask2 = 10000
}
Inside /data/lua files/datainfo/accname.lub and/or accname_eng.lub:
...
	[ACCESSORY_IDs.ACCESSORY_Chocolat_Rabbit_Hair] = "_Chocolat_Rabbit_Hair",
	[ACCESSORY_IDs.ACCESSORY_Cookie_PinkRibbon] = "_Cookie_PinkRibbon",
	[ACCESSORY_IDs.ACCESSORY_Majora_Mask2] = "_Majora_Mask2"
}
Save those and repack them into the Custom.grf (or data.grf if you're using that).
That's it for the GRF section. Onward to the Client files now. Open up /CustomRO/System/itemInfo.lua and we are going to edit near the bottom. Last item in the list. A new item.
The item info we are entering in must surpass the tieminfo that is going to exist as well. Let's jump right to 60,000 in this example:
...
		ClassNum = 0,
		costume = false
	},
	[60000] = {
		unidentifiedDisplayName = "Majora's Mask",
		unidentifiedResourceName = "Majora_Mask2",
		unidentifiedDescriptionName = { "Can be identified by using a ^990099Magnifier^000000." },
		identifiedDisplayName = "Majora's Mask",
		identifiedResourceName = "Majora_Mask2",
		identifiedDescriptionName = {
			"Description",
			"_______________________",
			"DEX +1",
		},
		slotCount = 4,
		ClassNum = 0,
		costume = true
	}
Save and we're done with the itemInfo.lua file.
So we've got Server files save and Client files asved. Lastly we need to do the Sprites for the client. The art portion. Let's go ahead and open up GRF Editor and import those files we created. The file structure for each file is below. The sprite and texture files we want are: (Example name is Majora_Mask2)
Some characters are not displayed correctly in the text.
data majorabw\sprite\_’AIU\Majora_Mask2.act
data majorabw\sprite\_’AIU\Majora_Mask2.spr
data majorabw\sprite\_€¬¬¯‡,r\3ý\3ý_Majora_Mask2.act
data majorabw\sprite\_€¬¬¯‡,r\3ý\3ý_Majora_Mask2.spr
data majorabw\sprite\_€¬¬¯‡,r\¨c\¨c_Majora_Mask2.act
data majorabw\sprite\_€¬¬¯‡,r\¨c\¨c_Majora_Mask2.spr
data majorabw\texture\A_A£AII’„AI«§\collection\Majora_Mask2.bmp
data majorabw\texture\A_A£AII’„AI«§\item\Majora_Mask2.bmp
Save the GRF and it's now ready to use your new item in-game!
Section 2 - Additional Resources
actOR : Actor Editor (Bulk Export)
a2.1.0
Editing in Actor is very easy. Scripting it is just as easy! In this step we are going to discuss and go through various methods of exporting and importing images using actOR.
To start we want to create an export script. We'll call it "export.cs" to start. Open a Notepad or Code editor and paste the following inside:
using System;
using System.Collections.Generic;
using System.Globalization;
using System.IO;
using System.Linq;
using System.Windows;
using System.Windows.Controls;
using System.Windows.Documents;
using System.Windows.Media;
using System.Windows.Media.Imaging;
using ErrorManager;
using GRF.FileFormats.ActFormat;
using GRF.FileFormats.SprFormat;
using GRF.FileFormats.PalFormat;
using GRF.Image;
using GRF.Image.Decoders;
using GRF.Graphics;
using GRF.Core;
using GRF.IO;
using GRF.System;
using GrfToWpfBridge;
using TokeiLibrary;
using TokeiLibrary.WPF;
using Utilities;
using Utilities.Extension;
using Action = GRF.FileFormats.ActFormat.Action;
using Frame = GRF.FileFormats.ActFormat.Frame;
using Point = System.Windows.Point;

namespace Scripts {
    public class Script : IActScript {
		public const int Magnify = 2;

		public object DisplayName {
			get { return "Export"; }
		}

		public string Group {
			get { return "Custom"; }
		}

		public string InputGesture {
			get { return "{Scrips.Export}" ; }
		}

		public string Image {
			get { return "scale.png"; }
		}

		public void Execute(Act act, int selectedActionIndex, int selectedFrameIndex, int[] selectedLayerIndexes) {
			// Script for extraction
			string basepath = @"C:\GRFsprites";
			var name = act.LoadedPath;
			var outputFolder = GrfPath.Combine(basepath, Path.GetFileNameWithoutExtension(name));

			if (Directory.Exists(outputFolder)) {
				var files = Directory.GetFiles(outputFolder);

				if (files.Length > 0) {
					if (!ErrorHandler.YesNoRequest("Do you want to replace the existing extracted files?", "Possible overwrite"))
						return;
				}
			}

			for (int i = 0; i < act.Sprite.Images.Count; i++) {
				var image = act.Sprite.Images[i].Copy();
				var ext = ".bmp";

				if (image.GrfImageType == GrfImageType.Bgra32) {
					ext = ".png";
				}

				var output = GrfPath.Combine(basepath, Path.GetFileNameWithoutExtension(name), String.Format("{0:0000}", i) + ext);
				GrfPath.CreateDirectoryFromFile(output);
				image.Save(output);
			}

			Utilities.Services.OpeningService.OpenFolder(GrfPath.Combine(basepath, Path.GetFileNameWithoutExtension(name)));
		}

		public bool CanExecute(Act act, int selectedActionIndex, int selectedFrameIndex, int[] selectedLayerIndexes) {
			return true;
		}
	}
}
Save that as "exprot.cs" and make sure the file type is changed to be a .CS file.
Inside actOR select "Scripts" in the menu at the top and navigate to "Open scritps folder".
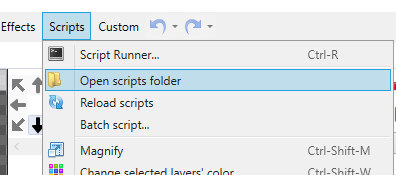
Simply paste the export.cs script inside this folder and actOR will do the rest by linking it with a DLL file. Close and reload actOR for changes to take effect.
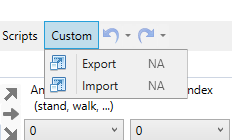
If all worked well you should see a new menu called "Custom" and it will have the export script inside it.
Select Export with your active sprite file open and it will extract all the images included in it to your C:/ drive with the folder named after the sprite.
You can now extract all images with one click! This is perfect and will save you so much time
Rgnarok BMP : Converting to BMP (Ragnarok Compatible BMP)
a2.2.0
Oh noe! I made all my files in .png and not .bmp! How can I fix this? I have over 9,000 files!
Ever done that? I have. It really sucks. Kind of.
There's a way through it without starting all over from scratch or going deep into your files and resaving them all as BMP one by one...
In this section we'll go through how to mass-convert all your files to be copatible with Ragnarok Online's file format. Start by downloading ImageMagick from their website and installing it. You'll maybe want (maybe need) "Legacy Tools" which can be checked during the installation process.
After installation you will likely have no visuals on how to operate this application. There is no drag-and-drop process for bulk operations. That would be quite complicated to code as well. BUt that's oaky. We have all the tools necessary built into both Linux and Windows operating systems already. The Terminal! (CMD)
Open up your terminal.
With ImageMagick they have now built in commands that we can execute from the terminal. This is going to prove very useful for the fastest and most effective conversion. This is partly because it skips all UI lag and extra garbage in an application. It processes this directly without any middle-man.
The file format we mentioned earlier is actually going to be very useful in filling out our command. To go over that again we have the following format to deal with:
A Bitmap image with no alpha channel processed under the palette layer with 255 colours at an 8 depth with no compression on a BMP3 level.
Broken down we can take their aspects from that description and put it into a line of code. Simple right? I knew you got it!
Change the directory to match your directory and enter in the following command to conver your first image: (Highlighted areas are what you will change)
Let's break that down, again. In short.
- magick mogrify is the command to tell our computer what program we need to use. Every command must start with this.
- format bmp sets the intial format we want to change the file type to. We must declare this first.
- alpha off will disable the alpha channel. Very necessary to avoid bad transparency issues. (Ragnarok Transparency runs on colours)
- type palette will change the layer we are operating on to the palette layer. This is our primary layer to work in when editing sprites and textures.
- colors 255 is going to set that maximum colours allowed for the final format. If this is 256 it will not work.
- depth 8 is going to set the bit depth to 8-bit which is the only size readable by Ragnarok for most things. This is because in 2002 code was much more limited in what it could possibly do.
- compress none will remove any compression. Ragnarok can't read compressed files.
- BMP3:"C:/Location" is going to be the final piece of the code that will set the file type one final time to be a BMP3 and save it in the location we designate.
Now that we have a better understanding we can learn from this while we continue to make all the images pixel perfect and compatible in the GRF.
Bulk Editing Images : Batch Image Manipulation (Bulk Edit)
a2.3.0
In this part of the guide we will go through how to edit multiple files with a single modification. This is called Batch Image Manipulation. There's even a great plugin we're going to use that is built for GIMP. The plugin is called Batch image Manipulation Plugin or BIMP for short. So in this section we will cover how to download, install, and user BIMP.
If you missed it, here's the download link for BIMP:
https://alessandrofrancesconi.it/projects/bimp/
Installing BIMP

Here's where things get slightly trickier. Follow the exact paths moving forward and you'll be bulk editing in no time.
Run BIMP installer. A window similar to this will appear:
Once you're at the window to select installation destination you'll need to navigate to and select the directory exactly as is below:
%AppData%\Roaming\GIMPIf it continues without requesting to select a destination then you're good to go!
After installation is done you can launch GIMP and navigate to the top menu:
File > Batch Image Manipulation PluginThis will be the primary window you need to operate in.
As you can see here there are many options you can play around with, including the very popular "Watermark" feature which will add a watermark to all your images for you.
This will save so much time later on.
That's just about it for this part of the guide. Happy editing!
Keep posted for more updates to this section.
Want to see something specific? Leave a comment and I'll do what I can!
Edited by RiversNew step
Link to comment
Share on other sites
4 answers to this question
Recommended Posts
Join the conversation
You can post now and register later. If you have an account, sign in now to post with your account.