Leaderboard


Popular Content
Showing content with the highest reputation since 04/17/24 in all areas
-
Hmm, there is an approximation that can be done which will probably be good enough. The point 2 is misleading; what is seen in the UI is a blend of the background + layers. You can't separate them as it's already a final image, if that makes sense. But you could in theory extract a transparency value by using a black and white background version of the composite image. Then do some math magic and approximate the bgra values. I've added the option in 1.1.0, though it's a bit awkward to use (found in File > Export as PNG...).3 points
-
Froggo Rö Folder This is a simple RO folder that contains everything you need to run a 2022-04-06 client, the latest publicly available. I have cleaned and compressed the data.grf file to reduce its size from 3.87GB to 2.15GB. official_data.grf took the same treatment and the file size went down to 426MB. Additionally, I have added a mini-map to all those maps that were lacking one, approximately 275 mini-maps were added, I only ignored some indoor (_in) and guild castles maps. Before BGM, the Rö folder has a total size of 2.62GB, after BGM it reaches 2.96GB Screenshots Requirements Server Up & Running with PACKETVER=20220406 Visual C++ Redistributables DirectX Runtime Features Includes latest RoEnglishRE - 16/mar/2024 Custom Lua Support jRO Enchantment Display Includes rsu-kro-rag-lite (kRO updater) - v4.2.2.1316 Includes opensetup - v3.1.0.627 Includes iRO's Setup.exe, thanks to relzz! Includes AzzyAI 1.55 Includes Packet Viewer Download click here to download a .zip file of this ro-folder Extra Warp Profile for 2022-04-06 used for FroggoClient.exe (mirror) 2022-04-06 Vanilla Ragexe Client Login Screen Creator Official Ragnarok Complete Installer (08/Jan/2024)(mirror) Froggö Ro Folder Gitlab's Repo FAQ Why am I getting CHARACTER_INFO size error when trying to log in? Possible reasons: You are using outdated rAthena which doesn't work with 2022-04-06 client. You haven't set correct PACKETVER or done it with mistakes (skill issue ). You haven't recompiled rAthena. You haven't restarted server after recompilation. Why am I getting errors about MSVCP140.dll, VCRUNTIME140.dll when executing FroggoClient.exe? You haven't installed Visual C++ Redist, check requirements section, if problem persists, try installing this too Visual C++ Redist for VS 2012u4 What is official_data.grf ? official_data.grf is from the ROResourceCollection project, which brings many items, mobs and npc files from other RO Regions and merges it into one convenient grf. Why does the Setup.exe opens instead of the FroggoClient.exe? In your Windows registry there is no data about your selected graphic card, to fix it, just set up your settings in Setup.exe and click on OK, be aware to don't select DirectX9, stay on DirectX7 What was removed from the data.grf? Several unnecessary files were removed from the data.grf . These included residual files such as thumbs.db and stray BMP Screenshots. However, the majority of the cleanup was performed in the mob and npc sprite folders. In these folders, some .spr files contained sprites (images) that were not utilized in their corresponding .act files. For example, the monster katrinn's .spr file contained approximately 140 images, but only 6 of them were actually used. In total, out of nearly 90,000 collective images, around 9,400 were removed alv.2 points
-
Fixed in 1.8.7.1. There was an issue with UV texture coordinates being all set to 0 on new tiles.2 points
-
After encountering issues with the current data.grf, I decided to start from scratch and overhaul the entire process. The result? A significantly reduced file size for the data.grf Previously, the data.grf weighed in at around 2.45GB, but now it’s down to just 2.15GB. In addition to the file size reduction, I’ve added 275~ mini maps to maps that were lacking them. The entire folder, including BGM, now stands at 2.96GB. What was done to the poor data.grf? Besides cleaning up unused sprites from npc and mob folders, now I converted all .BMP files to be 8bit, this doesn't affect quality on a game like RO, instead, it actually makes it easier for the client to handle those assets. .JPG and .PNG were treated as well but with some differences. Feel free to report any issue here2 points
-
Version 1.0.0
222 downloads
Hello everyone! Happy New Year! Here are my handmade gifts, custom maps for you: 2024: navayo (+nav_beach, nav_in01, nav_in02) https://rathena.org/board/topic/116200-showcase-navayo/ anrydrago https://rathena.org/board/topic/124265-showcase-miniquest-anry-dragon/ 2023: x_base https://rathena.org/board/topic/140494-showcase-x-base/ crimea https://rathena.org/board/topic/132870-showcase-crimea/ barcode https://rathena.org/board/topic/116040-showcase-barcode/ ice2xlake https://rathena.org/board/topic/124194-showcase-ice-twice-lake/ lv_beach https://rathena.org/board/topic/116553-showcase-love-beach/ yavin1b https://rathena.org/board/topic/116300-showcase-yavin1b/ mystvil https://rathena.org/board/topic/117187-showcase-mystical-vil/ crystal https://rathena.org/board/topic/116079-showcase-crystal/ 1@scp087 https://rathena.org/board/topic/116223-showcase-scp-087/ mag_dun03_ https://rathena.org/board/topic/127185-showcase-magma-dungeon-lvl-3/ b_book(1,2,3,4) https://rathena.org/board/topic/116491-showcase-four-battle-books/ The size of attachments (30mb) on rAthena does not allow to add map resources. You can find the full materials here: https://mega.nz/folder/8atXmYgC#yJEL_ssWj8D8XwmpgInYiQ ~ Keep calm and use it on your server ~ ~ Don't claim my work as yours please and etc ~ ~ Any requests/reports - https://rathena.org/board/profile/47250-w0wzukubg/ Thanks, Zuku ~Free2 points -
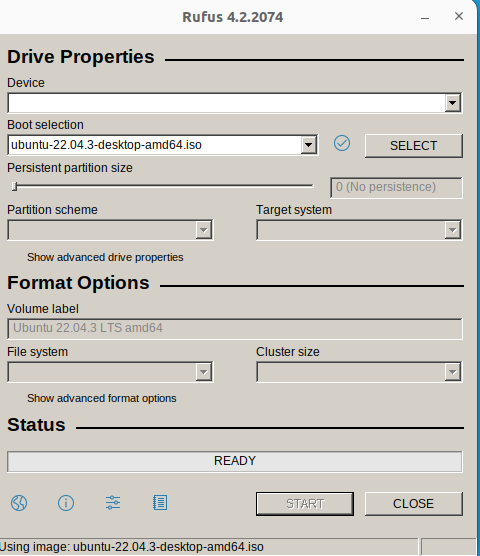
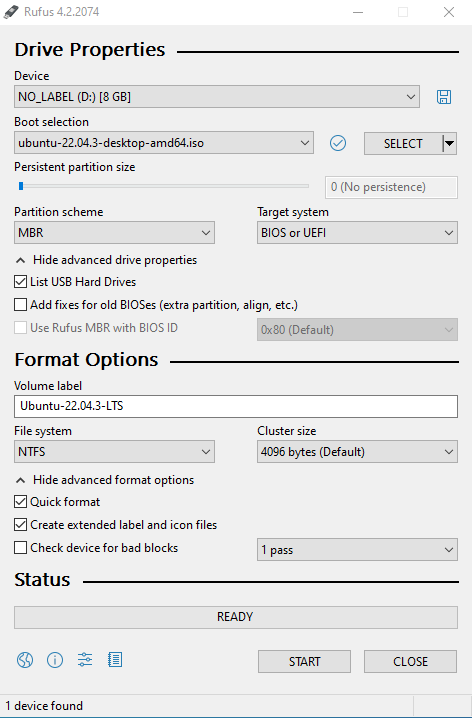
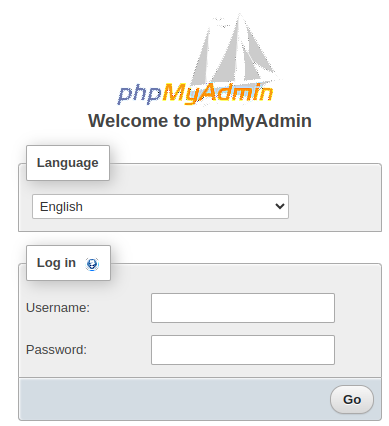
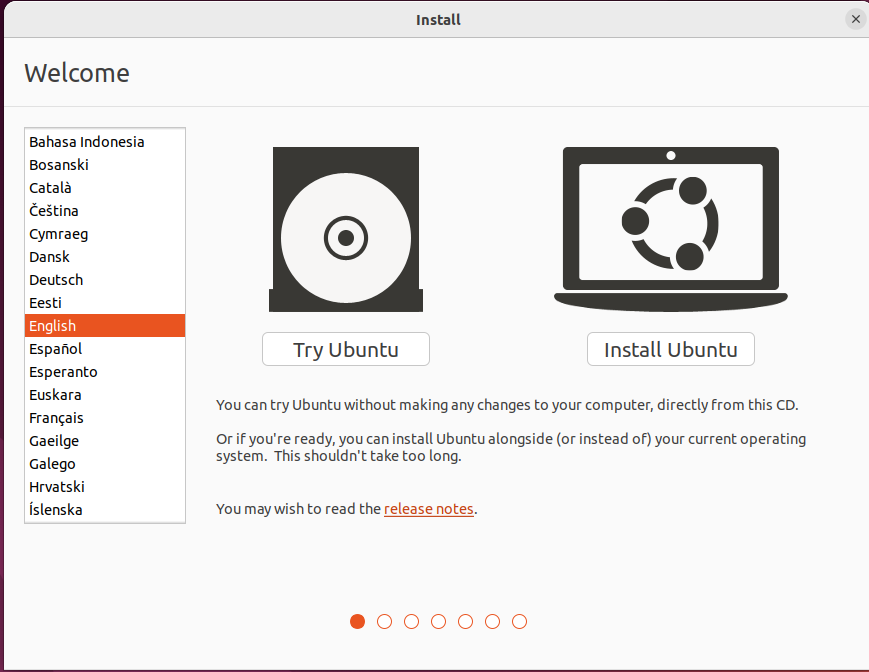
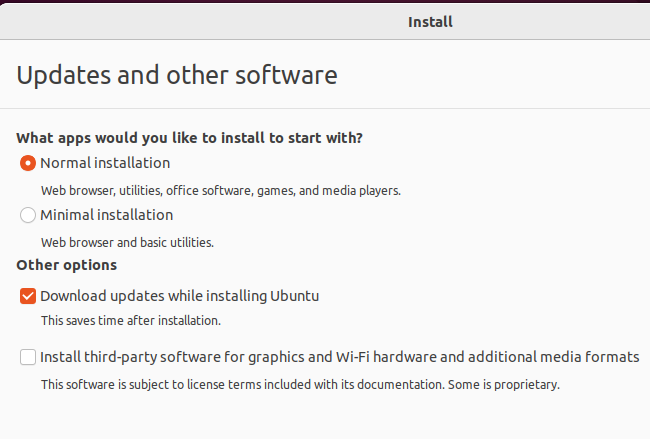
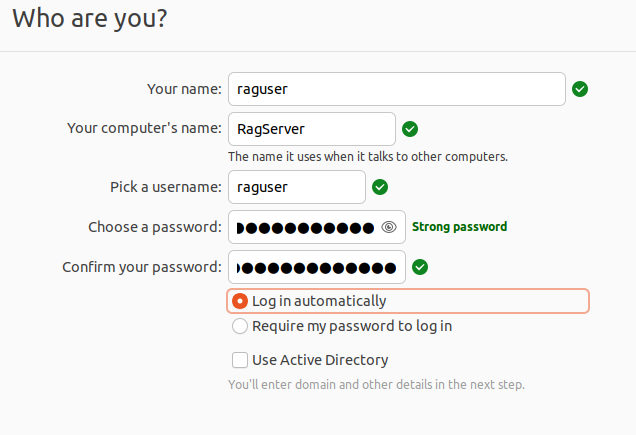
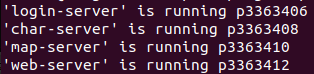
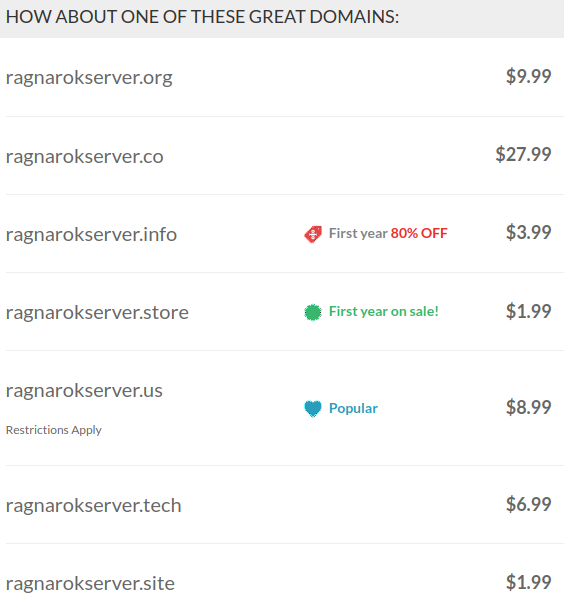
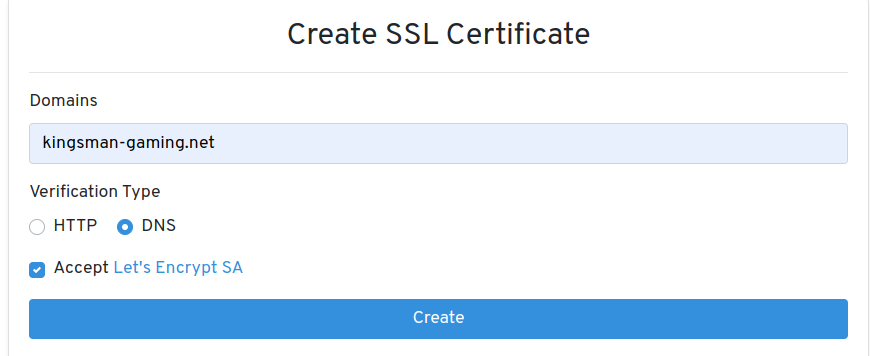
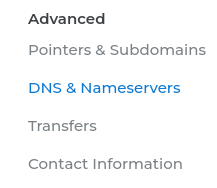
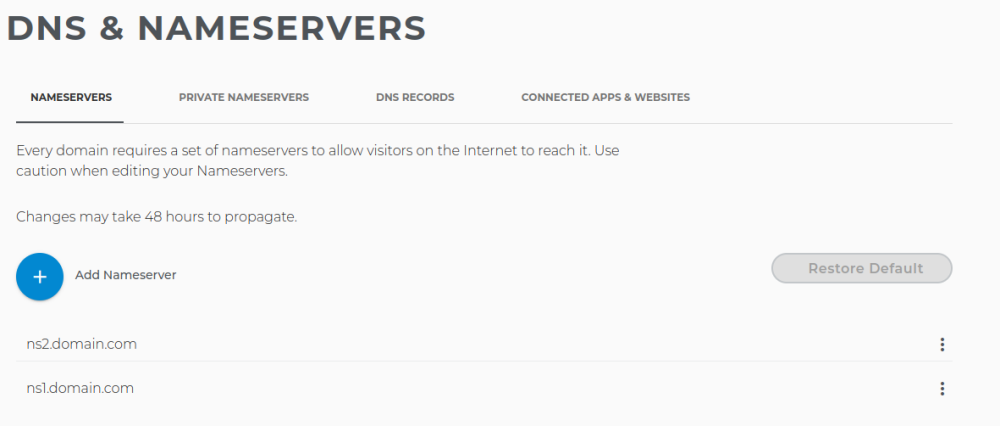
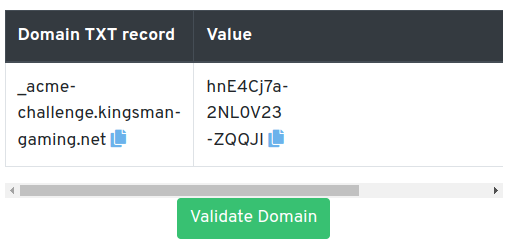
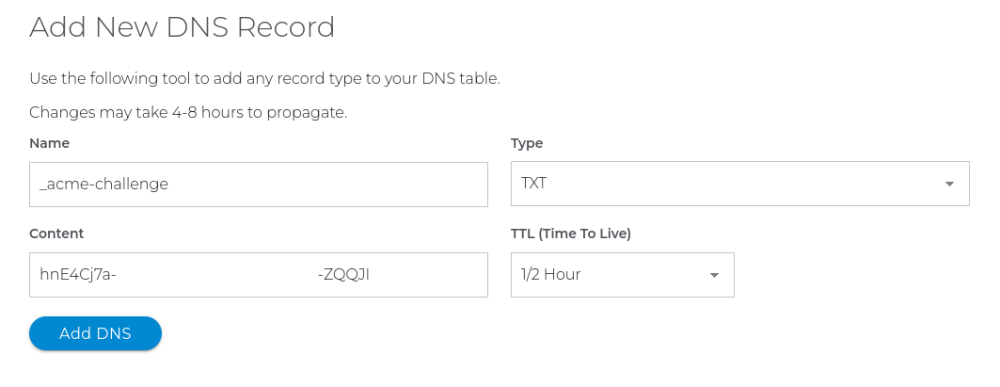
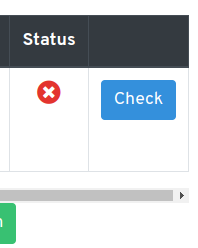
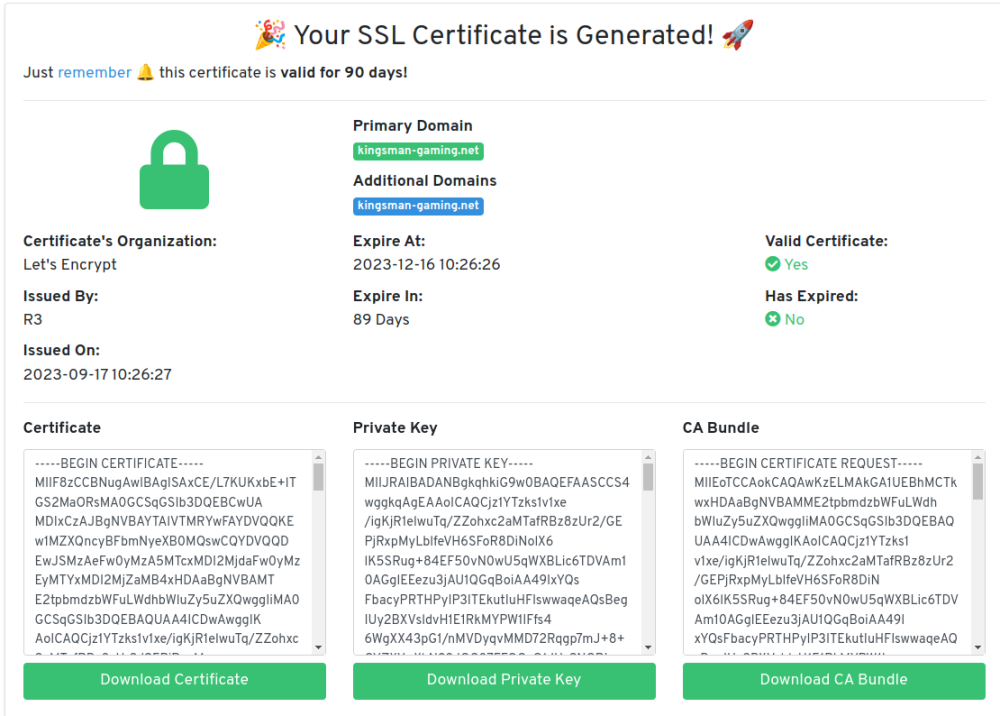
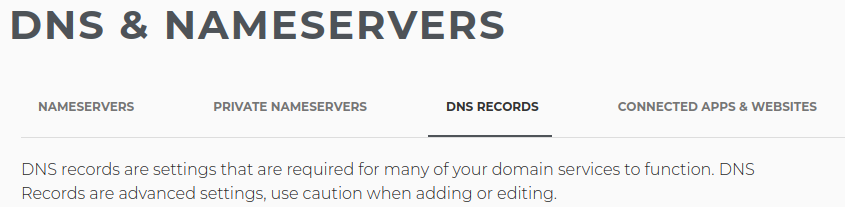
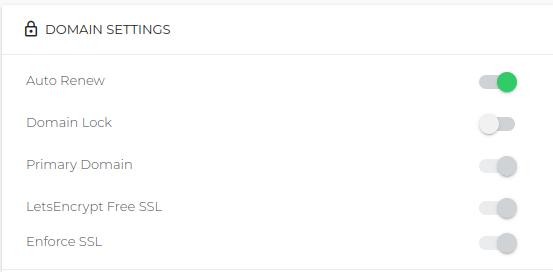
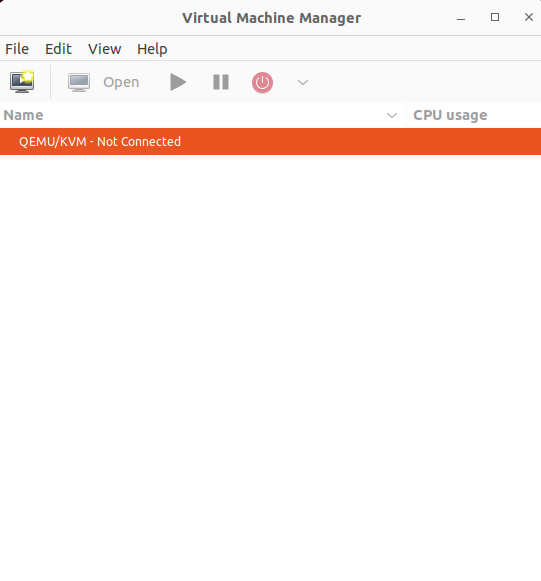
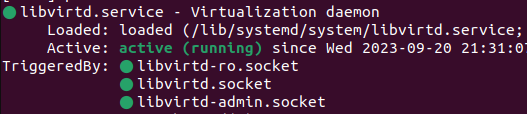
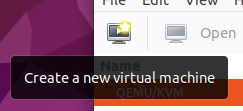
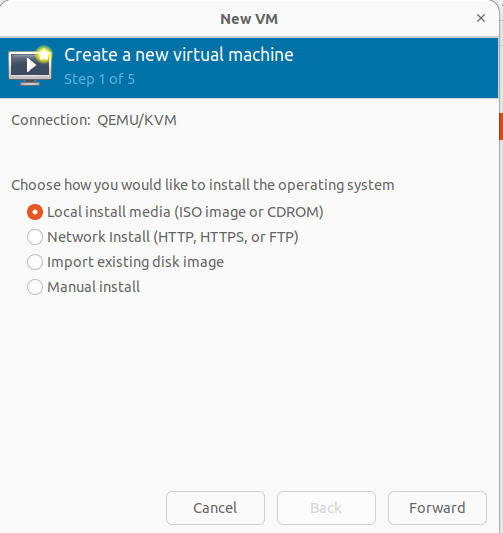
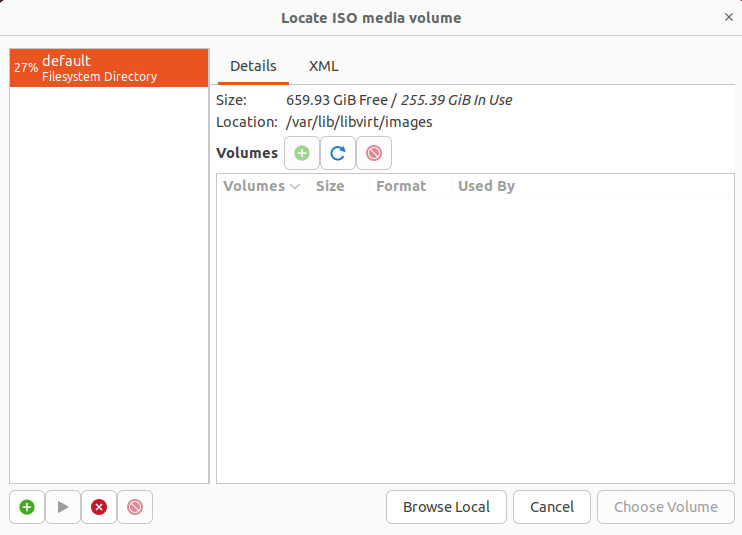
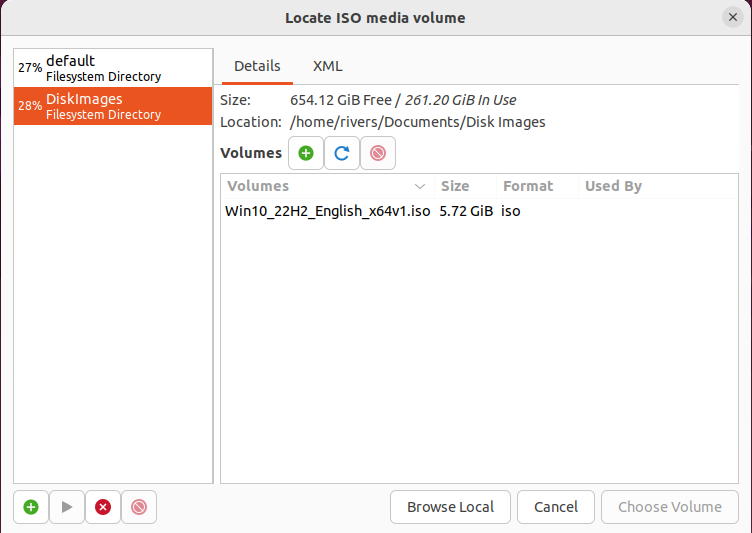
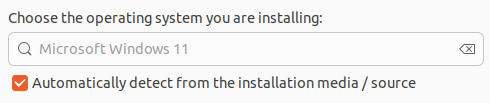
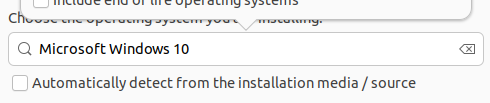
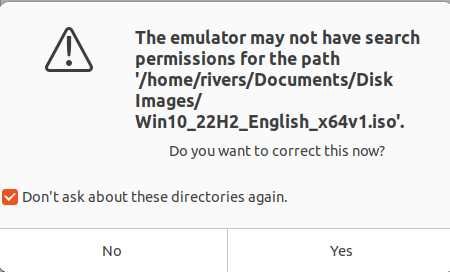
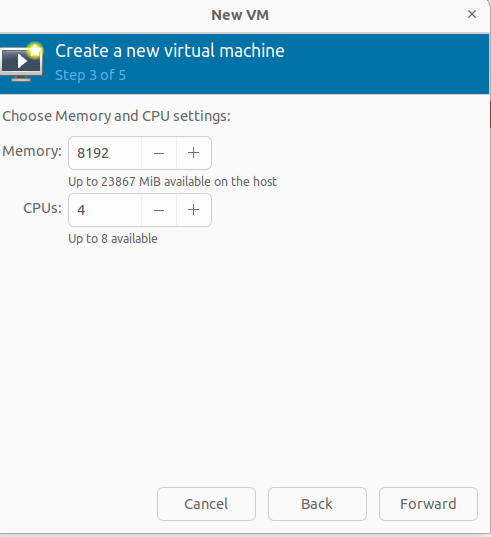
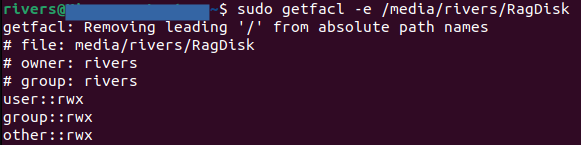
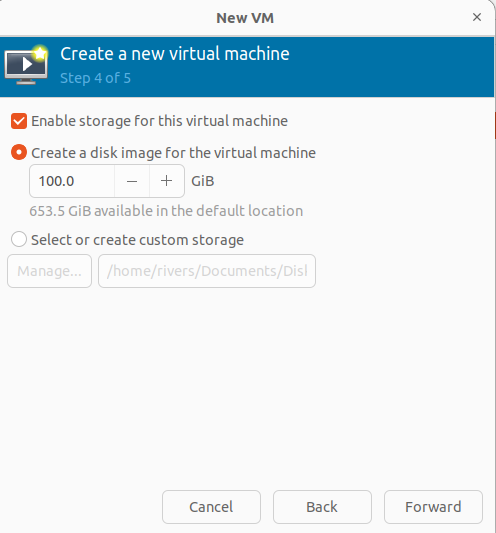
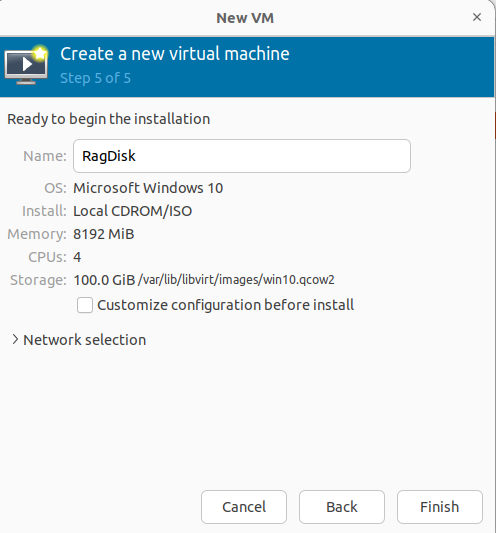
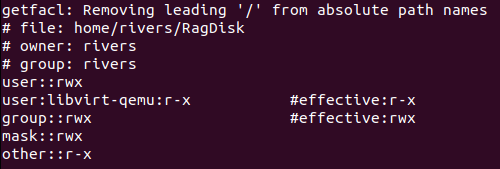
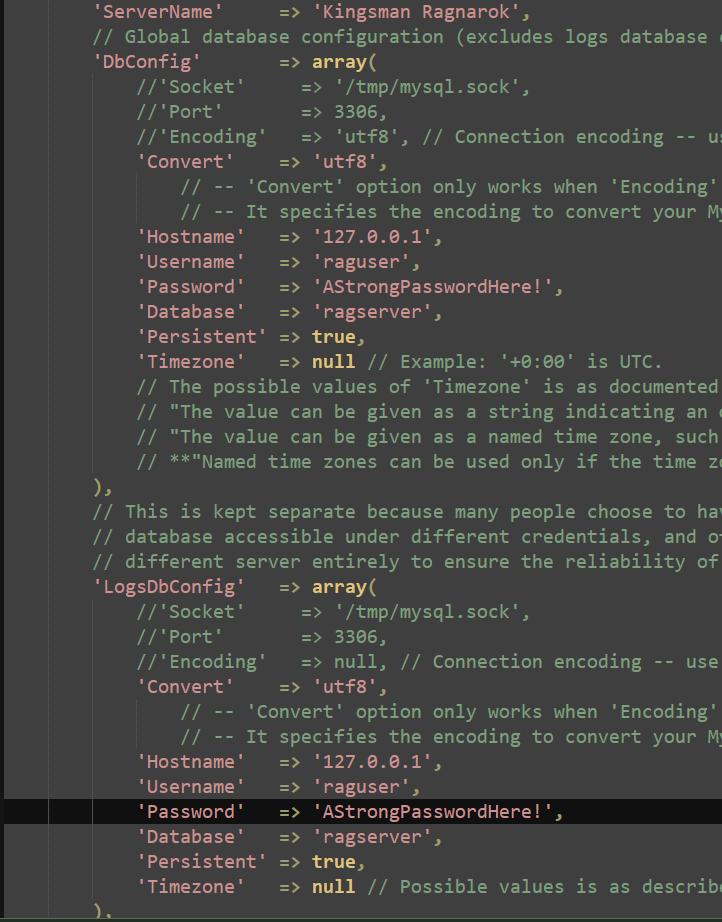
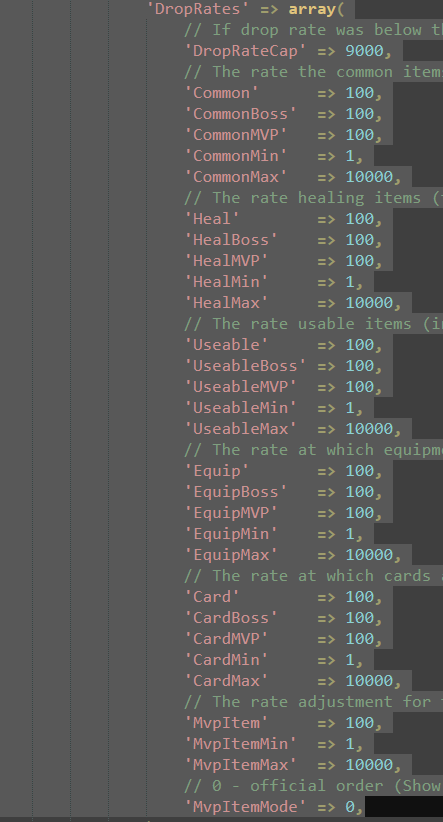
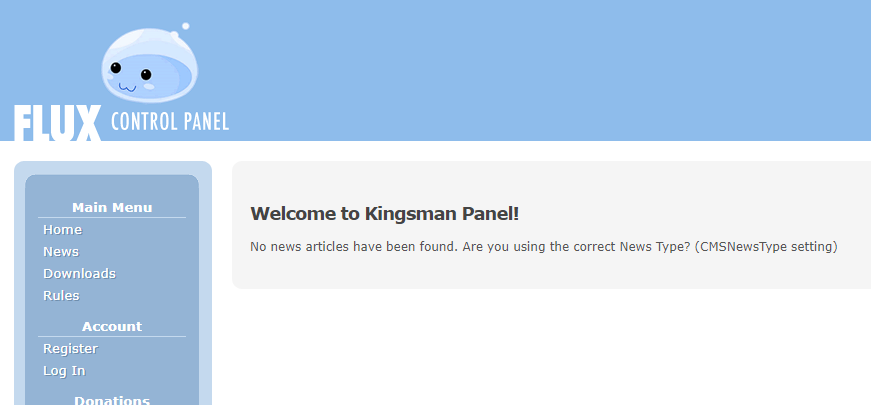
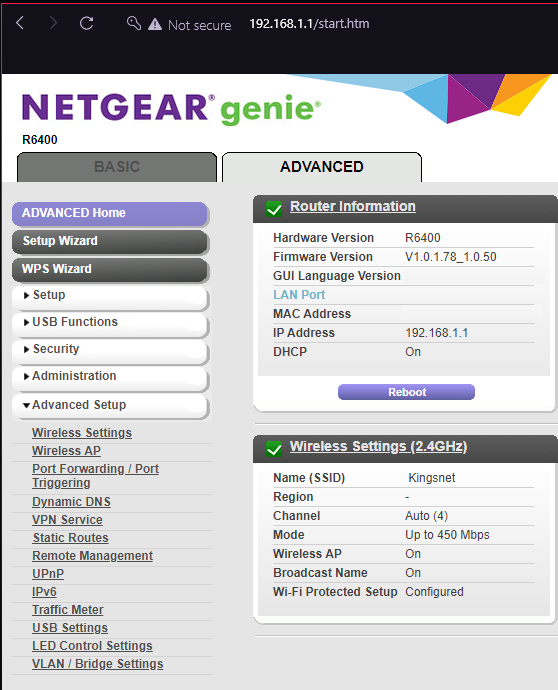
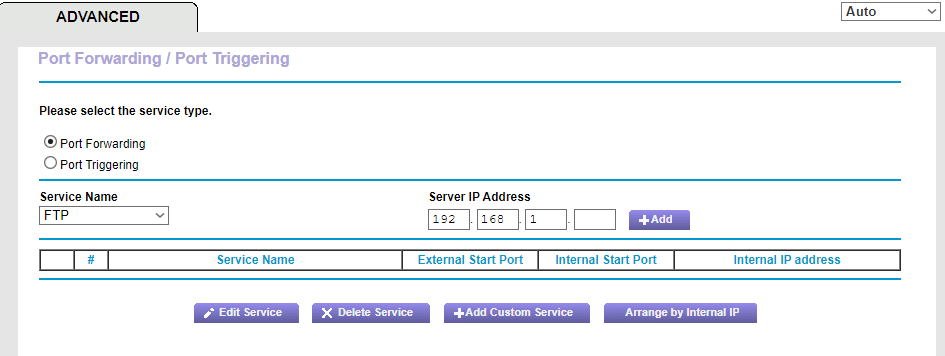
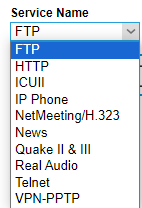
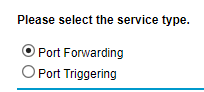
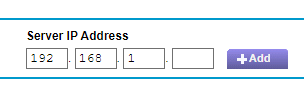
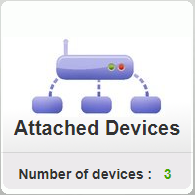
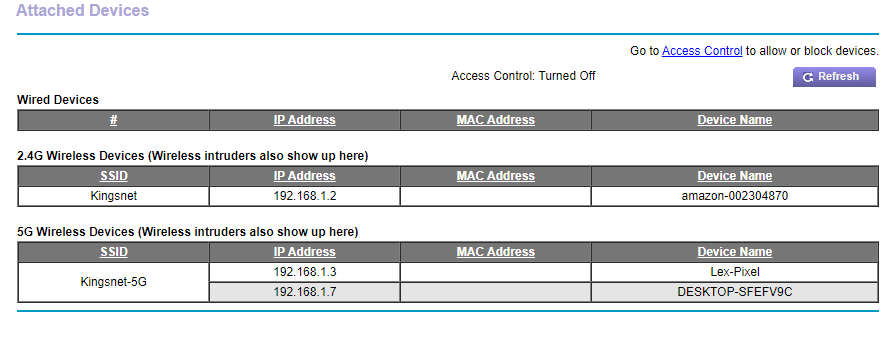
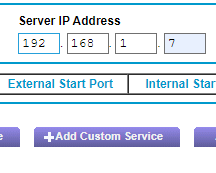
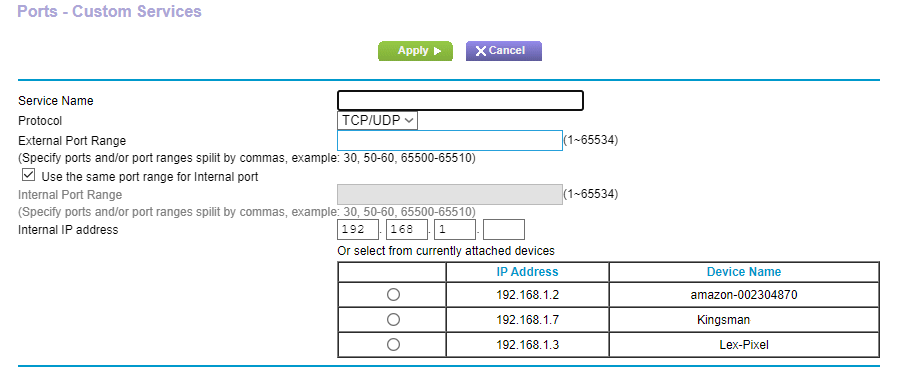
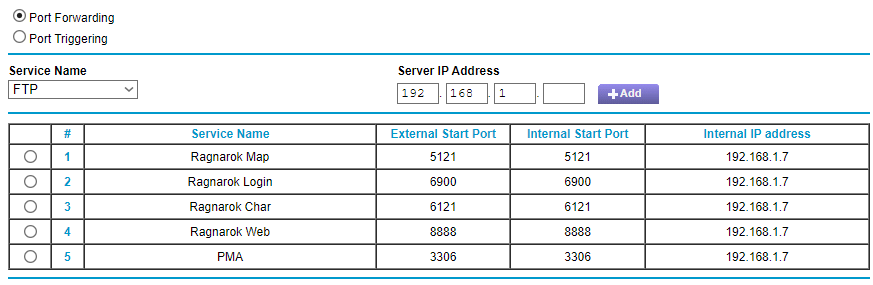
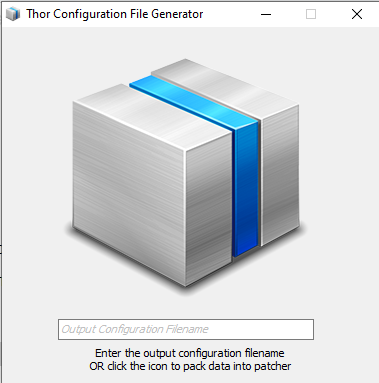
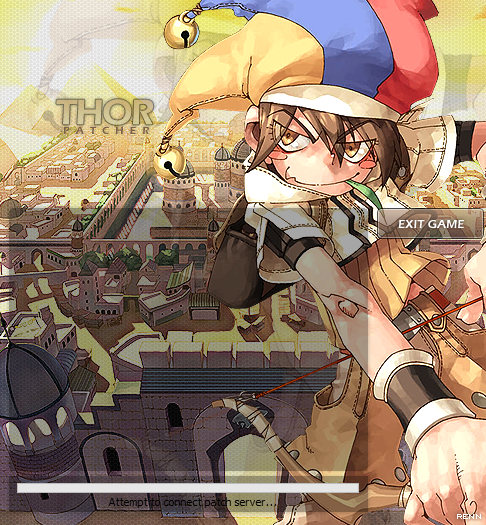
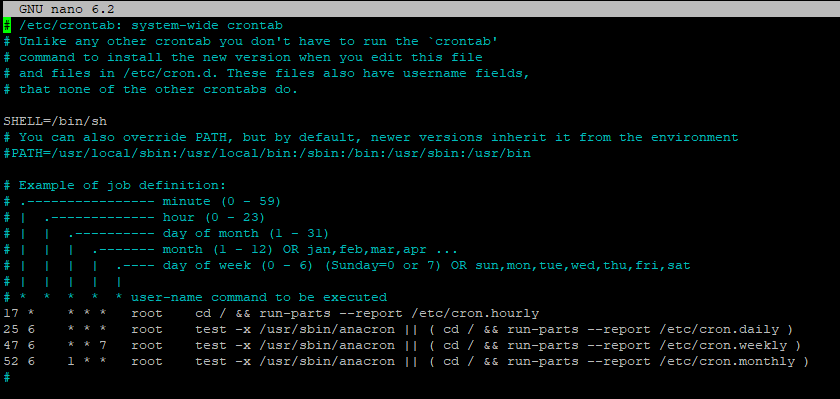
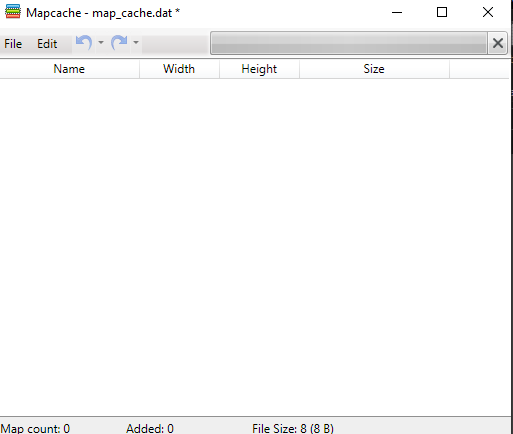
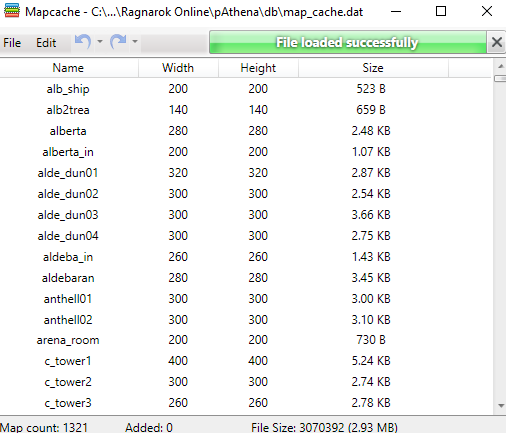
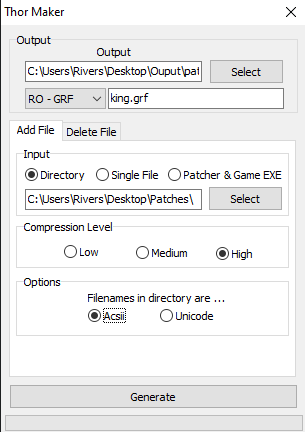
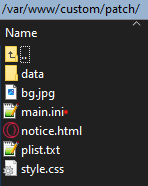
In this section we are going to go through the steps to getting you set up with your very own server computer to run Ragnarok Online (and other games). Requirements : A Computer with at least 128 GB of space & 4 GB of RAM (8GB Recommended). Latest rAthena (Download here) Your own pre-made private client. (Not covered in this topic) Stable Internet connection. Ubuntu Bootable drive. (This guide was made using UBUNTU 22.04 LTS) Download Rufus if you don't have a bootable drive made. (Not Portable) Some time to process all of this information. Replace 127.0.0.1 with your Public IPv4 address. Wired Internet connection Optional Requirements : A Domain name SSL Certificates 32 GB Free Space (we will format it) Windows 10 ISO (x64) PRE-GAME SETUP Very Minimum system requirements : Operating System : Windows 95 to 11 CPU : Pentium II, 400MHz (or better) Memory (RAM) : 128 MB (or higher) Hard Disk Space : 7.2 GB (after system installation) Monitor Resolution : 640 x 480 (or higher) Video Card : Any with 3D Acceleration & at least 16MB on-board RAM Sound Card : DirectSound (or compatible with 3D Sound Effect Support) Internet Connection : 56 kbps (or faster) DirectX : 8.1 (or newer) Recommended System specifications : Operating System : Windows 10 CPU : Intel® Core™ i3-1305U Processor - 10M Cache, up to 4.50 GHz (or better) Memory (RAM) : 2 GB (or higher) Hard Disk Space : 128 GB (after system installation) Monitor Resolution : 1080x 720 (or higher) Video Card : Any with 3D Acceleration & at least 16MB on-board RAM Sound Card : DirectSound (or compatible with 3D Sound Effect Support) Internet Connection : 10 MB/ps (or faster) DirectX : 8.1 (or newer) ...... Now that we got a few things to get us moving let's get started... Section 1 - Installation STEP ONE: Making the Bootable (Rufus booter) i1.1.0 Once you've downloaded Rufus (here if still need) you will run it. You will a simple window with a basic user interface. Simple click "Boot selection" and make sure "Disk or ISO image" is selected. We will continue by clicking "SELECT" and choosing the Ubuntu disk image we downloaded earlier. The "Device" will be the USB drive we're making bootable: The default "cluster size" we'll leave as default. The "Volume Label" is what we will name the USB (optional). With that we're ready to click "START"! Here is what mine looks like at the end of it. STEP TWO: Setting up the OS (Ubuntu 22.04) i1.2.0 Upon booting up, you'll want to select "Try or Install Ubuntu". After this it will load up the start up interface. Follow the linear steps to install your new operating system. (NOTE: Ubuntu Pro is optional) We will do a normal installation for our example. After selecting the driver and location, you will need to create your user account. This is very important as it will contain information used further into the guide. Make sure you can remember your credentials. Getting used to the system will be beneficial for you. For this guide, we will navigate to your app menu located by default in the bottom left corner. STEP THREE: Preparing the Server (Adding Utilities & Libraries) i1.3.0 Here we are going to download a few necessary packages and then we will be able to simply update them whenever we need to using our update and upgrade commands. First thing's first. Let's update & upgrade our system. Type inside your terminal the following command: sudo apt update && sudo apt upgrade -y This will update and upgrade the system. Next we will need to install some packaged to run the server. Still inside the terminal, we will enter the following commands: sudo apt update && sudo apt upgrade -y sudo apt install build-essential zlib1g-dev libpcre3-dev -y sudo apt install libmariadb-dev libmariadb-dev-compat -y sudo apt install software-properties-common apt-transport-https -y sudo add-apt-repository ppa:ondrej/php -y sudo apt-get install php phpmyadmin mysql-server mysql-client git make gcc libmysqlclient-dev zlib1g-dev libpcre3-dev -y sudo apt-get install g++ From here we are ready to download rAthena. (If you have it downloaded manually and have a custom directory already ready for it, go ahead and upload it now. If not, follow these next couple steps to download and set the directory.) In this example, we are going to make the rAthena folder inside our Documents folder so we can find it easily. In your terminal enter in the following command to change to your documents directory: (replace the name with your user.) cd /home/raguser/Documents The terminal should now read something along the lines of: raguser@RagServer:~/Documents$ This is where we will create the rAthena directory. We will pull the rAthena trunk to a custom location we will name using the terminal. To do this we must enter in: git clone https://github.com/rathena/rathena.git ~/rAthena This will now clone the rAthena repository to the directory we specified as rAthena inside the Documents folder. Now we need to update the repo to make sure we have the latest files. Change directory using the cd command and entering in the new folder we just created: cd rAthena And pull the latest updates from the repository to ensure we have the correct version: git pull We now have a fully functional rAthena that is ready to be set up with our packet information, SQL database, our website, and more. In the next section we will cover how to set up the SQL server using PMA (phpmyadmin) right from the desktop browser! STEP FOUR: PMA & SQL (Setting up the database) i1.4.0 Now that we have a fresh rAthena installed, it's time to check MySQL to see if it installed correctly at the start. This may not be installed by default so follow the commands if you don't have it. To check the status of MySQL enter in your terminal the following command: service mysql status This will tell you what the status of your MySQL is. If this fails, install MySQL using: sudo apt-get install php phpmyadmin mysql-server mysql-client git make gcc You will want to select apache2 to install. Now we will have full access to MySQL! We need to start our first launch of SQL to get thigns started. To access SQL enter in: sudo mysql -u root -p This will access MySQL as the root user after you enter the password. (The password is the one you set up earlier when initially installing MySQL) Once authenticated and inside we can create a database and populate it with our server account. Creating the database is done using a few simple inputs. Enter in & modify the following details: CREATE DATABASE ragserver; CREATE USER 'raguser'@'localhost' IDENTIFIED BY 'StrongPassword'; CREATE USER 'raguser'@'%' IDENTIFIED BY 'StrongPassword'; GRANT ALL PRIVILEGES ON ragserver. * TO 'raguser'@'localhost' WITH GRANT OPTION; GRANT ALL PRIVILEGES ON * . * TO 'raguser'@'%' WITH GRANT OPTION; GRANT ALL PRIVILEGES ON * . * TO 'raguser'@'localhost' WITH GRANT OPTION; This created the database 'ragserver' and added 'raguser' to the database with full access. Next we need to make the logs and grant privileges to raguser on it. To do this enter in: CREATE DATABASE log; GRANT ALL ON log.* TO raguser@localhost; Now we can leave by entering in: quit This next part of this step is a little more complicated, but very simple to do. rAthena has a database in their files that we are going to pull the columns and rows from so we don't have to manually construct it ourselves piece by piece. Thankfully we can execute it all in two simple commands: mysql -u raguser -p ragserver < /home/raguser/rAthena/sql-files/main.sql mysql -u raguser -p log < /home/raguser/rAthena/sql-files/logs.sql And finally we are going to insert the first player account of our database. To do so we much enter & modify the following details. (This can always be changed later.) sudo mysql -u raguser -p Inside MySQL enter the following lines: INSERT INTO `ragserver`.`login` (`account_id`, `userid`, `user_pass`, `sex`, `email`, `group_id`, `state`, `unban_time`, `expiration_time`, `logincount`, `lastlogin`, `last_ip`, `birthdate`, `character_slots`, `pincode`, `pincode_change`, `vip_time`, `old_group`) VALUES ('20000000', 'admin', 'adminPassword', 'M', '[email protected]', '99', '0', '0', '0', '0', '2022-02-20 00:00:00', '', '2022-02-20', '9', '', '0', '0', '0'); (You can always change this later in the PMA window in the next steps.) It's time to check our SQL to make sure it looks as good as we think. To do this we are going to need to go to your favourite web browser and enter in the following website ( your website! ) http://127.0.0.1/phpmyadmin/ And we're in! Here inside PMA you will find all the accounts and database information. You can load item and mob databases directly to here and read from here instead of the traditional rAthena directory. There are many things to control inside here, especially if you're troubleshooting. (You also have an App icon in your menu.) STEP FOUR-2: PMA (Restricted Access) i1.4.1 Now that we've got PMA up and running we're going to want to restrict access to any users other than the host. To do this we will use our host address and only allow access to PMA using that address. Else, it will throw a forbidden page to the user. Start by editing the following file: sudo nano /etc/apache2/conf-available/phpmyadmin.conf And at the very bottom we will enter a new line for it to read: <Directory /usr/share/phpmyadmin> Order deny,allow Deny from all Allow from 111.222.33.444 </Directory> Be sure to change the address to your machine's IP address. Restart apache2 and you're ready to go! sudo systemctl restart apache2 STEP FIVE: Getting Green (Online) i1.5.0 Great! You're this far. Not much more to do from here. We're going to now navigate to your rAthena directory and edit the "char_athena.conf" script located in: /home/raguser/rAthena/conf/char_athena.conf Open the file with any text editor, the default one will work. Inside this file, near the top, will be the lines that show your Name & Password. These are for your Login database we set up earlier for phpMyAdmin (PMA). Search for and change the values to a random name and password: // Server Communication username and password. userid: s1 passwd: p1 For this step it is recommended to use random password generator of some sort. This never needs to be entered in manually anywhere. You can copy-paste it everywhere in this guide. In this example we are changing it to: userid: 4Xy3NAKxnl3sk6Aj passwd: 79y59S3m8lWmMDMS Now the Server's username and password are set, we can change the "inter_athena.conf" file so that the server can read our database we set up. Navigate to: /home/raguser/rAthena/conf/inter_athena.conf This is where we are going to change some access information so the server can read through our MySQL login we made earlier. Find and change: // MySQL Login server login_server_ip: 127.0.0.1 login_server_port: 3306 login_server_id: raguser login_server_pw: StrongPassword login_server_db: ragserver login_codepage: login_case_sensitive: yes ipban_db_ip: 127.0.0.1 ipban_db_port: 3306 ipban_db_id: raguser ipban_db_pw: StrongPassword ipban_db_db: ragserver ipban_codepage: // MySQL Character server char_server_ip: 127.0.0.1 char_server_port: 3306 char_server_id: raguser char_server_pw: StrongPassword char_server_db: ragserver // MySQL Map Server map_server_ip: 127.0.0.1 map_server_port: 3306 map_server_id: raguser map_server_pw: StrongPassword map_server_db: ragserver // MySQL Web Server web_server_ip: 127.0.0.1 web_server_port: 3306 web_server_id: raguser web_server_pw: StrongPassword web_server_db: ragserver // MySQL Log Database log_db_ip: 127.0.0.1 log_db_port: 3306 log_db_id: raguser log_db_pw: StrongPassword log_db_db: log log_codepage: log_login_db: loginlog The last location we need to navigate to are our map server configurations. For this we will navigate to: /home/raguser/rAthena/conf/map_athena.txt Change the username and password for the server. It's the same as earlier: userid: 4Xy3NAKxnl3sk6Aj passwd: 79y59S3m8lWmMDMS Now add (or uncomment) the following lines: char_ip: 127.0.0.1 char_port: 6121 map_ip: 127.0.0.1 map_port: 5121 In this part of the step we will configure the client to match your packet version. First we need to ensure "make" is installed. Enter in: sudo apt install make We'll need to give execution access to the configure file. Enter inside the rAthena directory (cd /home/raguser/rAthena) : sudo chmod a+x ./configure Then we are going to configure the server packet to match the client we downloaded. ./configure --enable-packetver=YYYYMMDD The YYYMMDD is your client version for your server.exe. Our example is going to be 20211103: ./configure --enable-packetver=20211103 Once you've done that we're all ready to get the green light. Let's test it out! Let's make a clean slate! Enter in the command while still inside your rAthena directory: make clean Now let's start constructing the server: make server After that's done loading, let's give execution access to the start files & servers: sudo chmod a+x login-server && sudo chmod a+x char-server && sudo chmod a+x map-server Time to start it up! (Make sure you're inside the rAthena directory) To start the server: sudo ./athena-start start To stop the server: sudo ./athena-start stop To restart the server: sudo ./athena-start restart To check the status: sudo ./athena-start status We're online! EXTRA STEPS (OPTIONAL) STEP SIX: DNS. (Mask your IP) i1.6.0 So many of you, like myself, would like to mask your IP address and the best way to do this is to use a domain name service to mask our IP. But does this mean you can't find my IP? No. This does not mean your IP is hidden completely. It just means people have an easier way of accessing your website on a more reliable and trusted connection. In this part of the guide we will go through the process of obtaining and setting up the DNS on your personal dedicated server. Let's start by understanding what DNS means. I'll be quick. What this is telling is, is that we can now take one thing (our IP) and mask it with another thing (domain name). That's short enough. Now some might be wondering... "Don't I need a website and a host for all of that?" The answer is Yes. We set that all up in the previous steps of this guide. You're all ready good to go. The first step is to navigate to your favourite (and trusted) domain name service provider. There are many out there that a simple google search can discover. In this example we are going to use Domain.com. It's affordable, takes Paypal, and has everything we need neatly displayed. Right in the middle of the landing page, you'll notice a search bar. It's large and ahrd to miss. This is where you will type your domain name you want to look for. Don't worry about attaching the endings onto it (.com, .net, etc) as it will give you a list of all the available ones. Purchasing a domain will create an account for you using the details entered in during the billing process. The basic domain I purchased costs slightly more because it's a ".net", which holds a premium standard these days. You don't need to worry about protection and SSL either. We will be managing that all from the server computer as well. For free. Once you find a domain name that fits what you want to achieve and your account was successfully created, it's time to navigate to your email and verify the website. This process is necessary to get the site online. We are now authenticated and ready to move onto the next part of this step. Now that we have a domain, what do we do now? How do we ge this domain name we now own onto mask your personal address? Keep following along. We're almost there! To confirm we have everything, in case there was an issue before, we're going run, in the terminal, the command: sudo apt update && sudo apt upgrade -y && sudo apt install apache2 -y Next we'll need a couple library files for the server to read the data. The following command will give us those libraries: sudo apt install php libapache2-mod-php php-mysql -y Now that we made some changes, it's always good to verify things are still where we left them. Let's verify PHP again to make sure it's the same version as before (8.2.2) php -v Earlier we made a web server. Now it is time to configure it! Enter in and customise the name: sudo mkdir /var/www/customName sudo chown -R raguser /var/www/customName This creates a folder and gives us full ownership of it inside the webserver directory. The custom name is for security measures. This is where we will upload our website and all the web files later. First we need to make a configuration file to run it properly. To do that we must enter in and adjust the name of: sudo nano /etc/apache2/sites-available/customName.conf An empty screen will appear. This is what we want. Now we can populate it with all the information necessary to maintain the web server. I recommend pasting this into a notepad and changing the values as needed. You will need your web site name, user name,custom folder name we made moments ago and your public IP address (v4). Change the values and paste it in to the blank page: <VirtualHost *:80> ServerName localhost ServerAlias kingsman-gaming.net ServerAdmin [email protected] DocumentRoot /var/www/customName ErrorLog ${APACHE_LOG_DIR}/error.log CustomLog ${APACHE_LOG_DIR}/access.log combined </VirtualHost> Now the website is almost ready. We've given it instructions where to go. All we have to do now is verify it and enable scripts for the site to operate. Let's start by reloading our web server. sudo systemctl reload apache2 You may have to reload the apache2 service. If this appears simply run the command again: sudo systemctl reload apache2 This will appear a couple times through this part. Next we need to enable the default script. To do this we will run a command called "a2dissite". What this does is uses system links to run the website and disaables them when needed. Once enabled, we can set and forget even after reboots. sudo a2dissite 000-default Now we're going to do the same thing, except for the config file we just created above. The name must be exact: sudo a2ensite customName Let's test the config to see if it throws any errors: sudo apache2ctl configtest It looks like we got an error! It reads: If you encounter this, it's a simple fix! Enter the command to edit the following file: sudo nano /etc/apache2/apache2.conf Now we need to go to the bottom of the page and insert (at the very bottom) : ServerName localhost And now we want to reload the apache2 service one more time: sudo systemctl reload apache2 Finally, we must route our public IP to the domain name. This is done in that DNS menu on our domain host website. Let's navigate back to Domain.com and set this up. Here we want to edit (or add if it's not here) the "A record" that points to the host configured IP address. We will simply click edit to change the existing record and have it reflect (and edit to match your public IP) the values below: A @ 127.0.1.1 And to prepare things for the next steps, we are going to navigate to back to our basic domain settings and make sure the settings reflect the following: (Auto-renew optional) This is telling us all the options are disabled. We won't be needing any of them supplied by the host. That's it for this part! Our web server is ready for a website to be added and for the DNS to be redirected in our network settings. In the next step we will go through securing the website with a security certificate. It's free and easy to set up. STEP SEVEN: Getting SSL Certified (HTTPS) i1.7.0 In this step we're going to get that SSL set up. Currently when we access our website it says HTTP. We are going to make it say HTTPS. Start by registering to SSL For Web. It's free and easy to set up. After registering, we're going to go right to the top right and click the create button. You will be given two options. DNS & HTTP. We are going to select DNS to continue. You'll also need to enter your domain name to continue. This is where it gets a little more complicated, so follow closly. You will be given two codes to enter into your DNS register. To find this, you will navigate to where you purchased the domain name and modify the existing DNS service to include these values. Simple, right? In our example we used Domain.com. So we will continue using them. Log in and navigate to your domain. On the left side panel you will have some options. Select the one that says DNS & Nameservers. You will get a window like this: We are going to click DNS Records. This is where we will enter those values SSL generated for us. Go back to the SSL page and copy the first value on the left. This is a challenge domain for your domain name. Go back to your DNS records and enter in a new record. The record type we want is TXT. Paste inside the "Name" box the value we just copied. Go back to SSL and copy the value on the left. This is going to be pasted in the "Content" box. Set the value to 1/2 hour and hit confirm. Finally go back and verify that it worked. (It can take up to 30 minutes to fully work, but is usually quicker dependingon the service.) There is a status checker so you don't need to submit every time. Use the scroll bar to go to the right and check the status. Now that we have the green light and a security certificate is added to the domain, we can download the certificates and add them to the server. There are two main types of certificate for use and a bundled version. All we need in this example is the Certificate and Private Key. Now that we have them, how do we add them? Leave this page open for now, as we will need it shortly, and navigate back to your terminal. We're going to enter a few commands to get things set up on our dedicate server. Enter in to edit your certificate file: (rename to your website) sudo nano /etc/ssl/certs/kingsman-gaming.net.crt Then paste your certificate value that was given to you. We're looking for the Certificate. It now looks good to save! (CTRL-X, then enter Y to confirm) Now we must give it the key to the certificate. Enter in and edit the file: sudo nano /etc/ssl/private/kingsman-gaming.net.key We want to populate it with the key that SSLForWeb gave us. Go ahead and paste that in, then save the file. The last certificate we're going to add is the CA bundle. This will be used in the later steps, but let's add it now since we're here. Create a new file and give it adifferent name. In this example we just added ca. to it: sudo nano /etc/ssl/certs/kingsman-gaming.net.ca.crt Certificates are added and ready to go. Here we will go back to our server config file we made earlier and set it up for SSL encryption. Open: sudo nano /etc/apache2/sites-available/customName.conf We want to change the values to reflect: <VirtualHost *:443> SSLEngine on SSLCertificateKeyFile /etc/ssl/private/kingsman-gaming.net.key SSLCertificateFile /etc/ssl/certs/kingsman-gaming.net.crt ServerName localhost ServerAlias kingsman-gaming.net ServerAdmin [email protected] DocumentRoot /var/www/customName ErrorLog ${APACHE_LOG_DIR}/kingsman-gaming.net_error.log CustomLog ${APACHE_LOG_DIR}/kingsman-gaming.net_access.log combined <Directory /var/www/customName> Options FollowSymlinks AllowOverride All Require all granted </Directory> </VirtualHost> Then enable SSL to run scripts: sudo a2enmod ssl Let's break that down.... <VirtualHost *:80> is set to a standard, non-secured, port. We updated this to a secure port to allow the security certificates through. We added three lines to the top. These lines will be read first and indicate we are turning the SSL Engine ON, setting the Certificate Key file to our private ssl folder, and setting the Standard Certificate file to our certificate folder. And at the bottom we added some additional options for some System Links, Overrides, and Permission granting. Now the server can read all the security changes we made! Once we save that file we are going to enable the SSL scripts in the server. This was done simply with one command. With all this done, we have only one more step left to complete before we can fully set up SSL on the server. We need to allow our SSL access through the firewall. We can do this very easily with the following commands: sudo ufw allow 443 Your firewall should now appear with these ports for all of default Ragnarok services: (Check out open allowed services with sudo ufw status) 443 ALLOW Anywhere 5121 ALLOW Anywhere 6121 ALLOW Anywhere 6900 ALLOW Anywhere 80 ALLOW Anywhere 22 ALLOW Anywhere If you don't ahve an active firewall you can enable it with: sudo ufw enable With all this added, we are now going to check the syntax for the apache2 configuration to make sure it's still "OK" and restart the apache2 service: sudo apache2ctl -t sudo systemctl restart apache2 Common issue after this step: This is caused because the SSL scripts have to be passed through the system still. To do this we can enter in two commands to set this up: sudo a2enmod ssl sudo systemctl restart apache2 That's it for this step! We now have an SSL connection for our webserver. In the next section we will go through various methods of setting up the File Transfer Protocol (FTP) for our webserver. This is great for setting up files from your server for others to download. Users can download files directly from the web server. STEP EIGHT: File Trasnfer Protocol (FTP) i1.8.0 We're going to enable this on our server to allow users to download various files we set up in the download folder. Let's start by making that folder. Change directory to your web directory. We modified it earlier above: cd /var/www/kingsman/ Now create a directory: mkdir download We now have a folder where we will be adding out downloadable files. Let's get the libraries ready for the web server. Enter in: sudo apt-get update && sudo apt-get install openssh-server It will be a linear installation. Once it completes we can check the status of it: sudo systemctl status ssh If it failed to start load it again with: sudo systemctl start ssh Once we set the configs we're all ready to go. Edit the file: sudo nano /etc/ssh/sshd_config These settings will be added at the very bottom of this document. Scroll to the bottom, add & edit the following values: Match User raguser ForceCommand internal-sftp PasswordAuthentication yes ChrootDirectory /var/www/kingsman/download PermitTunnel no AllowAgentForwarding no AllowTcpForwarding no X11Forwarding no Save the document and exit. (CTRL + X then Y & Enter) Restart SSH with: sudo systemctl restart ssh We now have a fully functional FTP server attached to the web server. Now to get links for your files, you'll need to understand how the folders work in the web server. This part is completely ignored in the link you will generate: /var/www/kingsman/ Your link will be the default web address, so let's start with that: https://kingsman-gaming.net/ That's the start. Now we need to add our download folder. We know the default location is /var/www/kingsman/ directory, so this means kingsman-gaming.net is that location. To add the downloads folder we simply just separate it with a " / " and add the download directoy, exactly how it's spelt,in the file hierarchy: So /var/www/kingsman/download becomes: https://kingsman-gaming.net/download/ You can add as many directories as you can fit into the web address search bar and break off from the download folder to download other parts of the site. You'll add the file name to the link for which ever file you want to download. For example, I want to download VLRO.zip: https://kingsman-gaming.net/download/vlro.zip Now we have a place players can download our server from. Simply upload your files inside this download folder and send the link to your players to download. In the next step we will go through how to create a launchable version of Windows 10 wil your Ragnarok Online server set up on it. We will also go through various tools that will be useful to development. STEP NINE: Emulating Windows 10, Ragnarok & RO Tools (QEMU/KVM) i1.9.0 In this step we will be going through how to build and run a virtual machine based on Windows 10 operating system with our Ragnarok Online server installed onto it. Make sure to download Windows 10 ISO while we work. This will save some time later. You may also want to consider moving it to a new directory inside your Documents folder. We'll be doing this for our example moving forward, as well. Start by check that your system is Virtualization Ready. Enter in the terminal: egrep -c '(vmx|svm)' /proc/cpuinfo If your system is Virtualization Ready it will appear with a number greater than 0. My number came out as 16, so we're good to check if the system is supported. To do this enter in: kvm-ok If the system does not have the checker, you can enter this command to enable it: sudo apt install cpu-checker -y Now that we found out we can support virtualization it's time to install it, along with the librarfies neeeded to run it. Enter the following command to run all of this in one go: sudo apt install qemu-kvm virt-manager virtinst libvirt-clients bridge-utils libvirt-daemon-system -y We're going to run two more commands to make sure we have the virtualization daemon. Enter in: sudo systemctl enable --now libvirtd sudo systemctl start libvirtd Now check the status of to make sure it's online and everything is green:\ sudo systemctl status libvirtd Everything looks good so far! Before we can run the program we need to give our user specific permissions to access the daemon. To do this we will enter in: sudo usermod -aG kvm $USER sudo usermod -aG libvirt $USER We are now ready to launch! You can start the application in the application menu using the icon it supplies. (It can take a minute to populate) If you can't find it, or it hasn't appeared yet, you can manually run it with the command: sudo virt-manager You should now have a window that looks like this: If you experience an error trying to connect after finishing up to this part of the step and it reads something along the lines of: Unable to connect to libvirt qemu:///system.Verify that the 'libvirtd' daemon is running. Error: Failed to connect socket to '/var/run/libvirt/libvirt-sock': Permission denied It is recommended to restart your computer and try connecting. Sometimes after the installation it won't have all permissions set properly. A full restart of the system can resolve this. Now that we are set up, it's time to create a virtual machine! Go ahead and click the New Machine button at the top left. We're going to select Local install media from the list and select the ISO file we downloaded at the start of this step. (If you didn't donwload it before, now is a good time to. While you're waiting you can reflect over the steps you've went through to get this far. It is good to understand the system and how you got here.) We'll want to click "Browse..." and a new window will appear. Here we have our default filesystem directory. This is a default directory that is given with the application. We don't have files in this folder so we won't focus on this. At the bottom left, there's green " + ". Click it. Now we are presented with options for renaming the pool, changing the type of file it is, and setting the target path for where to read and write data. We are only going to focus on two of these options in this step. Name & Target Path. We'll give it the name "DiskImages", though you can name it anything you want, and we want to select the path to be the folder we created inside our Documents which holds the Windows 10 ISO. We now have a link to this folder inside the KVM. If we select it, we can now see the Windows 10 64 bit ISO is there. We will click it and Choose Volume. The applicatiion will likely guess that it is Windows 11, so we need to uncheck that box and change it from an 11 to a 10. Change to Press Forward and agree to the promt. You can click the Don't Ask button for future changes. Now we must set the amount of RAM and Cores to use. We can change this any time after shutting the virtual machine down. For now, we will use the default 8G and 4 Cores. (Recommend: 3G RAM or more, 2 cores or more for this setup) The next part of this step is to create the virtuale machine's hard drive. To do this we need to let the VMM do a rather long process to the 32 GB of space that will add a system file to a size we pre-determine, and it will allow us to boot Windows 10 off that space and dedicate it a hard drive to store files. It sounds complicated, but it's really simple to do. It just takes some time if you have larger spaces to work with. Moving forward, we much select "Enable Storage for this virtual machine" and we will then go to the bottom and select "Create a dusk image for the virtual machine" and click "Forward". If we get asked to grant search permissions for the path. Click YES. Now we are ready to create the Windows 10 disk space. Double check the information is correct, mainly the Windows 10 operating system doesn't say Windows 11. It will launch automatically for the first time on Finish. You will now be able to set up your emulated Windows 10. (If you encounter...) ERROR: If you experience an error, roughly like the one I created above, it's possible that the QEMU user does not have access to this directory still. You can manuall add this access very easily. Enter in the command to check the permissions, first: The output should look close to this: This is showing us that our QEMU is not here on the list. Let's add it: sudo setfacl -m u:libvirt-qemu:rx /home/raguser/RagDisk Now if we run the command to check it again: sudo getfacl -e /home/raguser/RagDisk We can see that the user is added successfully. Finally, Restart the Virtualization library and you're ready to continue on to the next parts of this step: sudo systemctl restart libvirtd You should be ready to launch now! We've got Windows 10 running and Updated as much as it can get. We're going to install a few necessary applications to run our programs and the game itself. Download the following files from the following (trusted) sources: -Microsoft Direct X Runtime -Visual C++ Redistributable for Visual Studio 2015 -.NET 6.0 or 7.0 -(Optional) RO Tools List With everything installed, and the system fully rebooted for good measure, we're ready to get started with the game installation. STEP TEN: Setting up rAthena Source (Game Files) i1.10.0 Now it's time to get rAthena set up so we can get players connecting to the server. First thing's first! Organise and familiarise yourself with the files. This is where you will be spending lots of your time. This will be an ongoing process once you complete these steps. In this guide, it will give you some organization pointers. Take your time with this and get used to how you lay things out. You will navigate back and forth a lot during a maintenance. If you have not already downloaded rAthena we will go ahead and do that now. The following commands will change your directory to the root for your profile, next it will make a "Server" folder for you to operate in, and finally it will download the rAthena trunk to that directory. Finally we will enter that directory to process the remaining steps. cd sudo mkdir Server git clone https://github.com/rathena/rathena.git ~/rAthena cd rAthena To update rAthena to the latest verison we need to process a git-pull while inside the rAthena diretory. git pull Now we've got rAthena's latest trunk and all the updates! It is important to get a good, or at least an okay, understanding of how rAthena has all their files organized. Things are in a specific place and named specific things for a reason. If you move or rename a file or folder it will cause you many problems. Source files are where you will make changes that will affect the entire game and the way it functions. Be very careful when editing these files and stay within the lines of the cave if you don't know what you're doing. Config files are where you will make the majority of changes to your server. This is where things like Drop rates, EXP rates, and all your Server settings will be located. In the continued steps below, we will go through how to set up the remainder of the server. It's time to create a database for all the player accounts to be saved to. To get started be sure you've followed the previous steps for setting up PMA (phpMyAdmin). Now that we have access to MySQL we can start by entering in some commands to give us access to the databases involved. Open the terminal and enter in the following: (Note: You set the username and password earlier) CREATE DATABASE ragserver; CREATE USER 'raguser'@'localhost' IDENTIFIED BY 'StrongPassword'; CREATE USER 'raguser'@'%' IDENTIFIED BY 'StrongPassword'; GRANT ALL PRIVILEGES ON ragserver. * TO 'raguser'@'localhost' WITH GRANT OPTION; GRANT ALL PRIVILEGES ON * . * TO 'raguser'@'%' WITH GRANT OPTION; GRANT ALL PRIVILEGES ON * . * TO 'raguser'@'localhost' WITH GRANT OPTION; This created the database 'ragserver' and added 'raguser' to the database with full access. Next we need to make the logs and grant privileges to raguser on it. Enter in: CREATE DATABASE log; GRANT ALL ON log.* TO raguser@localhost; Now we can leave by entering in: quit Majoirty of the database is set up now! This next step is a little more complicated, but very simple to do. rAthena has a database in the server files that we are going to pull the columns and rows from so we don't have to manually construct it ourselves piece by piece. Thankfully we can execute it all in two simple commands: mysql -u raguser -p ragserver < /home/raguser/rAthena/sql-files/main.sql mysql -u raguser -p log < /home/raguser/rAthena/sql-files/logs.sql Now we have an almost-fully functional database for the server. It's time to create the first account! Back to the terminal, we are going to enter and log in to MySQL again: sudo mysql In MySQL enter in: (Before submitting this to the database, we are going to change the Login Name, User Name, Password, & Email) INSERT INTO `ragserver `.`login` (`account_id`, `userid`, `user_pass`, `sex`, `email`, `group_id`, `state`, `unban_time`, `expiration_time`, `logincount`, `lastlogin`, `last_ip`, `birthdate`, `character_slots`, `pincode`, `pincode_change`, `vip_time`, `old_group`) VALUES ('20000000', 'admin', 'adminPassword', 'M', '[email protected]', '99', '0', '0', '0', '0', '2022-02-20 00:00:00', '', '2022-02-20', '9', '', '0', '0', '0'); Great! You're this far. Not much more to do from here. Navigate in WinSCP/FileZilla (or other FTP access app) and go to your directory: /home/raguser/Server/rAthena/conf/char_athena.conf Inside this, near the top, will be the lines that show your Name and Password. These are for your Login database we set up earlier for PMA. If you haven't changed these yet, do so now. I recommend a random generator for the values. A simple Google search for this will help. Search for and change the values to a random name and password: // Server Communication username and password. userid: s1 passwd: p1 These values must reflect what is inside the login database or the server won't be able to connect. Do not share these values. With anyone. Now the Server's username and password are set, we can navigate to: /home/raguser/rAthena/conf/inter_athena.conf This is where we are going to change some access information so the server can read through our MySQL login we made earlier.Find and change: // MySQL Login server login_server_ip: 127.0.0.1 login_server_port: 3306 login_server_id: raguser login_server_pw: StrongPassword login_server_db: ragserver login_codepage: login_case_sensitive: yes ipban_db_ip: 127.0.0.1 ipban_db_port: 3306 ipban_db_id: raguser ipban_db_pw: StrongPassword ipban_db_db: ragserver ipban_codepage: // MySQL Character server char_server_ip: 127.0.0.1 char_server_port: 3306 char_server_id: raguser char_server_pw: StrongPassword char_server_db: ragserver // MySQL Map Server map_server_ip: 127.0.0.1 map_server_port: 3306 map_server_id: raguser map_server_pw: StrongPassword map_server_db: ragserver // MySQL Web Server web_server_ip: 127.0.0.1 web_server_port: 3306 web_server_id: raguser web_server_pw: StrongPassword web_server_db: ragserver // MySQL Log Database log_db_ip: 127.0.0.1 log_db_port: 3306 log_db_id: raguser log_db_pw: StrongPassword log_db_db: log log_codepage: log_login_db: loginlog The last locations we need to navigate to are our map server & subnet configurations. Navigate to: /home/raguser/rAthena/conf/map_athena.txt Change the username and password for the server. It's the same as earlier: userid: 4Xy3NAKxnl3sk6Aj passwd: 79y59S3m8lWmMDMS Now add (or uncomment) the following lines: char_ip: 127.0.0.1 char_port: 6121 map_ip: 127.0.0.1 map_port: 5121 And finally adjust the subnet to match your server's IP address. This step can be a little tricky if you don't understand how a subnet works. So simply follow below and replace x.x.x.x with your server's IP address: subnet: 255.0.0.0:127.0.0.1:127.0.0.1 subnet: 255.0.0.0:x.x.x.x:x.x.x.x Excellent! You're near the end. It's time to configure the client to your packet version. Let's give execution access to the configure file: sudo chmod a+x ./configure Then we are going to configure the server: ./configure --enable-packetver=YYYYMMDD The YYYMMDD is your client version for your server.exe. An example of how this looks is: ./configure --enable-packetver=20211103 Congratulations on making it to the end of setting up your server. It's time to start it up now! Let's make a clean slate! Enter in: make clean Then let's start constructing that server. Enter in: make server After that's done loading, let's give execution access to the start files & servers: sudo chmod a+x login-server && sudo chmod a+x char-server && sudo chmod a+x map-server Time to start it up! (Make sure you're inside the rAthena directory) To start the server: ./athena-start start To stop the server: ./athena-start stop To restart the server: ./athena-start restart To check the status: ./athena-start status That's it for this step. If you followed up to here you'll have a all server files downloaded and ready on the server side with a database ready to accept logs and registrations. In this next step we will go through the systemd.service files to get your server running automatically when the system restart or if it crashes. STEP ELEVEN: Setting up UFW (Firewall) i1.11.0 When setting up the firewall, we want to make sure we know exactly what ports we are adding in before we add them. This will save us from having to deny thema ccess later. Let's gather the ports we know of for all the services we've set up thus far. We know of our Web ports, which should be automatically added when installed, but sometimes this isn't the case. We've also got the FTP ports for the download servers, if we want to use them. There's also the PMA & SSH ports. Are you writing this down? sudo ufw allow 443 sudo ufw allow 80 sudo ufw allow 20/tcp sudo ufw allow 21 sudo ufw allow 22 sudo ufw allow 3306 sudo ufw allow 6900 sudo ufw allow 5121 sudo ufw allow 6121 sudo ufw allow 8888 Sometimes you might still get some issues with the firewall blocking you. You may be required to let the firewall know what type of conneciton to allow, either TCP or UDP; but what is TCP/UDP you might ask? Very simply put... TCP means Transmission Control Protocol which runs a more reliable connection, however, it can lack in transfer speed. UDP means User Datagram Protocol and it has a much faster transfer rate of data, but can be unreliable in sending said data. What does this mean for you? You can choose to do UDP all accross the board since Ragnarok uses small packets of data compared to a much larger scale game. Just my recommendation. However, if you want absolute data transfer at the highest success rate to avoid lost packets and data, then do TCP. Still confused? Do both in the firewall. An example of what the command will look like for adding TCP/UDP: sudo ufw allow 5121/udp sudo ufw allow 5121/tcp Now that we've got an understanding of the firewall and the ports we have added we can now relax knowing the firewall will protect us from majority of threats. STEP TWELVE: Setting & Forgetting (Auto-Start scripts) i1.12.0 I hate when the server crashes. But you know what's worse? When it doesn't come back up until an admin turns it on. In this step we will go through the simple setup process to get your server ready to start when you load your system and reboot if it crashes. Start by opening up the terminal and entering in the following command to create a new system.service file: sudo nano /etc/systemd/system/ro-login.service This will create a system service file which we will enable later to start automatically. Inside these service files will be a series of commands that will allow the server to boot up automatically when it experiences an outage for a speificied amount of time & when starts the system after a reboot. Populate the file and edit the values to match your rAthena directory and User Login name: [Unit] Description=Ragnarok Login-Server After=syslog.target network.target mysqld.service [Service] WorkingDirectory=/home/raguser/rAthena User=raguser ExecStart=/home/raguser/rAthena/login-server ExecReload=/bin/kill -HUP $MAINPID KillMode=process Restart=on-failure RestartSec=15s [Install] WantedBy=multi-user.target We are going to do this two more times. Once for Character Server & another for the Map Server. sudo nano /etc/systemd/system/ro-char.service Populate with: [Unit] Description=Ragnarok Character-Server After=syslog.target network.target mysqld.service [Service] WorkingDirectory=/home/raguser/rAthena User=raguser ExecStart=/home/raguser/Server/rAthena/char-server ExecReload=/bin/kill -HUP $MAINPID KillMode=process Restart=on-failure RestartSec=15s [Install] WantedBy=multi-user.target And now: sudo nano /etc/systemd/system/ro-map.service Populate with: [Unit] Description=Ragnarok Map-Server After=syslog.target network.target mysqld.service [Service] WorkingDirectory=/home/raguser/rAthena User=raguser ExecStart=/home/raguser/Server/rAthena/map-server ExecReload=/bin/kill -HUP $MAINPID KillMode=process Restart=on-failure RestartSec=15s [Install] WantedBy=multi-user.target We will now start them all and check their status: sudo systemctl start ro-char sudo systemctl start ro-map sudo systemctl start ro-login sudo systemctl status ro-char sudo systemctl status ro-map sudo systemctl status ro-login Once we have the Green light on the status we can go ahead and enable the scripts to automatically start on boot. Enter in: sudo systemctl enable ro-char sudo systemctl enable ro-map sudo systemctl enable ro-login That's it! You're set to boot up automatically after a crash and upon system restart. Well done! Section 2 - After-Installation Now that we've got everything set up this far, we can continue maintaining & updating what we've started. Continue below to learn more on how to maintain the server after you've set it up. Requirements : Latest NEMO release An executable update from NEMO's website Latest FluxCP from rAthena STEP ONE: FluxCP (Registration & Logins) i2.1.0 Everyone needs to register somehow, right? We're mostly all aware of the high risks with enabling registration via "_M/_F", if you're not... In short: Don't use it if you're opening the server to the public. It can enable botters, spammers, & hackers the ability to just create infinite accounts and continue their schemes easier. With FluxCP we can help avoid this by limiting the amount of registrations allowed per person. Let's dive into it now. Gather your resources! You'll need to download the latest FluxCP by clicking that link. If you missed it, here's the link again: https://github.com/rathena/FluxCP This is where we will manage all the registrations to the game as well as many other fun functions we will get into later. For now download & extract this entire directory into your webserver. I put mine in the primary (root) directory of my webserver. That's the folder we created earlier with the custom name we provided. In this example we used "kingsman" as the custom name. The folder path is: /var/www/customName Our final output will look like not include the folder. This means we must drag all the contents into the root directory of the webserver. Now we should look like this at after extraction: Enter the config folder first. This is where we will be doing all the work for setting up this control panel. Inside the config folder you will have 31 files to select from. We're only going to work in two of these for this step. Open servers.php and you will see a set up similar to earlier where we added some settings for rAthena configs. They are the exact same configs. Go ahead and add that in there exactly as you did in the configs earlier. Now that we have our config looking good, let's scroll down towards the bottom and edit our rates to reflect that of our server's. This will display the rates set up in your databse as well so players can use that to search drop rates on your server. Change accordingly! That's it for the servers.php! Save that & move to the next file. Let's now open up application.php and edit the first few lines we see. We want to change the base URI to be blank. This will set it to the root directory where we hold the control panel. Server Address is going to remain localhost since we are running it on the localhost. And finally we need a storng password to gain access to the administration panel to set it up. 'ServerAddress' => 'localhost', // This value is the hostname:port under which Flux runs. (e.g., example.com or example.com:80) 'BaseURI' => '', // The base URI is the base web root on which your application lies. 'InstallerPassword' => 'superduperstrongpassword,man', // Installer/updater password. Save that and open your website now! You'll likely get several permission errors. Copy waht they say for you to do, it will be a sudo chmod command giving access to the logs. This is necessary to proceed to the next part. Add sudo before each command or it won't work. You'll need to enter your password into the control panel shown after granting permissions to FluxCP. After the password is successfully added it will update your PMA database with all the new information for FluxCP's registration and logins. Your panel should look like this by default now: You now have a palce where you can register and manage accounts! Navigate through the application.php file to change some various settings like your control panel name and what is displayed. You can also adjust the ports if they are different during the previous set up. STEP TWO: My First EXE (Making an Executable) i2.2.0 Now that we've got everything set up on the server-side of things it's time to work on the client-side of things now. Let us start first by making an executable. this will be the CustomRO.exe that players will use to run the game. Launch NEMO and give it a moment to load up. In a compact form, this is waht you'll see. What this is showing us is that we can Load a client, which we downloaded from the "Requirements" section above, we can apply patches, select the recommended patches, select previously loaded patches, load a pre-saved profile, and save an existing setup as a profile to load later. for this example we are going to use the current recommended version in rAthena's trunk. This is version "2021-11-03". We are presented with a file that will launch a terminal to download the latest executable. It will look similar to this: Now we have the executable ready to be patched. Back inside NEMO, we want to browse to that file we just downloaded and select it. You can change the saved outpute file name here or rename it anytime later. Here we will change it now. Click "Load Client" and a list of patches will populate. Now we want to "Select Recommended" patches given for for the executable. To apply these patches simply click the "Apply Selected" button and it will pack it for you. Brose the patches and select any patches that will help you or you might use in the future. For this example we are changing the Client Title name, the ItemInfo.lub or ItemInfo.lua and a majority of other changes that will allow the client to read LUA files over LUB files. Take your time going through the list. It will take a while the first time around. With all the patches applied we now have en executable in our output folder. But it came with other files, what do I do with those? You only need the custom executable we made (CustomRO.exe). This is going to be sent to the players and the rest will be removed from the client folder You're now ready to send this to other players! STEP THREE: My First Patcher (Making a Patcher) i2.3.0 We've got a client executable and it's fully patched the way we like. This is a great start! Now it's tie to send players an update. Through the patcher. But we don't have one yet! In this example we will go through the steps to creating a patcher using Thor Patcher from rAthena download section. Your extracted package should reflect similar to this: We want to enter the Configuration folder and edit the config.ini file located inside. Inside this config file are the lines necessary to connect the client to the server and send files from the server to the client. In the first few mines we'll edit the values to reflect our server values: The IP can be our website, this example is just a localhost address. Remote config file we will leave as default. Status file we can name server.dat. This can be anything, however. The custom GRF we have for our server, listed as number 0= in the data.ini. Finally our custom client executable we made earlier. Further down the page we have the title of the patcher. This can be anything. And lastly our notice page which will have a brief text description for the updates on the patcher front page. Save that and we're ready to launch the config generator. Drag the config into your .../Thor_Patcher/Patcher folder and it you're ready to copy them to your CustomRO client files. When compelte you'll have a patcher similar to this: You're made your Patcher now, well done! STEP FOUR: My First Patch (Making a Patch) i2.4.0 Keeping organised is key to staying sane. Let's start off by making a couple folders. A Patches folder & a data folder. It should look like this now: Patches/data This should look familiar. It's the same set up as the GRF. We will now be able to drag all the files we want to patch into this directory. One more folder we want to make is going to be the Output folder. This is where all the patches will be saved. There will be two more options to deal with. We want to set compression to HIGH and in the Options tab we want to set the file type to ACSII. It should reflect the below image. Once that's set we can click "Generate" to make the first patch. It will be create in the Output folder we selected. That's all there is too it! You've created your first patch. STEP FIVE: Sending The Patch (Sending Patches) i2.5.0 We now have it all. The Patcher & The Patch. Things are great. But how do we send it to players withing them having to redownload the entire GRF? Great question! In this next step we will cover how to add the patch to the webserver and get it ready for players to recieve when they load their patchers. In step i2.3.0 we covered how to set the patcher up in the web server. This is the file structure we will continue to follow moving forward. Let's open open up our file browser for accessing the server trunk, if needed, or it you're running your own system you can also navigate to the web server folder. The directories are the same either way. /var/www/custom/patch/ This is the directory we wil be working in regarding the patcher. It should now represent the image below: Let's break this down first... We have: The data folder. This is where we will add the patches into after we name them. The Background image. This will be a back ground image for the patcher to load. You can even leave this transparent if you want. Our main.ini is where we will configure the settings for the patcher. We will go through this soon. The notice page will be need to be updated with each news change. This is a very simple text edit. Keep it short and simple. Our patch list text file is where we will add the patches. The format will be discussed soon. Our Style sheet. This is the style arrangements for the pages. We usually don't need to modify this unless we know what we're doing. First thing to do after we have a patch made is to give it a name. What do you ask? A very specific name. In this example we will follow a date format with a part value in the event of more than one patch in a day. Our name in this example will be the date followed by a version number, or update number. 24012024-1 This well tell me that the patch was set for today and it's the first path released of that day. Now we can edit the plist.txt and add this patch into the list. Inside the patch list we will enter in the exact namme of the patch. Including the ending. Our names will start with an index number first. This is the order at which the patcher will read the patches. The index starts at 0 and is followed by a SPACE and then the item name. 1 24012024-1.thor Save and it's ready to load through the patcher! Finally we need to tell the website to send patches to players. Open up the main.ini file with a text editor. We're going to modify the line that asks for a website address. Search for "file_url=" ad edit that to be your website. Save and it's ready to go! That's pretty much it for uploading patches to the server. You're all set to start updating players with new content! STEP SIX: Adding/Removing Maps (map_cache.dat) i2.6.0 Got a enw map you want to try out or is your current map not up to date with your pathing? In this step we're going to add maps to the map_cache.dat, remove maps if needed and update the list with our new maps. First start by downloading the Map Cache Editor from the trusted rAthena source: HERE You'll be presented with a window that looks like this: What we want to do next is download our map_cache.dat from the server trunk: rAthena/db/map_cache.dat Once downloaded it will be able to drag and drop that file into this window. We now are presented with a list of maps. From here what we want to do is drag and drop all our map's .gat files from our GRFs into this window. this will update the walkable paths for the map. This is especially important when you cannot walk on certain maps due to old GAT configurations, It still thinks there are structures in the way. To delete a map you can select it and click delete. Simple as that. Save the Map Cache and reupload it to your server. That's it! Nice and quick. Section 3 - Optional Options Things are running now, yeah? That's great to hear. Sometimes they may require additional software, maybe another step or two, or maybe you need something else for it all to work. Below are some steps that are completely optional but might just help you out in some situations. STEP ONE: Forwarding a Router (Port Forwarding) o3.1.0 Understanding what port forwarding is will be an important start to not having your network breached. In this step we will go through the basics of forwarding your port through your router. The user interface (menus) will look different for each router brand, however, the concept will remain the same universally. Check your router software for updates before making any changes. Let's begin! Accessing the Router To access the router we want to first ensure we are connected to the internet using it. Next we will open the trouter software through our web-browser. To access that page we will have to enter the local domain IP to gain access to the initial menu. In your address bar enter in: 192.168.1.1 If this DOES NOT work try entering in: 192.168.0.1 My basic Netgear modem has a menu that looks like this. I'm going to want to click into Advanced Settings & open up the Port Forwarding option. We are now presented with a window similar to this. It will give us all options for forwarding our ports. Let's get an understanding of what's here before we continue... We will select between Forwarding and Triggering. Since we don't need to trigger a port we will focus only on Forwarding it. There are many types of services that might be precompiled in your router. For our Ragnarok Online server will be making a custom service. It's not as hard as it sounds, don't worry! The device IP we want to connect is a little different. It has to be exactly what device you have the server under. Let's navigate to the device list on the router. This will be under the "basic" settings, usually. It shows here I have 3 devices listed. An Amazon Fire stick, My cell phone and a PC I built specifcally for this guide. That's exactly what we are looking for, too! It looks like the device I am forwarding resides under the IP ending with 7. Okay, so we now understand where the ports are going to and waht device has them. So it's time to make that custom service we spoke of earlier. This interface has a button, making it very convenient to start. We're going to go ahead and click the "Add Custom Service" button. With the custom port window we can now add our ports for Ragnarok to run. We will need to process this 1 number of times as we have more than one port for Ragnarok Online services. The ports we need to add are: 3306, 6900, 5121, 6121, 8888 Make sure to select the proper device for it to work as we want it to. After they are all applied, it will represent something similar to this: That's it! Your ports are now open & ready for users to connect through to. Make sure firewalls are enabled at all times. STEP TWO: Automatic Server Backups (World Runner) o3.2.0 This script will automatically save your server to your server_backup folder every 24 hours. This time is completely adjustable in time and destination. I originally made this for Minecraft hence the name World Runner. Open the terminal and enter in the command: sudo nano /etc/systemd/system/worldrunner.service This will create a service script we will set to run on start up. Inside this document we are going to add int the following script and change the destination values to match our back up folder destination: [Unit] Description=This will copy the Server folder to a back-up location [Service] Restart=always RuntimeMaxSec=1d User=raguser ExecStart=cp -r /home/raguser/Server/rAthena /var/www/raguser/Documents/server_backups/ RemainAfterExit=yes [Install] WantedBy=multi-user.target Now we want to enable it on start-up: sudo systemctl enable worldrunner If you're having issues with it executing properly we can simply grant permissions to the file to do so: sudo chmod 600 /etc/systemd/system/worldrunner.service We now have the trunk backing up now, but what about the SQL server? For that we need to edit a default file structure in Ubuntu called Cron. Cron can hold automated tasks on a timer, or schedule, just like what we want to do for backing up MySQL. Enter in the terminal: sudo nano /etc/crontab You'll be presented with a window simial to this: As you can see here they are displaying each value for the job. First digits represents Minutes and the second digits represents Hours. These are the two we'll primarily need for daily backups to occur. At the very bottom we are going to add the following line: (NOTE: Include your password after the -p. My password is "69SuperStrongPass69" so the password section will look like -p69SuperStrongPass69 ) 0 0 * * * root mysqldump -u raguser -p69SuperStrongPass69 --all-databases | gzip > /home/raguser/Documents/Rag_SQL/ragserver_`date +%d%m%Y-%H:%M:%S`.sql.gz This will set the back up time to be at Midnight each night using the PMA login we set up earlier, backing up our ragserver database into a zip file at the directory ~/Documents/Rag_SQL. NOTE: Avoid use of these symbols in the password field: ) ( ' ` Finally we need to restart the service for it to take effect: sudo /etc/init.d/cron restart That's all there is to it! Keep up to date with the latest changes & updates to this guide. Want to see something included? Suggest it below!


 1 point
 -
Thank you so much for this! Great work Tokei!!1 point
-
Before have some suggestion about the SQL generator. I don't think its needed since you might change some data generated and there are already SQL generator from rathena (yaml2sql.bat) so you can use your edited YML and generate the exact SQL for it. And since I saw some users are struggling setting up server with custom max levels, maybe Ill create a generator for that too.1 point
-
Duplicate GvG map damage modiflier functions then create condition for check attacker was monster then do a multiplier there. (Try to use Find All in Visual Studio to find where to edit)1 point
-
Para cambiar eso debes hacerlo en status.cpp https://github.com/rathena/rathena/blob/master/src/map/status.cpp#L6739 ahi para la dex por ejemplo debes buscar donde se calcula la luk y el crit y luego modificas donde corresponde1 point
-
It's an encoding issue Rynbef~1 point
-
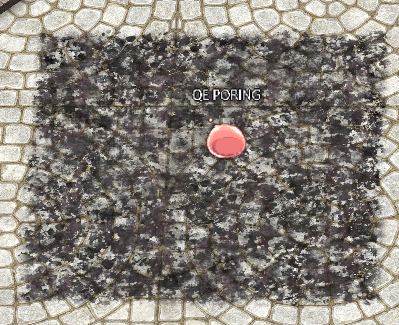
Unfortunately, that's not an str effect. You cannot edit the Evil Land because it's a 3D ground effect. It also happens to be hard coded in the client. You can change the texture (data\texture\effect\evilland\demonground.tga), but that won't do much. I presume bRO is the official server, correct? Then it's a bit weird that you're lagging. Evil Land isn't a fancy effect at all, it's a single texture shown on the floor: I looked at rAthena's db/source and it's using Layout 1 instead of 0, which makes the effect being sent 9 times instead of 1, which is wrong of course. That would normally be the reason for your lag, but since it's bRO... then it doesn't make sense. I made a basic gray looking evil land if you want to give it a shot nonetheless. demonground.tga demonground_alpha_translucent.tga Well, unless bRO still uses a very old client, then there's really nothing you can do...
 1 point
 -
item cooldown is not displayed on the skill bar. In my opinion, the skills should be visually represented on the client side if they are changed on the server side. Rynbef~1 point
-
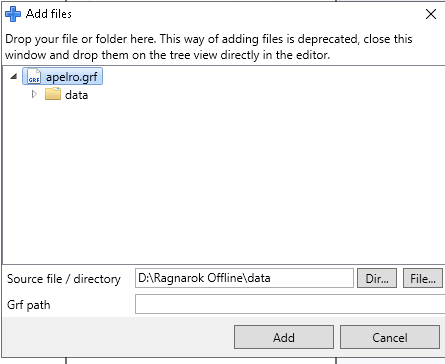
are 4jobs.grf your custom grf, i yes put the file at this grf. try this step. 1 create data folder and put the file like this path data/luafiles514/lua files/skillinfoz/skilldescript.lub 2. open 4jobs.grf using grf application, here as example using grf editor, at your grf righ click than choose add 3. pick data folder directore point no 1 4. then click add, wait until the progress bar finished. 5. click file and then pick save.


 1 point
 -
Set Auto Farm Level (Use Item) + Auto Attack All Monster + Auto Attack By Monster Name + Auto Loot + Auto HP + Auto SP + Auto Teleport1 point
-
This diff works for the latest version of rathena | 19-04-2024 [ Extend Vending 3.0 ] Rev16.8 JinYuichi.diff1 point
-
Version 1.0.0
1 download
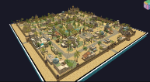
Hi ! Discord: https://discord.gg/qgJCERnqem https://payhip.com/b/knwPc I Present to you my map: Oasis of Morocc I let you watch the video below or the screenshots to get a overview of the project. - What's in the .rar file? Map (Rsw, Gat & Gnd Files) Textures & models - SCREENSHOTS : https://bluff-ro.artstation.com/projects/4XWNg1 INFORMATIONS -You should know that the project took me a long time! -Be indulgent -Do not share or sale this project (It's my work) -if you find any errors contact me so i can correct and update the project You can support my work : putting a "like" on the video & SUBSCRIBE ! React & give your opinion on my work buy the project Pay a cofee : https://www.paypal.com/donate/?hosted_button_id=Q4T6KSYZBPYY840.00 USD1 point -
View File Morocc New Hi ! I Present to you my map: Oasis of Morocc I let you watch the video below or the screenshots to get a overview of the project. - What's in the .rar file? Map (Rsw, Gat & Gnd Files) Textures & models - SCREENSHOTS : https://bluff-ro.artstation.com/projects/4XWNg1 INFORMATIONS -You should know that the project took me a long time! -Be indulgent -Do not share or sale this project (It's my work) -if you find any errors contact me so i can correct and update the project You can support my work : putting a "like" on the video & SUBSCRIBE ! React & give your opinion on my work buy the project Pay a cofee : https://www.paypal.com/donate/?hosted_button_id=Q4T6KSYZBPYY8 Submitter Bluff Submitted 04/18/24 Category Maps & 3D Resources Video https://youtu.be/kjHC_BsR93I Content Author Bluff1 point
-
View File Sky Prontera Hi ! I Present to you my map: SKY PRONTERA I let you watch the video below or the screenshots to get a overview of the project. You need to know how to add a Sky map on your server to see the clouds. - What's in the .rar file? Map (Rsw, Gat & Gnd Files) Textures & models - SCREENSHOTS : https://bluff-ro.artstation.com/projects/LeWX2K INFORMATIONS -You should know that the project took me a long time! -Be indulgent -Do not share or sale this project (It's my work) -if you find any errors contact me so i can correct and update the project You can support my work : putting a "like" on the video & SUBSCRIBE ! React & give your opinion on my work buy the project Pay a cofee : https://www.paypal.com/donate/?hosted_button_id=Q4T6KSYZBPYY8 Submitter Bluff Submitted 04/18/24 Category Maps & 3D Resources Video https://youtu.be/EN_ftdRd_sU Content Author Bluff1 point
-
Official servers have a drop penalty on level difference, but many private server remove that "feature". I only play on pre-renewal servers so not sure how many there are that actually have a drop penalty.1 point
-
I think your client read GRF file instead of data folder, so you must import your modification data folder into your grf file.1 point
-
https://github.com/rathena/rathena/blob/master/src/config/renewal.hpp#L45C1-L45C21 If you didnt want Renewal drop mode, then you can disable it.1 point
-
1) You add the numbers together that you want it enabled for. For example if you only want Heal and Sactuary to be boosted by this bonus, then you would put "3" (1+2). If you want everything to be affected from that list you put 1+2+4+8+16+32+64+128+256=511. 2) If you are running renewal, you can define the exp and drop penalty here: https://github.com/rathena/rathena/blob/master/db/re/level_penalty.yml1 point
-
Solo copia y pega y ya esta, no tienes que modificar nada.1 point
-
You can add a skill in pc.cpp (src/map/pc.cpp) int pc_skillheal_bonus(map_session_data *sd, uint16 skill_id) { int bonus = sd->bonus.add_heal_rate; nullpo_ret(sd); skill_id = skill_dummy2skill_id(skill_id); if( bonus ) { switch( skill_id ) { case AL_HEAL: if( !(battle_config.skill_add_heal_rate&1) ) bonus = 0; break; case PR_SANCTUARY: if( !(battle_config.skill_add_heal_rate&2) ) bonus = 0; break; case AM_POTIONPITCHER: if( !(battle_config.skill_add_heal_rate&4) ) bonus = 0; break; case CR_SLIMPITCHER: if( !(battle_config.skill_add_heal_rate&8) ) bonus = 0; break; case BA_APPLEIDUN: if( !(battle_config.skill_add_heal_rate&16)) bonus = 0; break; case AB_CHEAL: if (!(battle_config.skill_add_heal_rate & 32)) bonus = 0; break; case AB_HIGHNESSHEAL: if (!(battle_config.skill_add_heal_rate & 64)) bonus = 0; break; case CD_MEDIALE_VOTUM: if (!(battle_config.skill_add_heal_rate & 128)) bonus = 0; break; case CD_DILECTIO_HEAL: if (!(battle_config.skill_add_heal_rate & 256)) bonus = 0; break; } } for (auto &it : sd->skillheal) { if (it.id == skill_id) { bonus += it.val; break; } } return bonus; } skill_add_heal_rate: 487 <--- means skill number designed, 1 = Heal Skill, 2 = Sanctuary Skill, etc so 487 means Heal + Sanctuary + Potion Pitcher + Cheal + highness heal + mediale + dialectio1 point
-
Todo lo que tenga que ver con client side no se toca con el emulador, en este caso es client side y no tienes que compilar nada.1 point
-
You can download directrly trough this link: https://github.com/llchrisll/ROenglishRE1 point
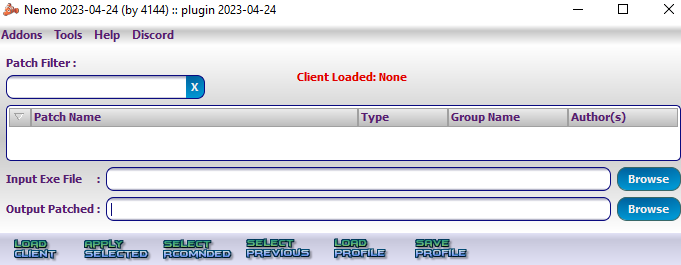
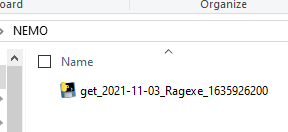
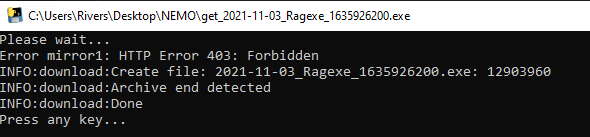
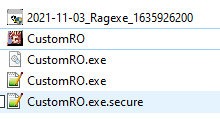
-
gunakan code box formating untuk code agar lebih rapih dan text formating code tidak berubah, script engine pada emulator sensitive untuk tab dan space pada saat parsing code. saya telah meninggalkan beberapa catatan pada script silahkan di telaah. prontera,158,180,4 script VRO Asisten 100,{ mes "[VRO Asisten]"; mes "Halo! Apakah kamu ingin menjual Jellopy padaku? Saya membayar harga yang berbeda tergantung waktu!"; next; // Tampilkan harga yang saat ini ditawarkan mes "Saat ini, saya akan membeli Jellopy seharga "+.selected_price+" Zeny per buah."; next; // Note 1: // Kalau bisa jangan terlalu banyak membuat nesting if else // buat script mudah di baca dan pahami dengan sekilas agar mudah dalam debuging. // Cek apakah pemain memiliki Jellopy if (countitem(909) < 1) { mes "Tampaknya kamu tidak memiliki Jellopy!"; close; } mes "Berapa banyak Jellopy yang ingin kamu jual?"; // Note 2: // gunakan variable type yg tepat // untuk user input seperti ini gunakan temporary script variable type ".@" // Note 3: // ".selected_price" dapat berubah ketika script dalam keadaan "suspended / pause" state // script command yg dapat menyebabkan suspended / pause state, // sleep, sleep2, next, progressbar, menu, select. // sebaiknya preserve value ".selected_price" pada saat user akses time dan bandingkan nanti // apakah value ".selected_price" berubah atau tidak (validasi). .@selected_price = .selected_price; input .@amount; // *Note 1, prevent nesting if else if (.@amount < 0 || .@amount > countitem(909)) { mes "Mohon masukkan jumlah yang valid!"; close; } // *Note 3 validasi value ".selected_price" if (.@selected_price != .selected_price) { mes "Harga telah berubah, silahkan coba lagi!"; close; } // Hitung total zeny yang akan diterima pemain // *Note 2, use apt variable type. .@total_price = .@amount * .selected_price; mes "Kamu akan mendapatkan "+ .@total_price +" Zeny untuk "+ .@amount +" Jellopy."; next; // *Note 3 validasi value ".selected_price" if (.@selected_price != .selected_price) { mes "Harga telah berubah, silahkan coba lagi!"; close; } .@s = select("Jual:Ya,Tidak"); if (.@s == 1) { // *Note 3 validasi value ".selected_price" if (.@selected_price != .selected_price) { mes "Harga telah berubah, silahkan coba lagi!"; close; } // Konfirmasi penjualan dan transaksi delitem 909, .@amount; // Hapus Jellopy dari inventory pemain Zeny += .@total_price; // Berikan Zeny kepada pemain mes "Terima kasih telah menjual Jellopy-mu!"; } else { mes "Mungkin lain waktu!"; } close; OnInit: // Inisialisasi setarray .price[0], 10, 20, 30; // Array harga yang mungkin OnTimer900000: // ubah harga setiap 15 menit. stopnpctimer(); // Menetapkan harga acak dari array .price set .selected_price, .price[rand(getarraysize(.price))]; // use initnpctimer() script command disini untuk membuat loop. initnpctimer(); end; }1 point
-
Thanks for sharing1 point
-
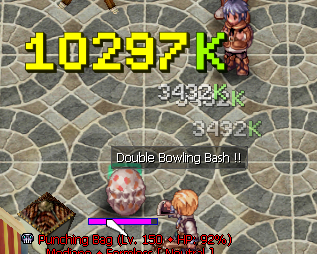
Version 1.2
779 downloads
I just updated the existed one by raPalooza~ to include the K and M indicator. DarkBreath is there too. The K is light green like a frog and the M is red wine like frog's blood Used font is PixelOperator 8Free1 point -
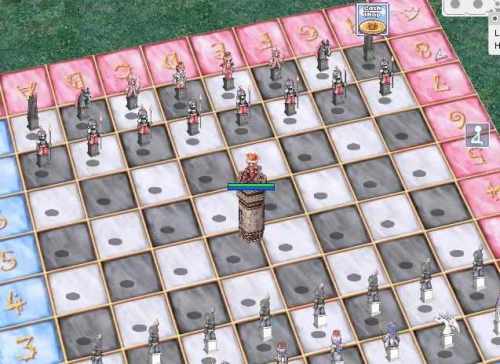
Version 1.0.0
115 downloads
[Event] Chess 1.0 By: MihaSenpai About: Hello Everynyan! My name is Mihael and I hope you are all well. I recently found these files in a personal repository and decided to share them with you. The .ZIP Contains the files: Script: NPC programmed for two players to participate in a game of chess. Map: Files containing the original Map of the event. Sprites: Files containing the event's ORIGINAL NPC Sprites. Hope you like it. If you have any questions, you can contact us here on the Forum or via Discord. A belated Happy 2024 to everyone.Free1 point -
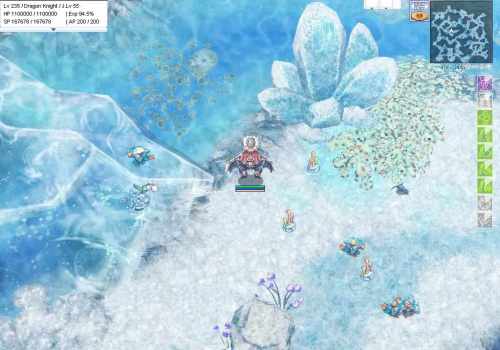
Version 1.0.1
134 downloads
***Include Abyss Lake4**** -IllusionTeddy Bear/Labyrinth base on https://www.divine-pride.net/ (Include Drops Table) -No Portal -Issgard Dun/Frozen scale Field are custom to fit my server. (Custom Drops Table) Install : Put Mob and mob skill to rathena\db\import PutNpcfiles (Custom.txt) to rathena\npc\custom add new line npc: npc/custom/Custom.txt at rathena\npc\scripts_custom.confFree1 point -
[ Creating an Open-source Ragnarok Online Server with kRO & OpenKore Support ] [ Table Of Contents ] Introduction Master List: All The Required Downloads Microsoft Visual Studio 2022: Installation Laragon: Installing and Upgrading rAthena: Installing, Configuring, and Optimizing Flux Control Panel: Installing and Modifying The kRO Client: Updating, Diffing, Hexing, Translating, and Customizing The OpenKore Client: Packet Extraction, Configuration, and Field Updating Logging Into Your Server, Making a GM Account, and Playing! Troubleshooting The Situation Packaging It Up For Transportation Post Install House Cleaning Conclusion [ Introduction ]I'd like to walk you through the complete process of creating an up-to-date open-source server for Ragnarok Online using rAthena. This includes removing all of its security so that it can be accessed via multiple clients. Next, we'll install a web management control panel that users can create accounts on, submit tickets with, even research your servers’ unique stats and databases. Afterwards we're going to transform the latest official Korean client by diffing, hexing, translating, & heavily customizing it. Finally, we're going to configure the OpenKore client to work with our server. As well support interfacing with the official client through proxy.We're going to be using the same packet structure across all aspects so that they can properly communicate with each other. This was selected by researching what the last fully developed version was for OpenKore. (2020-04-01b) Since this is running primarily open-source software, it slowly gets better overtime. This is actually ahead of the International Servers and many other countries not only in features but content. I've included the full process so that anyone can take the next or a different set of packets and reproduce these results. This is also completely portable. Ends with one folder, drag and drop. All software included is free, there is zero piracy endorsed. [ Master List: All The Required Downloads ] [ 3.8GB ]Compiling and Editing:01.) Microsoft Visual Studio (link)02.) Notepad++ (link)Databases and Webserver:03.) Laragon Portable (link)04.) MariaDB Server 10.7.3 (link)05.) PHP 7.4.28 (non thread safe) (link)06.) Nginx 1.21.6 Mainline (link)07.) HeidiSQL 11.3 (64 portable) (link)Server Emulator and Web Management:08.) rAthena (link)09.) Flux Control Panel: (link)Official Client:10.) kRO (v20210406) (link)11.) 2020-04-01bRagexe (link)12.) ROenglishRE (link)13.) RO Patcher Lite (link)14.) RO OpenSetup (link)15.) Nemo (link)OpenKore Client:16.) OpenKore (link)17.) Winsock Packet Editor (link) (password: openkore)Troubleshooting:18.) Visual C++ Redistributable Runtimes All-in-One (link)[ Microsoft Visual Studio 2022: Installation ] [ 7.62GB ]01.) Execute "VisualStudioSetup.exe". (let it update)02.) At the install screen, scroll down to the "Desktop & Mobile" section.03.) Checkmark "Desktop development with C++".04.) Then look on the right side under "Installation details", go to the "Optional" section.05.) Uncheck "Just-In-Time debugger". (this will remove Live Share as well)06.) Uncheck "C++ profiling tools".07.) Uncheck "C++ CMake tools for Windows".08.) Uncheck "C++ ATL for latest v143 build tools (x86 x64)".09.) Uncheck "Test Adapter for Boost.Test".10.) Uncheck "Test Adapter for Google Test".11.) Uncheck "IntelliCode".12.) Uncheck "C++ AddressSanitizer".13.) Click Install. (in bottom right)Note: Wow! Even stripped down, this is a massive 7.62GB installation. Depending on how you access the internet this might take a while. Also, consider how far into the future you are from the time of this post. The install size will be different given it's continually updated. Feel free to move on while this is running in the background. You won't actually need to compile anything until you reach Step 14 of the rAthena section.14.) Install Notepad++ (execute npp.8.3.2.Installer.x64)Note: Moving forward, I highly suggest using Notepad++ to create and edit files. Primarily so you can get a line count without needing to boot all of Visual Studio. This is a clean and lightweight solution.[ Laragon: Installing and Upgrading ]01.) Extract Laragon Portable.02.) Delete "php-5.4.9-nts-Win32-VC9-x86" from "\laragon\bin\php".03.) Extract "php-7.4.28-nts-Win32-vc15-x64" as a folder into "\laragon\bin\php".04.) Delete "mysql-5.1.72-win32" from "\laragon\bin\mysql".05.) Extract "mariadb-10.7.3-winx64" as a folder into "\laragon\bin\mysql".06.) Delete "nginx-1.14.0" from "\laragon\bin\nginx".07.) Extract "nginx-1.21.6" as a folder into "\laragon\bin\nginx".08.) Delete all the contents of "\laragon\bin\heidisql".09.) Extract "HeidiSQL_11.3_64_Portable" directly into "\laragon\bin\heidisql".10.) Open Laragon. Click Start All.11.) Grant MariaDB and Nginx firewall permissions when prompted.12.) Close Laragon window, do not exit the program. Don't worry it's still running in your system tray.[ rAthena: Installing, Configuring, and Optimizing ]01.) Extract rAthena.02.) Go to "\rathena\conf". Rename the "import-tmpl" folder to "import".03.) Open: "\rathena\conf\import\char_conf.txt", add: // Server Communication username and password. userid: supercool passwd: coolsuper server_name: GoblinRO // Login Server IP // The character server connects to the login server using this IP address. // NOTE: This is useful when you are running behind a firewall or are on // a machine with multiple interfaces. login_ip: 127.0.0.1 // Character Server IP // The IP address which clients will use to connect. // Set this to what your server's public IP address is. char_ip: 192.168.1.130 // Starting point for new characters. start_point: iz_int,18,26 // Amount of time in seconds by which the character deletion is delayed. char_del_delay: 10 // Restrict character deletion by email address or birthdate. char_del_option: 1 // Restrict character deletion as long as he is still in a party or guild. char_del_restriction: 0 // Pincode system pincode_enabled: no Note: You're going to want to enter your own userid/passwd, server name, and server IP. (wan if going off network)04.) Open: "\rathena\conf\import\inter_conf.txt", add: "use_sql_db: yes"05.) Open: "\rathena\conf\import\log_conf.txt", add: // log_filter: 1 = logs ANY items log_filter: 1 // log_chat: 63 = logs everything log_chat: 63 06.) Open: "\rathena\conf\import\login_conf.txt", add: // Can you use _M/_F to make new accounts on the server? // Note: This only works if client side password encryption is not enabled. new_account: yes // Ipban features ipban_enable: no 07.) Open: "\rathena\conf\import\map_conf.txt", add: // Server Communication username and password. userid: supercool passwd: coolsuper // Character Server IP // The map server connects to the character server using this IP address. // NOTE: This is useful when you are running behind a firewall or are on // a machine with multiple interfaces. char_ip: 127.0.0.1 // Map Server IP // The IP address which clients will use to connect. // Set this to what your server's public IP address is. map_ip: 192.168.1.130 Note: You're going to want to enter the same userid/passwd and IP used in char_conf.txt.08.) Open: "\rathena\conf\import\packet_conf.txt", add: // IP rules // allow : Accepts connections from the ip range (even if flagged as DDoS) allow: 127.0.0.1 allow: 192.168.0.0/16 Note: Change to match your network setup.09.) Open: "\rathena\src\config\packets.hpp". Comment out lines: 44-62. (packet obfuscation)10.) Open: "\rathena\src\custom\defines_pre.hpp". Line 12 add: "#define PACKETVER 20200401".11.) Open: "\rathena\npc\re\warps\cities\izlude.txt". Comment out lines: 39-54.12.) Open: "\rathena\npc\re\warps\fields\prontera_fild.txt". Comment out lines: 94-113.Note: Why are removing these warps important? So these are the novice start areas to the game. Like any MMORPG these were the most populated maps 24/7/365. It got to the point where they became overflooded not just by new players but bots. You'd wonder around trying to find something to kill that wasn't already taken, to the point leveling actually became a nightmare. So what they did was implement multiple instances of the same maps. Putting players in different load balanced instances allowed everybody to breath and comfortably start the game with some people but not to many.Though this had some downsides. Let's say you just started new characters so you could play with your friends. You might be loaded into prt_fild08a while your friends were loaded into b and c. Meaning there is zero crossover, you're all in your own unique world. You can't see each other, the monsters spawn differently, and that fun starting the game together experience is gone. Given we're setting up a small server here, there is no point in having multiple instances. So we're removing the extras and specifying a singular starting area.13.) Create a new "compile.bat" file inside "\rathena" that contains: @echo off "C:\Program Files\Microsoft Visual Studio\2022\Community\Msbuild\Current\Bin\MSBuild.exe" -m pause Note: Your install location might be different. Adjust accordingly.14.) Execute compile.bat. Wait for it to finish. Check to make sure it's error free at the end.15.) Convert all data files to SQL so you can use MariaDB via running "\rathena\yaml2sql.bat". (you will have to confirm with "Y" ten times during this process)16.) Open "\rathena\sql-files", delete the following: item_db.sql item_db_equip.sql item_db_etc.sql item_db_usable.sql item_db2.sql mob_db.sql mob_db2.sql mob_skill_db.sql mob_skill_db2.sql readme.md 17.) Open "\rathena\sql-files\compatibility" and move "item_db_re_compat.sql" and "item_db2_re_compat.sql" up one level to "\rathena\sql-files". You should now have 16 files (not including folders) inside "\rathena\sql-files".18.) Open Laragon. Click Database. Click New. (bottom left)19.) Under "Session Name", change "Unnamed" to "Laragon". Then click "Open".20.) Click "manage user authentication and privileges" in the top bar.21.) Click "Add". Change username to "ragnarok". Change password to "ragnarok". Checkmark the "Global Privileges" box. Click Save. Click Close.22.) Right click "Laragon" in the top of the left column. Expand "Create new". Click "Database". Enter name "ragnarok". Click OK.23.) Click "ragnarok" in the left column. Go to "File" in the top left. Expand and click "Run SQL File". Direct to "\rathena\sql-files\". Select all 16 .sql files. Click Open. Confirm auto-detect. (let finish)24.) Click "refresh" in the top bar. (next to manage user authentication and privileges)25.) Expand the "ragnarok" database in the left column. Click "login" which will bring it up on the right. Click the "data" tab.26.) Change the account's userid and user_pass to match the server communication username and password created back in step 3.27.) Close these windows. Get back to having Laragon running in your system tray.28.) Open "kRO_FullClient_20210406.zip", extract "msvcr110.dll" into "\rathena".29.) Go to "\rathena", execute "runserver.bat". Three consoles: the login, character, and map servers are going to open.30.) As each part comes online you'll need to grant it firewall access.Note: We're spinning up the server to make sure we're good before moving on. You should see all green status updates.Note: If you plan on including WAN clients, then you'll need to open the: 5121, 6121, 6900, & 80 ports on your network firewall / router. Please consider this a large security risk! The scope of this document does not include properly securing an exposed server. Proceed with caution.[ Flux Control Panel: Installing and Modifying ]01.) Extract FluxCP into "\laragon\www" make sure it's the actual root contents and not just the folder that contains them. (replace index.php)02.) Open "\laragon\www\config\application.php".03.) Line 6: delete BaseURI. EX: 'fluxcp', becomes '',04.) Line 7: change your Installer Password. EX: "secretpassword" becomes "supersecretpassword".05.) Line 43: change MinPasswordLength to 6.06.) Line 45: change PasswordMinUpper to 0.07.) Line 46: change PasswordMinLower to 0.08.) Line 47: change PasswordMinNumber to 0.09.) Line 49: change GMMinPasswordLength to 6.10.) Line 50: change GMPasswordMinUpper to 0.11.) Line 51: change GMPasswordMinLower to 0.12.) Line 52: change GMPasswordMinNumber to 0.13.) Line 53: change GMPasswordMinSymbol to 0.14.) Line 54: change RandomPasswordLength to 6.15.) Line 60: change PincodeEnabled to false.16.) Line 78: change ShowCopyright to false.17.) Line 82: change UseCaptcha to false.18.) Line 99: change AcceptDonations to false.19.) Line 220: change CMSNewsType to 2. (this adds rAthena news) (not required)20.) Line 225: change CMSNewsLimit to 2. (two articles fits the new layout well)21.) Line 233: change SDEnableCreditRewards to false.22.) Comment out lines 251 - 260. (removes fluff from web navigation)23.) Comment out lines 269 - 272. (removes donations from web navigation)24.) Comment out lines 288 - 291. (removes social media from web navigation)25.) Comment out line 305. (removes send email button)26.) Comment out line 307. (removes cash shop button)27.) Comment out lines 329-331. (removes transfer credits and cart)28.) Comment out line 348. (removes cash points)29.) Comment out line 360. (removes paypal)30.) Comment out lines 376 - 380. (removes donations)31.) Save and close file.32.) Open Laragon. Click Database. Click "Open" in the new window. Click "manage user authentication and privileges" in the top bar.33.) Click "Add". Change username to "fluxcpuser". Change password to "fluxcppass". Checkmark the "Global Privileges" box. Click Save. Click Close. Close database window.34.) Open "\laragon\www\config\servers.php".35.) Line 7: change your Server Name to something friendly. EX: "FluxRO" becomes "GoblinRO".36.) Line 17: change your Username from "ragnarok" to "fluxcpuser".37.) Line 18: change your Password from "ragnarok" to "fluxcppass".38.) Line 38: change your Username from "ragnarok" to "fluxcpuser".39.) Line 39: change your Password from "ragnarok" to "fluxcppass".40.) Line 55: change your Server Name to the new one from Line 7.41.) Save and close file.42.) Open Laragon. Click Menu. Expand PHP. Expand Extensions. Click tidy.43.) Click Menu. Expand Nginx. Expand sites-enabled. Click 00-default.conf.44.) Line 9: change "127.0.0.1;" to "all;". Save file. Close file.45.) Open Laragon. Click "Reload" on the Nginx line next to the open port (80).46.) Click Web. The installer should now pop-up in your browser.47.) Enter your installer password changed in Step 4. Click Authenticate.48.) Click "Install or Update Everything". (it's in bold) Confirm process.49.) Once the new site pops up, change the URL from localhost to the IP address of the machine hosting the server. Press enter.50.) Confirm it works and bookmark this page as it's your new control panel, ticket system, and server information tool. (you can click around for fun if you like)Note: You can login via any account on the server or make a new one! During account creation a working email address is NOT required but input of one is. ([email protected], etc.) Accounts flagged as GM in the database will have Admin access in the control panel.[ The kRO Client: Updating, Diffing, Hexing, Translating, and Customizing ]01.) Extract kRO_FullClient_20210406.02.) Extract RO Patcher Lite into "\client".03.) Execute "rsu-kro-rag-lite-x64.exe" and wait for it to finish updating the client.04.) Extract RO OpenSetup into "\client".05.) Extract ROenglishRE.06.) Open "ROenglishRE\Renewal". Copy everything into "\client". (override already present files)07.) Open "ROenglishRE\Client Support\Renewal\2020-09". Copy "data" folder into "\client". (override as well)08.) Extract Nemo. Execute "NEMO.exe".09.) Look for "Input Exe File" at the bottom. Click "Browse". Direct towards "2020-04-01bRagexe.exe".10.) Look for "Output Patched" at the bottom. Click "Browse". Direct towards "\client\2020-04-01bRagexe_patched.exe".11.) Create a new "profile.log" file (any location) that contains: 3 Chat Flood Remove Limit 9 Disable 1rag1 type parameters (Recommended) 14 Disable Hallucination Wavy Screen (Recommended) 16 Disable Swear Filter 20 Extend Chat Box 21 Extend Chat Room Box 22 Extend PM Box 23 Enable /who command (Recommended) 24 Fix Camera Angles (Recommended) 32 Increase Zoom Out Max 34 Enable /showname (Recommended) 35 Read Data Folder First 36 Read msgstringtable.txt (Recommended) 38 Remove Gravity Ads (Recommended) 39 Remove Gravity Logo (Recommended) 41 Disable Nagle Algorithm (Recommended) 44 Translate Client (Recommended) 46 Use Normal Guild Brackets (Recommended) 47 Use Ragnarok Icon 48 Use Plain Text Descriptions (Recommended) 49 Enable Multiple GRFs (Recommended) 50 Skip License Screen 53 Use Ascii on All LangTypes (Recommended) 64 @ Bug Fix (Recommended) 65 Load Custom lua file instead of iteminfo*.lub (Recommended) 73 Remove Hourly Announce (Recommended) 74 Increase Screenshot Quality 84 Remove Serial Display (Recommended) 88 Allow space in guild name 90 Enable DNS Support (Recommended) 91 Disconnect to Login Window 213 Disable Help Message on Login (Recommended) 215 Increase Map Quality 216 Hide Cash Shop 226 Disable Walk To Delay. 230 Always load Korea ExternalSettings lua file (Recommended) 231 Remove hardcoded address/port (Recommended) 232 Restore old login packet (Recommended) 233 Hide SNS Button 242 Disable kRO Site Launch 244 Disable Cheat Defender Game Guard (Recommended) 248 Remove wrong chars from cash shop 253 Skip some hidden menu icon buttons 270 Change AchievementList*.lub path 272 Change Towninfo*.lub path 273 Change PetEvolutionCln*.lub path 274 Change Tipbox*.lub path 275 Change CheckAttendance*.lub path 276 Change OngoingQuestInfoList*.lub path 277 Change RecommendedQuestInfoList*.lub path 278 Change PrivateAirplane*.lub path 279 Fix item description bug 284 Copy patched Cheat Defender Game Guard 289 Fix Homunculus attack AI 313 Change MapInfo*.lub path 322 Case-Insensitive Storage Search 323 Restore Songs Effect 326 Disable OTP Login Packet (Recommended) 328 Enable 44.1 kHz Audio Sampling Frequency 334 Remove Hardcoded HTTP IP 338 Additional client validation (Recommended) 347 Disable OS Privileges execution level 348 Send client flags to server (Recommended) 351 Translate arrows buttons text from korean to english 362 Fixes the Korean Job name issue with LangType (Recommended) 399 Set high priority class for active client 400 Set normal priority class for inactive client 404 Use borderless mode in full screen (Recommended) 416 Fix Tetra Vortex 427 Check is servertype in xml file was set to correct value (Recommended) 12.) Click the "Load Client" button at the bottom.13.) Click the "Load Profile" button to the right of it. Select and open the "profile.log" file just created.14.) Some modifications require input. As each prompt appears, edit them as follows: DATA.INI System/itemInfo_EN.lua 100 System\achievement_list_EN.lub System/Towninfo_EN.lub System\PetEvolutionCln_true_E.lub System/tipbox_EN.lub System/CheckAttendance_EN.lub System\OngoingQuestInfoList_True_EN System\RecommendedQuestInfoList_True_EN System\PrivateAirplane_T_EN.lub System\mapInfo_true_EN.lub Using wrong servertype in clientinfo/sclientinfo xml. Please change servertype to correct one. Note: You'll notice how two of them don't ask for a file extension, which is why we leave it off. That is not erroneous.15.) You should have 70 enabled patches when finished. Click "Apply Selected". Close Nemo.16.) Clean up the "\client" directory by deleting the following no longer required files: \AI_sakray \AuthModuleCache \client \db \doc \HShield \PatchClient 2020-04-01bRagexe_patched.exe.db 2020-04-01bRagexe_patched.exe.txt 2020-04-01bRagexe_patched.exe.secure.txt aossdk.dll ASPLnchr.exe bz32ex.dll CDResFileList.dat dbghelp.dll FORMAT.CFG GameGuard.des IFU13.inf IFU19.inf IFU7A.inf IFUEC.inf Init.exe KOR_LANG.CFG lua.exe mirrors.json NPCHK.DLL NPCIPHER.DLL npkcrypt.dll npkcrypt.sys npkcrypt.vxd npkcusb.sys npkeysdk.dll npkpdb.dll NPPSK.DLL NPSCAN.DES npupdate.dll NPUPDATE0.DLL NPX.DLL opensetup.ini.sample Patch.inf patchRE.inf Patchup.exe Patchup_RE.exe Ragexe.exe RagexeRE.exe RagHash.dat RagnarokKR.inf rsu-kro-rag-lite.exe rsu-kro-rag-lite.ini rsu-kro-renewal-lite.exe rsu-kro-renewal-lite.ini SavePath_Rag.exe SavePath_Sak.exe Setup.exe suipre.dll supdate.log v3hunt.dll Note: This should leave you with 58 files inside "\client". (8 folders + 50 misc)17.) Go to "\client\data". Open "clientinfo.xml". Change it too: <?xml version="1.0" encoding="euc-kr" ?> <clientinfo> <desc>Ragnarok Client Information</desc> <servicetype>korea</servicetype> <servertype>primary</servertype> <connection> <display>GoblinRO</display> <address>192.168.1.130</address> <port>6900</port> <version>55</version> <langtype>0</langtype> </connection> <connection> <display>OpenKore</display> <address>127.0.0.1</address> <port>6901</port> <version>55</version> <langtype>0</langtype> </connection> </clientinfo> Note: Inside the first <connection> block, change the <display> name and <address> to match your server. If WAN, you can use services like No-IP.18.) Go to "\client". Execute "opensetup.exe". (decline Telemetry prompt) Change the options to match your wants and needs. (graphics device, resolution, etc)Note: I personally like 1280x720 when playing in a window. Specifically while using X-Kore which we'll cover later.[ The OpenKore Client: Packet Extraction, Configuration, and Field Updating ] [ Best Client ]Note: Steps 1 and 2 are educational. Worth learning but can be skipped as I've already done this for you.01.) Extract Winsock Packet Editor (WPE). Allow the executable if Windows Defender or your anti-virus software flags it.02.) Using "WPE PRO - modified.exe" follow the Openkore Wiki Connectivity Guide to obtain master version and version number. (screenshot)03.) Extract OpenKore.04.) Go to "\openkore\tables" then open "servers.txt". Find "[Localhost]" towards the bottom. Replace with: [Localhost] ip 192.168.1.130 port 6900 private 1 master_version 0 version 128 charBlockSize 155 serverType kRO_RagexeRE_2020_04_01b serverEncoding Western addTableFolders kRO/RagexeRE_2020_04_01b;translated/kRO_english;kRO Note: Change the IP address to match your server. If WAN, you can use services like No-IP.05.) Go to "\openkore\fields". You'll notice inside are a number of folders labelled by episode number. You're going to want to take all the files out of each of these episodic folders and move them up a directory. Overriding the ones currently in your "\openkore\fields" folder.Note: We're doing this so that the bot can understand the map layouts of the newer content. The rAthena emulator is always improving but currently at the time of posting goes all the way to Episode 18. You might notice the bot is currently only developed up to Episode 17.1. If you play that far then you'll probably have a good idea on making the bot work in uncharted waters. For now, don't worry about it one bit. You're good for a loooooong time. Hell they'll probably have it included by the time you make it there.[ Logging Into Your Server, Making a GM Account, and Playing! ]Note: Even if you want to go straight to using OpenKore, we're going to use the kRO client to finish off the server and make our first accounts. While these steps can be done in OpenKore, it's easier to just follow along using a visual interface for now. If you've picked this project up at a later date, then make sure you've started the rAthena servers. (go to "\rathena", execute "runserver.bat")Using the kRO Client:01.) Go to "\client" and execute "2020-04-01bRagexe_patched.exe".02.) Select "GoblinRO" when prompted. (the server name you entered previously)03.) At the login screen type "admin_M" to make a new account on the server. You need to enter a 6+ digit password as well. (123456)Note: The first account is always a GM account. This has a different set of sprites used that are not compatible with actually wanting to play the game. They look cool because on the off chance you actually crossed one it needed to be unique. Generally you only saw one if you were about to get banned for botting or hacking so it was quite the event to casually see an admin. LOL!04.) Make a new character you're going to use to pwn rule breakers. Once in game, hit escape, then click "exit to windows".05.) Open Laragon. Click Database. Click "Open" in the new window.06.) Expand the "ragnarok" database. Click "login" again like we did in Step 25 of setting up rAthena. Click the "data" tab.07.) Look for the newly created admin account under the server account. Change it's "group_id" to 99. (now has full GM powers)08.) Close these windows. Go back to having Laragon running in your system tray.09.) Once again head to "\client" and execute "2020-04-01bRagexe_patched.exe".10.) At the login screen let's make a real account to actually play on. Once again, "yourname_M" or "yourname_F" (male or female) to make a new account on the server.Note: The sex you select here is only used for account management and does not effect the sex of your characters you make in game. It's pretty much pointless.11.) Spend extra time picking the right hair style, color, sex, and race. This is your new character!!12.) Play the game!Note: Future logins do not require the _M or _F after your account name. This is only done the first time to register a new account on the server from inside the client. You can also register accounts with the Flux Control Panel if you like. If you ever want to delete a character, it'll ask you for your email address as a security check to confirm. Accounts created in client automatically get registered with "[email protected]" as their email address in the database.Using the OpenKore Client:01.) Go to "\openkore\control". Open "config.txt".02.) Line 6: add "Localhost".03.) Line 7: add "0".04.) Line 8: add "Goblin". (your username) (do not add _M or _F)05.) Line 9: add "123456". (your password)06.) Line 11: add "0". (number / position of your character)07.) Save file.08.) Go to "\openkore" and execute "wxstart.exe". (wait for it to process maps and finish loading)09.) Play the game!Note: OpenKore does not currently support the new character start maps. It'll just throw errors in the console about not being able to navigate. Use the kRO client to at least get out of the introduction area. You can walk directly through the beginning and board the ship to Izlude. It's not required to interact with anything if you don't want to. There is stuff to do though, up to you.Using OpenKore inside kRO via X-Kore:01.) Go to "\openkore\control". Open "config.txt".02.) Line 23: change "0" to "3".03.) Line 30: change "ragexe.exe" to "2020-04-01bRagexe_patched".04.) Save file.05.) Go to "\openkore" and execute "wxstart.exe". (wait for it to finish loading)06.) Go to "\client" and execute "2020-04-01bRagexe_patched.exe".07.) Select "OpenKore" when prompted.08.) Login via your normal username and password for the account.09.) Select your character at the next screen.10.) Play the game with two clients at once!Note: I highly suggest running kRO in windowed mode for ease of use. This way you can bounce back and forth between the clients effortlessly. You do not need to keep the kRO or OpenKore windows as a focused priority. You can literally open other applications on top of both without any pause to the botting. You'll hear it in the background still playing the game while you're reading the wiki, checking email, or just doing whatever you please.[ Troubleshooting The Situation ]Note: Having an odd problem loading software at any point? Getting an error and not sure why? I'm not sure why either so give this a whirl.01.) Extract "Visual-C-Runtimes-All-in-One-Feb-2022.zip"02.) Execute "install_all.bat".03.) Wait for it to finish.04.) ??? Try Again ???05.) Probably Success.[ Packaging It Up For Transportation ]01.) Make a new folder called "GoblinRO". (or whatever you like)02.) Place your "\laragon", "\rathena", "\client", & "\openkore" folders inside it.03.) Make a new folder inside called "troubleshooting".04.) Copy "Visual-C-Runtimes-All-in-One-Feb-2022.zip" into "\troubleshooting".05.) Compress your "GoblinRO" folder. (zip/rar)Note: Transportation or not, I suggest you make a backup like this once you're finished. Always a good idea! Also compressing it greatly helps transfer times to things like USB drives or across networks. Not only is the file size reduced from around 5.5GB to 3.9GB but the fact that it doesn't have to work with the insane amount of small files present is a life saver. Remember you can always just extract the /client or /openkore folder if you're on computers that aren't running the server.[ Post Install House Cleaning ]01.) Delete the Master List of downloaded files required for install. (18 files, 3.8GB)02.) Uninstall Microsoft Visual Studio 2022 Community Edition. (7.62GB)Note: You will lose your ability to compile the server again if you make future changes.[ Conclusion ]Alright! Way to make it to the end! I spent a week constructing this. Across that time, I reached out to a lot of the related discord servers and forums. Mainly making sure my instructions were correct and up to date. At most stops I was met with silence then a private message with a price tag. Anywhere from $10-100 an hour, just for their working knowledge of an old MMORPG. For truly custom work I do understand it, but for basics? It really only motivated me more to put this out.I'd like to help remove the ridiculous paywall that has slowly started to surround this information. Sure, this has been a deep dive into an esoteric world. This game is over twenty years old at this point. Though it saddens me to see information omitted or even removed in order to sell it back to people as a service. I think that's not only harmful but gating something we have all enjoyed for decades. This is just information, there is nothing deserving of your currency. Everyone should be able to do this, for free.I hope you have found this both helpful and educational! Feel free to translate into your local language and distribute. I have done three trial runs across different machines and have not had a problem. If you're experiencing issues check that you haven't missed a step. Need support? Check the forum, wiki, github, and discord for both rAthena and OpenKore. Still can't find a solution? Post here! I cannot guarantee a timely response but I will check back in occasionally and try to help out as much as I can. Thanks for reading! /cheers1 point
-
Version 1.0.0
272 downloads
I'm sharing this skin because it might helps someone who want to explore and edit elurair skin easier, and not a lot of people share or release Elurair skin in rAthena forum. 1. Download Elurair Patcher from Ai4rei website : http://ai4rei.net/p/skal and extract it. 2. Extract this uploaded file elurair-valkyrie_skin.zip and add it in Elurair Patcher folder. 2. Use builder.exe in builder folder to create Elurair.exe. Target Patcher file elurair.exe, Configuration file elurair.Chaos92.ini. 3. Tick compile, and add all the skin files in skin_valkyrie folder. Maybe purge existing skins if you want to replace with your own skin. 4. Insert Icon file and Window Title (optional) and then click 'Build'. 5. Use the web files and upload if needed. *** To run Elurair Patcher, you need .inf generated from here : http://ai4rei.net/make/patch.inf/<desired numeric id>. For example, to start from patch number 0, you can open the link : https://ai4rei.net/make/patch.inf/0 . And include the .inf file in the same folder with Elurair.exe. Things that you need to replace depends on your setup. InfFile=patch.inf PakFile=main.grf WebList=patch_main.txt WebPath=/data/ WebSite=patch.example.com And also all the ActionData= in the elurair.Chaos92.ini if needed. I include web files folder too just incase this might help you (without main.inf, you can generate it yourself as told above). The ONLY files that you need in client folder after 'Build' Elurair.exe : - inf file - elurair.exe (no problem to rename it) - media folder (contains media for the skin) - your own client files Documentation & example for elurair settings you can found in elurair.default.ini. Website Elurair : http://ai4rei.net/p/skal . Discord NN (Creator of Elurair Patcher) : http://ai4rei.net/p/discord . Not all the resources for the skin are created by me. Video source : https://steamcommunity.com/sharedfiles/filedetails/?id=1964715704 . Skin file compiled and released by Chaos92. rAthena Profile : https://rathena.org/board/profile/6755-chaos92 . Facebook Page : https://www.facebook.com/hostingmalaya . Can contact me via links above for web hosting & services. Wanna treat me some coffee ? https://www.buymeacoffee.com/chaos92 .Free1 point -
(UPDATED 2022-05-16) Unlike popular believe, Brasilis actually existed in pre-renewal, but only on bRO and jRO. Since it never existed on kRO, it is undefined in what rAthena consider "official stats". As of today I pushed the pre-renewal Brasilis monsters stats (jRO version) to rAthena master. Originally we left the guessed values as they were, but as we now have the YAML format that allows overwriting only selected stats of a monster rather than having to copy over the whole line, it's better to have as many official values as possible already in the base file. Now the only thing you need to do to get the bRO version of pre-renewal is to overwrite the ATK values. I've attached mob_db_bra_atk.yml which includes these changes. If you have no custom changes to your monsters, then you can just name it "mob_db.yml" and overwrite the file in \db\import\. Otherwise just copy the monster lines into the "Body" section of your file. I originally released the monster stats already in 2013, but the jRO values were guessed based on Doddler's comment that they seem to be about "3x" as high. In the meantime jRO actually released their customized values so we know the real ATK stats now. I also fixed the ATK in my original release from 2013, but keep in mind that the mob_db.txt format changed. This monster lines in the file will only work until rAthena from March 2016. After that you will need to fix the "mode" of the monsters (see here: https://github.com/rathena/rathena/commit/55e4df14c2141f291a985c391408a045ec1b25c4) or just use latest rAthena which uses YAML format. My old file also includes the spawns, they should still be working, but I did not test it (alternatively you can just use the renewal spawn files for bra_fild and bra_dun). bRO and jRO have slightly different versions, here are the differences: - the bRO version is the original version, but features really low monster attack, jRO considered this as too easy / exploitable and decided to strongly increase the ATK of the monsters (around 3x as much) - bRO's field map mainly has Headless Mule's and Curupira spawning, first floor is mainly Piranha and second floor is mainly Iara - jRO removed Headless Mule from the field map completely and added more Toucan and Jaguar spawns instead - jRO added Thara Frog and Headless Mule to the first dungeon floor - jRO removed all weaker monsters except Hydra on the second dungeon floor and added Headless Mule instead Issues that are not 100% official because a leak is missing: - monster modes in pre-renewal are unknown (both bRO and jRO), jRO reported that Iara was actually aggressive, however since we have no leaks on the monster modes, I simply used the renewal ones - the spawn types of jRO are 100% official, but the amounts are estimated Everything else should be 100% accurate. bra_all.txt mob_db_bra_atk.yml1 point
-
I just want to say thank you for making this tool, I've been a big fan of your works for a while. I'm a sprite artist and I've been dying to find out a way to make special effects, this makes it MUCH easier. I'm downloading it right now as I type this.1 point
-
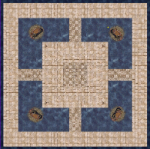
Version 1.0.0
311 downloads
Hi Guys , here is a small pvp map to fight you! If you need a change or a fix let me know. Do not hesitate to contact me if you have any map projects. I'm available on the Forum or on Discord #Bluff#5446. just a small reaction will make me happy to know if my work pleases you. a small video is available on my youtube channel to present the map: https://www.youtube.com/watch?v=AYhyZDWiS30Free1 point -
I have made my own Plagiarism NPC last week. Hope it helps you. //===== rAthena Script ======================================= //= Plagiarism NPC //===== By: ================================================== //= Easycore //===== Last Updated: ======================================== //= 20210905 //===== Description: ========================================= //= Simple Plagiarism Skill //= Require 'getskillname' script command: //= https://rathena.org/board/files/file/4307-script-command-getskillname/ //============================================================ prontera,150,150,3 script Plagiarism NPC 747,{ mes "[ ^FF0000Plagiarism Master^000000 ]"; if (.plag_skill && !getskilllv("RG_PLAGIARISM")) { mes "You must have Plagiarism learned."; close; } mes "Heya ^FFA500"+strcharinfo(0)+"^000000!"; mes "Do you want to copy a skill?"; if (.zeny) mes "My service costs ^FF0000"+.zeny+" Zeny^000000."; if (select("~ Proceed","Cancel") == 2) close; if (.zeny > 0 && Zeny < .zeny) { message(strcharinfo(0),"Not enough Zeny."); close; } .@menu$ = ""; .@f = getarraysize(.SkillID); for(.@i = 0; .@i < .@f; .@i++) .@menu$ += getskillname(.SkillID[.@i])+(.@i==.@f?"":":"); .@s = select(.@menu$) - 1; close2; if (.zeny > 0 && Zeny < .zeny) end; if (.zeny > 0) Zeny -= .zeny; npcskill .SkillID[.@s],.SkillLV[.@s],20,200; sleep2 1500; unitwarp getnpcid(0),.map$,.x,.y; end; OnInit: //Default NPC Data Values setunitdata(getnpcid(0),UNPC_DEX,300); setunitdata(getnpcid(0),UNPC_ATKMIN,100); setunitdata(getnpcid(0),UNPC_ATKMAX,200); getmapxy(.map$,.x,.y,BL_NPC); //Configuration //Zeny required? Set 0 to disable it .zeny = 25000; //Must Plagiarism skil be learned? (1. Yes | 0. No) .plag_skill = 1; //Skill ID Array setarray .SkillID[0],263,13, 7,14,19,20,21,83,84,85,86,89,90,91,421,534,536,537,540,542; //Skill LV Array setarray .SkillLV[0], 10,10,10,10,10,10,10,10,10,10,10,10,10,5, 7, 10, 5, 10, 19, 5; end; } PS: It requires 'getskillname' script command to work.1 point
-

Version 1.2.0.0
7577 downloads
Heya! This is a new project I've made aiming to manage the various databases as easily as possible. This tool was initially developped using Client database editor's engine, a tool from GRF Editor. It has been adapted to support more database formats and many of the features have been improved. How to install Download the zip archive provided from the download link at the top right corner of this description or directly from there : http://www.mediafire.com/download/p0zhcc8ipa6cjt3 . Install the application with SDE Installer.exe; if you are missing a .NET Framework you will be prompted to download it. Once you are done, you can start the program from the link on your desktop. Features Both rAthena and Hercules' formats are supported by the application. Many conversions between rAthena and Hercules are possible. Converting items can be done simply by right-clicking on the elements and selecting "Copy entries to clipboard (ServerType)". Undo and redo commands are available, as well as navigation commands (quite useful when switching tabs a lot). There are many shortcuts within the application, all of which are shown when right-clicking items or going through the menus. I do plan on adding more as well. The databases are 'merged' between each other to offer an easier view. This is true mostly for the item and mob databases. Flag fields can be entered with either an hexadecimal value or an integer value. You will have to add "0x" if you want to enter an hexadecimal number though. For Windows XP users, the program's layout may change a bit. The Aero theme is applied to make sure the application looks like it should. Getting started Create a new project from File > New project. Go in the settings tab and set the path of your database. If you're using pre-renewal, then drop the pre-re folder in the "Server DB path" box (drop the re folder otherwise). Don't drop your "db" folder, it simply won't work! Save your project file to avoid redoing this step everytime you reload the application by going in File > Save project info. The project info file is automatically saved, so you don't need to save it everytime you do a modification in the settings. If you associate .sde files with this tool, you will be able to start up your project from the project file directly (which is more convenient). The last setting is the resource files and it is optional. Simply drag and drop a GRF in the paths list. This will add icons in the items list view (it will also make the application slower when scrolling for that list). Easy input fields All the fields are easy to set and most of them have tooltips. For example, to edit the drops of a mob, simply right-click on the items and change the drop value (both float and integer values are accepted in the field : typing 5.20 is the same as typing 520). How to save the database There are multiple ways to save the database : quick save, full save and export. Quick save keeps the commands you've applied on the database (Ctrl-S), this is the saving option you should be using. Full save (Ctrl-Shift-S) does not keep the commands and you will not be able to undo any operations afterwards. Export (File > Export to db/SQL) exports the database to another folder and this is normally used to convert databases. When saving, the comments are preserved as much as possible, but this is not always possible. For example, the items table from Hercules is always rewritten, so the comments will be lost in this file. Unmodified tables will not be saved. Disabling a tab will also prevent the associated table from being rewritten/saved. This can be achieved by right-clicking on a tab and selecting "Disable 'table name'". SQL support You can export your current database to SQL from File > Export to SQL > ... The first option in the list is the current database format. The other options are used for conversions between rAthena and Hercules. Backups system The application automatically creates backups everytime you save the database (can be disabled in Settings > Enable backups manager). You can revert to a previous date by going in Tools > Backups manager. This tool's purpose is to make sure you never lose any important data (as well as preventing data corruption). Merging or adding lines from another database It is possible to merge databases by going in Edit > Add item from raw db line. Simply copy and paste the lines from the database you want to add. You must select the corresponding table before doing so, of course. (Known bug : adding lines with invalid parameters will put the database in an invalid state). Synchronize with client database files If "Synchronize with client database files" is checked in the Settings tab, you'll be able to turn on all the following features. Bind item tabs together (suggested by UltraCat) This feature enables you to quickly alternate between the Item and Client Items tabs. Whenever you switch table, it will autoselect the item previously selected. The text search filter will also be applied to all three tables (Item/Item2/Client Items). Subfilters (such as item description, script, etc) will be ignored if the item isn't included in the search result. Manage view IDs automatically (suggested by UltraCat) This feature allows you to completely ignore the view IDs for headgears and costumes. Only the identified resource's field is taken into account when synchronizing with the client databases, so make sure you set at least this field! You must also set up the lua paths; go in any item table and click on the wheel next to the "View ID" field. This will bring up a dialog to setup the paths (preferably, the files should be located in your data folder to avoid saving the GRF all the time). They will be automatically decompiled if necessary. If everything has been properly set, the View ID field for the headgears and costumes will be grayed out. When saving, you'll notice some view IDs will be switched around, but SDE will try to keep your original IDs as much as possible. The view names will be changed to the item's Aegis Name (has no effect ingame). Mob sprites edition In the mob tables, you will find a wheel button, similar to the view IDs. Setting up the paths will allow you to see the mob sprites as they will appear ingame (except for granny models, like emperium for instance). The "..." button can let you select the sprites from the mob folder in the GRFs (or data folder). Preview images With the client tables synchronization, the preview image for items in the list view will be properly displayed. This is handy for custom items. Notepad++ support There is support for Notepad++ to easily find items in a text (or conf) database. Right-click an item and use "Select in Notepad++". Search feature The search engine is the same used as CDE, so it should make it easy to find an item. There is also a hidden search option : if you type "[number_of_slots] 4" it will give all the items with 4 slots or "[refineable] true" will give you all refineable items. This can be applied to any attribute in the table which are not shown in the search panel. Todo list Import from SQL (is that even necessary?). Automatically create a table from a file. Batch files / command line methods (would be similar to GrfCL). Known bug : exporting mob_skill_db from Hercules to SqlRenewalHercules doesn't seem to be parsing properly (for this file only). Type safety (check for invalid inputs, use the same SQL rules when loading the databases). Hope you enjoy this tool! The sources will be available on githut for the next release. If you have a feedback or suggestions, let me know and I'll probably add them to the software. Sources https://github.com/Tokeiburu/RagnarokSDEFree1 point -
Version 2.0.2
1335 downloads
FluxCP Responsive Theme base on Bulma.io This fluxCP only compatible with rAthena FluxCP = https://github.com/rathena/FluxCP DEMO LINK HERE >>> CLICK HERE <<< [ WHEN VISITING THE LINK PLEASE CHANGE THE THEME TO = hurtFreeV2 = FOR THIS THEME ] you can login the page using this:- admin:- username = test password = test normal user:- username = test password = test Come with Easy config ./themes/hurtFreeV2/config/hurtsky_settings.php 'yourServerName' => 'Hurtsky', //this name maybe will be use on top and footer 'newsTitleLimit' => 10, //this will limit character/letter in title of RSS 'newsContentLimit' => 100, //this will limit character/letter in content of RSS 'enableSocialNetworkLink' => true, //disable this will remove the get connected section 'enableFacebookIcon' => true, 'facebookLink' => 'https://hurtsky.com/fluxcp', 'enableDiscordIcon' => true, 'discordInviteLink' => 'https://hurtsky.com/fluxcp', 'enableTwitterIcon' => true, 'twitterLink' => 'https://hurtsky.com/fluxcp', 'footerCopyrightTrademarkLable' => 'All trademarks referenced herein are the properties of their respective owners', 'footerCopyrightInitialDate' => 2017, How to install: 1. place the folder under ./theme/ 2. open file ./config/application.php 3. change 'ThemeName' => array('default','bootstrap'), to 'ThemeName' => array('hurtFreeV2'), 4. for WOE status, you need to import this SQL file to database = woe_status.sql 5. also add this NPC script to your emulator = woe_status.txt 6. done THIS FREE THEME PROVIDED AS IT NO SUPPORT COME WITH IT USE IT AT YOUR OWN RISKFree1 point -
The topic has been removed because of rAthena staff double standards and hypocrisy things. (rA staff blame me that I made a money on this topic while it's not and never was) All that I did for the last 2.5 years with around ~1k answers from my side is help for free for newbies here, but to rA staff, my topic is a pain in the ass. Sorry guys, but the topic can't be maintained on such a community anymore because of its admins. Bye1 point
-

Version 1.0
9543 downloads
These files are not created by me. I just found someone share a complete package of it on facebook. Thank him/her for collecting all these Skin across the world wide web, I believe some skin files was updated or fixed by him/her. So, I'll just provide a text file that contain the link to download these files from my dummy OneDrive Folder. Album Preview : http://imgur.com/a/b1MHG Installation Guide : Pick any RO Skin that you like and Download it to your PC/Laptop. Extract the files using 7-Zip / WinRar / WinZip / etc. Copy and paste the extracted files into the %System%/kRO/Skin/ folder. Again, I don't own any of these files. I just sharing the files. None of these are commercial items. Please insert / remain the credits in case you know who're them. Thank you.Free1 point -
Version 1.0
13624 downloads
(I am not the creator of this set!) Here is an updated version of the well known 553 Clothes Dyes / 251 Hair Dyes Pack. I duplicated the existing palettes from the pack to fill the missing gaps. It now works with 3rd classes, kagerou, oboro, and everything. However, I didn't fix any of the issues in this pack, you may see: - Black Areas on clothes - Ugly colors that doesn't fit ragnarok like flashy yellow - Many palettes which look the same - 3rd classes which doesn't look really good - Blacks Pecos etc.... I made a picture with all the palettes, you can check it. If you want palettes of a better quality, you may want to check My Palleting Services. Thank you!Free1 point -
Client-Side Just name the files as morocc (for morroc) and payon (for payon) then add in your data. Server-Side First be sure your grf-files.txt in your conf folder is properly configurated. //grf: C:\Program Files\Gravity\RO\data.grf >>Add your grf here just like the model //----------------------------------------- // Data Directory // Use the base folder, not the data\ path. //----------------------------------------- //data_dir: C:\Program Files\Gravity\RO\ >>Add your RO folder here just like the mode Then using WeeMapCache Open your mapcache.dat (in db folder) and delete the payon and morocc from the list, save and close your mapcache. Run the mapcache.bat in the trunk folder of the emulator (the main folder) and the maps will take place of the current ones. NOTE: you must have to fix the NPC and Portal positions Manually.1 point
-
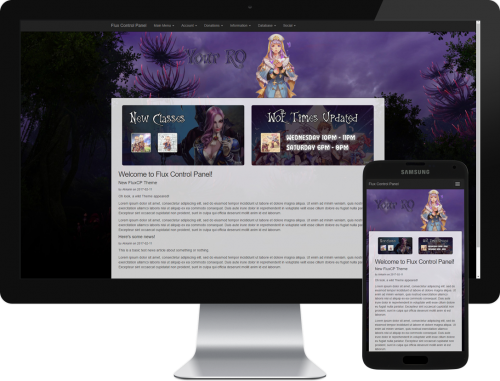
Version 1.0.0
86 downloads
Simple mobile responsive FluxCP theme. Includes: Header/Logo PSD Fonts PSDs for two homepage images Theme files for use with up-to-date FluxCP 6 Loading Screens using same background This theme is capable of using new ReCaptcha code. This theme is designed with ease of customisation in mind. Simply swap out the background image for a totally different feel to your site. This theme has been uploaded to rAthena under the @Files user and is available for a very low price. Sales generated under this user is kept by rAthena and not commission based.5.00 USD1 point -
3374 downloads
This is just a compilation of aura's I've had for quite a few years. I figured since you don't really see many aura's anymore I'd upload all of them from old projects I used to have. IDK who owns all of these so if anyone can look through them and maybe shoot me a pm I'll be able to change this post to give credit where due.Free1 point -
Version 1.0
4668 downloads
Full Credit's to Denny who made these maps, I'm just sharing them (of course with her permission) :> This Map Pack Contains: Glastheim Restored Uncursed Glastheim. All textures are cleaned, light maps edited, models changed. The Map comes with: - 10 Indoor maps - text file with all the warps for the indoors. - BGM that I felt will be a proper for the map Glastheim Winter Add-on Simple textures edit. You will still need the restored version first. Geffenia Restored Geffenia (or part of it anyway). The server where it was used had three races living there thus the map appears as if divided between elves and fiaries. Map comes with: - Indoor map. - text file with all the warps for the indoors. - BGM that I felt will be proper for the map. - Couple of NPCs - Mini Map Yggdrasill Tree Village A village situated at the Yggdrasill Tree`s roots. It is supposed to go with Geffenia. The Map comes with: - Mini Map Heidelberg Village situated south of Glastheim. It is meant to go with the Glastheim map. It is rather huge for a village actually. Map comes with: - Mini Map New Prontera A redesigned Prontera and I don`t mean retextured. This map is not meant to be placed over the old Prontera map. Sadly I lost the warp fixes so you have to adjust the warps on your own. Map comes with: - BGM that I felt will be proper for the map. - Mini Map Izlude Fair Izlude map redesigned for a fair. You know, like in Chrono Trigger only not as cool and awesome.Map comes with: Simple Arena Map Well if you want a simple medieval arena with like thrones for the royalties for whatever reasons, feel free to use this one. Map comes with: - BGM that I felt it will be proper for the map Shroom Underground Village A village for a race or people who live under ground. Base used for this was the cave map. Map comes with: - BGM that I felt it will be proper for the map. - Mini MapFree1 point -
All old maps are in our download section: https://rathena.org/board/files/file/7-old-payon-morocc-10/ https://rathena.org/board/files/file/2392-old-izlude-and-alberta/1 point
-
something like this ??? prontera,155,181,5 script Sample 992,{ OnHeal: percentheal 100,100; end; OnBuffs: percentheal 100,100; skilleffect 34,0; sc_start SC_BLESSING,360000,10; skilleffect 29,0; sc_start SC_INCREASEAGI,360000,10; end; OnLink: switch ( basejob ) { case Job_Alchemist: set .@spirit, 445; break; case Job_Monk: set .@spirit, 447; break; case Job_Star_Gladiator: set .@spirit, 448; break; case Job_Sage: set .@spirit, 449; break; case Job_Crusader: set .@spirit, 450; break; case Job_SuperNovice: set .@spirit, 451; break; case Job_Knight: set .@spirit, 452; break; case Job_Wizard: set .@spirit, 453; break; case Job_Priest: set .@spirit, 454; break; case Job_Bard: case Job_Dancer: set .@spirit, 455; break; case Job_Rogue: set .@spirit, 456; break; case Job_Assassin: set .@spirit, 457; break; case Job_Blacksmith: set .@spirit, 458; break; case Job_Hunter: set .@spirit, 460; break; case Job_Soul_Linker: set .@spirit, 461; break; default: if ( upper == 1 && baselevel < 70 ) set .@spirit, 494; } if ( .@spirit ) { sc_start4 sc_spirit, 360000, 5, .@spirit,0,0; skilleffect .@spirit, 5; } end; OnInit: defpattern 1, "heal","OnHeal"; defpattern 1, "buff","OnBuffs"; defpattern 1, "link","OnLink"; activatepset 1; end; } heal = Heal HP / SP buff = Supportive Skills Buff link = Soul Linking1 point


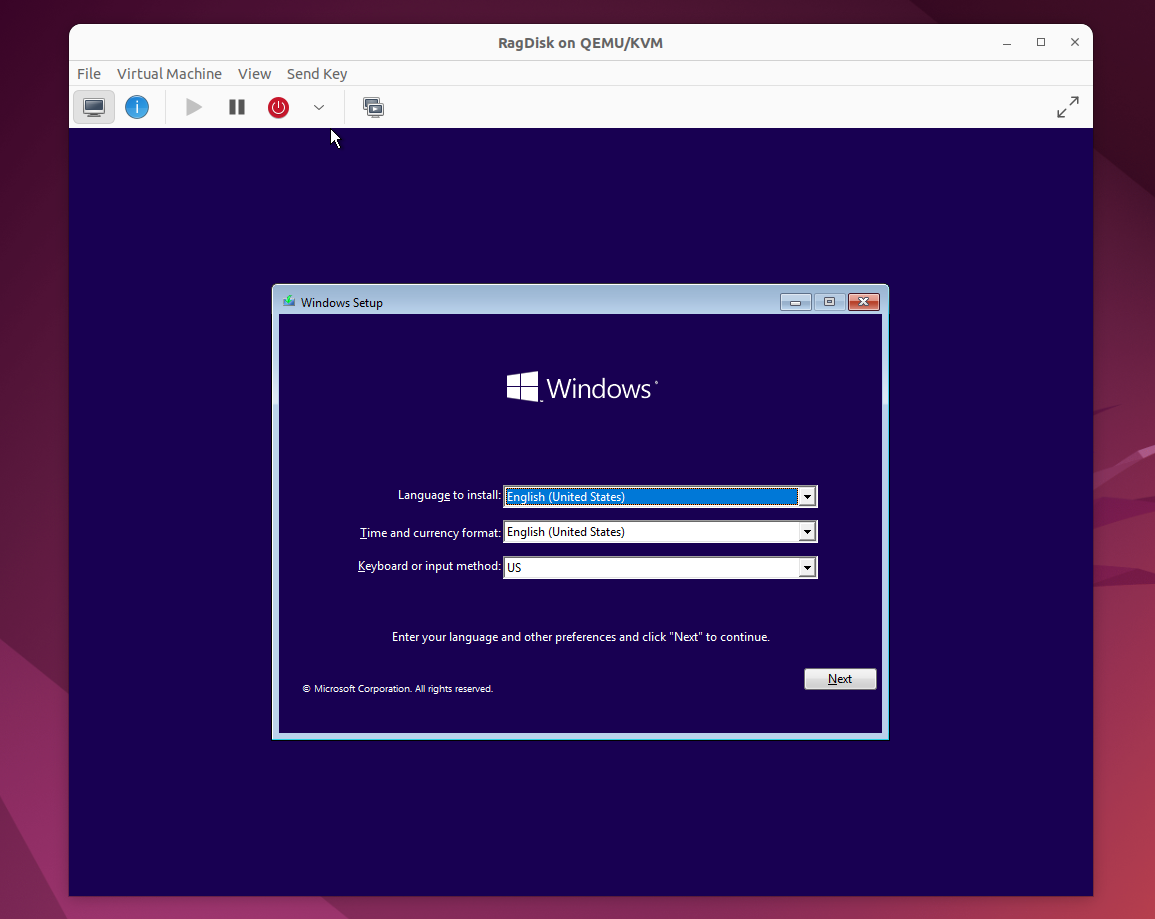

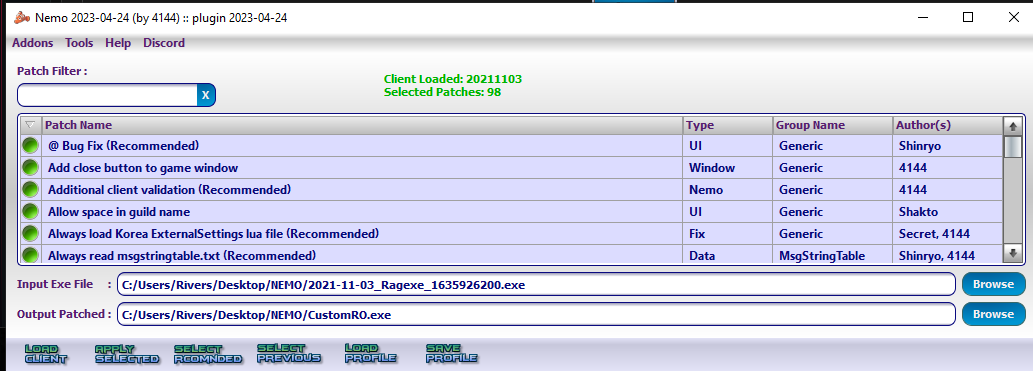


.thumb.jpg.9645e6c2b3931c4a2ba6ade64b2db47c.jpg)