Leaderboard
Popular Content
Showing content with the highest reputation on 09/24/20 in all areas
-
Version 1.0.0
323 downloads
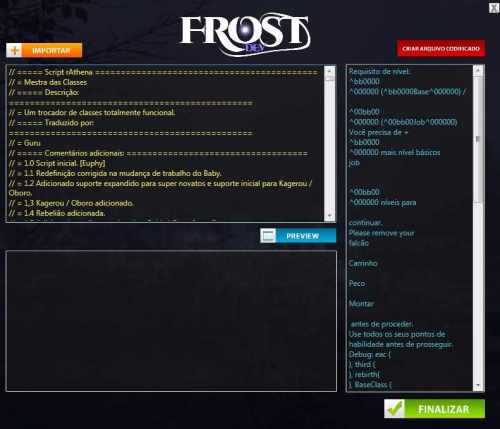
A while ago I searched for everything for a program that separated all the strings in a file so that I could translate more easily, well I didn't think so I paid a developer to help me create, unfortunately I lost the source code of this incredible editor because of a ransomware, but I managed to find the executable, I hope it helps many people as it helped me! Description: Basically if you want to translate something or just edit the strings of an npc just import your .txt file and it will separate and you can edit / translate as you prefer. Demonstration video: Importar button: you import the.txt file Button "Criar arquivo codificado" :you create a file only with the strings all in line and encoded for windows 1252. button visualizar : you can preview the result. and Finalizar button it saves! obs1: take care not to increase the number of lines and nothing else will be out of order. obs2: You need to press on preview to apply the changes obs3: And be careful also when using it, as it can confuse a string with text, it identifies everything inside a string, so it can have this pattern: "here" ok "here" here OK here I'm sure it will be easier to translate into your language. using it is just a matter of habit, if I find the source code I will post it for free. would you like to donate to this project? paypal: [email protected] thanks!!Free2 points -
Version 5.0
1860 downloads
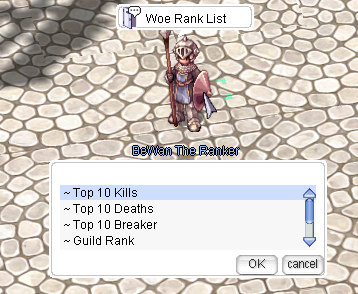
In response to this post : https://rathena.org/board/topic/122667-woe-ranking-script/ https://rathena.org/board/topic/121631-woe-rankings-script/#comment-373249 https://rathena.org/board/topic/96397-woe-ranking/ https://rathena.org/board/topic/109488-ranking-woe/ By downloading this file, you agree with my Terms of Service: • You are not allowed remove my signature from any of the included files. • You are not allowed claim my work as yours. If you like it, give me a ?Free1 point -
Version 1.0.0
270 downloads
Modified NPC sprite as a monster sprite. In addition to the normal monster animations, it also has one pet performance animation. Note: the preview gifs don't exactly look great, but it's due to the transparency of the flame effects. It looks normal on the ACT editor and ingame.Free1 point -
The following is a guide that my friend, Vi, created mainly for the players of my old server during her early days of spriting. She is no longer active in the RO scene and my old server is no longer active so I just thought it would be a big waste to not share this with the community. By passing on this knowledge to those who are interested in learning the basics of spriting, I hope that more talented artists will arise in this community and more professional work can be seen. Please refrain from ripping images off of this guide and do give Vi full credits if you decide to repost this elsewhere. p.s. I am only sharing this information, therefore no support can be given from me over this guide so please don't ask me any questions. ^^ -------------------------------------------- hello! In this guide, I will cover the point after which you have completed your frames and you want to transition your .bmp frames into files workable for Ragnarok Online. This is perhaps the most grueling part of creating custom work for RO. I am in no way an expert (I am simply a novice, still always learning) and simply writing this to aid anyone who wishes to sprite. This is dedicated smexy Lexy. Before starting, you will need these programs: Any image editing software, I personally use Photoshop to do the artwork. actOR to edit your .act files. SPRconview to convert your .bmp files to .spr files and vice versa. You can obtain actOR and SPRConview from ratemyserver's RO tools page here. things to know At this point, you should have the artwork for your headgear done. This is what I'll be using as an example for this guide, Lady's Sailor Hat: Depending on your hat, you can have one to fifteen frames (if this isn't an animated headgear). Generally, things such as "GF Wanted," "Notice Board," etc. hats have one frame. Hats generally have five+ frames. Hats with five frames generally only have art work done for the first five angles of the hat, while the ones with fifteen frames have artwork done for all poses/angles. The Lady's Sailor Hat has fifteen frames. What determines how many frames you have is the .act you choose to work off of for your headgear. I don't know how to create an .act from scratch, I typically pick a headgear closest/most similar to the hat I have done. The .act file holds the positioning information for your headgear, it references the .spr file for the images. What does the .spr file do? The .spr file holds all the visual information for your headgear. The .act and .spr files work hand in hand. Let's get started. creating your .spr file. Time to slice your original artwork into its individual frames. Make sure all of the frames of your headgear are the correct size. If the size you choose is too large, you will encounter problems when you create your .spr file. It will do things such as distort or repeat itself in the frame. So slice up your artwork. I've picked the size 31 x 31 for the Lady's Sailor Hat. You have to save each of your frame files as an indexed .bmp. In Photoshop, you must go to Image > Mode > Indexed Color... It will ask you to Flatten Layers, click OK. This window will pop up: Now you want to go to the drop down menu where it says "Exact" and select Custom. (Make sure that before you select Custom, the drop down menu is already set to Exact. If not, select Exact and then go to Custom.) A second window will pop-up and you will see all of the colors used in your headgear. This step is critical, or else your headgear will show up with crazy colors when you convert it in SPRConview. Now, you have to denote what color is going to be transparent. In this second window, which is called the Color Table, the first box is the color which tells the .spr file what to make transparent. I've chosen this mint green color. So click the first box and the color picker will pop up. Simply click your background color. Now you want to save out your Color Table. Click save on the right hand of the color table. This is also indeed an .act file, but don't be confused! This is different from your file to be used with RO. I've saved my palette file out as "palette_ladyssailorhat.act." Now that you have all of the color information done, save your file. Save it as an 8-bit .bmp file. naming convention in ragnarok online, each gender has their own set of spr/act files. If you dig through the sprite files in your data folder, you'll notice ¿© and ³² as a suffix for your file names. ¿© denotes female, while ³² denotes male. Generally, I save my files as suffix_headgearname00xx.bmp. So continuing saving your frames out. Remember to check if your headgear's color palette is loaded into each frame. You can load your color palette by going to the "Custom" drop down menu and clicking "Load..." on the right hand side to select your palette file. After you finish, your folder should look something like this: Now go into your sprite data folder and pick a headgear that you feel is closest to the headgear you're working on. For the Lady's Sailor Hat, I've chosen Pirate's Pride. So copy and paste the .act/.spr files of the headgear into the folder of the headgear you are working on. Now open up SPRconview. Now go to Convert > Bmp to Spr. You will get another pop up window. Add all of the frames of your headgear and make sure that they're in numerical order. Under where it says Sprite, hit Browse and browse to where you saved the .spr file of the headgear you chose. Remember, I chose the Pirate's Pride. After you've done that, click Convert. Done with your .spr file! When you do this, SPRconview will replace the images of the original headgear with the ones you have made. Open up the .spr file and check to make sure everything is a-okay. Scroll through it and make sure the colors aren't all off either, as well as the transparency. That's it for your .spr file. time to edit your .act file Now go back to your folder and open up the .act file that you had copy and pasted for your headgear with actOR. Most of the time, when you open up your .act for the first time, you may get a message saying that the width and height is not correct. Simply click Yes and carry on. Now you should see this: Now look to the right. Under reference, check the box next to "head." You'll see that the head shows up, but the hat is behind the head! So look to the left where it says "Change priority ref. spr..." A window pops up. Underneath "head" hit the bubble for back. The hat is now in front of the head. Look: You can change the reference head anytime you want by replacing the ref_head act/spr files in the location where you installed actOR. Simply replace those files. Now, we have to edit the .act file. But first, here is a quick diagram explaining the basics of actOR. 01 action This refers to each of the acts that correspond with an action in Ragnarok. In the drop down menu, there are 13 acts, going from 0-12. Act 00 is the act for standing, act 01 is for walking, act 02 is for sitting, etc. You have to check every single act and every single direction to make sure that the hat sits on the head properly. This is where most of the labor comes from. 02 direction clicking through this scrolls through all of the angles of the head and hat. 03 scroll bar for each pose/angle, there are several frames. this scroll bar scrolls through all of them. You must check through all of these to make sure that the hat sits on the head properly. 04 reference this is simply where you turn the reference head and body on and off via the boxes, x is on and a blank box is off. 05 x offs this is the x-coordinate of the headgear. You can edit this value by clicking and dragging the headgear by hand, or tap-tap double clicking the value under Xoffs with a certain timing to change it numerically. 06 y offs this is they-coordinate of the headgear. You can edit this value by clicking and dragging the headgear by hand, or tap-tap double clicking the value under Yoffs with a certain timing to change it numerically. 07 EXT this simply refers to the reference head sprite/hairstyle. 08 x offs this is the x-coordinate of the head. You can edit this value by clicking and dragging the headgear by hand, or tap-tap double clicking the value under Xoffs with a certain timing to change it numerically. 09 y offs this is the y-coordinate of the head. You can edit this value by clicking and dragging the headgear by hand, or tap-tap double clicking the value under Xoffs with a certain timing to change it numerically. That is basically all you need to know of actOR to get the job done. Personally, I don't know what everything else does! Now you must go through all the .act's angles and frames to make sure the hat sits correctly on the character's head. Once you are done, simply save your file. And you're done! You now have the .act and .spr file of your headgear. the data folder 1 sprite this main folder is where your sprites reside. under this folder is two other folders. a. ¾ÆÀÌÅÛ holds the .spr/.act of the thumbnail of your headgear. b. ¾Ç¼¼»Ç¸® where your headgears reside. Underneath this folder are two other folders. c. ¿© the female folder d. ³² the male folder 2 texture this main folder is where your .bmp images for your items reside. under this folder is two other folders. a. À¯ÀúÀÎÅÍÆäÀ̽º this folder holds two other folders under it. b. collection this is where the artwork for your headgear resides as a 75 x 100 bitmap image. c. item this is where the .bmp thumbnail of your image resides; the image is the same as the .spr thumbnail of your headgear and is 24 x 24 in size. notes I generally work with the female .act/.spr files first. Afterwards, I simply copy and paste those files over to the male folder and paste, afterwards, I rename them. A lot of the time, the female .act will not suffice for the male .act since the male hairstyles tend to be smaller than the females. You will have to go back and edit the male .act file after copying and pasting. The way you position your headgear might not work across all hairstyles as well. You want to choose a position that can be workable across most hairstyles.1 point
-
prontera,155,185,5 script fhdskdjf 1_F_MARIA,{ mes "select a stat to reduce by 10"; next; .@s = select("Str","Agi","Vit","Int","Dex","Luk") -1; for (.@i = 0; .@i < 10; ++.@i) { if (readparam(.stat[.@s]) == 1) break; statusup2 .stat[.@s], -1; StatusPoint += needed_status_point(.stat[.@s], 1); } close; OnInit: setarray .stat, bStr, bAgi, bVit, bInt, bDex, bLuk; end; }1 point
-
can only be done with source edits src/map/mob.cpp | 9 +++++++++ src/map/mob.hpp | 1 + src/map/unit.cpp | 11 +++++++++++ 3 files changed, 21 insertions(+) diff --git a/src/map/mob.cpp b/src/map/mob.cpp index 3e0b54f37..686c30ac1 100644 --- a/src/map/mob.cpp +++ b/src/map/mob.cpp @@ -708,6 +708,15 @@ int mob_once_spawn(struct map_session_data* sd, int16 m, int16 x, int16 y, const //"I understand the "Aggressive" part, but the "Can Move" and "Can Attack" is just stupid" - Poki#3 sc_start4(NULL,&md->bl, SC_MODECHANGE, 100, 1, 0, MD_AGGRESSIVE|MD_CANATTACK|MD_CANMOVE|MD_ANGRY, 0, 60000); } + + if (md != NULL) { + if (mob_id < 0) { + md->special_state.deadbranch = 1; + md->deletetimer = add_timer(gettick()+5000,mob_timer_delete,md->bl.id,0); + } + else + md->special_state.deadbranch = 0; + } return (md) ? md->bl.id : 0; // id of last spawned mob } diff --git a/src/map/mob.hpp b/src/map/mob.hpp index 5b47b8c6f..37921599c 100644 --- a/src/map/mob.hpp +++ b/src/map/mob.hpp @@ -189,6 +189,7 @@ struct mob_data { unsigned int size : 2; //Small/Big monsters. enum mob_ai ai; //Special ai for summoned monsters. unsigned int clone : 1;/* is clone? 1:0 */ + unsigned int deadbranch : 1; /* summon from branch */ } special_state; //Special mob information that does not needs to be zero'ed on mob respawn. struct s_MobState { unsigned int aggressive : 1; //Signals whether the mob AI is in aggressive mode or reactive mode. [Skotlex] diff --git a/src/map/unit.cpp b/src/map/unit.cpp index 15632f201..b42668a1d 100644 --- a/src/map/unit.cpp +++ b/src/map/unit.cpp @@ -2420,6 +2420,17 @@ int unit_attack(struct block_list *src,int target_id,int continuous) if(ud->attacktimer != INVALID_TIMER) return 0; + if (target_id != 0) { + struct block_list *target_bl = map_id2bl(target_id); + if (target_bl->type == BL_MOB) { + struct mob_data *md = map_id2md(target_id); + if (md->special_state.deadbranch == 1 && md->deletetimer != INVALID_TIMER) { + delete_timer(md->deletetimer, mob_timer_delete); + md->deletetimer = add_timer(gettick() + 5000, mob_timer_delete, md->bl.id, 0); + } + } + } + // New action request received, delete previous action request if not executed yet if(ud->stepaction || ud->steptimer != INVALID_TIMER) unit_stop_stepaction(src); I tested with 5000 = 5 seconds, change them into 600001 point
-
1 point
-
1 point
-
1 point
-
Version 1
1866 downloads
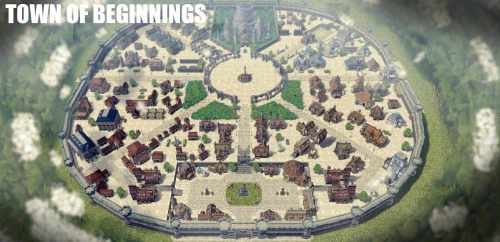
Town of Beginnings from SAOI'm releasing this map that I made a while ago for a SAO-RAG project that has been put on hold, and i felt like it's too good of a map to put it on a shelf ;]Hope you guys enjoy the release. ;] Some files inside include the color changes on some texture files, so keep that in mind, and delete them if you want.Free1 point -
1 point
-
1 point
-
Version v.1.0
477 downloads
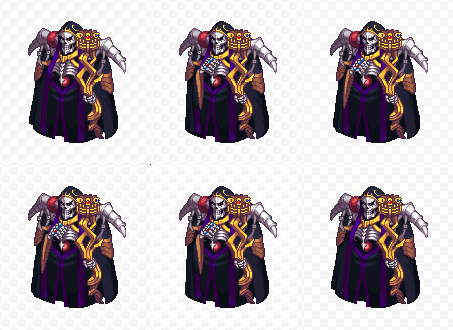
VOTE for the Sprite's or Post your comment in the Support Topic ---- File Info ---- This File Includes: Flam Lord Spr and Act File ---- Rules ---- 1. Do not claim my work as yours. 2. Do not remove or alter my signatures/watermarks within the sprites and all associated files. 3. Credit me if you use my work as a base. 4. Do not edit or alter my sprites in any way without permission from me. 5. Do not distribute my sprites on any file hosting sites.Free1 point



.thumb.png.78b75d582443fd9d049003d975264b39.png)
